Today, we will guide you on how to enable/Disable email logs in MailEnable. In order to enable/disable email logs in MailEnable, you need to perform the following steps.
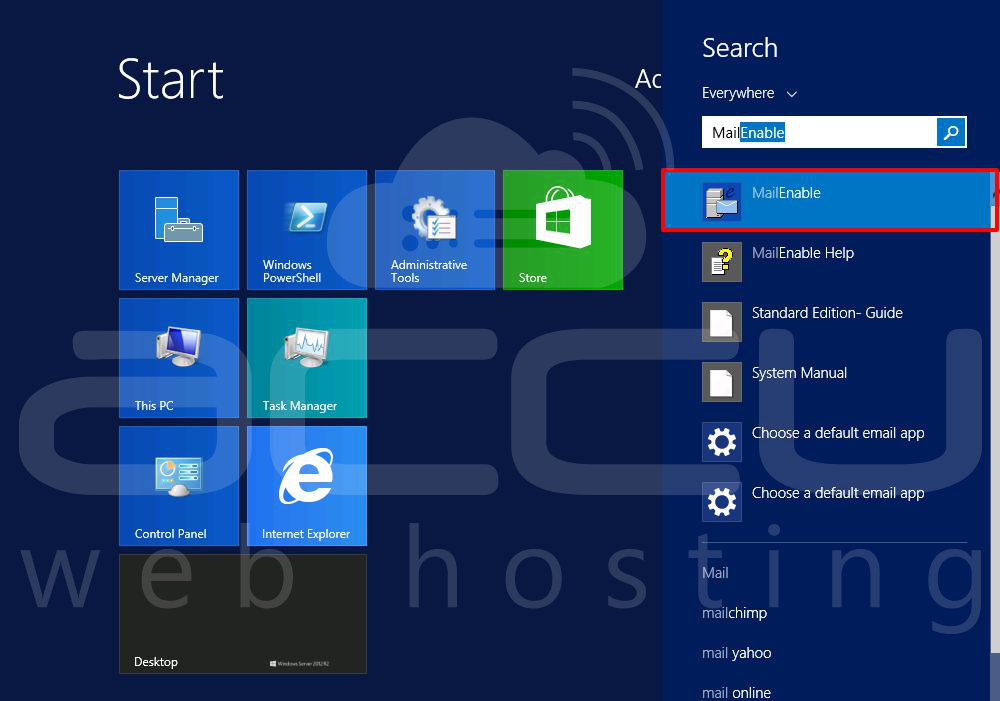
- Login to the server and click on the start menu, search “MailEnable” in the search bar.
- Once the default screen of MailEnable opens, click on “Servers” then click on the localhost. Once you expand the localhost, click on the Services and Connectors. You will see the below option as shown in the screen capture.

Note: If you want to disable the entire MailEnable log, you will have to disable the logs for every component, we will discuss all the services and connectors below.
2.1 List Server: To disable the logging for “List Server” right-click on the “List Server” option and click on Properties.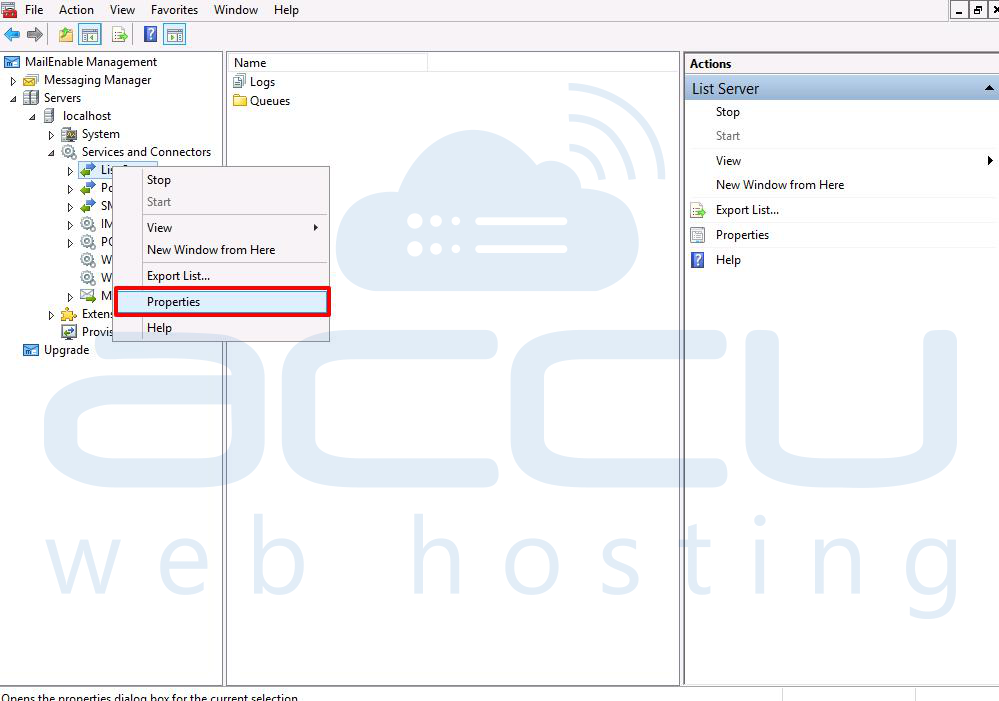
Once you click on the properties, a pop-up will open, then click on the logging tab as shown in the below screen capture.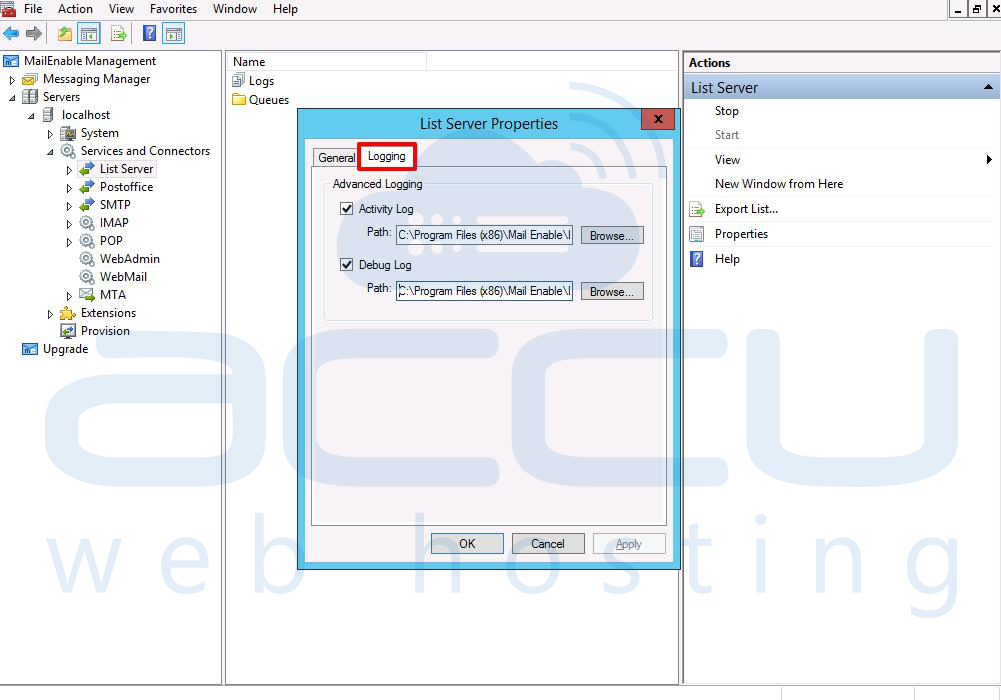
If you check both the checkbox (activity log and debug log), it will generate the logs for activity and the issue that can arise. You can disable the logging(log file) for both (activity log and debug log) by unchecking the checkbox and click on the “Apply” button.
2.2 PostOffice: To disable the logging for “Post Office” right-click on the “Post Office” option and click on properties as shown in the below screen capture.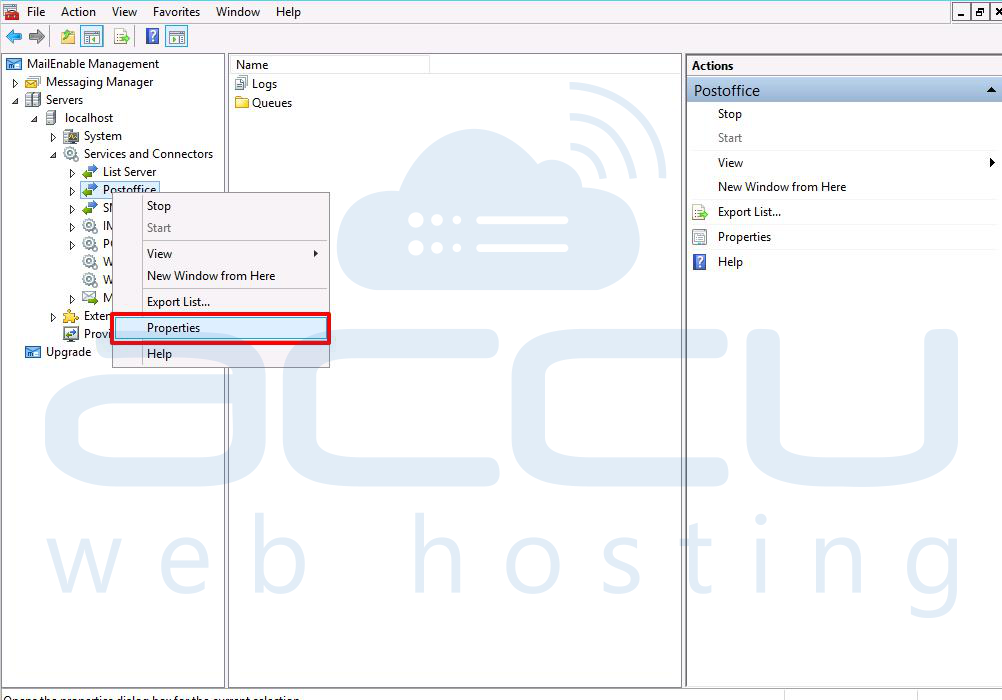
Once you click on the properties, a pop-up will open, then click on the logging tab as shown in the below screen capture.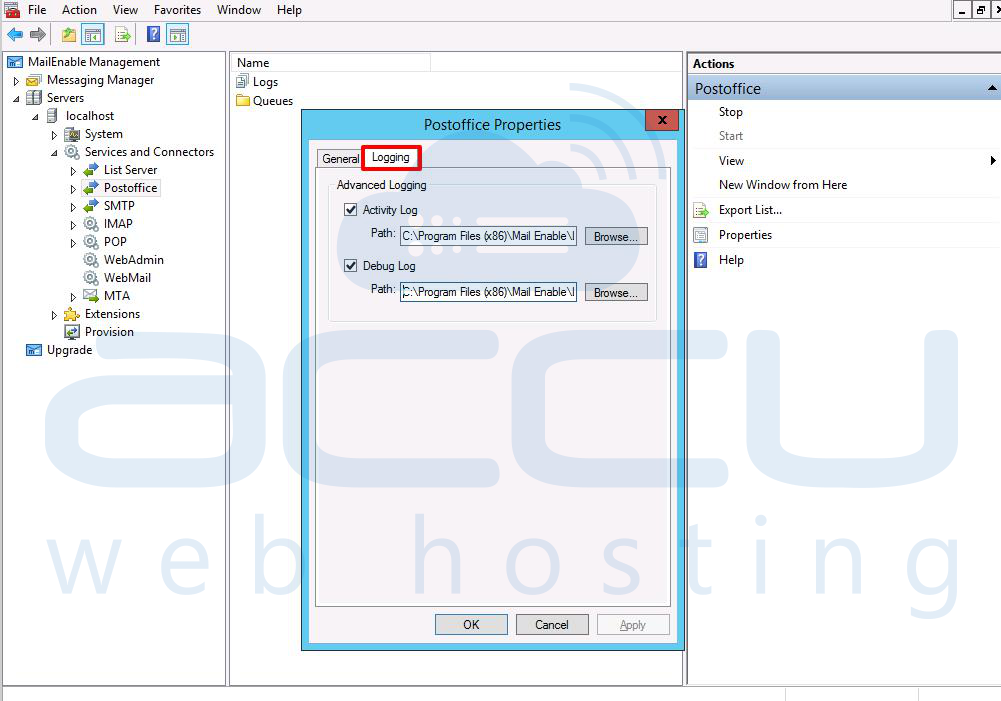
If you check both the checkbox for Activity Log and Debug Log, it will generate the log file of activate log and debug log for post office connector. To Disable the logging for Post Office, uncheck both the checkbox and click on the “Apply” button.
2.3 SMTP: To disable the logging for “SMTP” right-click on the “SMTP” option and click on properties as shown in the below screen capture.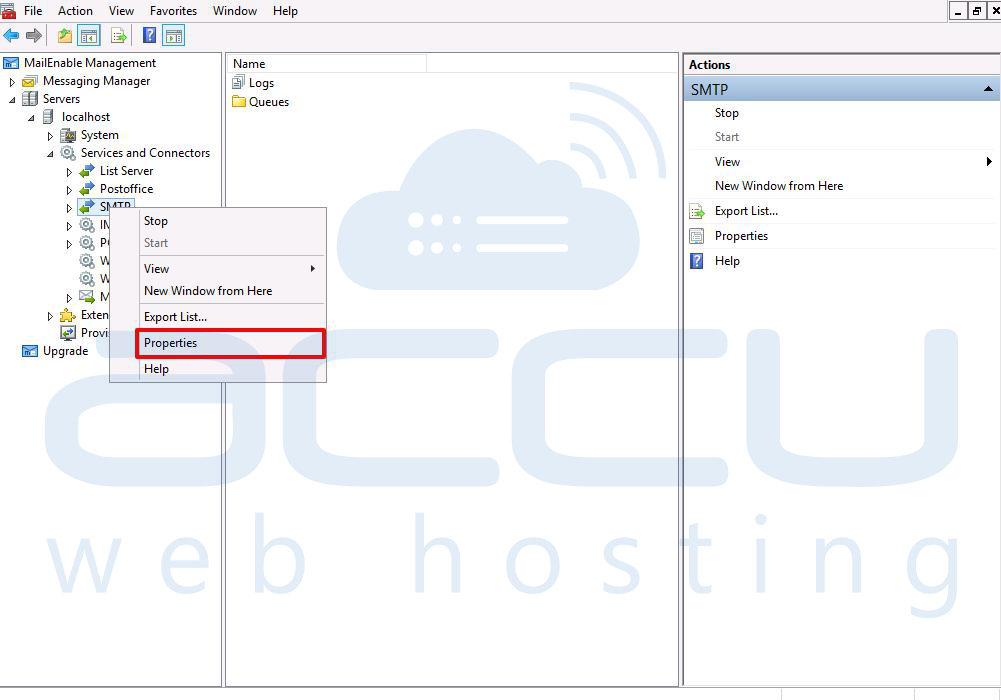
Once you click on the properties, a pop-up will open, then click on the logging tab as shown in the below screen capture.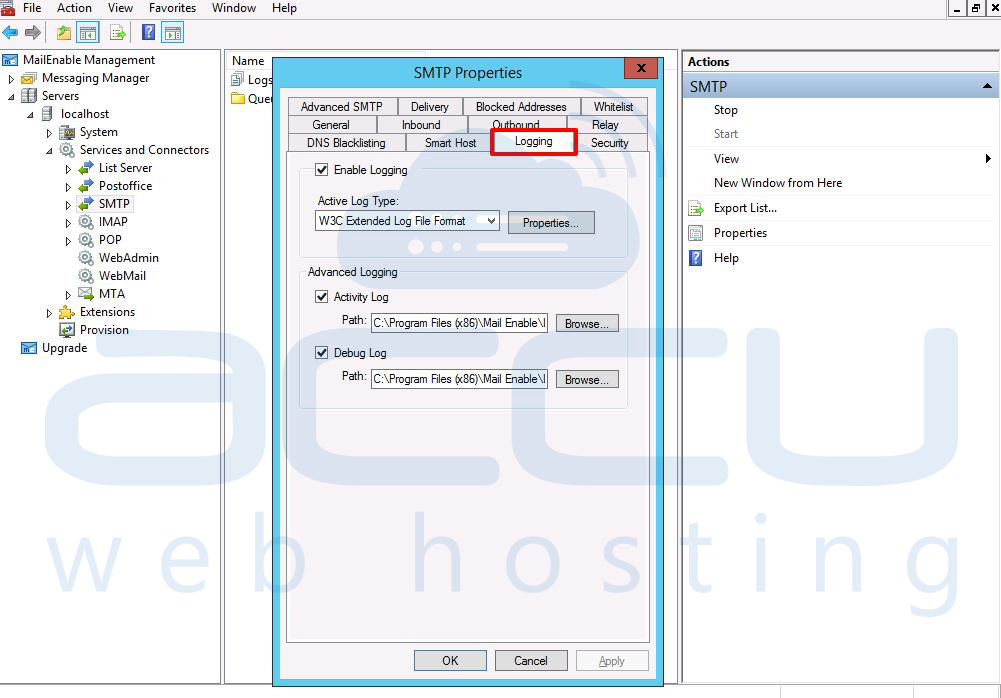
SMTP provides the W3C log. W3C logging generates the logs of service usage. Activity log generates/maintains the log file of system activity and the debug generates the low-level log file of system activity.
To disable log files for Activity, Debug, and Enable Logging uncheck all three checkboxes and click on the “Apply” button.
2.4 POP: To disable the logging for “POP” right-click on the “POP” option and click on properties as shown in the below screen capture.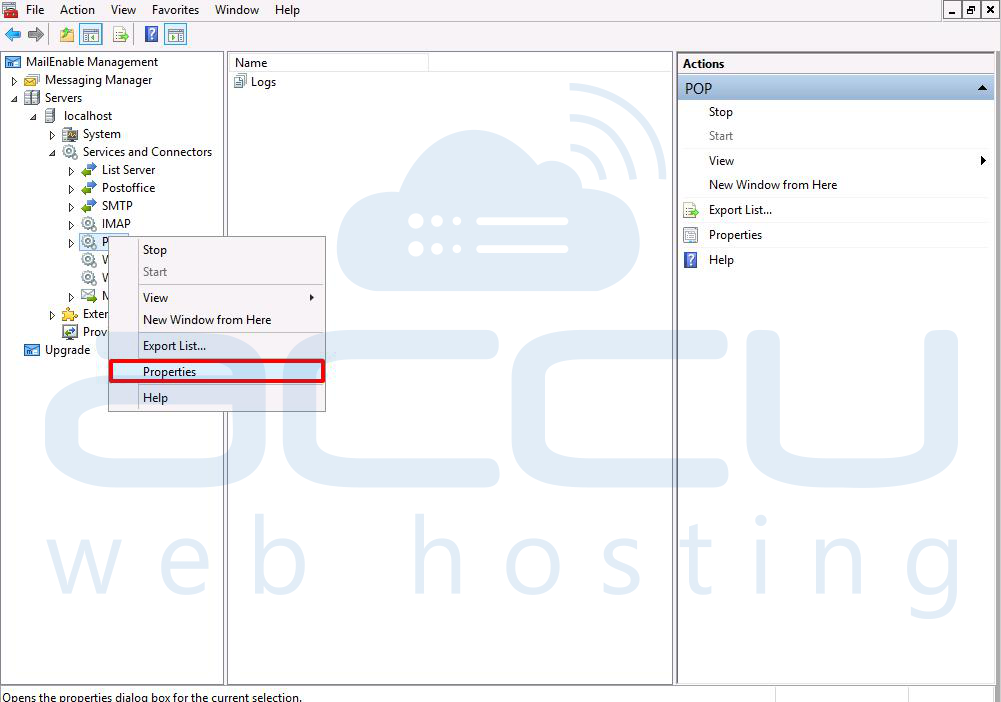
Once you click on the properties, a pop-up will open, then click on the logging tab as shown in the below screen capture.
Enable Logging: It is used to identify which fields are logged and the rollover frequency. You can also specify the directory on it.
Active/Debug Log: It is used to produce debug and activity logs for the POP3 service. You can use it to gain more details about the service.
If you don’t want to maintain such a log file, uncheck three checkboxes to disable the logging and click on the “Apply” button.
2.5 WebMail: To disable the logging for “WebMail” right-click on the “WebMail” option and click on properties as shown in the below screen capture.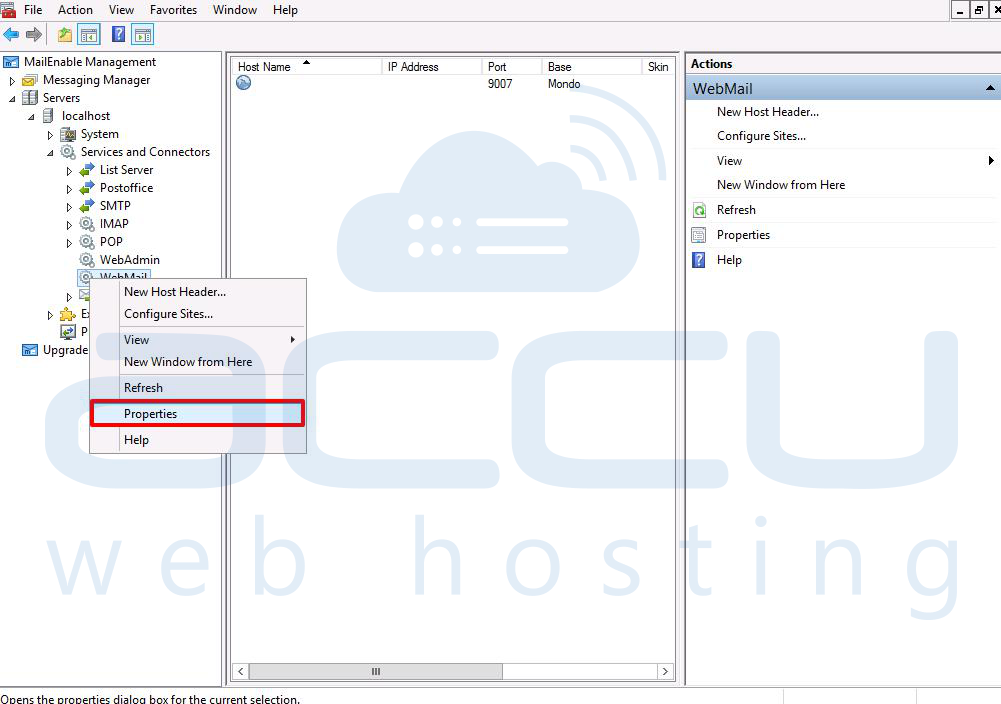
Once you click on the properties, a pop-up will open, then click on the logging tab as shown in the below screen capture.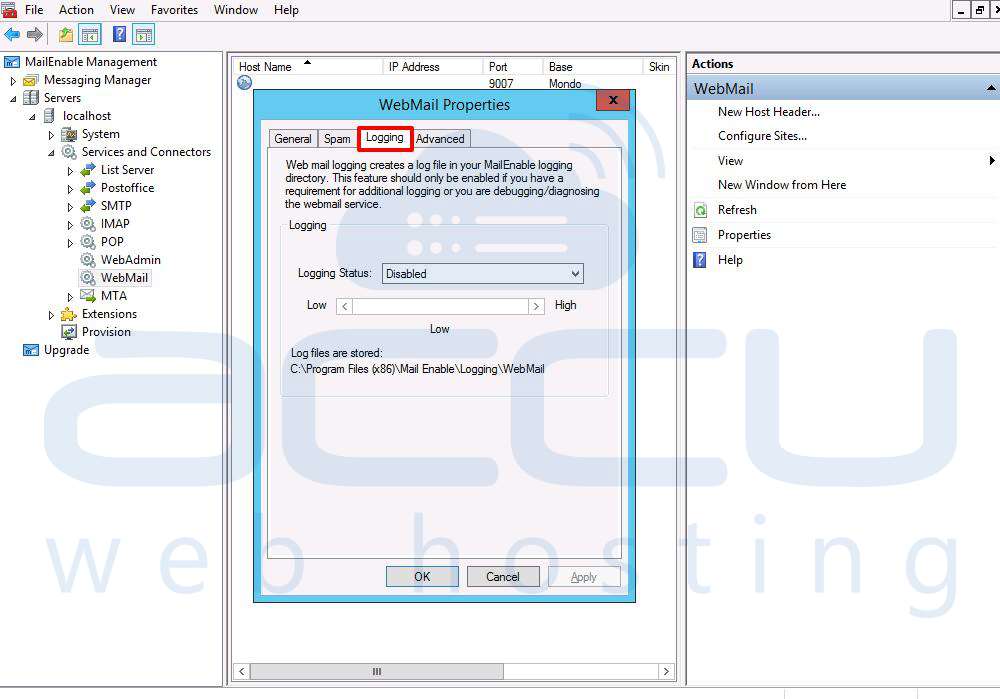
The logging status can be set to either ‘Disabled’, ‘Log to Debug log’ or “Log to Windows Event log’. If you want to disable the log then you need to set the Logging status to disable.
The sliding bar sets the level of logging from low to high. Low-level logging includes only logins, high-level logging includes listing messages, folders, sending, receiving, actions, and retrieval.
2.6 MTA (Mail Transfer Agent): To disable the log of MTA, right-click on it and click on the properties option as shown in the below screen capture
In the Advance logging section, you will see the Activity and Debug Logs. In MTA, the Activity and Debug log provide information about what the service is doing.
You can disable it via uncheck both the checkboxes and click on the “Apply” button.
