Windows Defender is an in-build anti-virus and anti-malware protection service for Windows 2016 servers. However, if you want to use any third-party anti-virus or anti-malware service on your server, you might require to disable and remove it. Following are the steps to disable and remove windows defender service from Windows Server 2016.
First Part: How to Disable Windows Defender on Windows Server 2016?
1. Log in to your windows server 2016.
2. Click on Start >> Settings.
3. Click on Update & Security.
4. On the next page, turn off the Real-time protection. 
How to disable Windows Defender from PowerShell?
1. Open Powershell inside your Windows server.
2. Run the below command.
Set-MpPreference -DisableRealtimeMonitoring $true

Second Part: How to Uninstall Windows Defender on Windows Server 2016?
1. Log in to your Windows Server 2016.
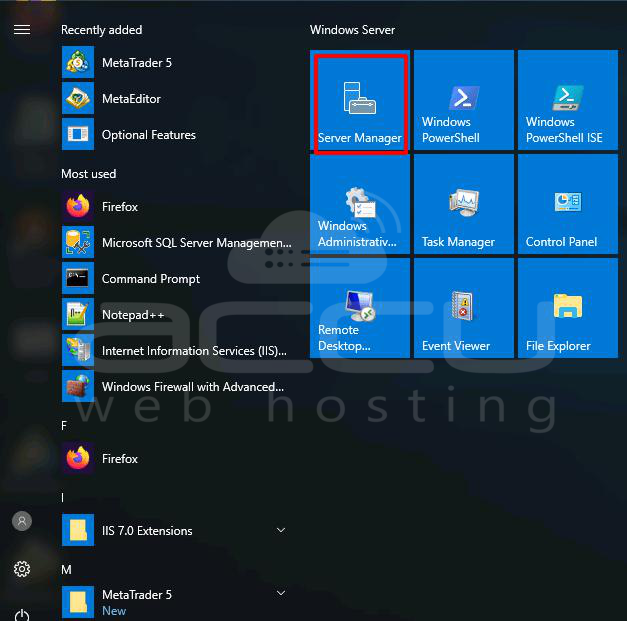
2. Click on the Server Manager.

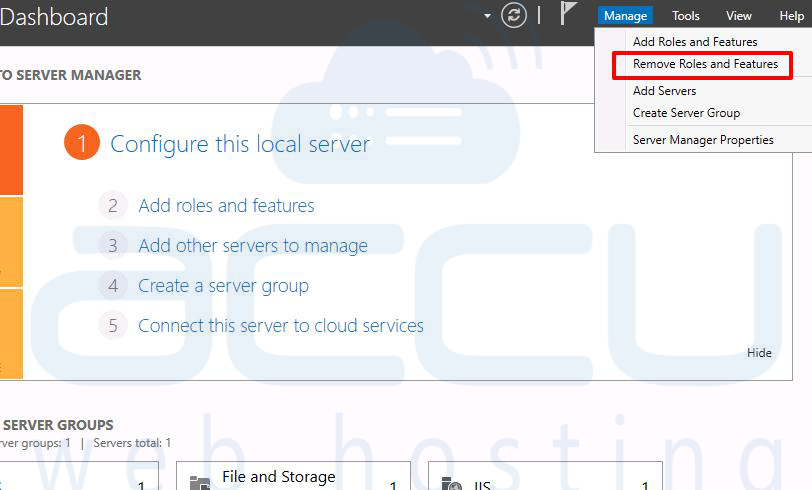
3. Go to Manage and click on Remove roles and features. 
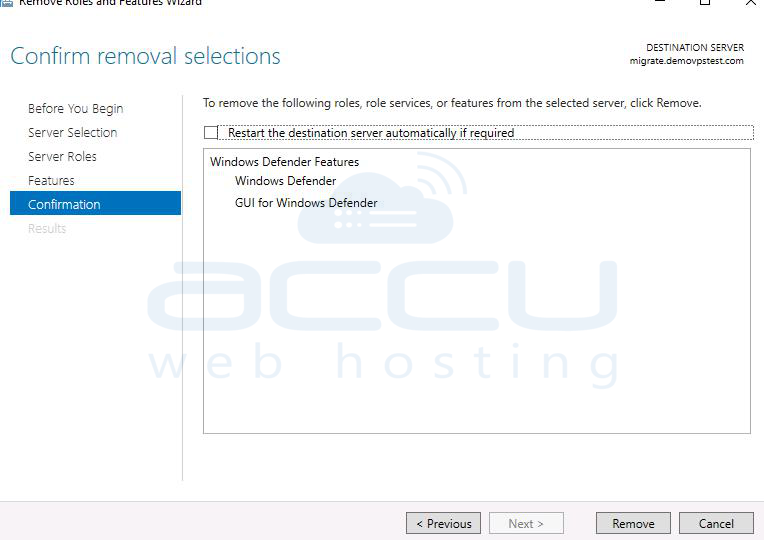
4. Untick the Windows Defender and click on Next. In the last step, click on the Remove button. 

How to remove Windows Defender from PowerShell?
1. Open Powershell inside your Windows Server.
2. Run the below command.
Uninstall-WindowsFeature -Name Windows-Defender

3. Finally, reboot the server to complete the uninstallation. 


