You may face an issue sending emails from your website (PHP or ASP.NET) using the local server SMTP service. In this case, you must check the SMTP logs of the Internet Information Service (IIS).
Please refer to the following steps to check the SMTP logs in the Windows Server (IIS) –
Enable SMTP Logs
1. Log in to your server.
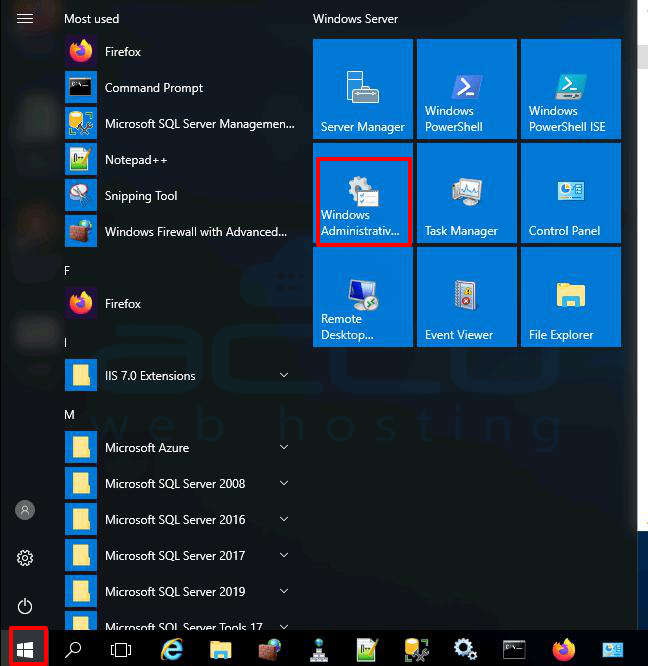
2. Go to Start > Administrative tools.
3. Click on Internet Information Service (IIS) 6.0 Manager.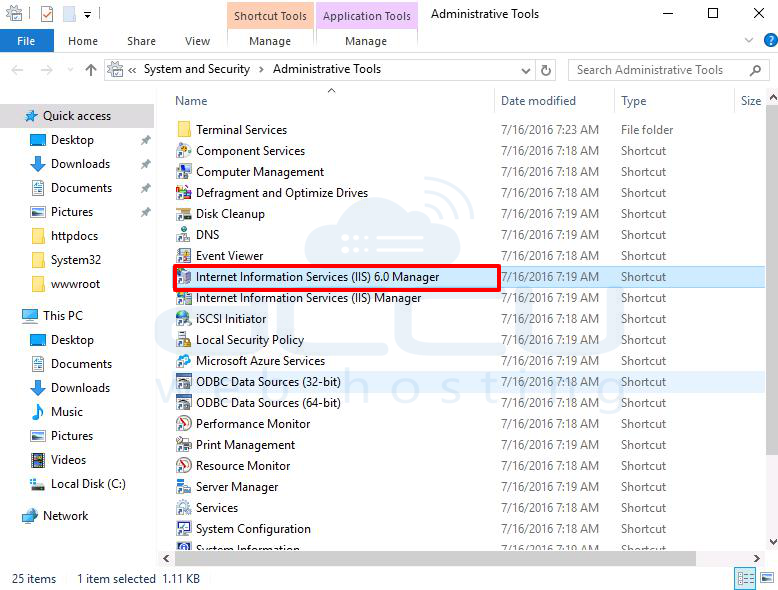
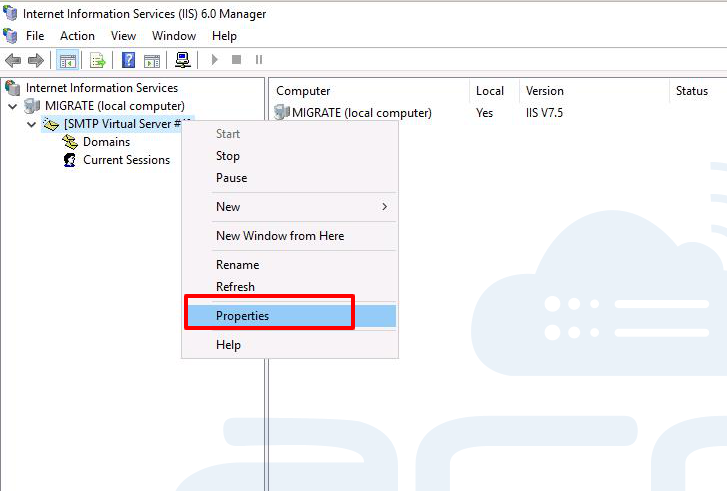
4. Expand your hostname at IIS 6; it will show you SMTP Virtual Server #1.
5. Right-click on SMTP Virtual Server and click on Properties.
6. Click on Enable logging and then click on the Properties button. 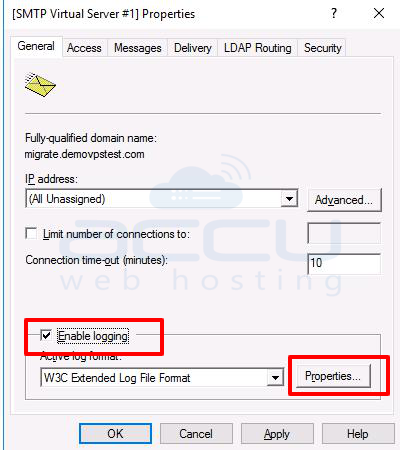
7. At the logging properties, click on the Advanced tab, check all the boxes, then click on the OK button. 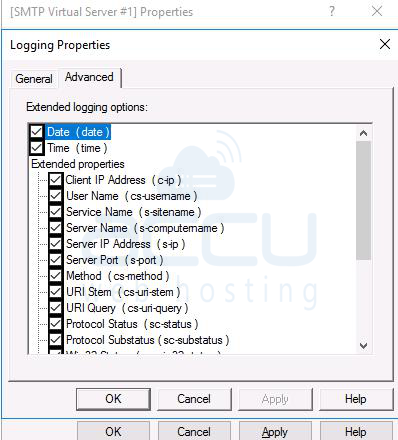
Check SMTP Logs
Once the SMTP logs are enabled, we can find all the logs at the location mentioned below –
C:\WINDOWS\system32\LogFiles\SMTPSVC1
Understand the SMTP Log
If you find the status code '250', it means OK.
Here is the understanding of SMTP status codes.
|
Status Code
|
Description
|
|
211
|
System status, or system help reply
|
|
214
|
Help message
|
|
220
|
Service ready
|
|
221
|
Service closing transmission channel
|
|
250
|
Requested mail action okay, completed
|
|
251
|
The user not local; will forward to
|
|
354
|
Start mail input; end with "."
|
|
421
|
Service not available, closing transmission channel
|
|
450
|
Requested mail action not taken: mailbox unavailable
|
|
451
|
Requested action aborted: local error in processing
|
|
452
|
Requested action not taken: insufficient system storage
|
|
500
|
Syntax error, command unrecognized
|
|
501
|
Syntax error in parameters or arguments
|
|
502
|
Command not implemented
|
|
503
|
Bad sequence of commands
|
|
504
|
Command parameter not implemented
|
|
550
|
Requested action not taken: mailbox unavailable
|
|
551
|
User not local; please try <....>
|
|
552
|
Requested mail action aborted: exceeded storage allocation
|
|
553
|
Requested action not taken: mailbox name not allowed
|
|
554
|
Transaction failed
|


