
Ubuntu 18.04 uses Netplan to configure network settings instead of the older /etc/network/interfaces method.
Netplan stores network configurations in YAML files inside the /etc/netplan/ directory. In this guide, we will show you how to add a static IP address on Ubuntu 18.04 using Netplan.
Step 1: Locate the Default Network Configuration File
Run the following command to list the Netplan configuration files:
# ls /etc/netplan/

Step 2: View the Current Configuration
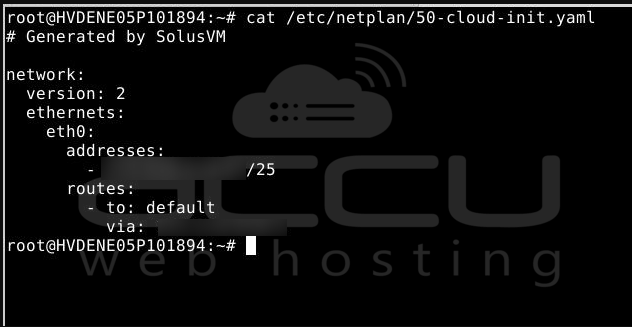
Open the configuration file (for example, 50-cloud-init.yaml) to see existing settings:
# cat /etc/netplan/50-cloud-init.yaml
Step 3: Identify Your Network Interface
Look for your Ethernet card name, such as enp0s1, in the configuration file. This is where you will assign the new IP address.
Step 4: Backup the Existing Configuration
Always take a backup before making changes:
# sudo cp /etc/netplan/50-cloud-init.yaml /etc/netplan/50-cloud-init.yaml.bak

Step 5: The Configuration to Add a Static IP Address
Open the file in a text or:
# sudo nano /etc/netplan/50-cloud-init.yaml
Modify it as follows (replace with your actual values):
IP address for enp0: 192.168.0.1 (your IP Address)
Gateway: 192.168.0.0
Netmask: 255.255.255.0
DNS servers: 8.8.8.8 and 8.8.4.4.
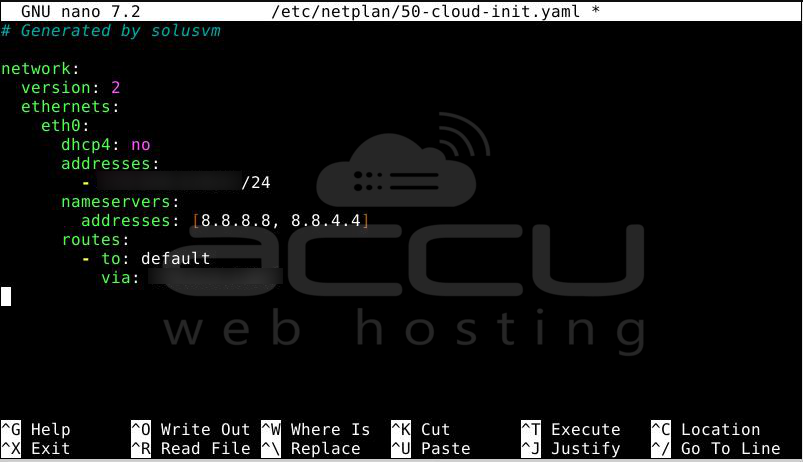
Note: Make sure indentation is correct in YAML files. Use spaces (not tabs).
Step 6: Save and Exit
Press CTRL + X, then Y, and press Enter to save the file.
Step 7: Apply the Configuration
Run the following command to apply the changes:
# sudo netplan apply

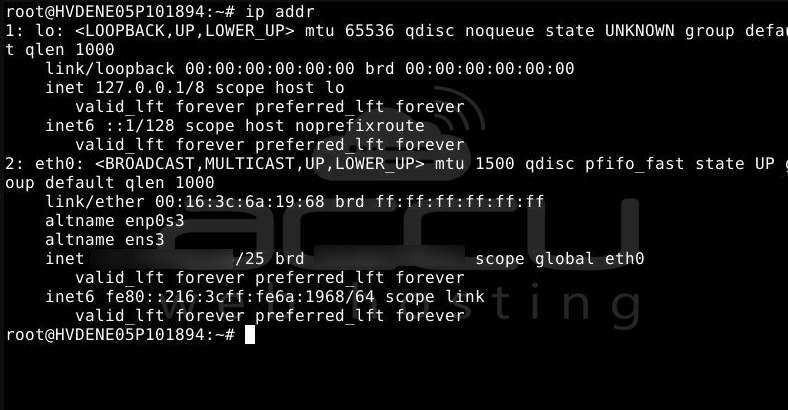
Step 8: Verify the New IP Address
Check if your new IP address is assigned:
# ip addr
Conclusion:
By following these steps, you can easily assign a static IP address on Ubuntu 18.04 using Netplan. This method ensures that your network settings remain consistent across reboots. For troubleshooting, you can restore the backup file created earlier.