SMTP stands for Simple Mail Transfer Protocol. SMTP allows your emails to be sent from one mail server to another mail server. It works at the application layer of TCP/IP. You will not be able to send your emails without SMTP on the server. The following are the steps to install and configure the SMTP service on Windows Server 2016.
SMTP Installation
Step 1: Log in to your Windows Server.
Step 2: Click on Windows and Server Manager.
Step 3: Click on Add Roles and Features and hit the Next Button before you begin the page.
Step 4: At Installation Type, select Role-based or feature-based installation and click Next.

Step 5: Keep the default. Select a server from the server pool and click Next. 
Step 6: We don't need to install any Roles, so click on Next.
Step 7: On the Add Features Wizard, select SMTP Server. Clicking the SMTP Server will prompt for the Dialogue box. Tick on Include Management tools and hit the Add features Button 

Step 8: Make sure IIS6 Management Console and Metabase Compatibility are selected, and click on the Install Button.
SMTP Configuration
SMTP uses port 25 to relay the emails. We need to disable the open relay to prevent SMTP from sending spam emails. The following are the steps to do that.
Step 1: Open IIS Manager 6 from the Administrative Tools.
Step 2: Right-click on the SMTP Virtual Server and select properties. 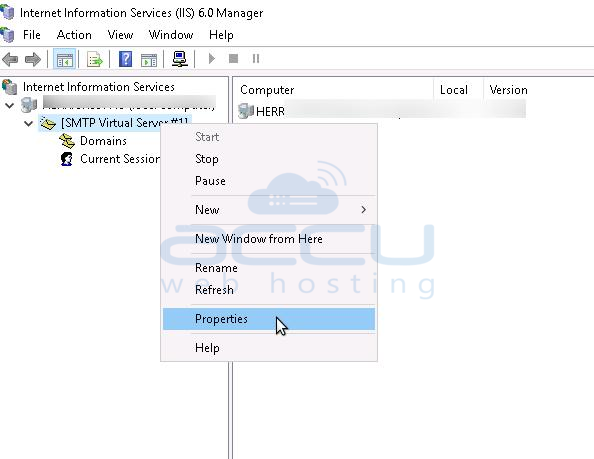
Step 3: Click on the Access tab and hit the Relay Button.
Step 4: Select only the list below inside Relay restrictions and click on the Add button. 
Step 5: Enter the localhost IP address, 127.0.0.1, and click OK
Step 6: Hit Ok Again.
Step 7: Click on the Connection Button and repeat the steps from (4) to (6).
Step 8: Finally, Hit the OK Button on the SMTP Properties Button.
