Need to rename a MySQL table without writing any SQL queries? phpMyAdmin makes this process simple and quick, even for beginners. Whether you're reorganizing your database structure or cleaning up table names, here's a step-by-step guide to help you get it done right from your cPanel interface.
Steps to Rename a MySQL Table via phpMyAdmin
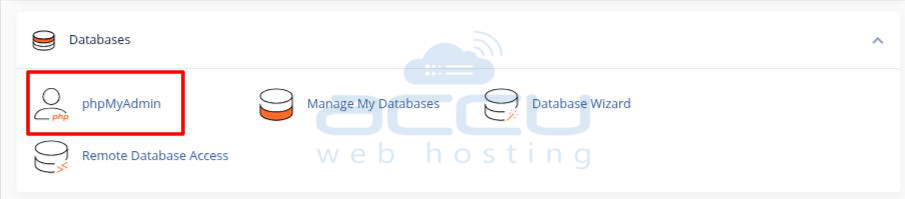
Step 1: Log in to your cPanel.
Step 2: Navigate to the Databases section. Click on phpMyAdmin under the Databases section.
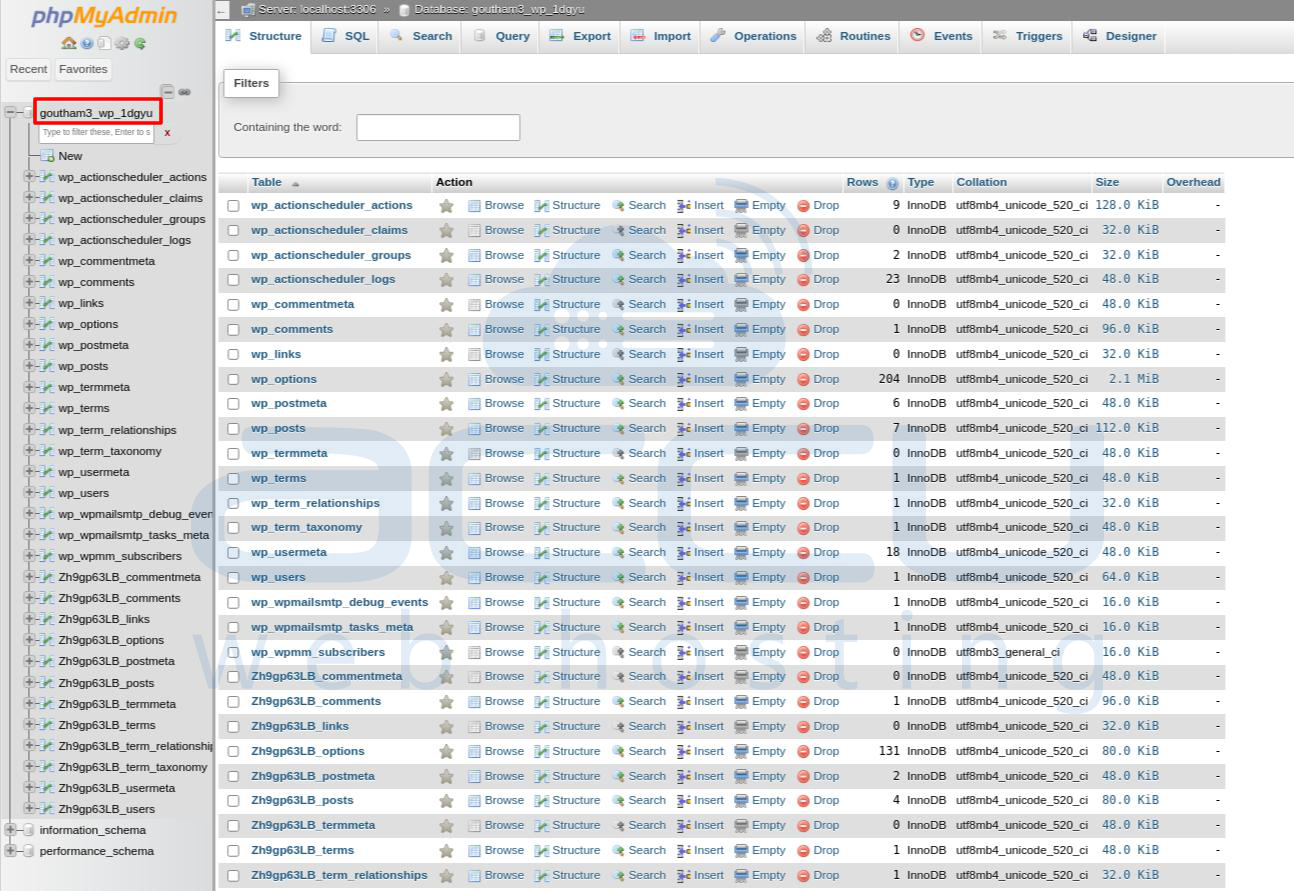
Step 3: From the left sidebar, choose the database that contains the table you want to rename. It will display all the tables under that database.
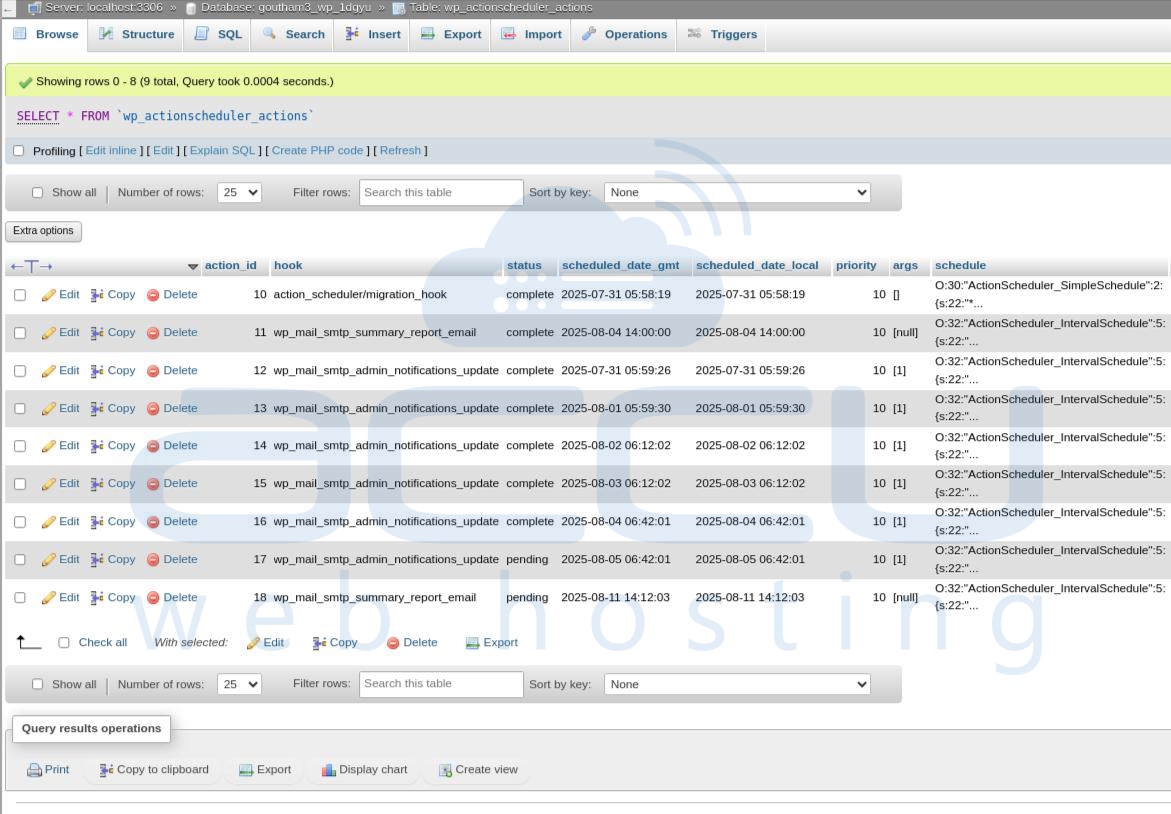
Step 4: Click on the table name that needs to be renamed. This will open the table’s structure view.
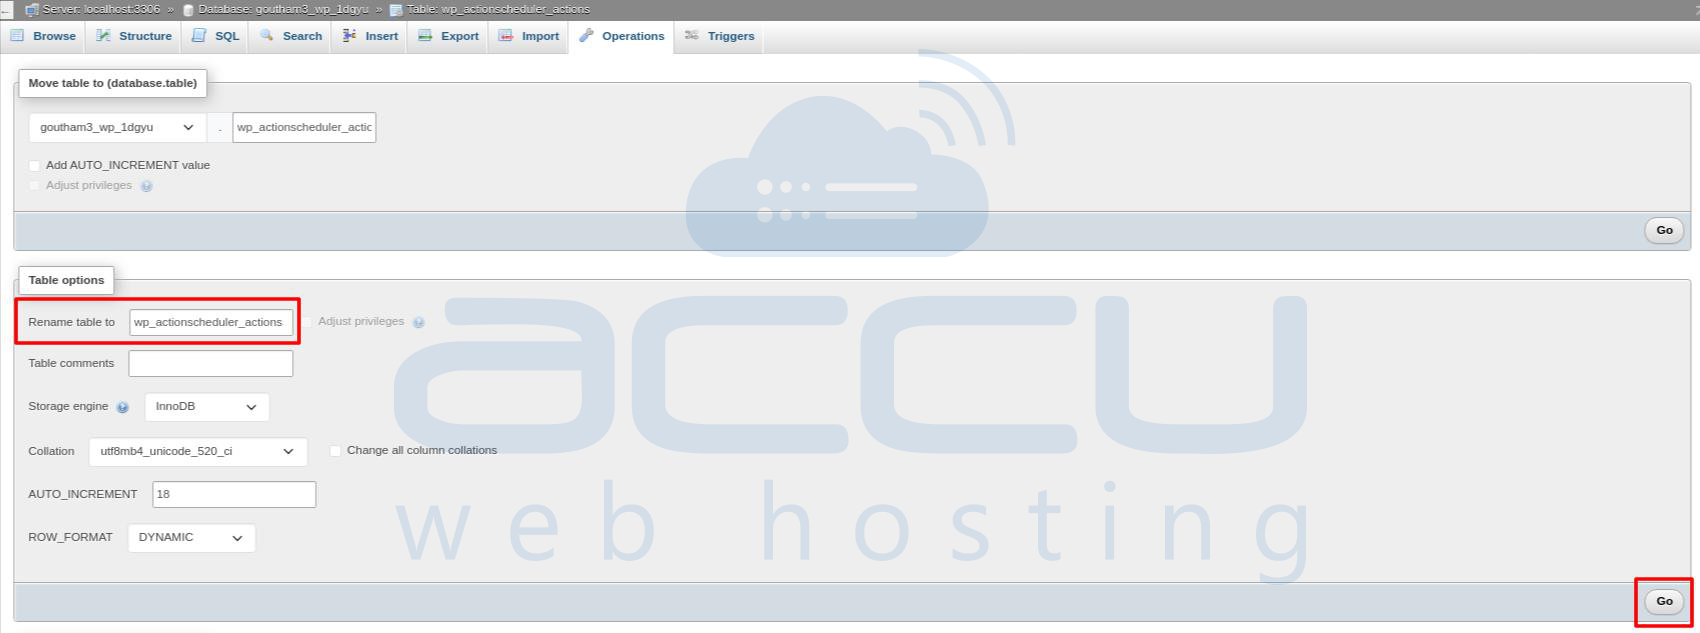
Step 5: At the top navigation bar inside the table view, hit the Operations button.
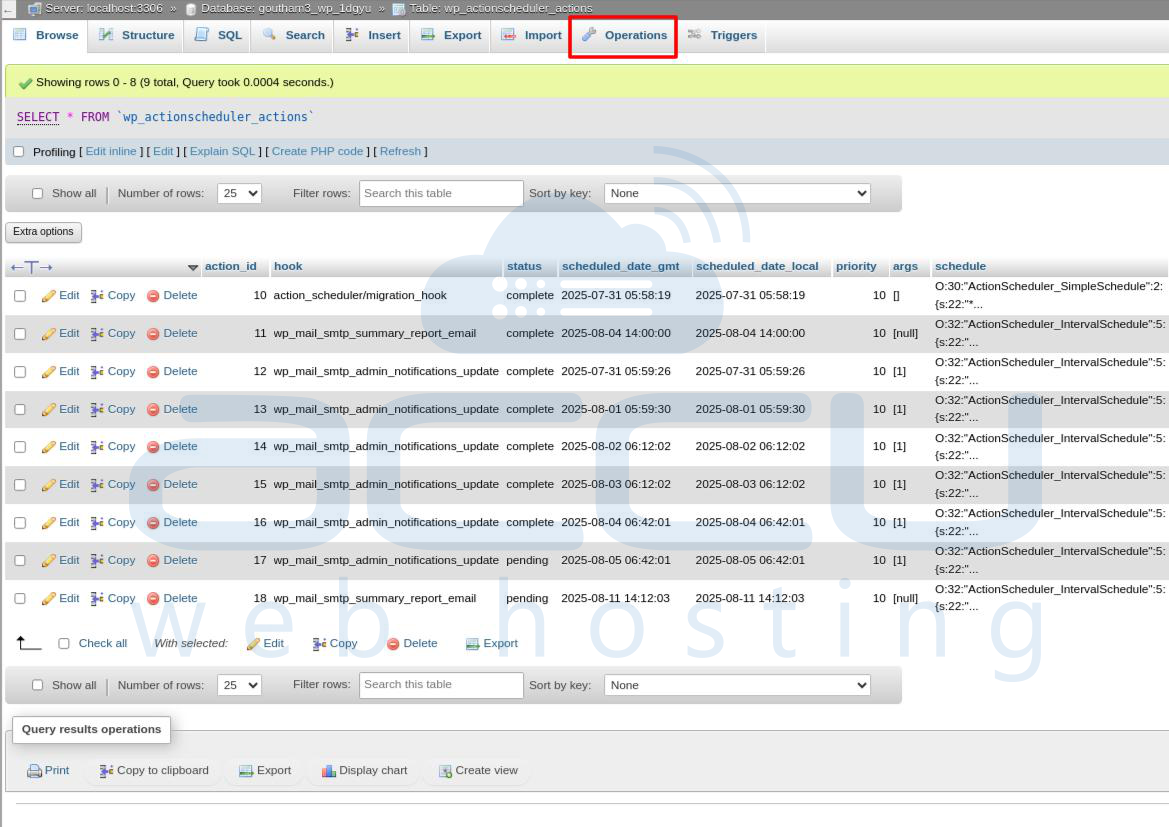
Step 6: Under the Table options section, enter the new table name in the “Rename table to” field, then click the Go button.
Step 7: phpMyAdmin will confirm the change with a message indicating that the table has been renamed successfully.

Conclusion:
Renaming a MySQL table in phpMyAdmin is a quick and straightforward process, even for non-technical users. It’s a handy tool for managing database structure during development or after a website redesign. Always double-check the new name before confirming, especially if your application code depends on specific table names.


