ISPConfig is an open-source control panel for Linux with an easy-to-use web interface that helps you to manage websites, DNS records, email addresses, FTP, database, etc.
If you want to install ISPConfig in Debian, please refer to this article – Install ISPConfig on Debian for more details.
If you want to install ISPConfig in Ubuntu, please refer to this article – Install ISPConfig on Ubuntu for more details.
This article discusses the steps to install ISPConfig 3 on CentOS 7/AlmaLinux.
System requirements:
- A server with CentOS 7/AlmaLinux
- Access to the root user.
Steps to install the ISPConfig on CentOS 7.x
Step 1: Run the command given below:
# cd /tmp wget --no-check-certificate -O installer.tgz "https://github.com/servisys/ispconfig_setup/tarball/master"
tar zxvf installer.tgz cd ispconfig bash install.sh
Step 2: Select 'yes' when it asks for your Linux distribution. Installing for this Linux Distribution: CentOS 7. Is this correct? (y/n)
Step 3: It will ask you for a fully qualified hostname. You can type 'n' if you already have a fully qualified hostname.
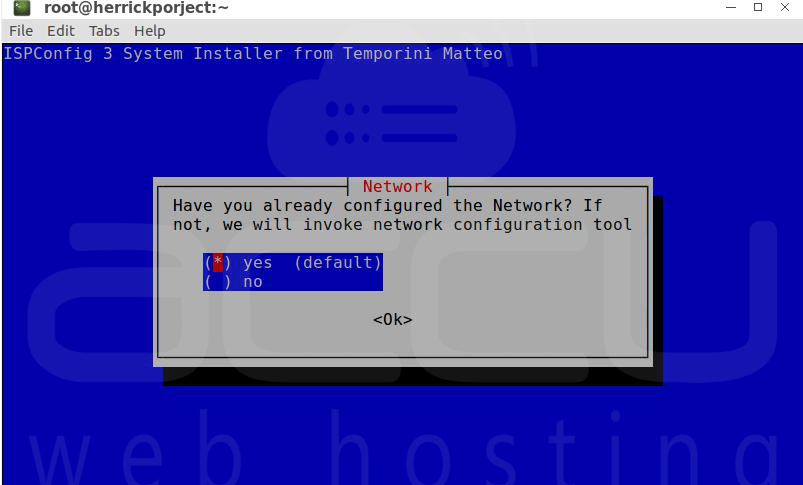
Step 4: Press Enter for the default network configurations.
Step 5: Specify your root password.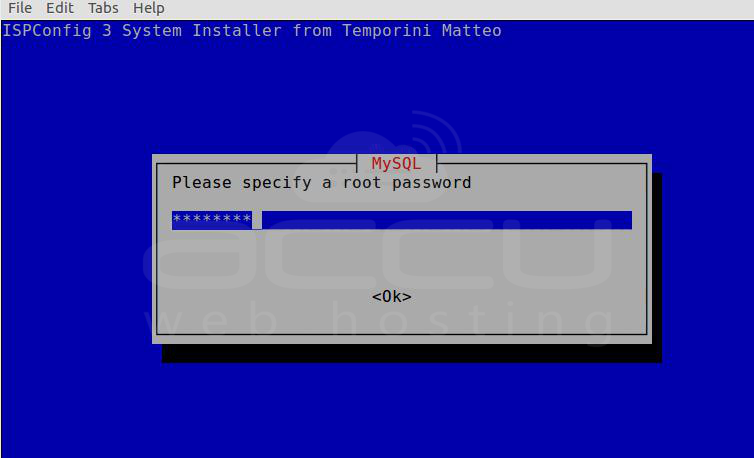
Step 6: Select your web server type. 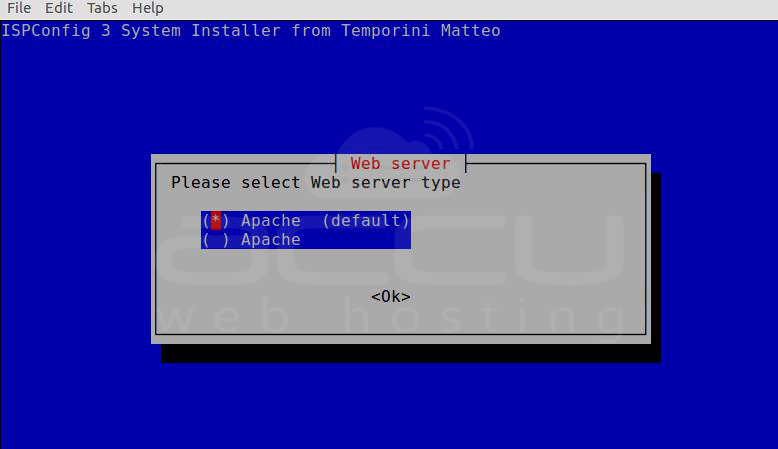
Step 7: Select Dovecot default Mail Server type.
Step 8: Select 'Yes' and enter the Jailkit as it is required for the ISPConfig.
Step 9: Select 'No' for the DKIM skip. You can use the tab to change the selection.
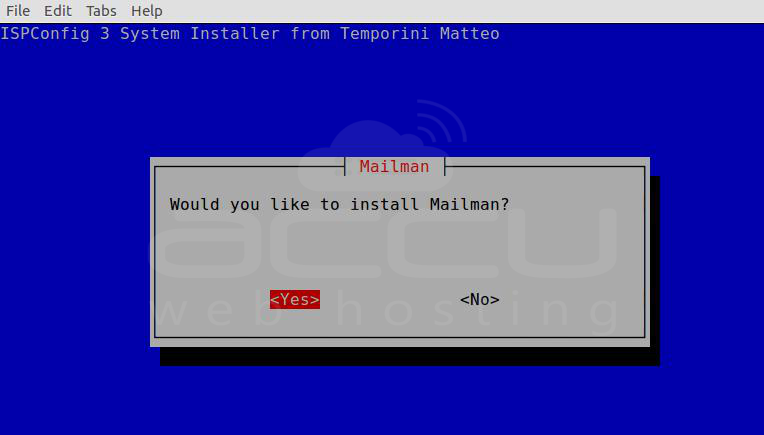
Step 10: Select 'Yes' to install Mailman.
Step 11: Set the root as a Mailman site owner.
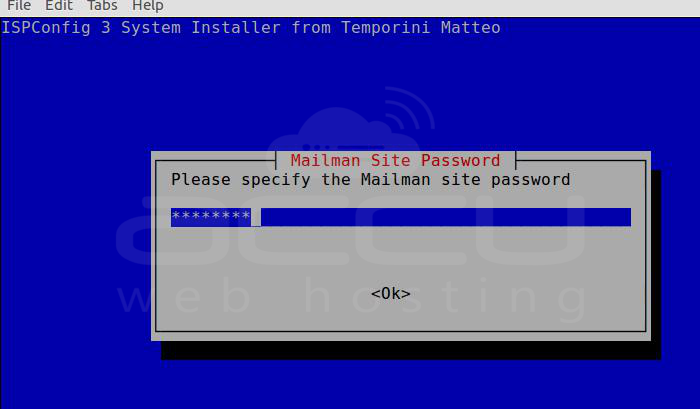
Step 12: Give Mailman a password and press Enter.
Step 13: Select the required webmail service. RoundCube or SquirrelMail.
Step 14: We will keep root as the RoundCube user. 
Step 15: Give Roundcube DB a user password.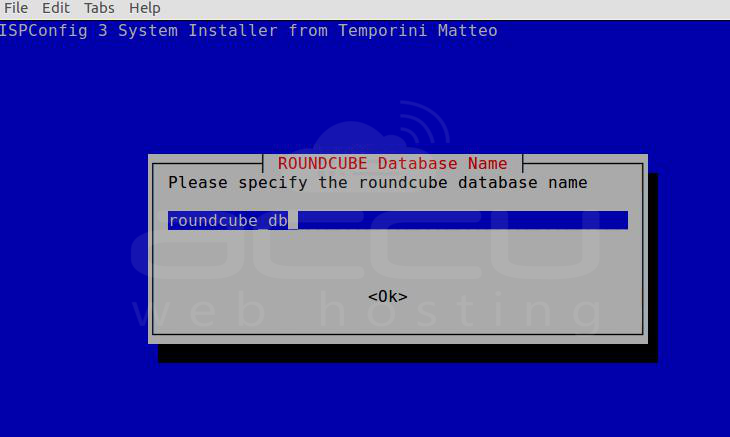
Step 16: Set a 2-digit country code. 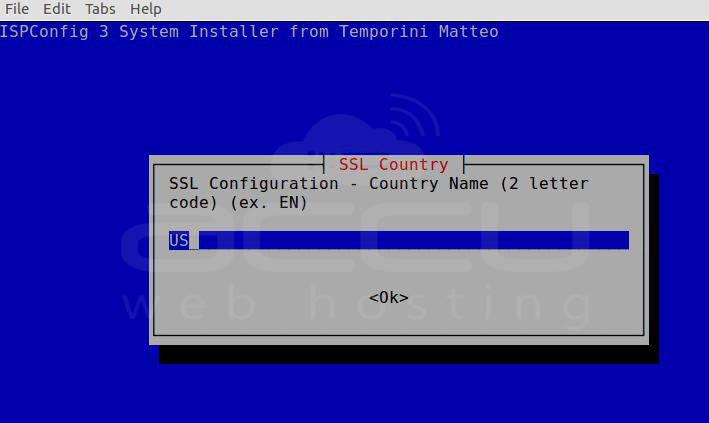
Step 17: Provide the province name, locality, organization name, etc., for the SSL Certificate.
Step 18: After that, all the processes will work automatically, including MariaDB, phpMyAdmin, Pure FTPD, DNS Service (BIND), Let's Encrypt SSL, etc.; it will take some time to install all the configurations.
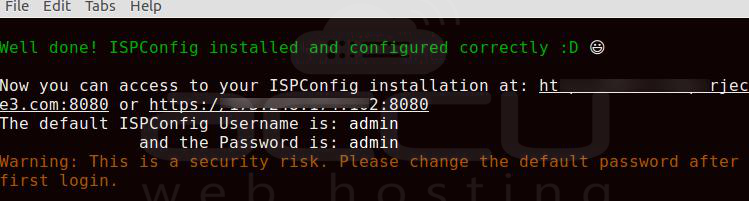
Step 19: Now that the installation is complete, you can access the ISPConfig control panel from your web browser. Open your preferred web browser and type your server IP address with the default configured port for ISPConfig, as shown below:
https://server_IP_address:8080/
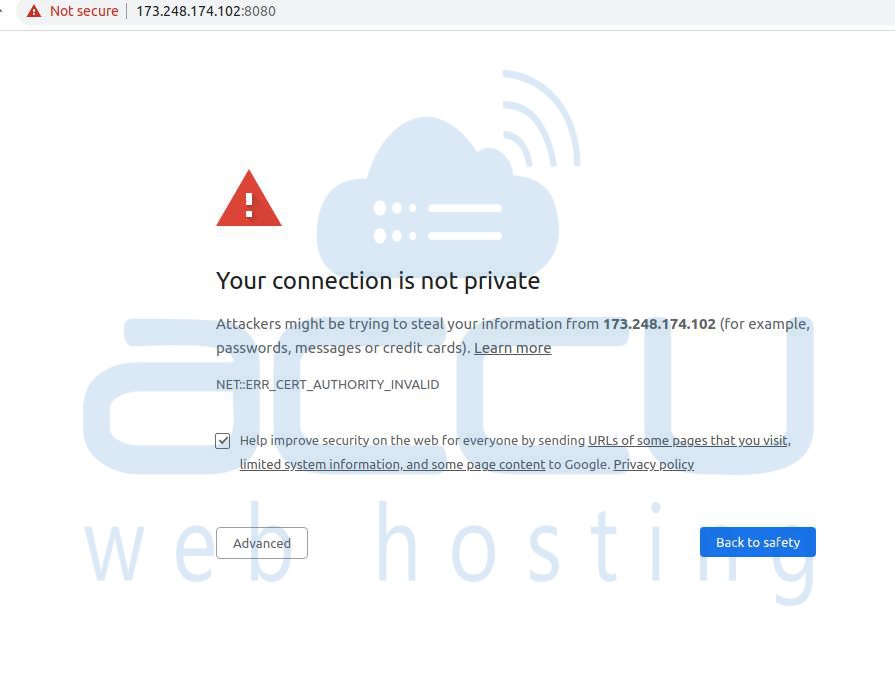
Step 20: Click on the Advanced button and proceed with the unsafe
That's it.
