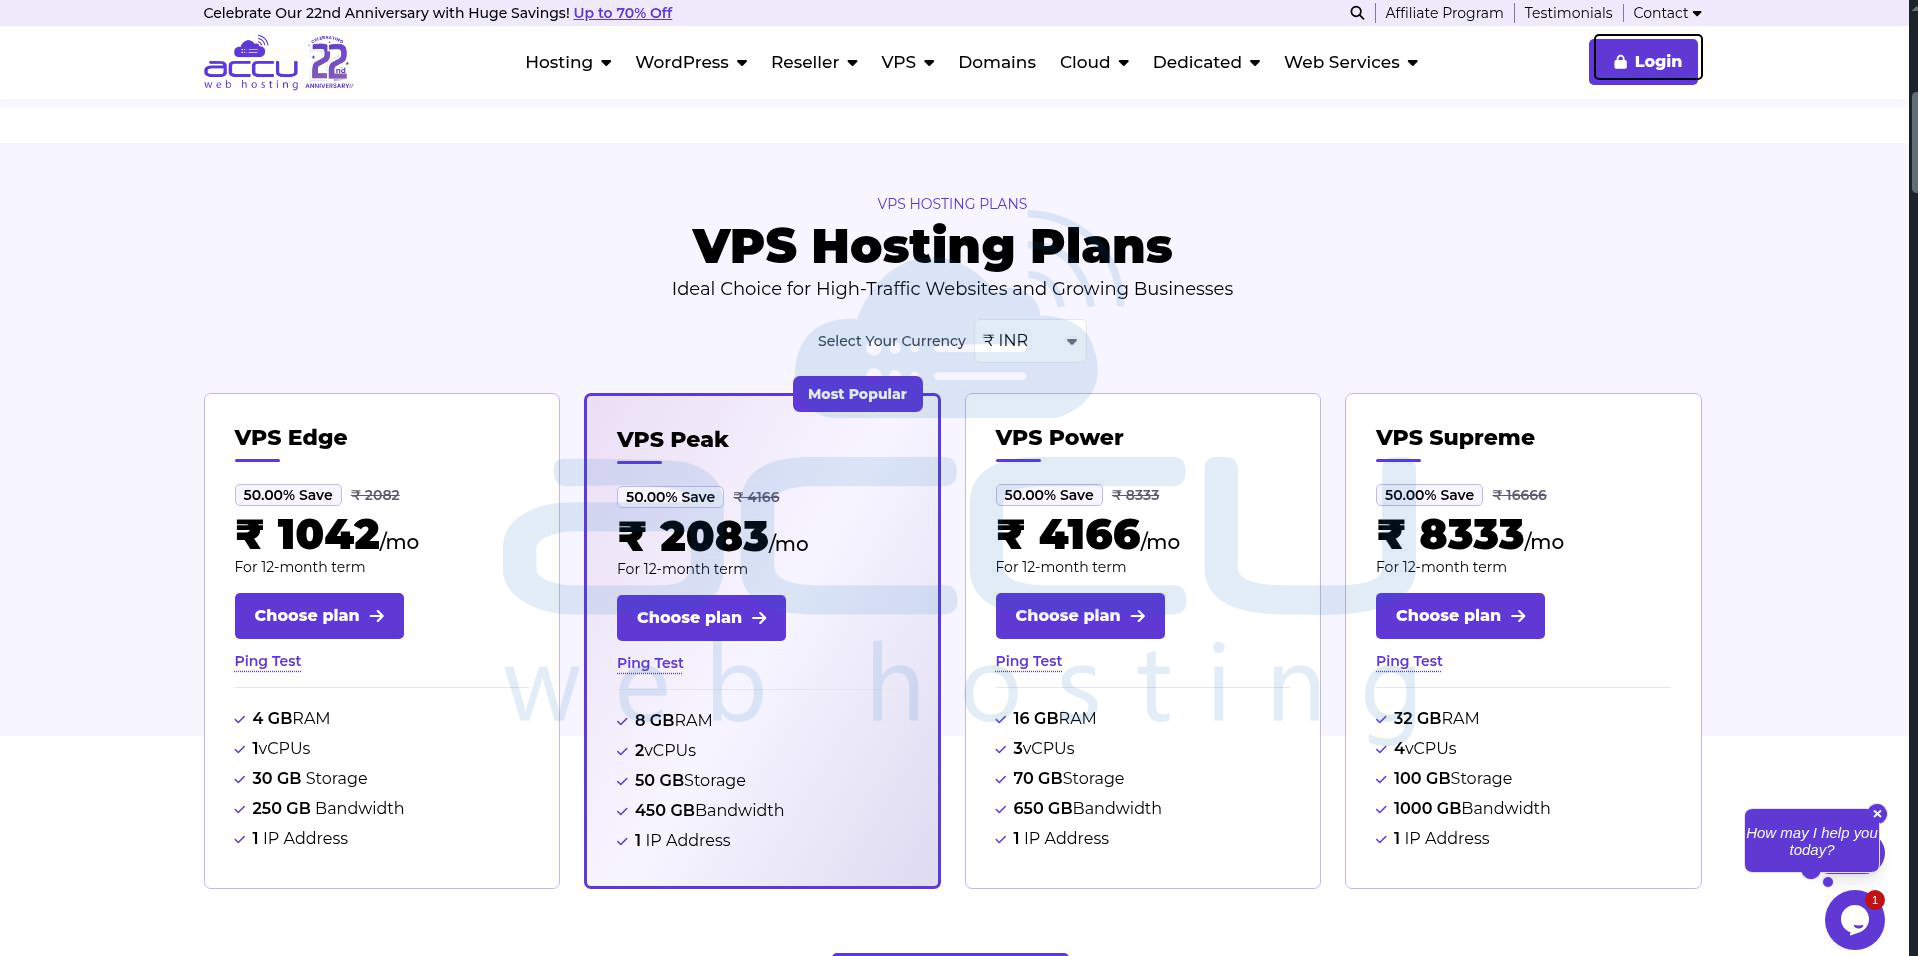
Step 1
First, select your desired Linux VPS Hosting plan with your preferred billing cycle from the hosting plan page.
Then click on the Order Now button.
Step 2
Next, you will see the Configurable Option portion, from which you can choose the required details. It will update us on how your VPS should be configured. It includes the following options –
- Operating System: Choose the desired operating system for your VPS.
- Control Panel: Choose the control panel whether you want to add it to your VPS. There are many options for the control panels, including paid control panels (cPanel, Plesk) and Free Control Panels (Ajenti, Webmin, Virtualmin).
- Daily Backup: Select the appropriate option for CDP Backup. Leave it as 'None' if you do not need CDP Daily Backup.
- Additional Disk Space: Choose the additional storage space you need for your VPS. Leave it as 'No Additional Disk Space' if you do not need additional disk space.
- Additional RAM: Choose the additional RAM you need for your VPS. Leave the 'No Additional RAM' option unchanged if you do not need additional RAM.
- Additional IP address: Select how many additional IP Addresses you need for your VPS. Leave it as 'None Additional IP Address if you do not need an additional IP Address.
- Additional CPU Core: Choose the additional vCPU you need for your VPS. Leave it as ‘No Additional vCPU’ if you do not need an additional vCPU.
- Additional Bandwidth: Choose the additional bandwidth you need for your VPS. Leave it as ‘No Additional Bandwidth’ if you do not need additional bandwidth.
- Managed Services: Select whether you need an Unmanaged VPS Hosting service or a Managed VPS Hosting service.
For more details, click here. - Softaculous: Softaculous is an additional plugin for cPanel/ Plesk that allows one-click installation for many applications, CMS, etc.
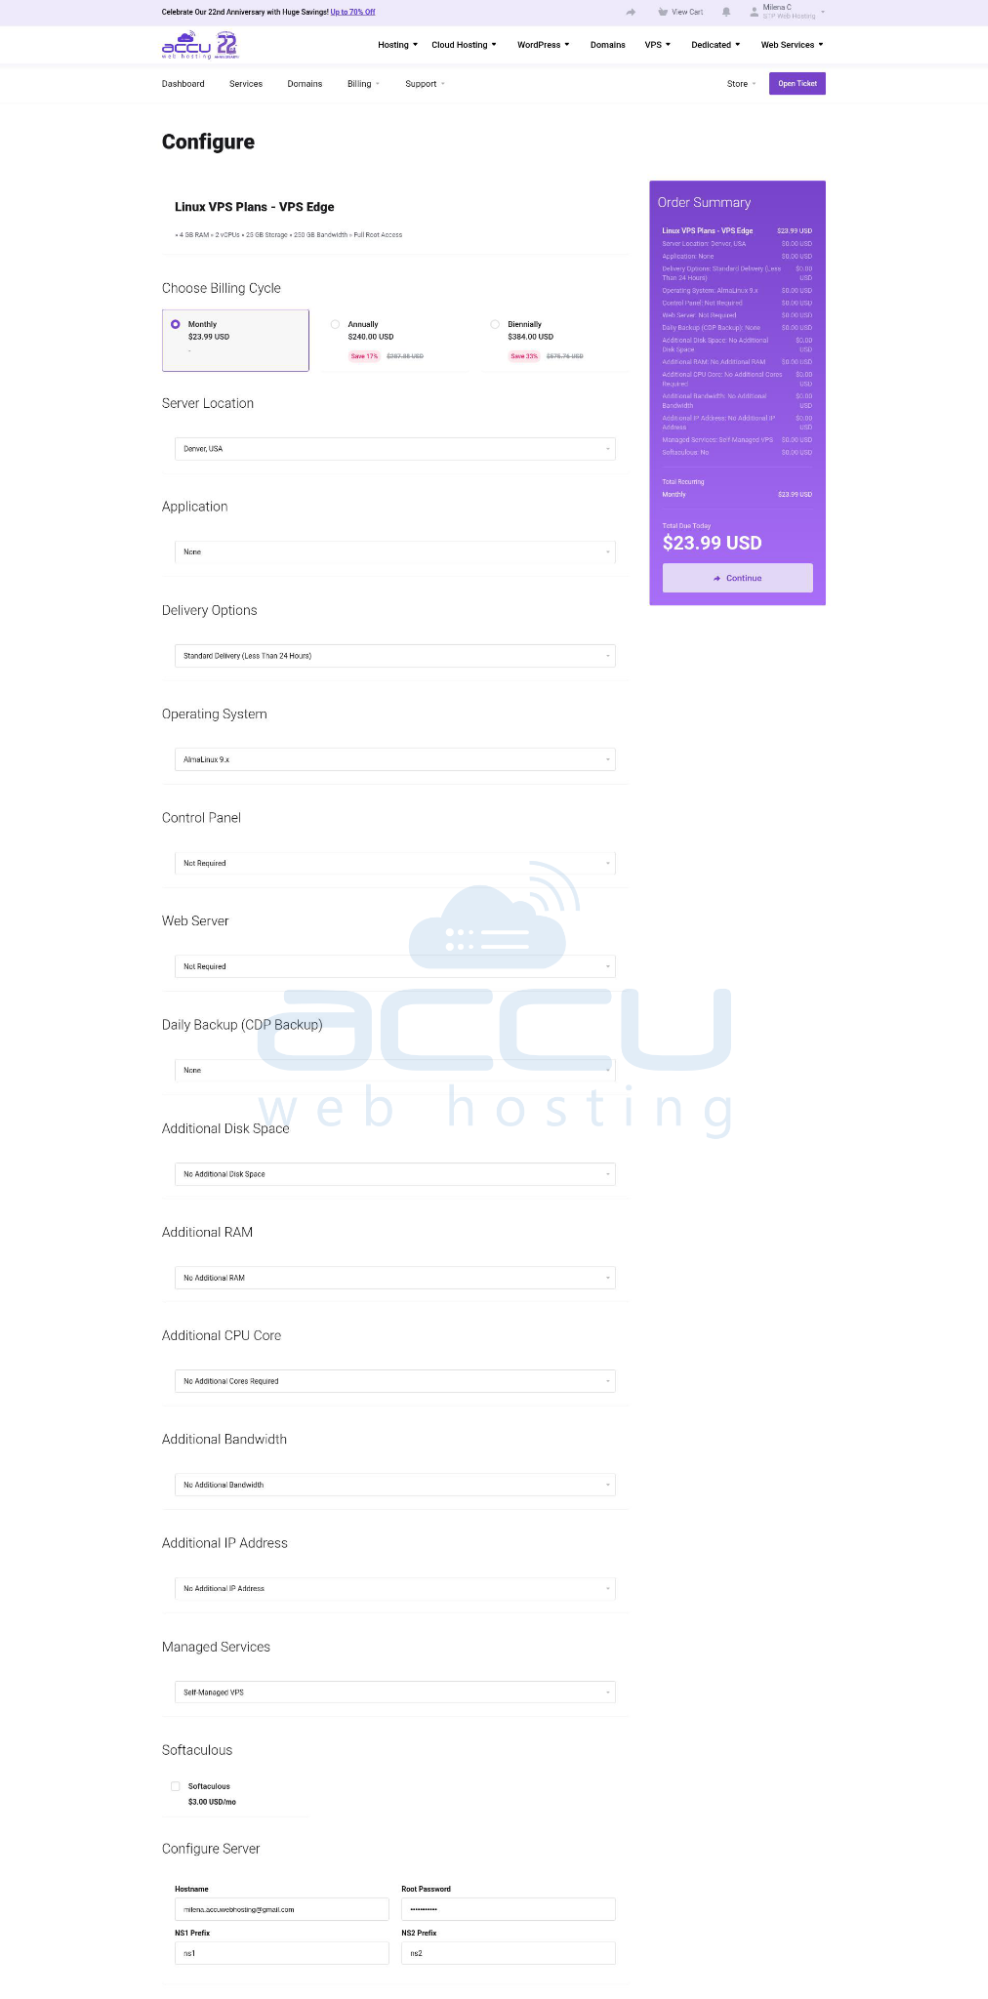
Step 3
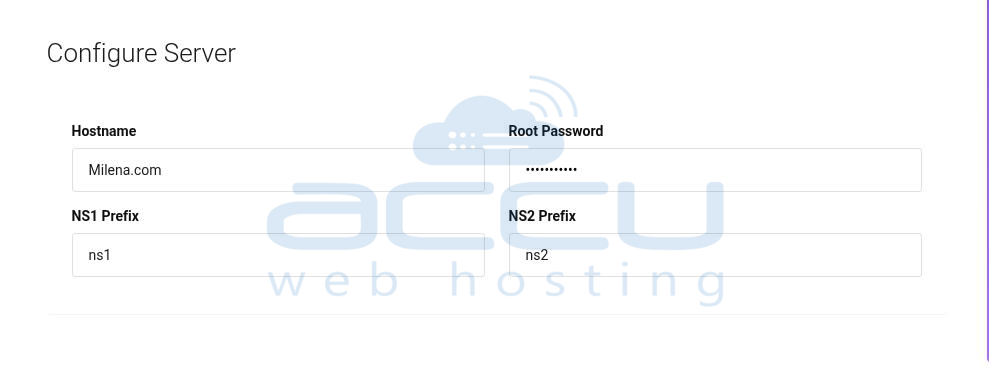
Next, you will see the Configure Server option. It is mandatory to fill out all the details in this section, which include the following –
- Hostname: A hostname can be used to identify your order. Therefore, if you have an active domain, you can use it as your VPS hostname. Otherwise, any name can be added as a hostname.
- NS1 Prefix: Please don't make any changes to the NS1 prefix; keep it as it is.
- NS2 Prefix: Please don't make any changes to the NS2 prefix; keep it as it is.
- Root Password: Enter your preferred password, which you want to use as a root password for your VPS. We recommend you use a strong alphanumeric combination as a password.
Step 4
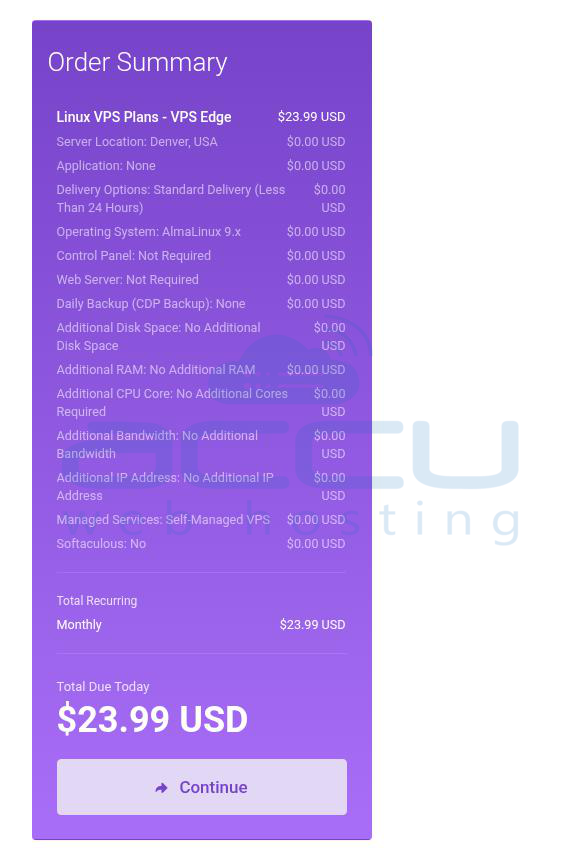
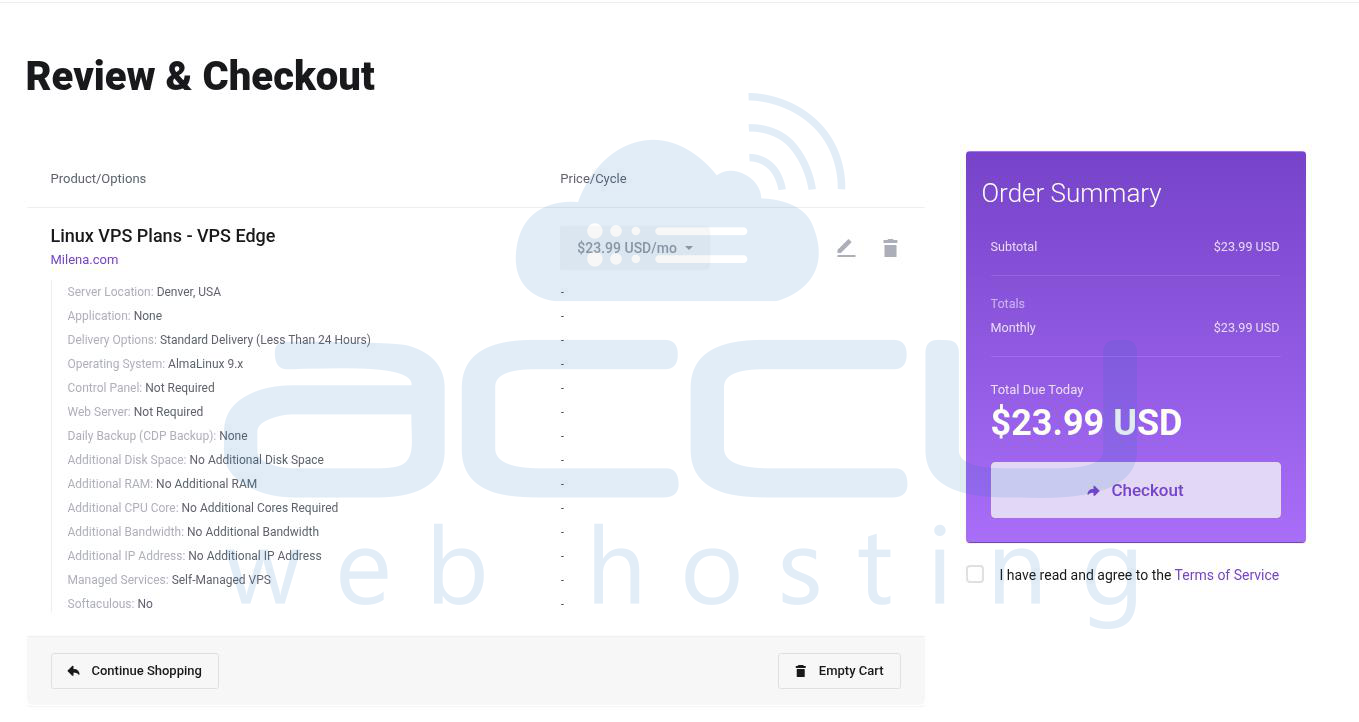
Check the VPS order and its additional resources in the Order Summary section. Once you are ready to place an order, click on the Continue button to check out.
Step 5
Now you will be on the Review & Checkout page to check the shopping cart with the total price of your order, including a discount (if applicable).
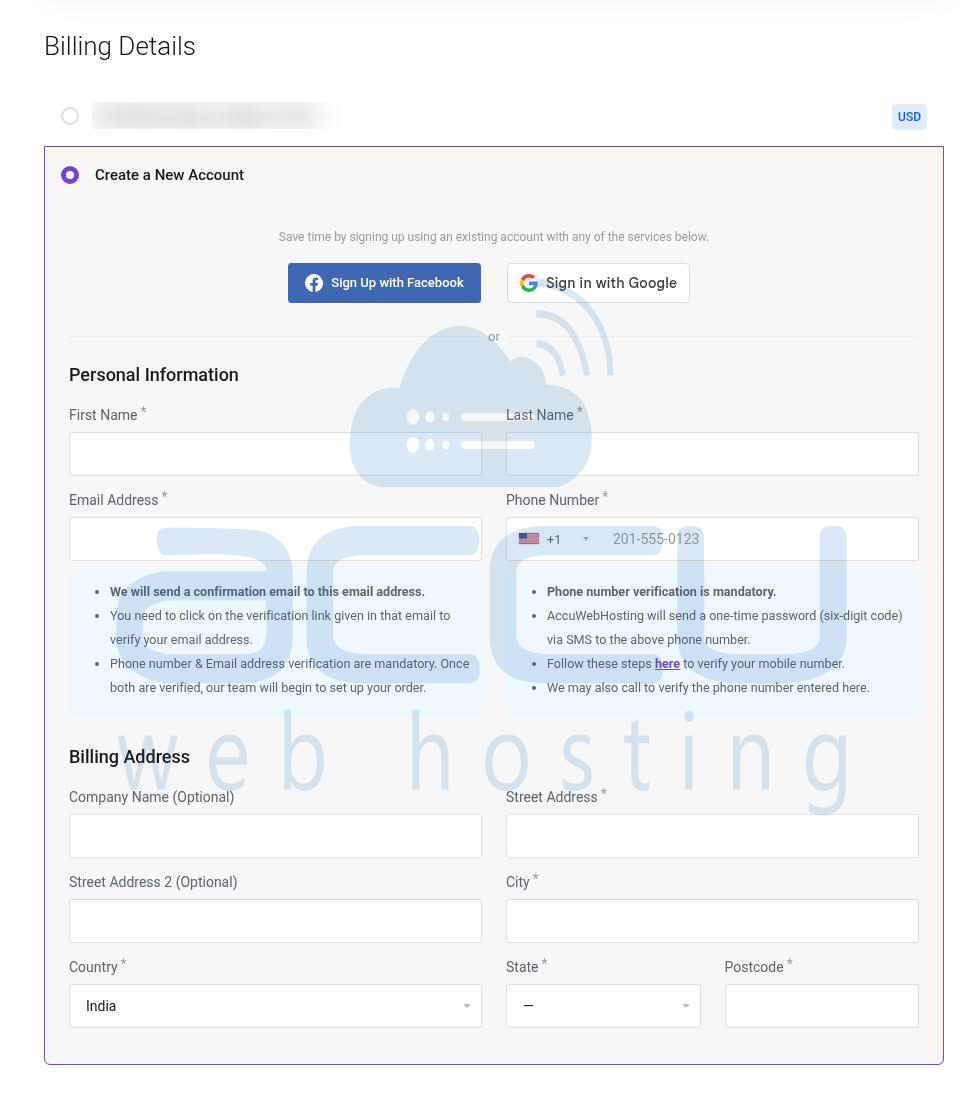
Step 6
Scroll down and fill in all your profile details to register your billing account with us, including your phone number and postal address.
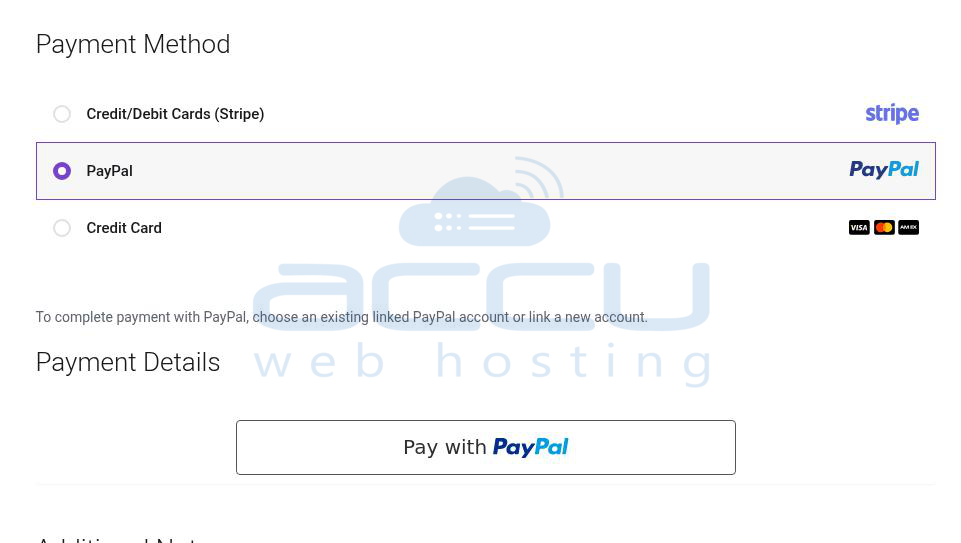
Step 7
Choose your Payment Method from the provided list of different payment methods.
You can enter a Promotional Code that can be applied to your cart (if you have one).
Click on the Validate Code button to validate the promotion code. Otherwise, keep this field empty.
If you have a special note or request about your VPS configuration, you can include it in the Notes/ Additional Information field.
Read the Terms of Service and proceed to Checkout.
Click the Checkout button to complete the order and initiate the checkout process.
Step 8
Now, you will be redirected to the Payment Gateway.
There are multiple payment methods, and you can choose one to make the payment.
PayPal
- If you select PayPal as your payment method while completing the order. You will be asked to enter your PayPal account details. If you already have an account, you can select the PayPal I already have a PayPal account option and enter your credentials.
- Complete the payment via PayPal.
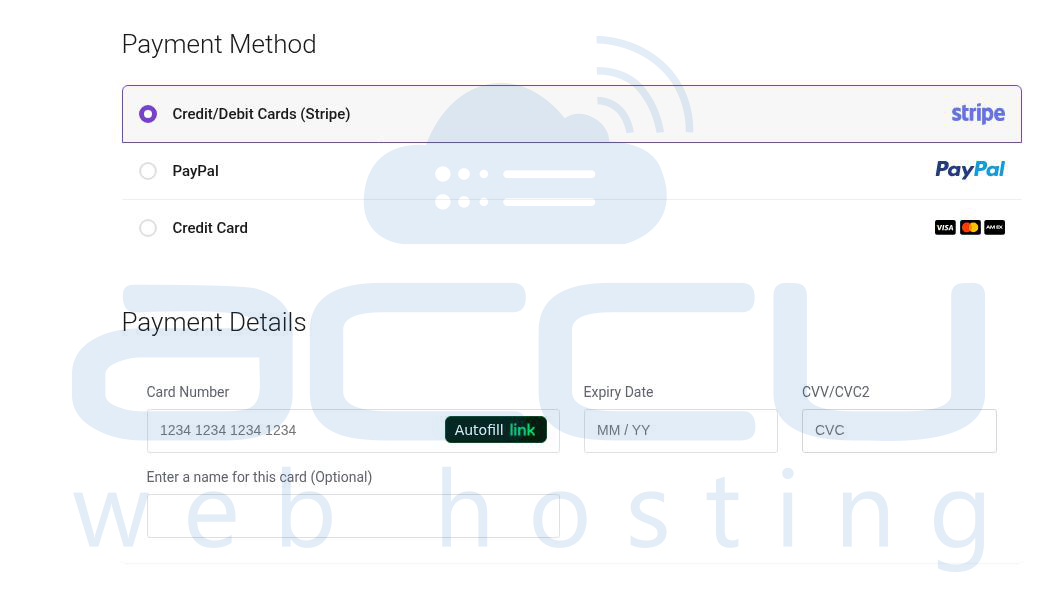
Credit Card
- If you select the Credit Card option while completing the order, you will need to enter the card details such as Card Type, Card Number, Expiry Date, and CVV/CVC2 Number.
- If you want to opt for the recurring payment, select the Yes option for the Recurring Subscription. Otherwise, select No for the One-Time Payment.
For detailed steps, you can visit this article. - Complete the Payment via Credit Card.
Step 9
We have an Order Verification Process to verify each order we receive.
- You should verify your registered phone number and email address to speed up the verification process.
- Once our automated verification system has verified your order, the Technical Department will start its execution.
This process will take approximately 6-8 hours to complete.
Note: All our VPS plans are different. Hence, the pricing and configurable options of additional applications other than the OS will be different.
