Sometimes your Windows VPS may drift away from the correct time by as many as a few seconds to a few minutes. Keeping your VPS time up to date is essential, as inaccurate system time may cause many problems. For example, your time-critical scheduled jobs might run at the incorrect time, or emails sent from your server might have incorrect time stamps.
To prevent such errors, the Windows systems have a built-in time synchronization scheduler that automatically synchronizes your VPS clock with the Windows time server. Apart from the Windows time server, you can also use any time server maintained by the National Institute of Standards and Technology (NIST).
This article will explain the steps to synchronize your VPS clock with remote time servers.
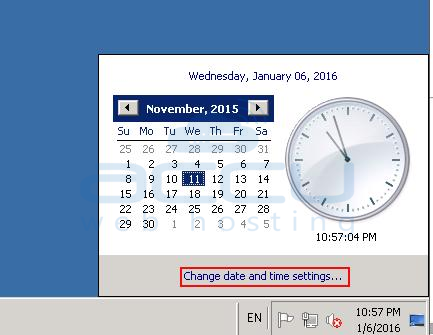
1. Click on the Windows clock at your desktop's bottom right. It will pop up to show the time and date.
2. Click on the Change Date and Time Settings link at the bottom.

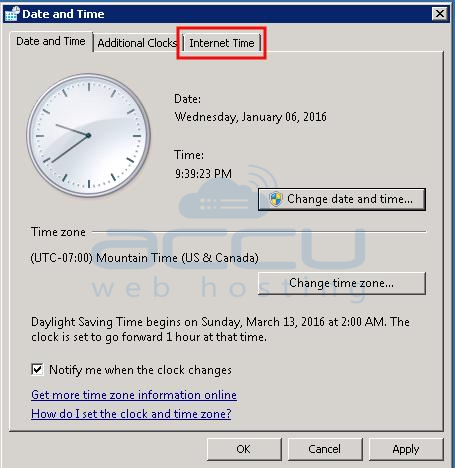
3. Select the Internet Time tab in the Date and Time window.
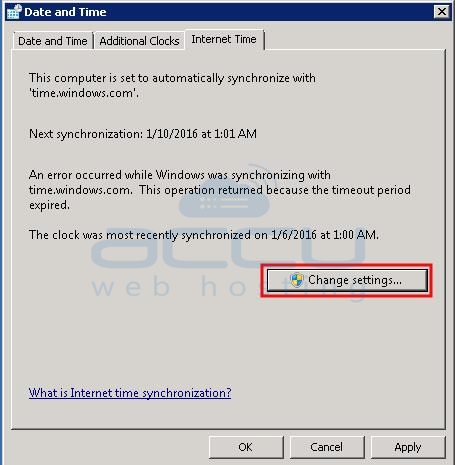
4. Click on the Change Settings button.
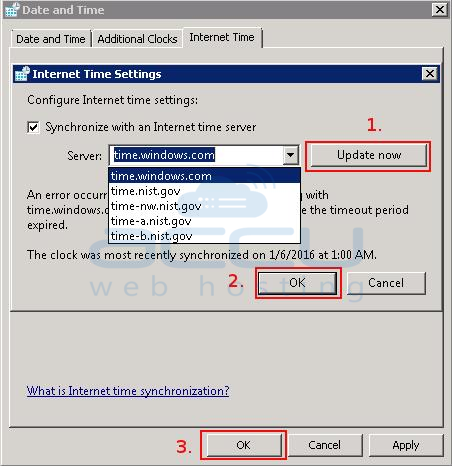
5. Select one of the time servers from the Server drop-down list and click on the Update now button.
6. Click on the OK button twice to save the changes.
The Windows systems default sync clock every 7 days (604,800 seconds). But if you wish to sync your VPS clock more often than the default, you can change the sync interval time via the registry editor (regedit).


