Telnet Client allows you to connect to remote and local computers via the Telnet protocol. Telnet Client is not installed by default on Windows Operating systems. Telnet Client allows you to connect to remote or local computers using the Telnet protocol. By default, Telnet Client is not installed on most operating systems.
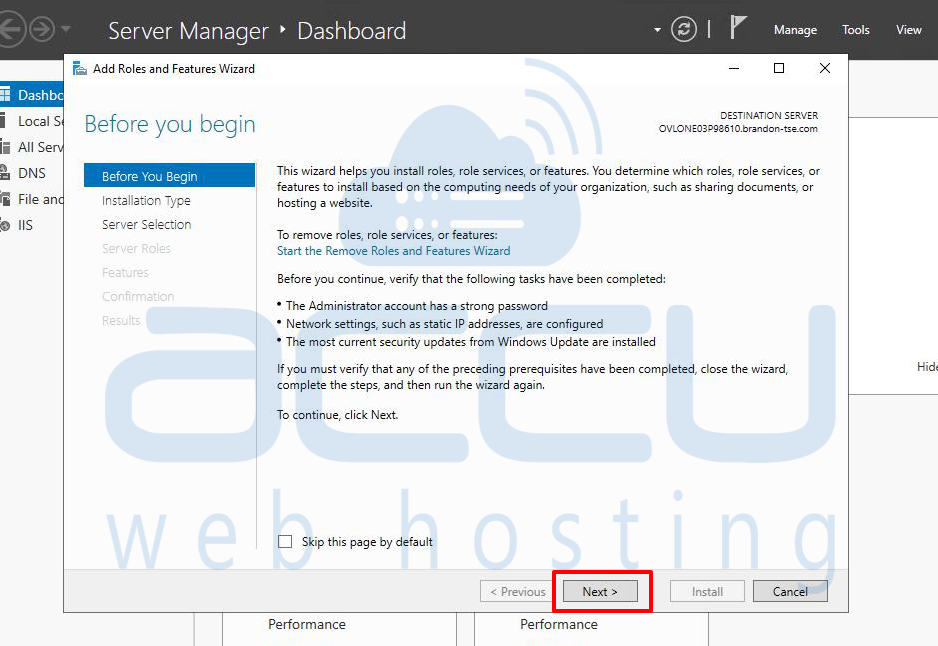
Follow the steps below to install Telnet Client on Windows.
Install Telnet Client on Windows
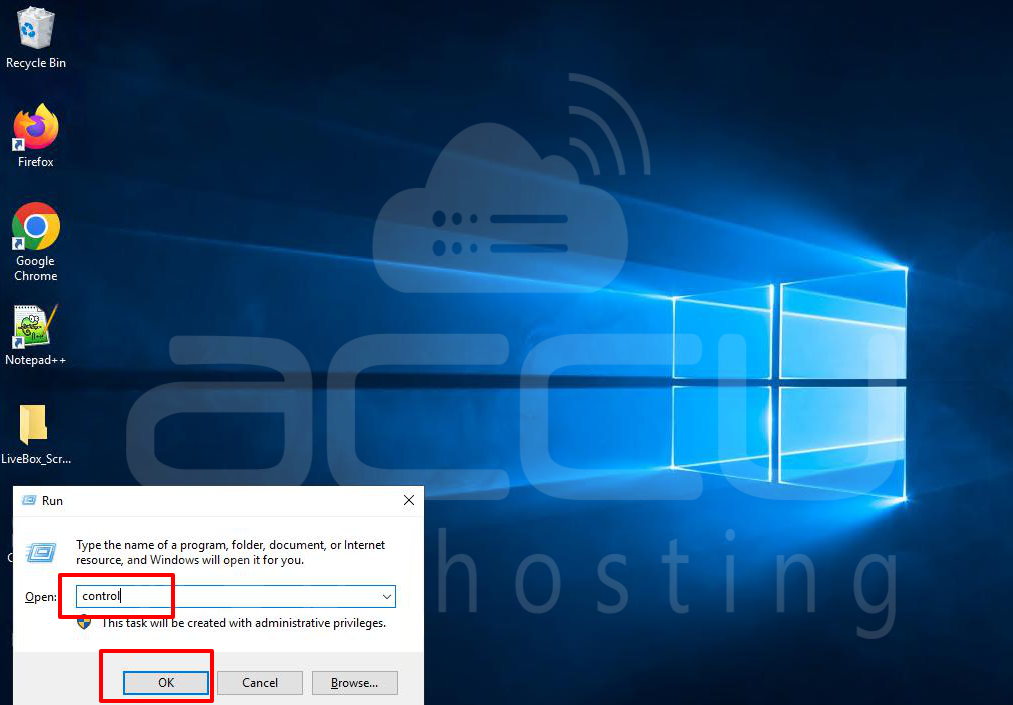
Step 1: Open Control Panel
Press Windows + R, type control, and press Enter.
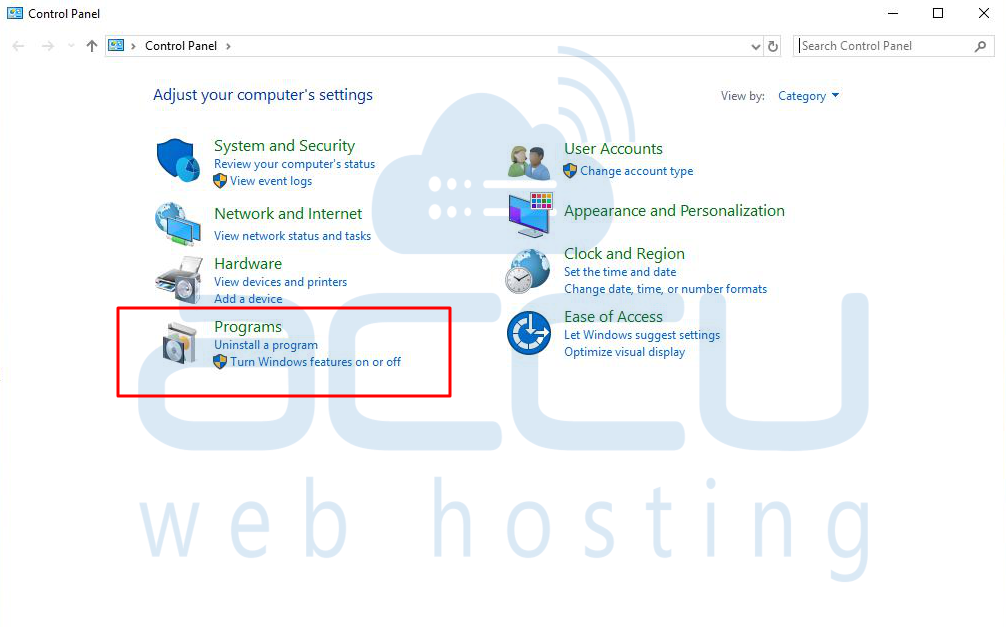
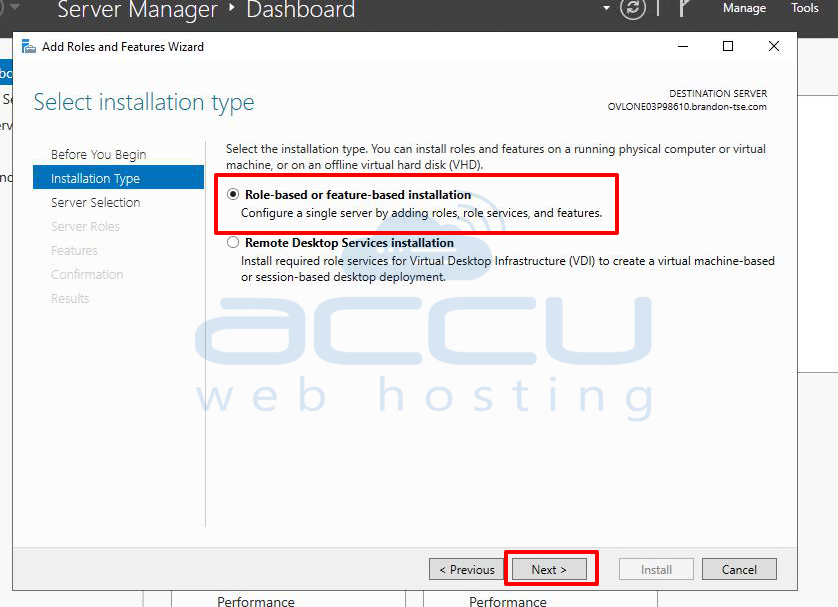
Step 2: Access Programs and Features
Click on Programs.
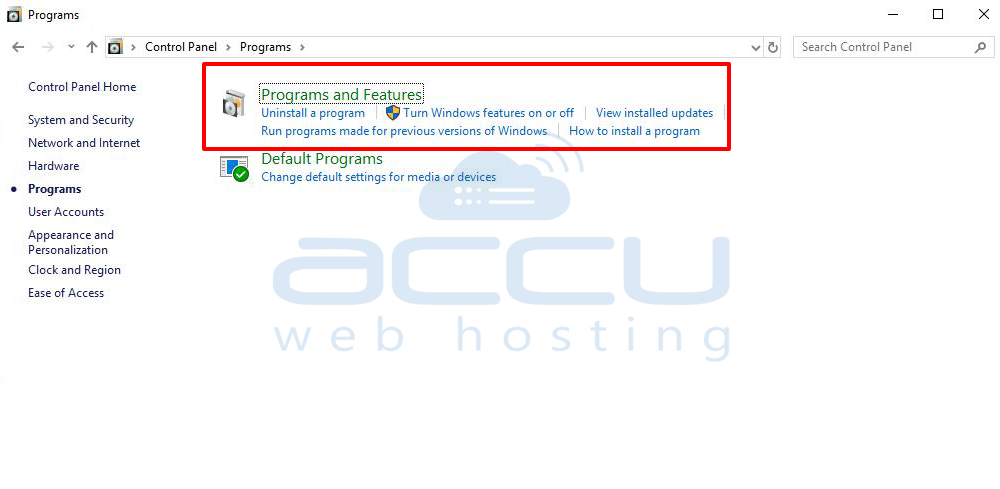
Under Programs and Features, click Turn Windows features on or off.
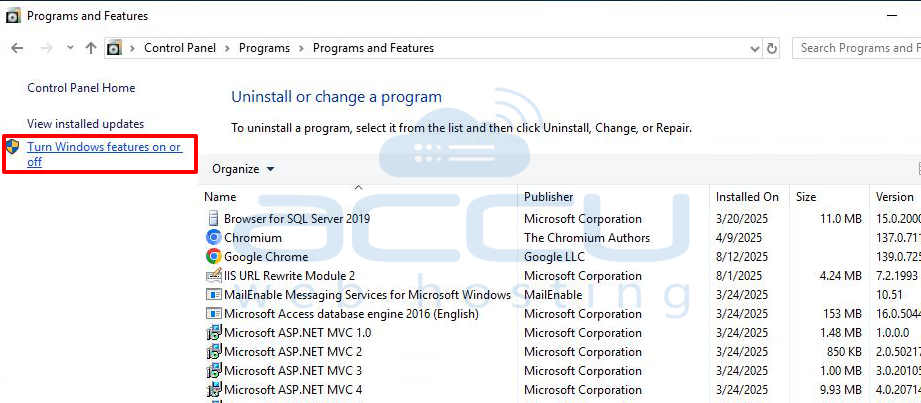
Step 3: Enable Telnet Client
In the Windows Features list, check Telnet Client.
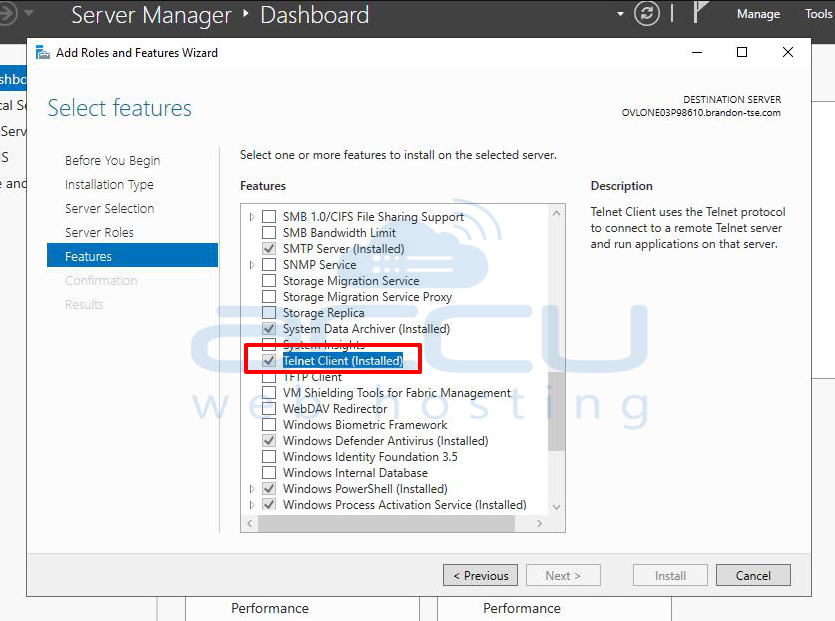
Click OK and wait for the installation to complete.
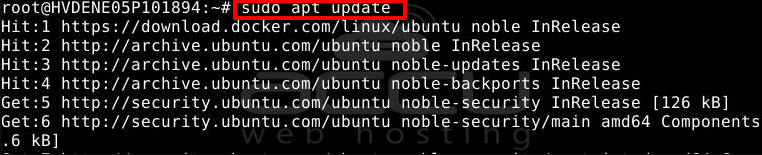
Install Telnet Client on Linux
Step 1: Update Package Repository
For Debian/Ubuntu
# sudo apt update
For CentOS/RHEL
# sudo yum update -y
Step 2: Install Telnet
Debian/Ubuntu
# sudo apt install telnet -y
CentOS/RHEL
# sudo yum install telnet -y

After installation, you can verify the Telnet Client by running:
# telnet

If the Telnet prompt appears, your installation was successful. Telnet is now ready for testing and connecting to remote servers.
