Internet Information Services (IIS) is a web server developed by Microsoft for hosting web pages, web applications, and web services. In most cases, the IIS web server hosts ASP.NET-based web applications. However, it can also serve web applications built on the PHP programming language.
Unlike Apache web servers, IIS provides a console-based GUI to manage the websites, FTP sites, and related services.
Note:
- All necessary software and components will be pre-installed if you've chosen the complete OS configuration to be installed on a Windows VPS, then all the required software and components will be pre-installed.
- On the other hand, if you've chosen only OS configuration, this tutorial will help install the IIS role in your Windows Server 2016, 2019, and 2022 VPS.
Steps to Add an IIS Role in Windows Server
Step 1: Log in to your Windows server via Remote Desktop.
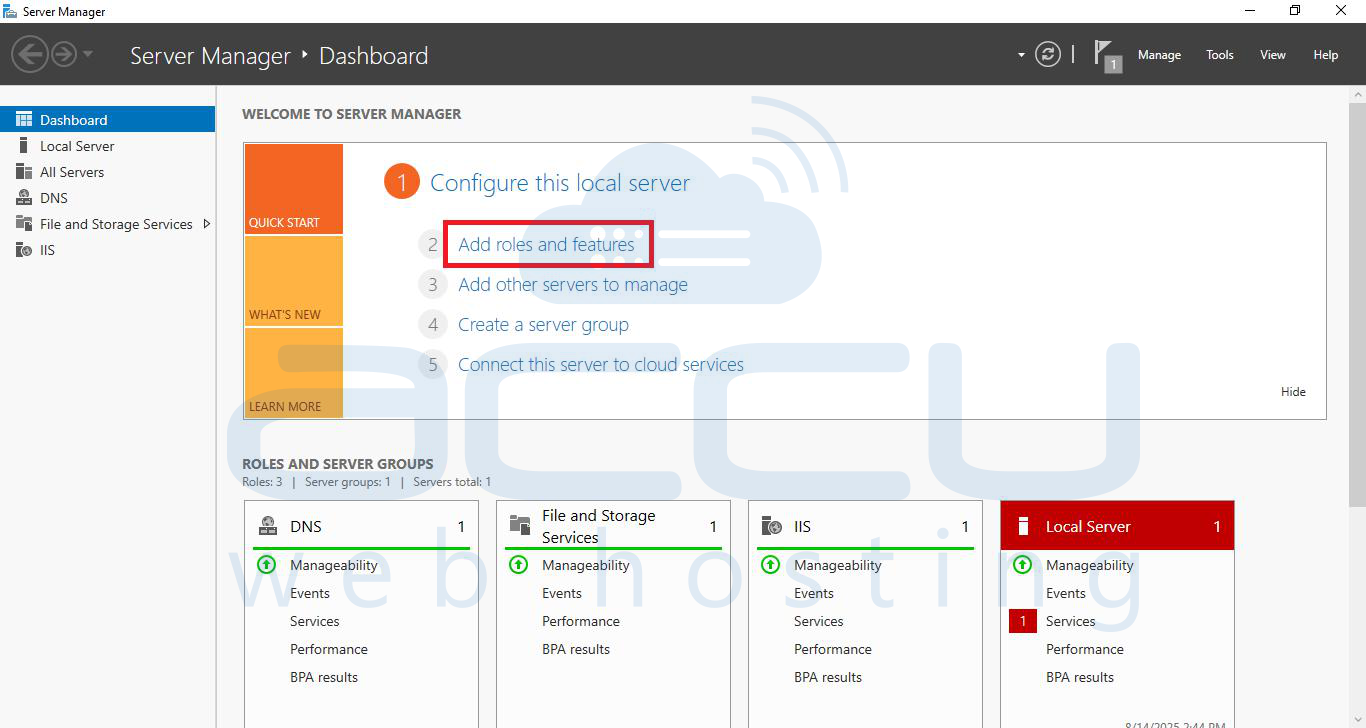
Step 2: Click on the Server Manager icon on the taskbar, right-click on Computer, and then click on the Manage option.
Step 3: On the Server Manager window, click on Roles → Add Roles.
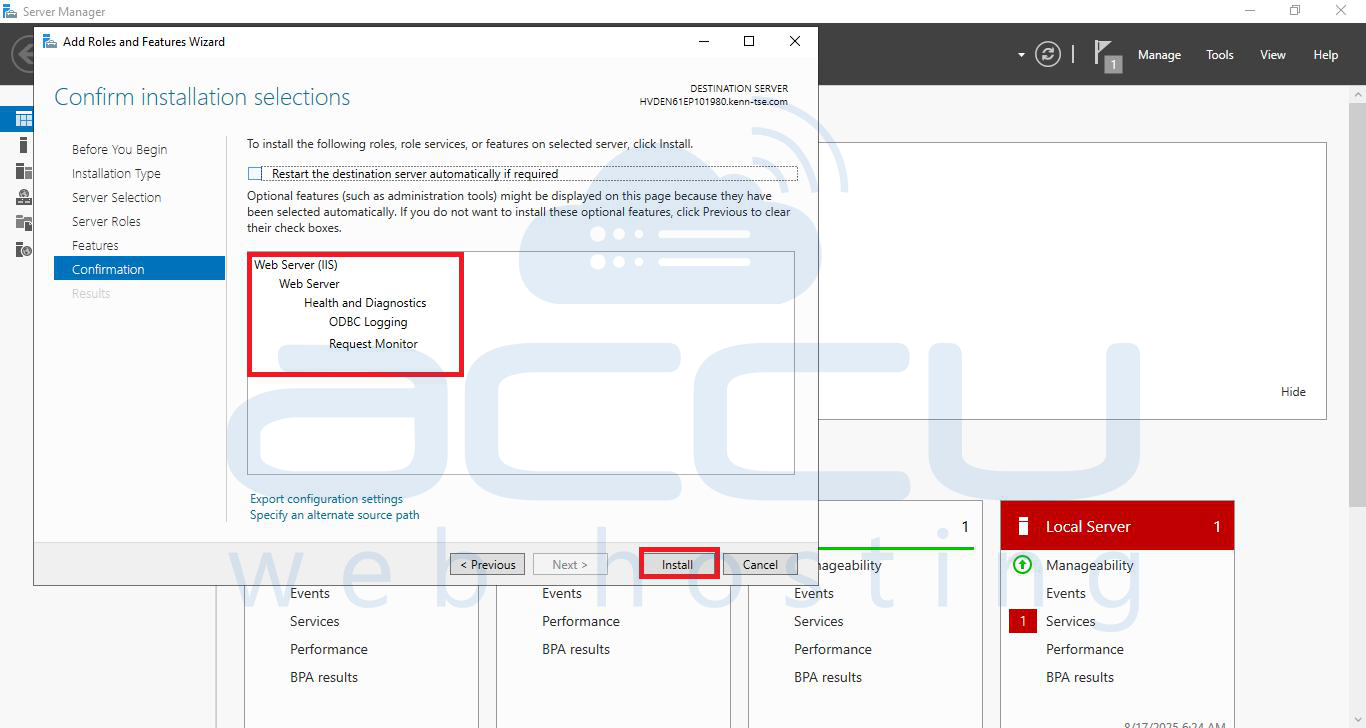
Step 4: Click Next on the Before You Begin screen. On the next screen, you will see the list of roles; locate and select Web Server (IIS),
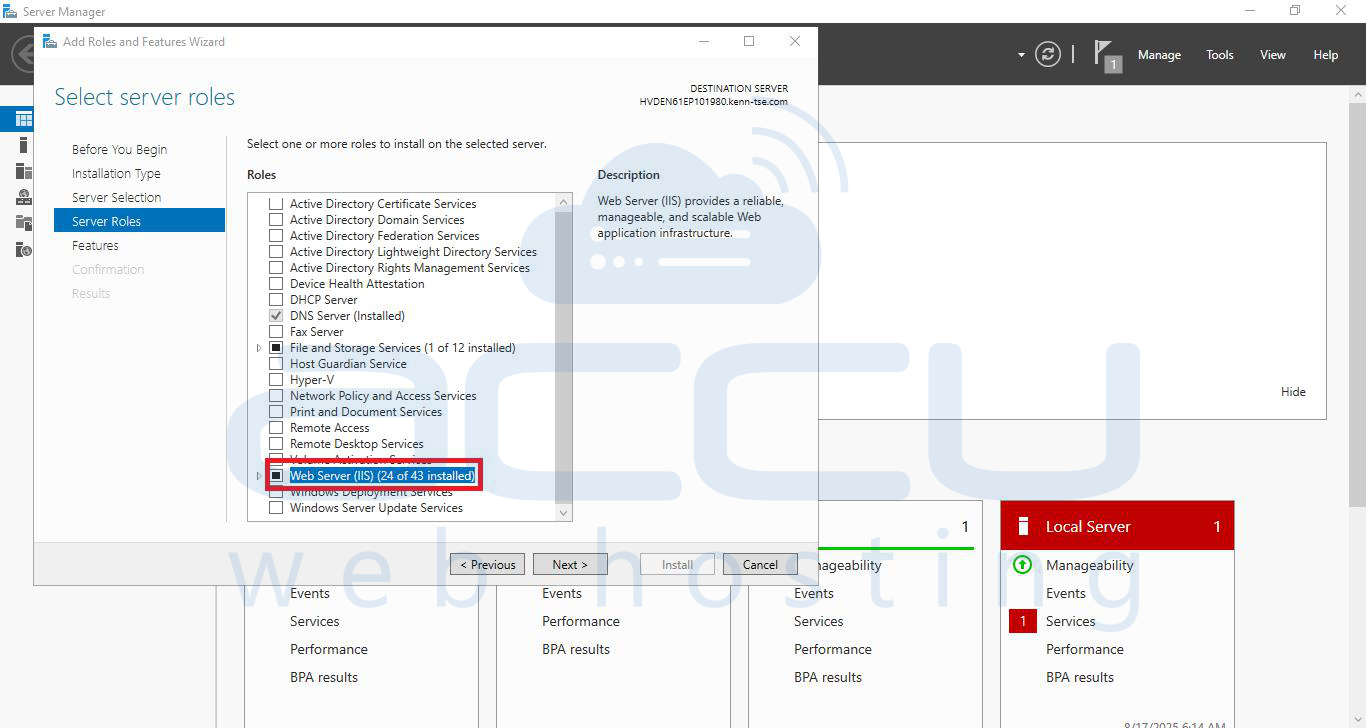
Click the arrow next to it to expand and view optional role services. Leave the required features selected and click on the Next button.
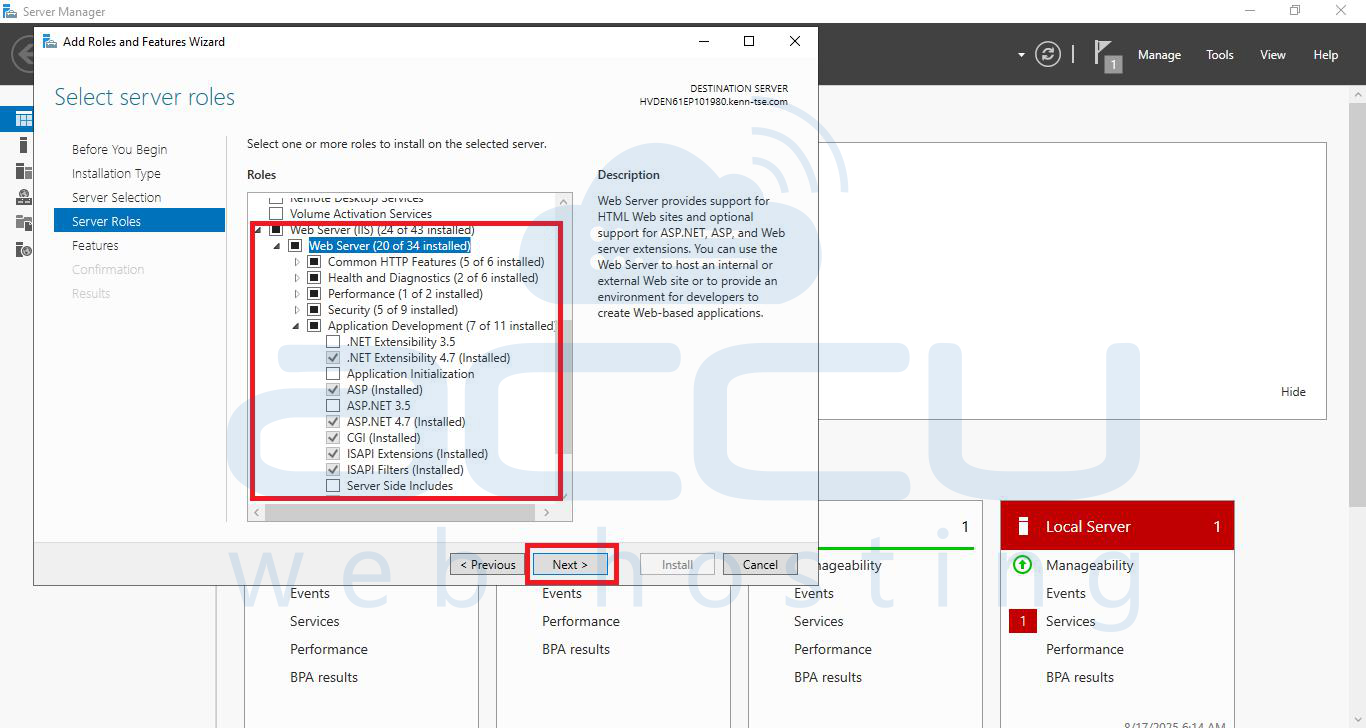
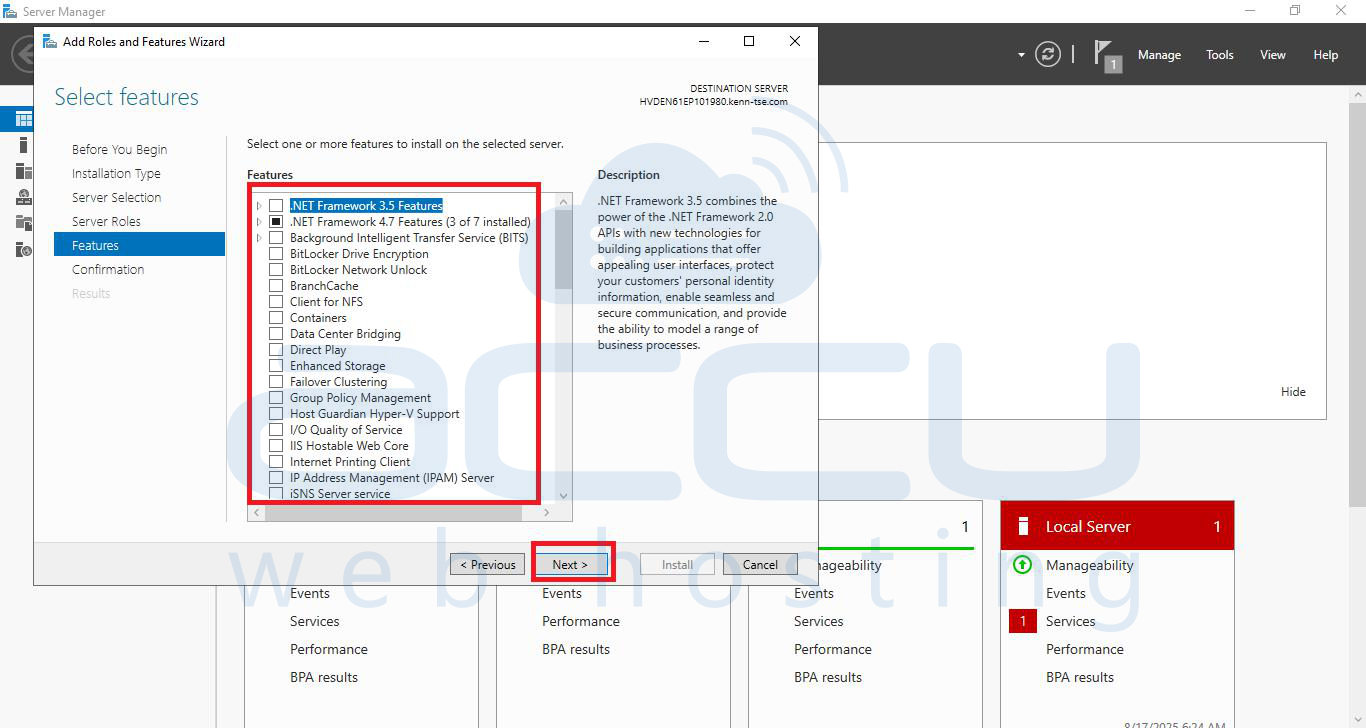
Step 5: On the next screen, select the different IIS Role Services you wish to install. Check each Role Service as per your requirement, and click on the Install button.
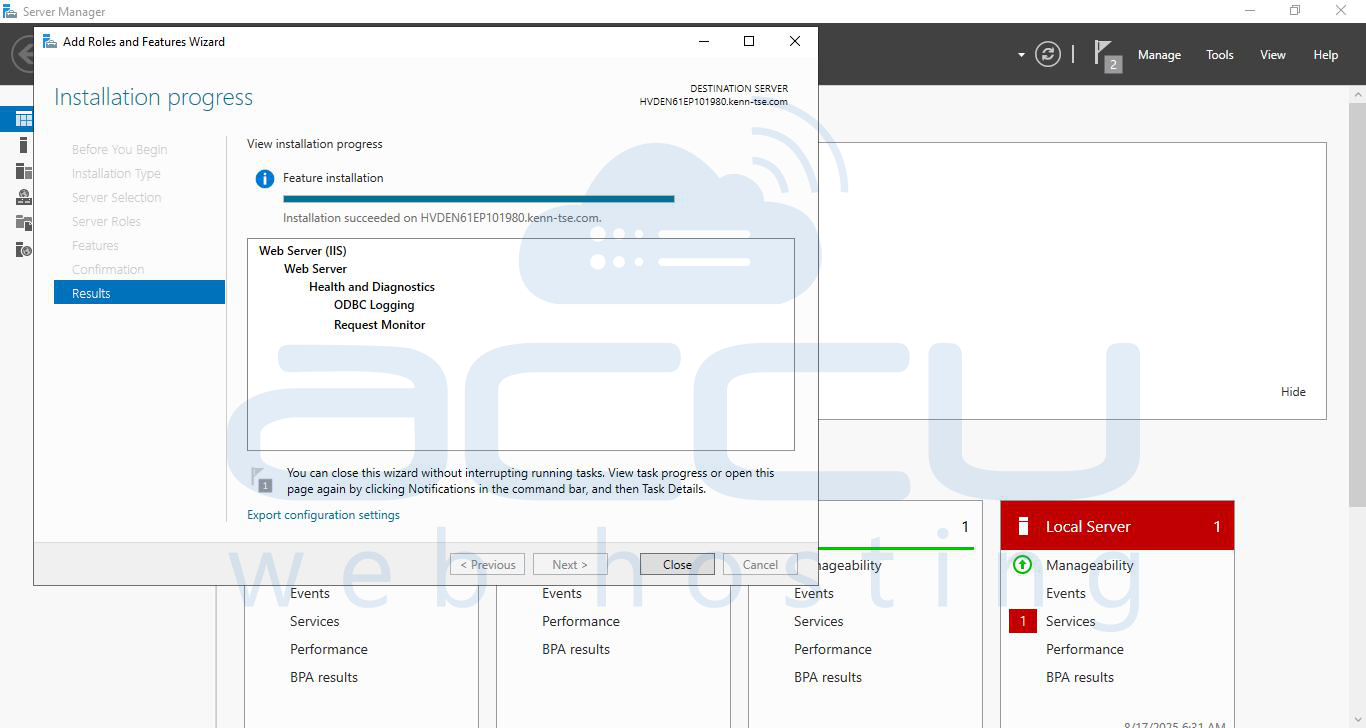
Step 6: Based on the Role Services you have selected, the setup will take a few minutes to finish the installation process.
The setup will show you the post-Installation Summary once the IIS Role is installed successfully.
In this way, we can add IIS roles.
