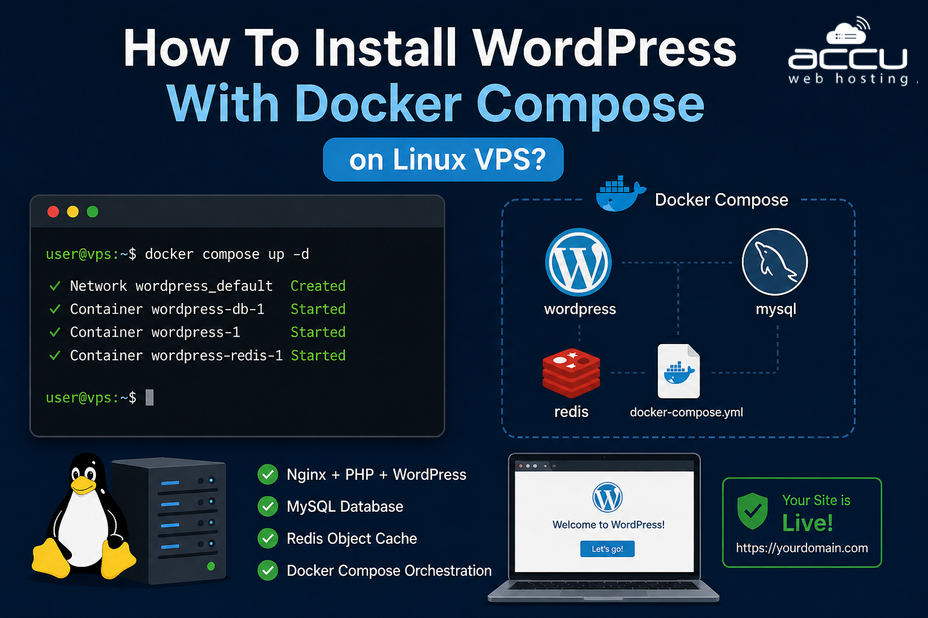
Deploying WordPress on a Linux VPS has never been easier thanks to Docker and Docker Compose. Docker allows you to package WordPress and its dependencies into a single, portable container, ensuring consistency across environments. Docker Compose simplifies the management of multi-container applications, such as WordPress with a database backend. In this article, we’ll walk through installing WordPress using Docker Compose on a fresh Linux VPS.
Prerequisites
Before we begin, ensure you have the following:
- A fresh Linux VPS — ideally Ubuntu 22.04 LTS or Ubuntu 20.04 LTS.
- Root or sudo privileges — needed to install packages and run Docker commands.
Steps to Install WordPress With Docker Compose on Linux VPS
Step 1: Before installing any software, always update your system. This ensures you have the latest security patches and package versions.
sudo apt update && sudo apt upgrade -y
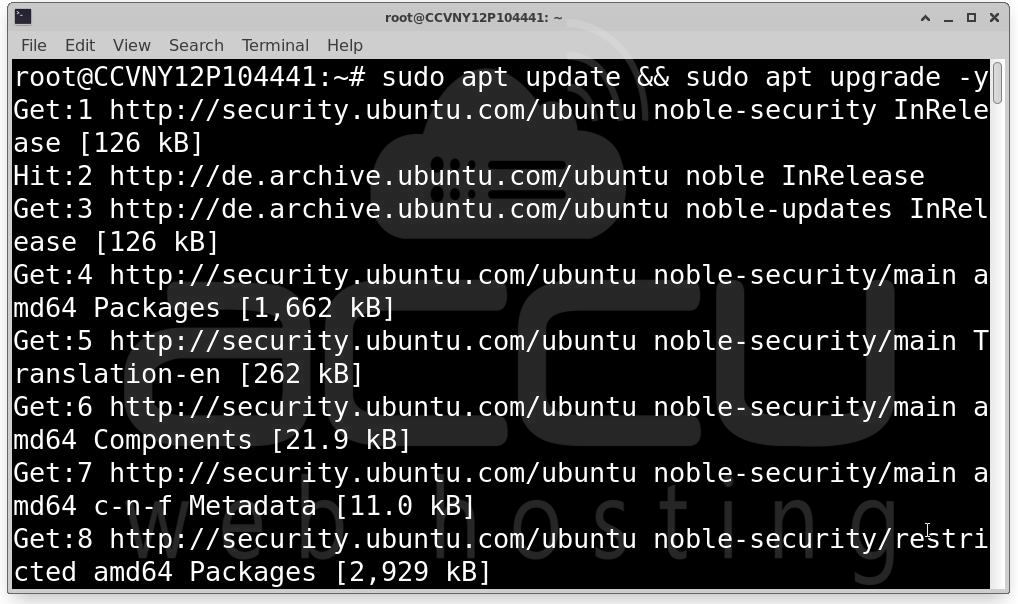
sudo apt update refreshes the list of available packages and sudo apt upgrade -y upgrades all installed packages to their latest versions.
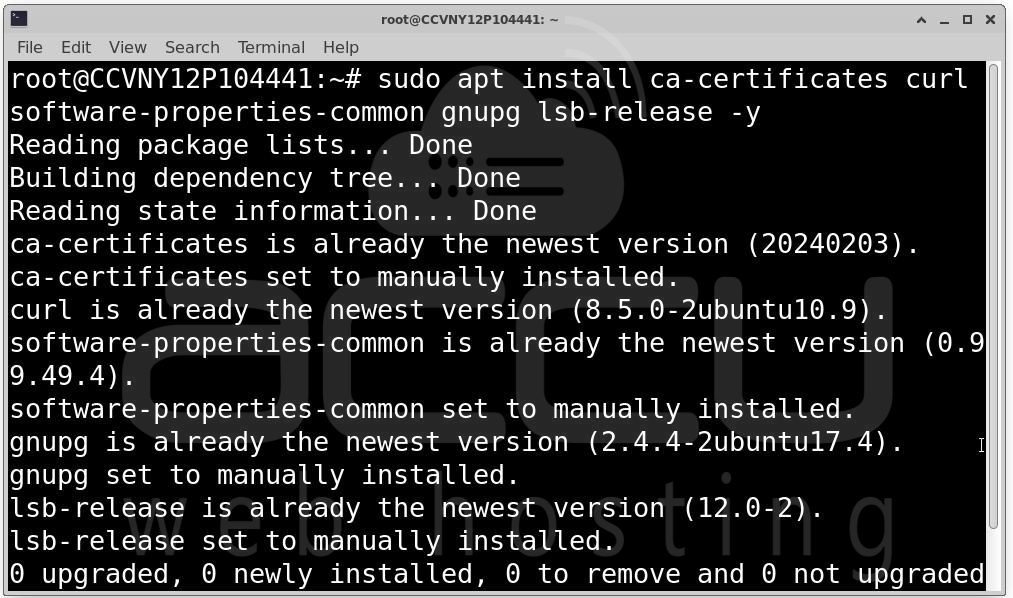
Step 2: Docker requires a few system packages to function properly. Let’s install them.
sudo apt install ca-certificates curl software-properties-common gnupg lsb-release -y
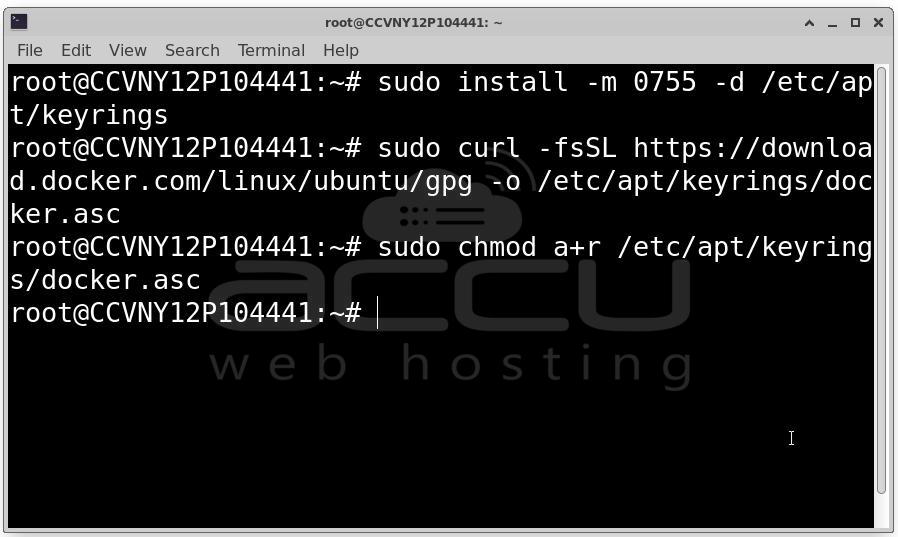
Step 3:Docker uses GPG keys to verify the authenticity of their packages. Adding this key ensures we download genuine software.
sudo install -m 0755 -d /etc/apt/keyrings
sudo curl -fsSL https://download.docker.com/linux/ubuntu/gpg -o /etc/apt/keyrings/docker.asc
sudo chmod a+r /etc/apt/keyrings/docker.asc
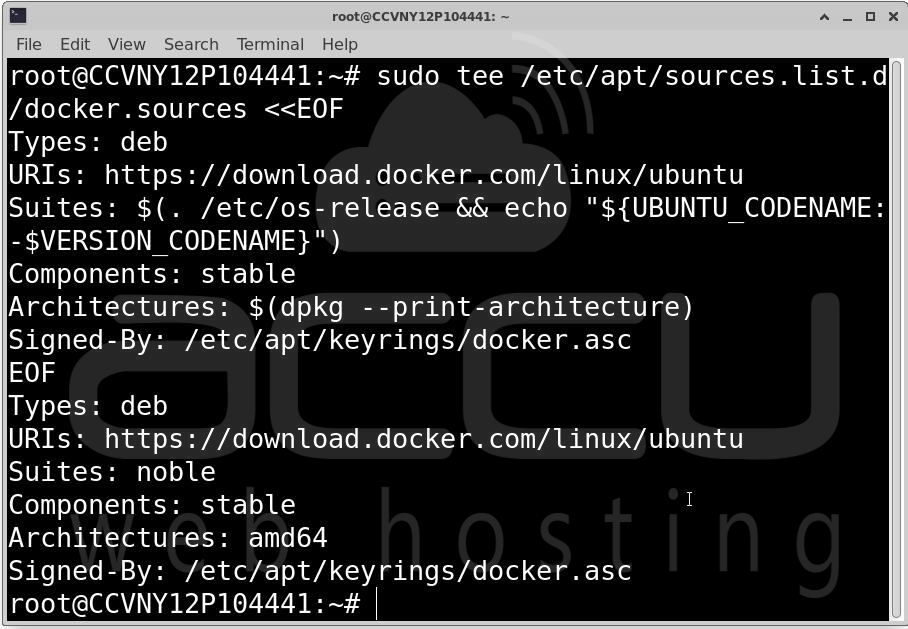
Step 4: Next, configure APT to use Docker’s official repository for package installation. This ensures we install the latest stable Docker version.
sudo tee /etc/apt/sources.list.d/docker.sources <<EOF
Types: deb
URIs: https://download.docker.com/linux/ubuntu
Suites: $(. /etc/os-release && echo "${UBUNTU_CODENAME:-$VERSION_CODENAME}")
Components: stable
Architectures: $(dpkg --print-architecture)
Signed-By: /etc/apt/keyrings/docker.asc
EOF
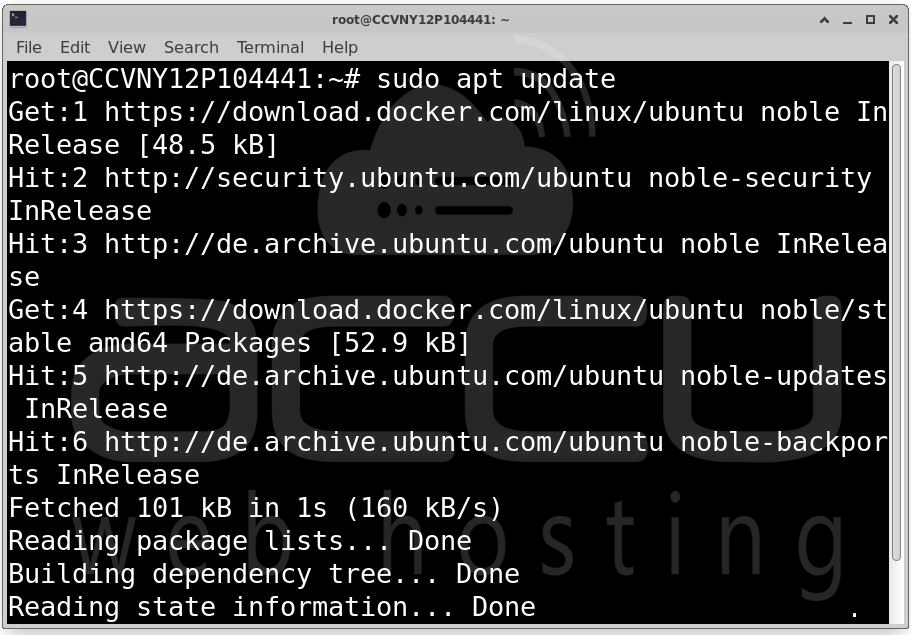
Step 5: Now that the repository is added, update APT and install Docker:
sudo apt update
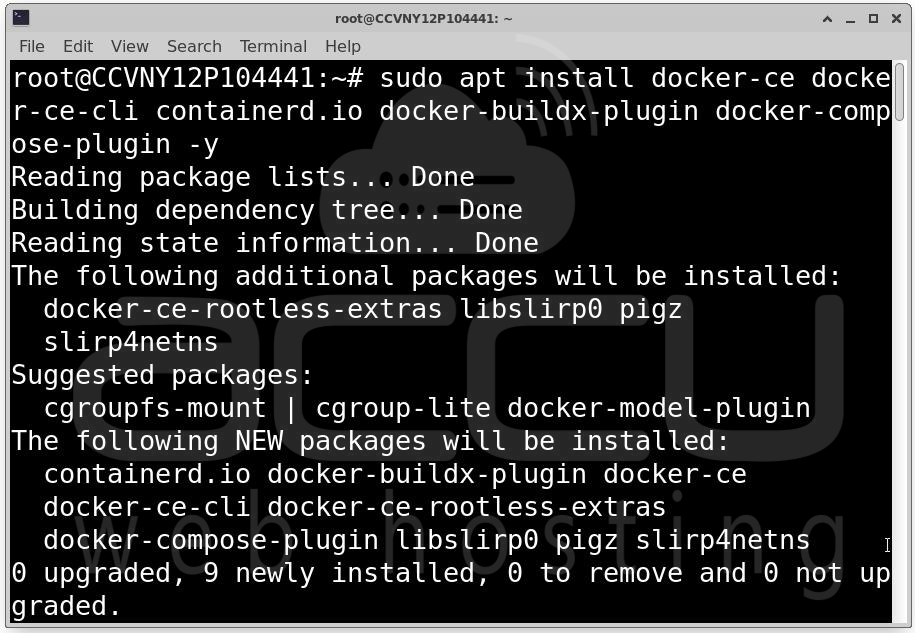
sudo apt install docker-ce docker-ce-cli containerd.io docker-buildx-plugin docker-compose-plugin -y
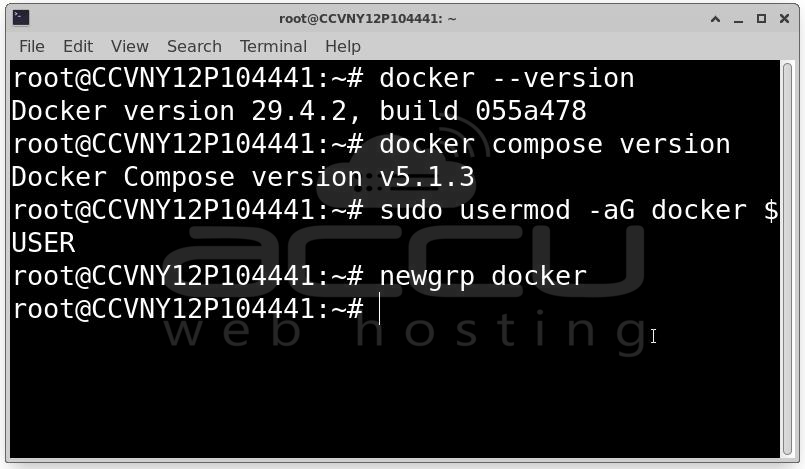
Step 6: Verify Docker Installation. Check if Docker and Docker Compose are correctly installed:
docker --version
docker compose version
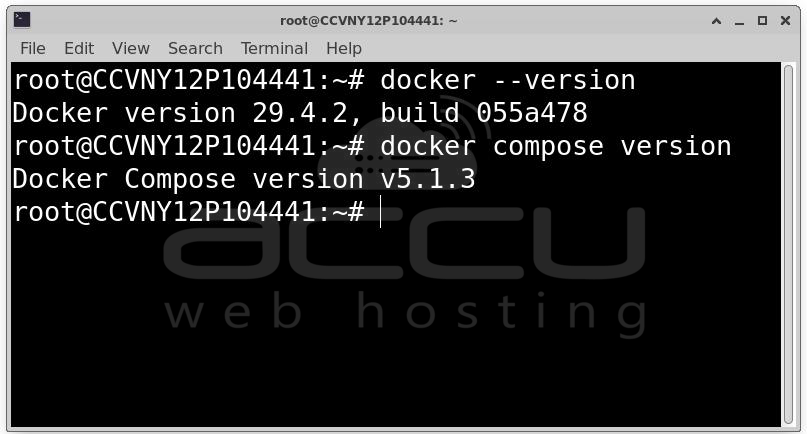
You should see output like:
Docker version 29.4.2, build 055a478
Docker Compose version v5.1.3
If you get permission errors, run Docker commands with sudo, or add your user to the docker group:
sudo usermod -aG docker $USER
newgrp docker
Step 7: Create a Docker Compose File for WordPress. With Docker installed, it’s time to deploy WordPress. Docker Compose makes it simple to manage multi-container setups.
Create a project directory:
mkdir ~/wordpress-docker
cd ~/wordpress-docker
Create a docker-compose.yml file:
nano docker-compose.yml
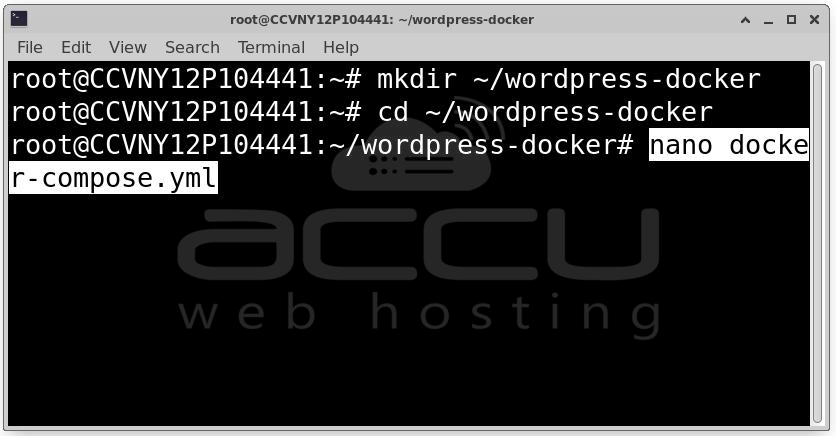
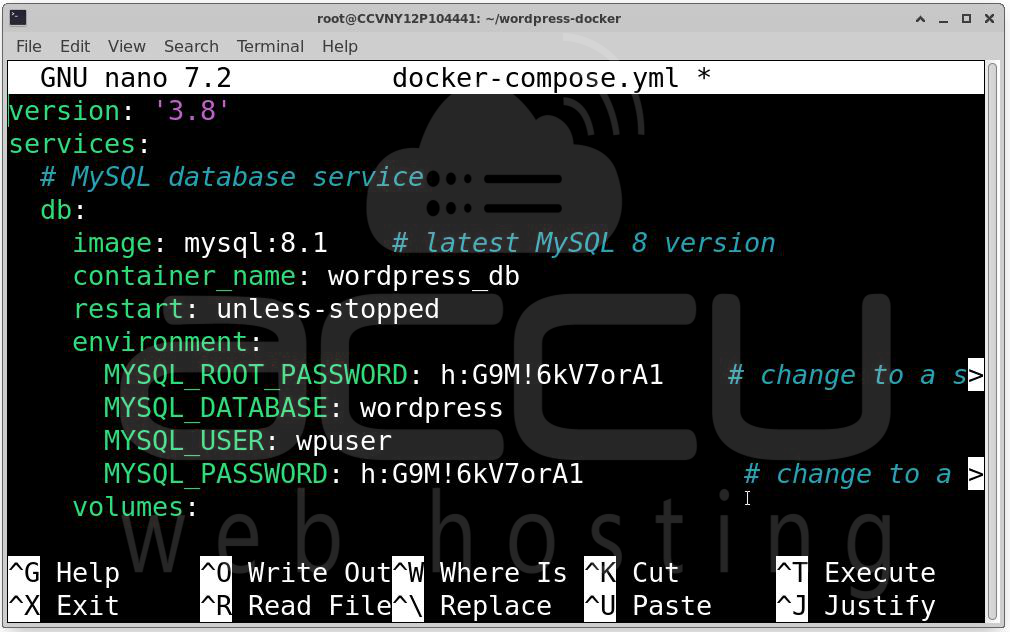
Add the following content:
version: '3.8'
services:
# MySQL database service
db:
image: mysql:8.1 # latest MySQL 8 version
container_name: wordpress_db
restart: unless-stopped
environment:
MYSQL_ROOT_PASSWORD: rootpassword # change to a strong password
MYSQL_DATABASE: wordpress
MYSQL_USER: wpuser
MYSQL_PASSWORD: wppassword # change to a strong password
volumes:
- db_data:/var/lib/mysql
# WordPress application
wordpress:
image: wordpress:latest # always pulls latest WordPress
container_name: wordpress_app
depends_on:
- db
environment:
WORDPRESS_DB_HOST: db:3306
WORDPRESS_DB_USER: wpuser
WORDPRESS_DB_PASSWORD: wppassword
WORDPRESS_DB_NAME: wordpress
VIRTUAL_HOST: yourdomain.com # replace with your domain
LETSENCRYPT_HOST: yourdomain.com # replace with your domain
LETSENCRYPT_EMAIL: [email protected] # replace with your email
volumes:
- wordpress_data:/var/www/html
# Nginx reverse proxy for HTTPS
nginx-proxy:
image: jwilder/nginx-proxy
container_name: nginx_proxy
restart: unless-stopped
ports:
- "80:80"
- "443:443"
volumes:
- /etc/nginx/certs:/etc/nginx/certs:ro
- /etc/nginx/vhost.d
- /usr/share/nginx/html
- /var/run/docker.sock:/tmp/docker.sock:ro
# Let's Encrypt companion for automatic SSL
letsencrypt:
image: nginxproxy/acme-companion
container_name: letsencrypt_companion
depends_on:
- nginx-proxy
restart: unless-stopped
environment:
NGINX_PROXY_CONTAINER: nginx_proxy
volumes:
- /var/run/docker.sock:/var/run/docker.sock:ro
- /etc/nginx/certs:/etc/nginx/certs:rw
- /etc/nginx/vhost.d
- /usr/share/nginx/html
volumes:
db_data:
wordpress_data:
Explanation:
- MySQL 8.1: Always use the latest stable MySQL 8 for security and performance. Persistent data stored in db_data volume.
- WordPress latest: Automatically pulls the newest WordPress image. Configured to connect to the database container.
- Nginx Proxy: Detects WordPress container using VIRTUAL_HOST environment variable. Handles incoming HTTP/HTTPS requests.
- Let’s Encrypt Companion: Requests SSL certificates automatically. Certificates are auto-renewed every 60–90 days. Environment variables LETSENCRYPT_HOST and LETSENCRYPT_EMAIL are mandatory.
- Volumes: db_data persists MySQL data. wordpress_data persists WordPress files.
Note: Change yourdomain.com, MYSQL_ROOT_PASSWORD, MYSQL_USER, and MYSQL_PASSWORD to strong, unique values for security.
Step 8: Launch WordPress with Docker Compose. Run the following command in your project directory:
docker compose up -d
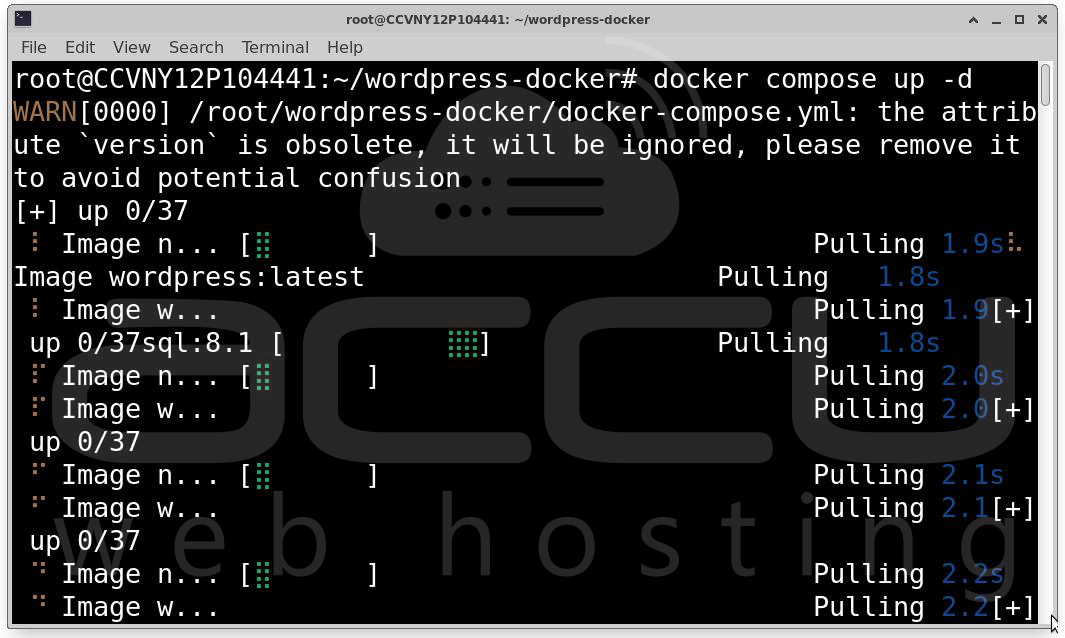
Check container status: docker ps
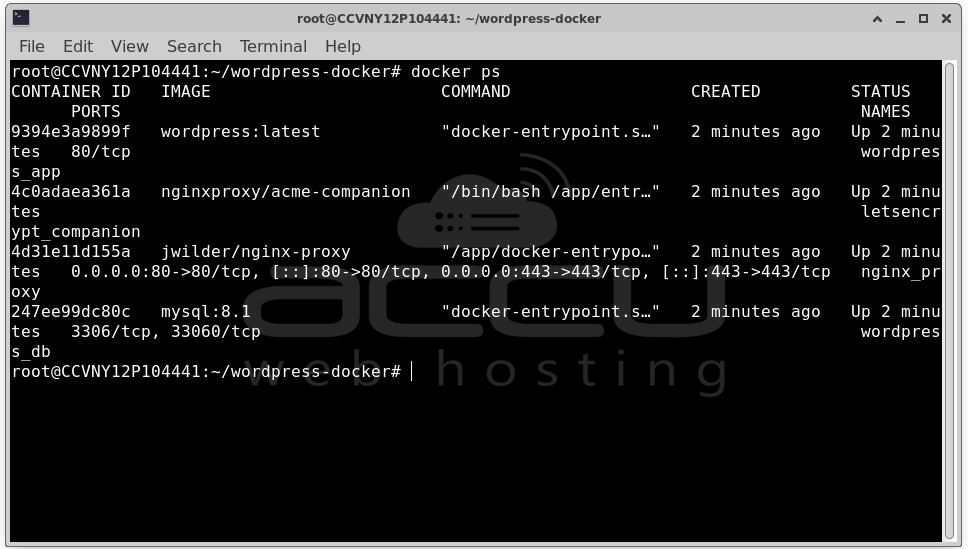
You should see two containers: wordpress_db and wordpress_app.
To view logs: docker compose logs -f
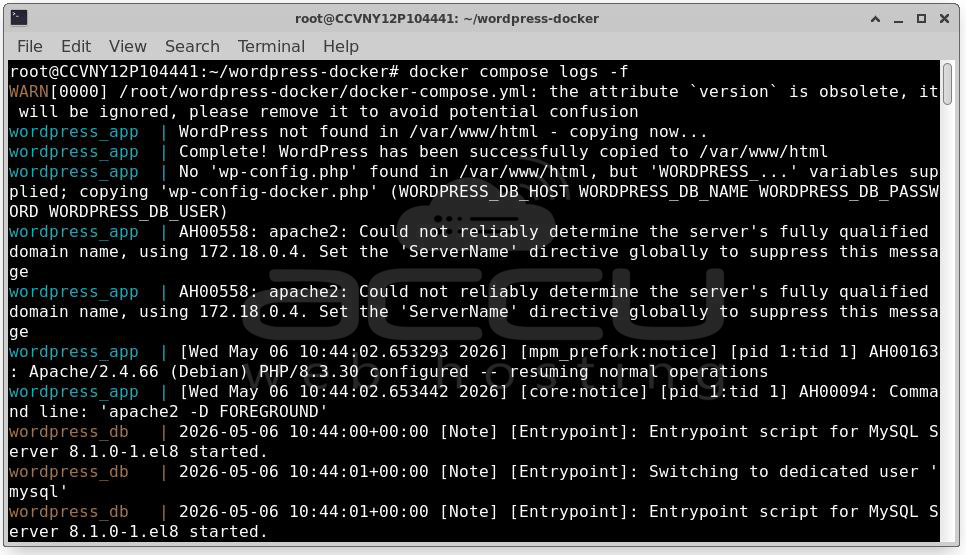
This is useful if WordPress fails to start or database errors occur.
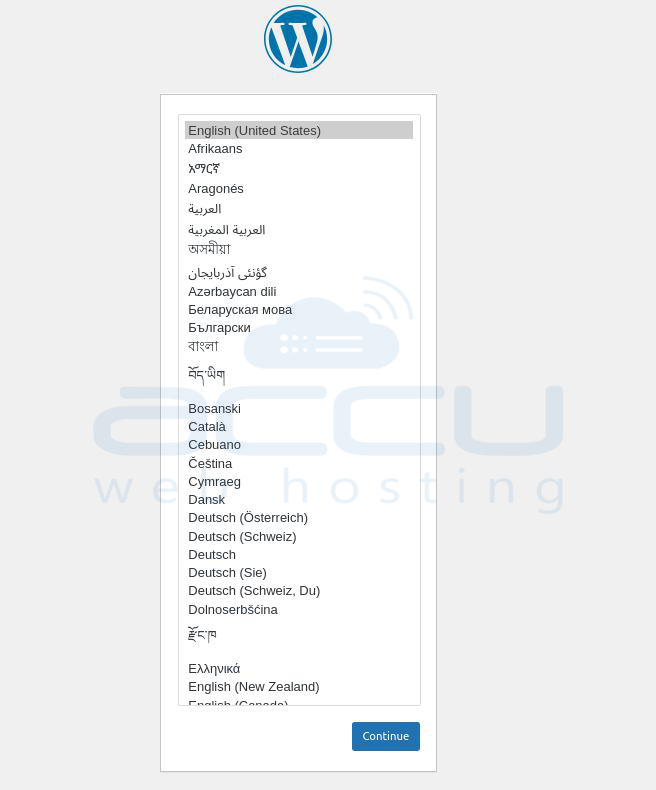
Step 9: Complete WordPress Setup in Browser. Open your VPS IP in a browser: http://your_domain_name
Follow the WordPress installation wizard:
Choose a language.
Set Site Title, Admin Username, Password, Email.
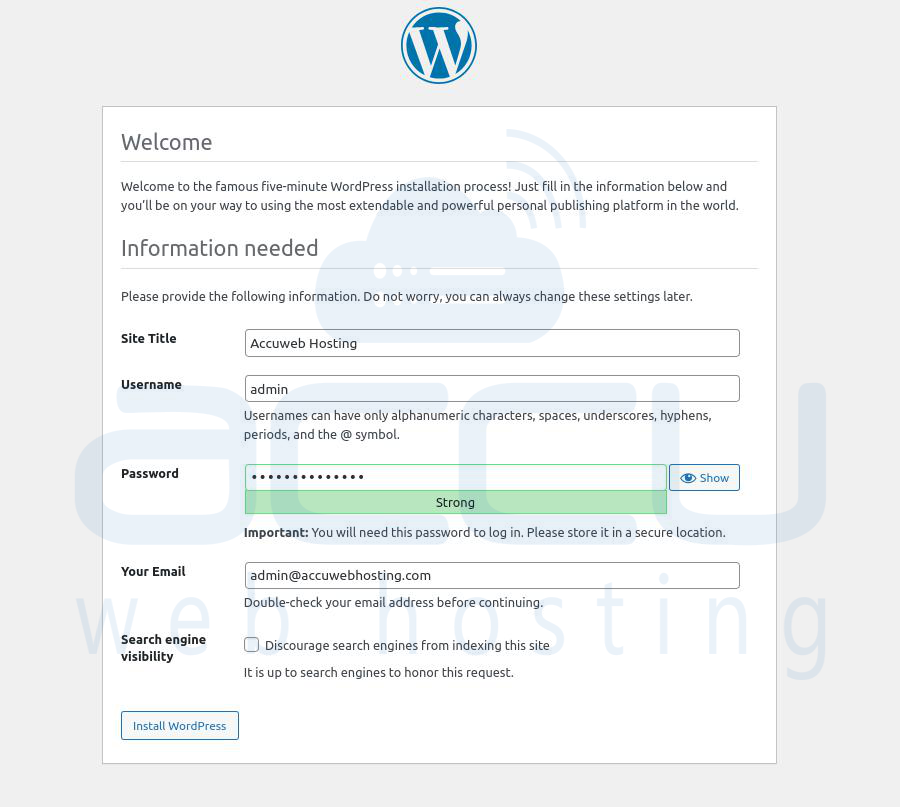
Complete setup.
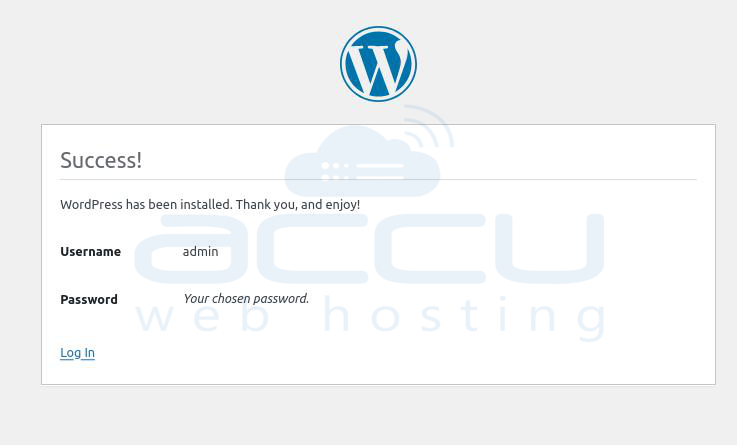
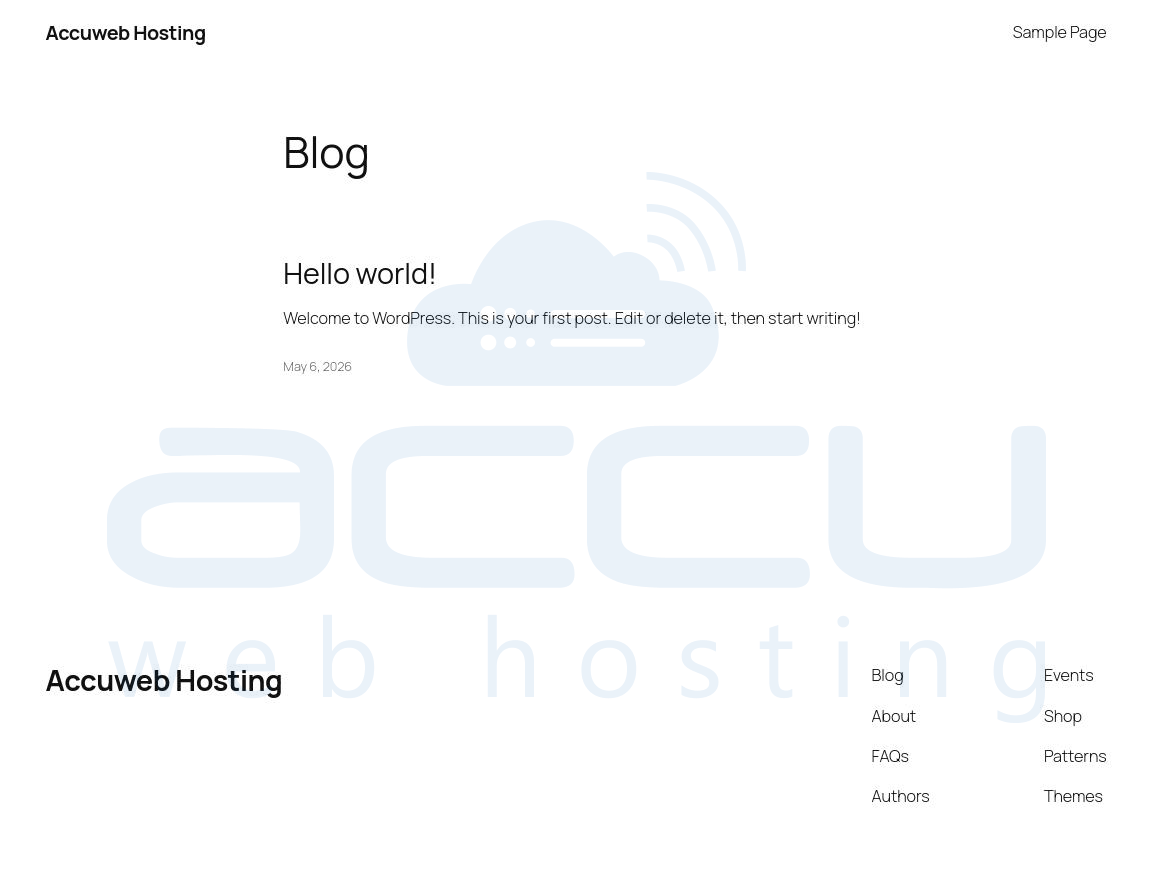
You have successfully installed WordPress.
Conclusion
Installing WordPress on a Linux VPS using Docker Compose is efficient, portable, and scalable. With this setup: You can manage WordPress and database containers independently, Data persists across updates via volumes and Upgrading WordPress or MySQL is as simple as pulling new images.
Docker and Docker Compose remove the traditional headaches of dependency management, making deployment consistent across servers and environments. By following this guide, you now have a fully functional WordPress site running in isolated, reproducible containers on your VPS.
