Introduction:
Deploying AI workflow tools shouldn’t feel like assembling a rocket. With platforms like Langflow, you can visually design and run LLM pipelines without writing much code. If you’ve just ordered a VPS and want a fast, production-ready setup, using a one-click installer is the easiest path; no manual dependency wrangling, no long debugging sessions.
This guide walks you through deploying Langflow on a VPS using a one-click installer approach, ensuring your environment is ready, secure, and accessible.
Step 1: Update System & Install Docker
First, update your server packages:
sudo apt update && sudo apt upgrade -y
Install Docker & Compose:
sudo apt install -y docker.io docker-compose
Enable and start Docker:
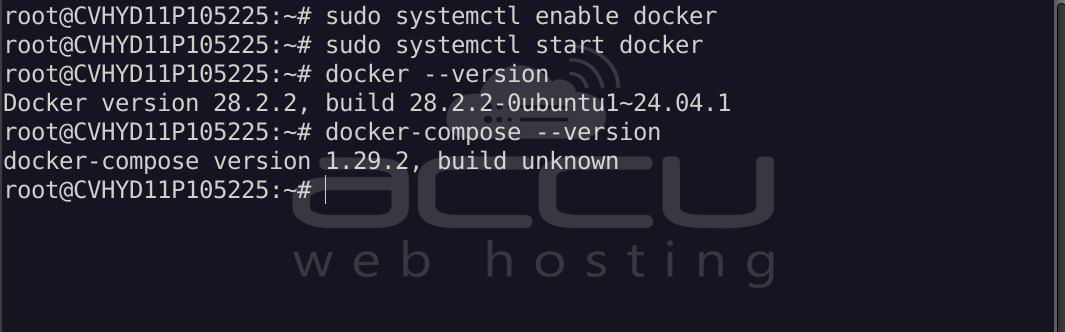
sudo systemctl enable docker
sudo systemctl start docker
Verify installation:
docker --version
docker-compose --version
Step 2: Open Necessary Ports
Before deploying, ensure your server allows traffic on the required port.
To allow traffic via iptables:
# Allow the Dashboard (7860)
sudo iptables -I INPUT -p tcp --dport 7860 -j ACCEPT
# Save the rule (requires iptables-persistent)
sudo apt install iptables-persistent -y
sudo netfilter-persistent save
Step 3: Deploy Langflow Instantly
Run the Langflow container using a single command:
docker run -d \
  --name langflow \
  -p 7860:7860 \
  -v langflow_data:/app/langflow \
  langflowai/langflow:latest
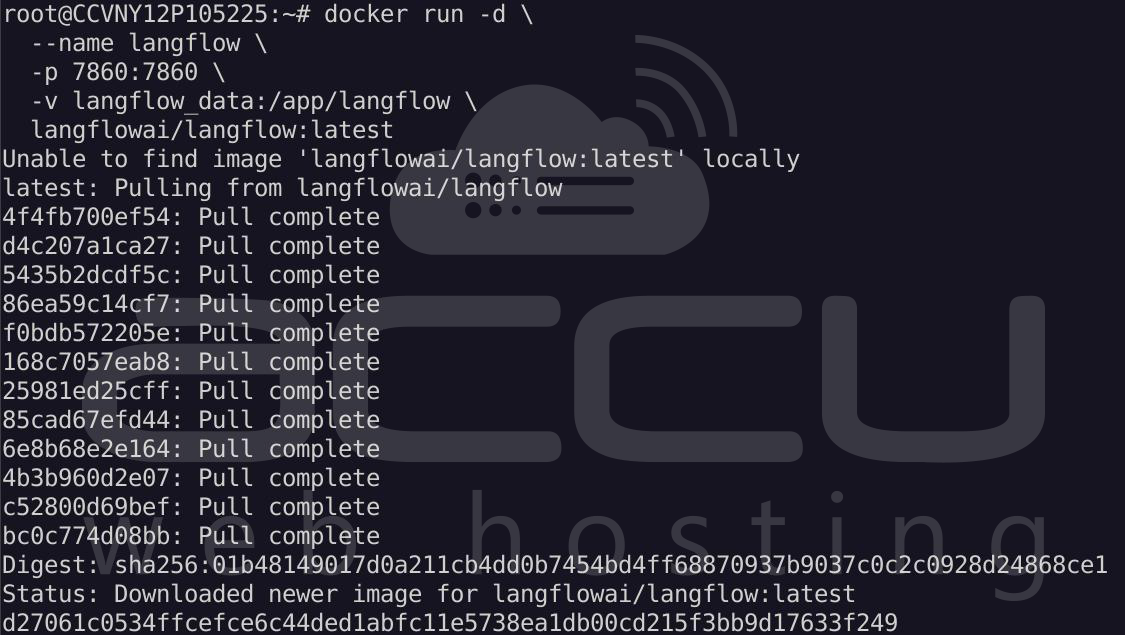
This command:
- Pulls the latest Langflow image
- Starts the service
- Exposes it on port 7860
- Persists your data
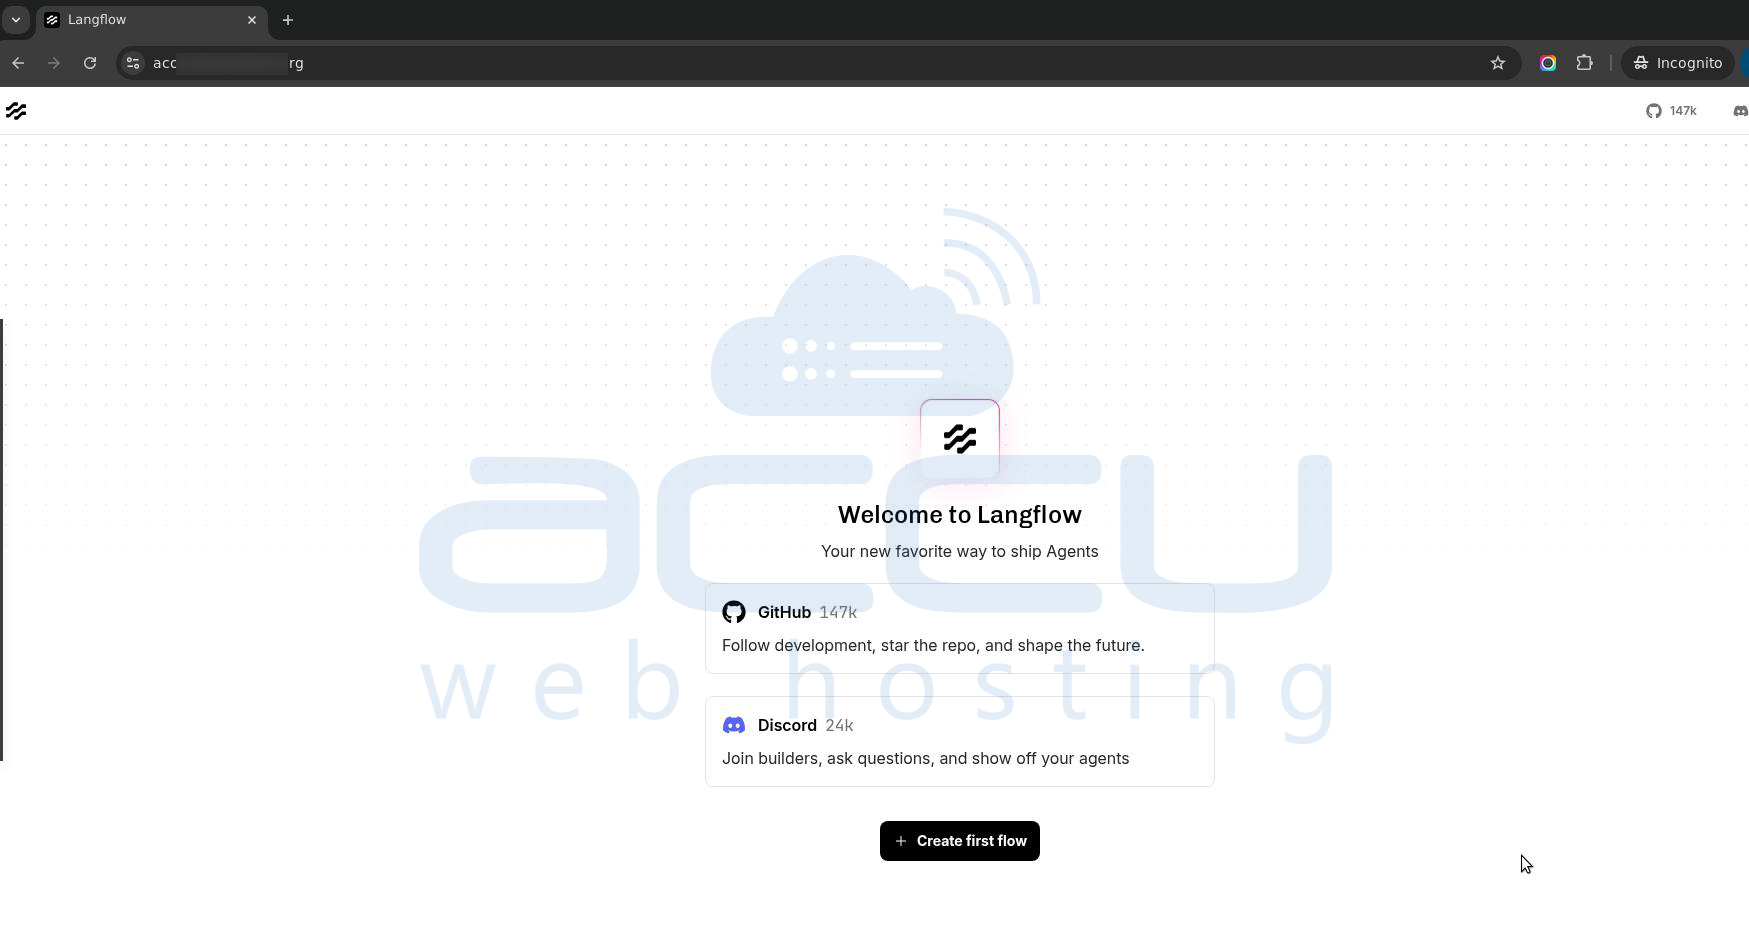
Step 4: Access Langflow Dashboard
Open your browser and visit:
http://your-server-ip:7860
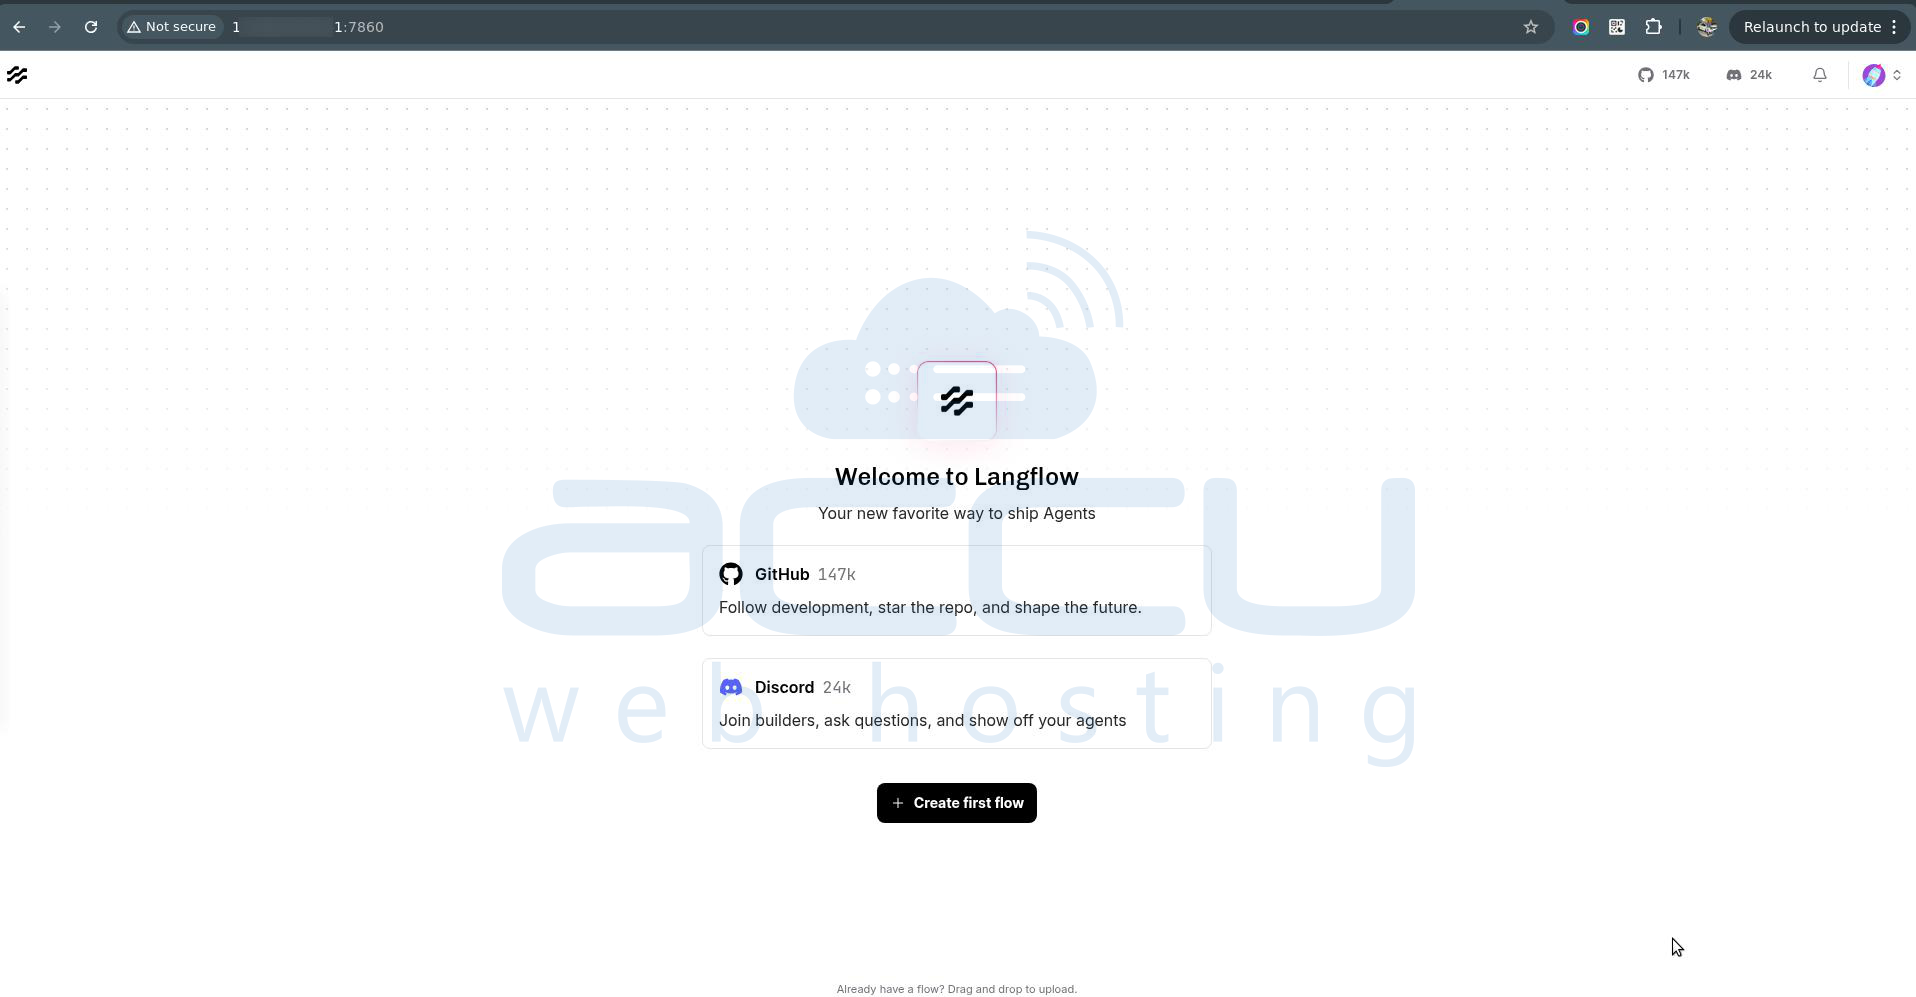
You should now see the Langflow UI.
Step 5: Set Up a Domain & SSL (Optional)
For production use, configure a reverse proxy with Nginx:
apt install nginx -y
Create a config file:
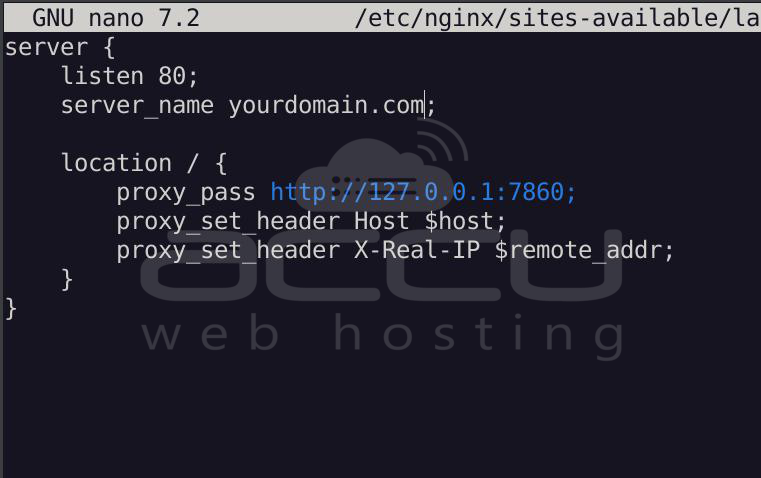
nano /etc/nginx/sites-available/langflow
Example config:
server {
    listen 80;
    server_name yourdomain.com;
    location / {
        proxy_pass http://127.0.0.1:7860;
        proxy_set_header Host $host;
        proxy_set_header X-Real-IP $remote_addr;
    }
}
Note: Replace the “yourdomain.com” with your Actual domain name.
Enable the site:
> ln -s /etc/nginx/sites-available/langflow /etc/nginx/sites-enabled/
> nginx -t
> systemctl restart nginx
Install SSL using Certbot:
> apt install certbot python3-certbot-nginx -y
> certbot --nginx -d yourdomain.com
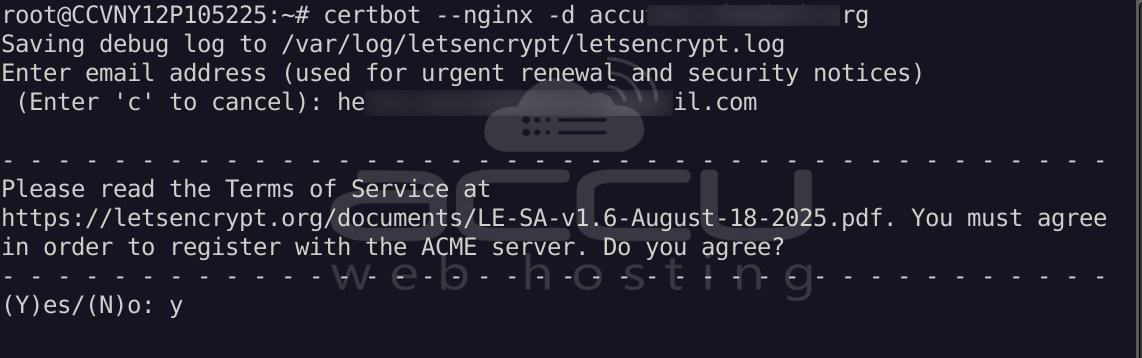
Note: Replace the “yourdomain.com” with your Actual domain name.
Now, you can view the LangFlow Dashboard via your domain name.
https://yourdomain.com
Step 6: Managing Langflow (Useful commands):
Check container status:
docker ps
Stop Langflow:
docker stop langflow
Start Langflow:
docker start langflow
To check logs:
docker logs langflow
Conclusion:
Setting up Langflow on a VPS using a one-click installer is one of the fastest ways to get started with building AI pipelines. By leveraging Docker, you avoid complex dependency issues and gain a portable, scalable deployment.
Once installed, you can focus on what actually matters: designing workflows, integrating APIs, and experimenting with LLM-powered applications. With optional enhancements like SSL and domain mapping, your Langflow instance can easily scale from a simple test environment to a production-ready system.
