Self-Host AFFiNE on Ubuntu Server with Docker
In today’s world of productivity tools, AFFiNE stands out by combining features similar to Notion and Miro in one place. If you want a workspace that is private and fully under your control, self-hosting it on your own Ubuntu server is a great option. In this guide, we’ll show you step by step how to set up AFFiNE on a fresh Ubuntu 24.04 server and get it running smoothly.
Prerequisites
Before we dive into the terminal, ensure you have:
-
An Ubuntu Server (This guide uses Ubuntu 24.04 "Noble").
-
Root or Sudo access to the machine.
-
A Domain Name (if you want to access it outside your local network).
Phase 1: Preparing the Environment
To run AFFiNE reliably, we need the official Docker engine rather than the default snap versions. This ensures compatibility with complex docker-compose stacks.
Step 1: Update System Packages. Start by ensuring your local package index is up to date. Open your terminal and run:
sudo apt update

This command communicates with Ubuntu's repositories to see which packages have newer versions available.
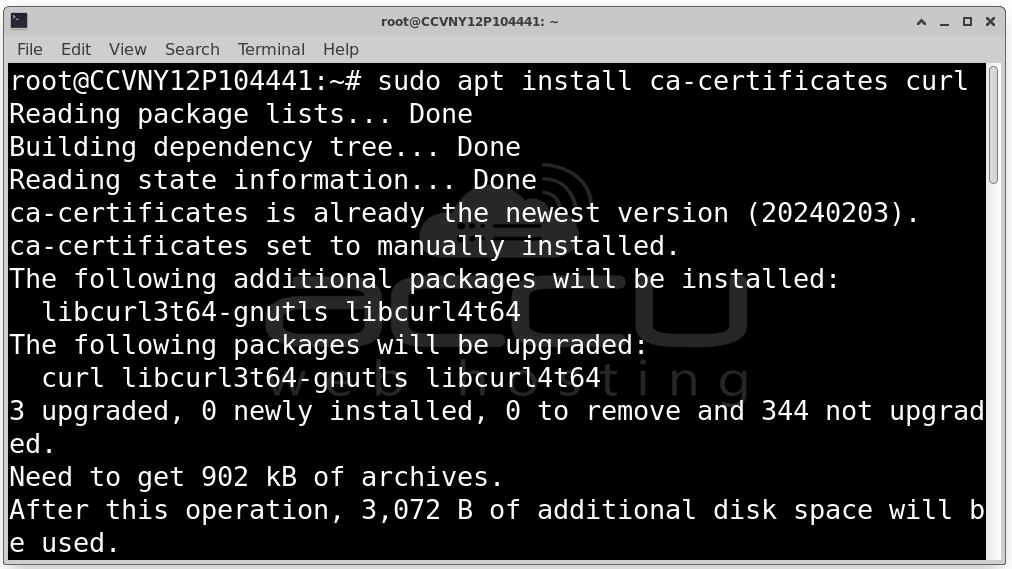
Step 2: Install Essential Dependencies. Before adding the Docker repository, we need tools to handle HTTPS and GPG keys.
sudo apt install ca-certificates curl
-
ca-certificates: Allows the system to verify security certificates.
-
curl: A tool to transfer data from servers (used to grab Docker's security key).
Phase 2: Installing the Docker Engine
We want the official, stable version of Docker directly from the source.
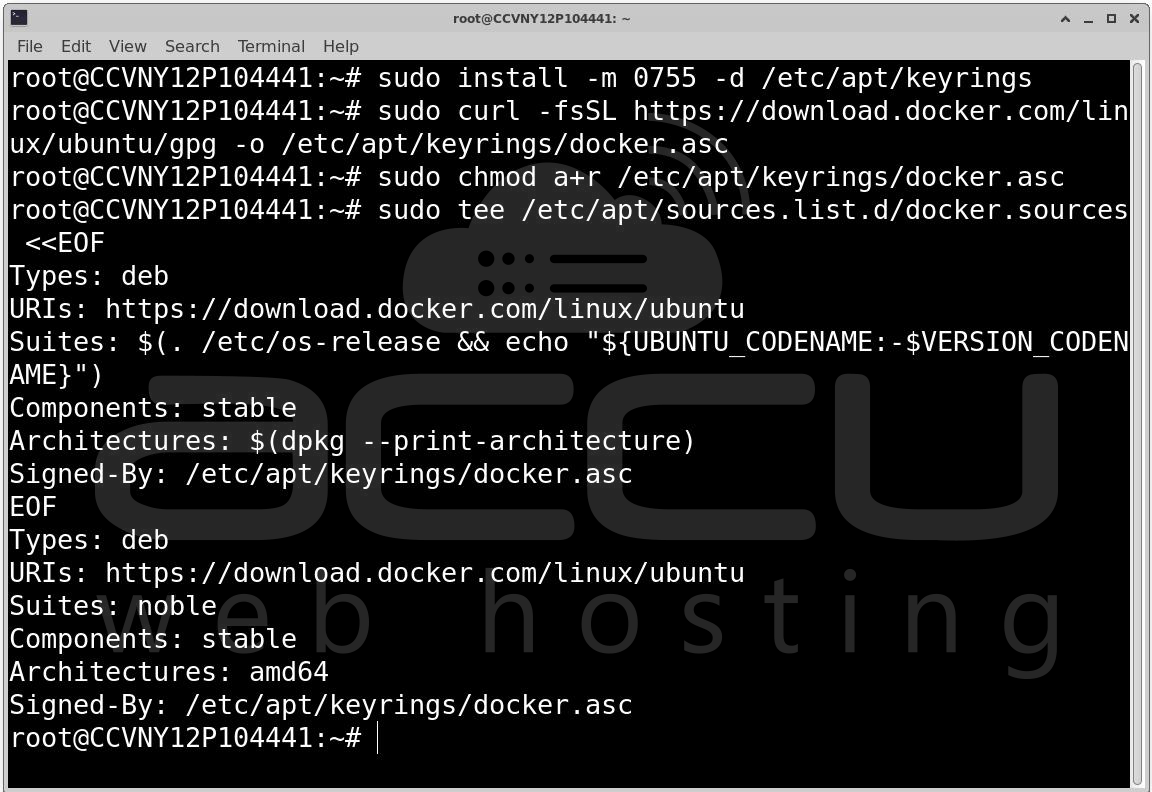
Step 3: Add Docker’s Official GPG Key
sudo install -m 0755 -d /etc/apt/keyrings
sudo curl -fsSL https://download.docker.com/linux/ubuntu/gpg -o /etc/apt/keyrings/docker.asc
sudo chmod a+r /etc/apt/keyrings/docker.asc
Step 4: Set Up the Repository. Now, we tell Ubuntu exactly where to look for Docker updates. The following command creates a source file that points to the "Noble" stable branch.
sudo tee /etc/apt/sources.list.d/docker.sources <<EOF
Types: deb
URIs: https://download.docker.com/linux/ubuntu
Suites: $(. /etc/os-release && echo "${UBUNTU_CODENAME:-$VERSION_CODENAME}")
Components: stable
Architectures: $(dpkg --print-architecture)
Signed-By: /etc/apt/keyrings/docker.asc
EOF
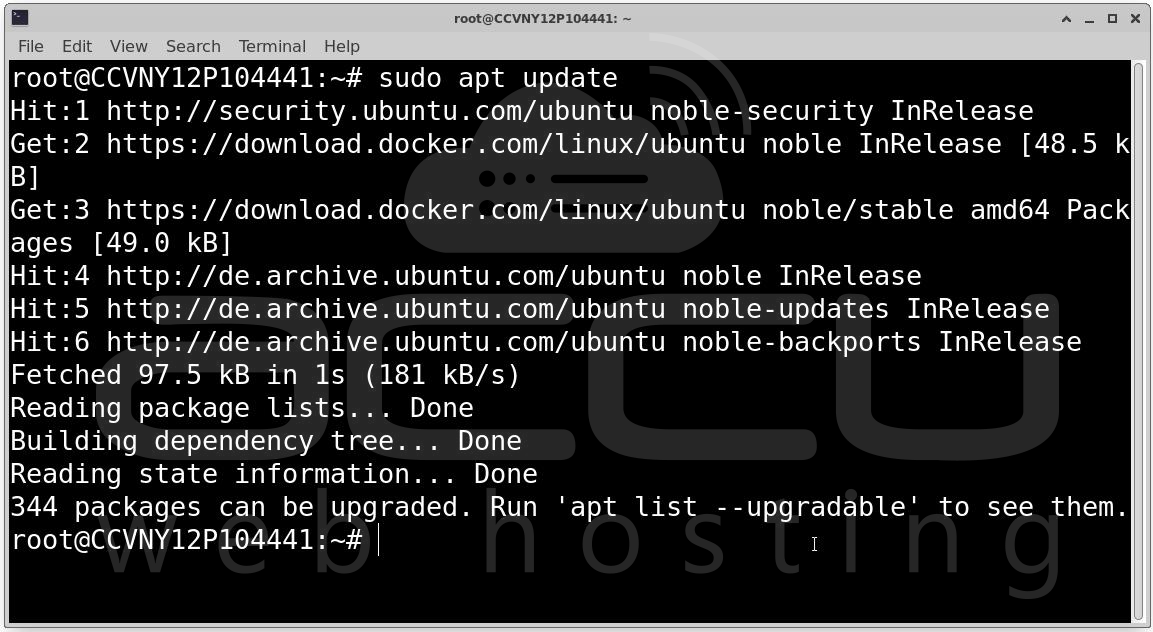
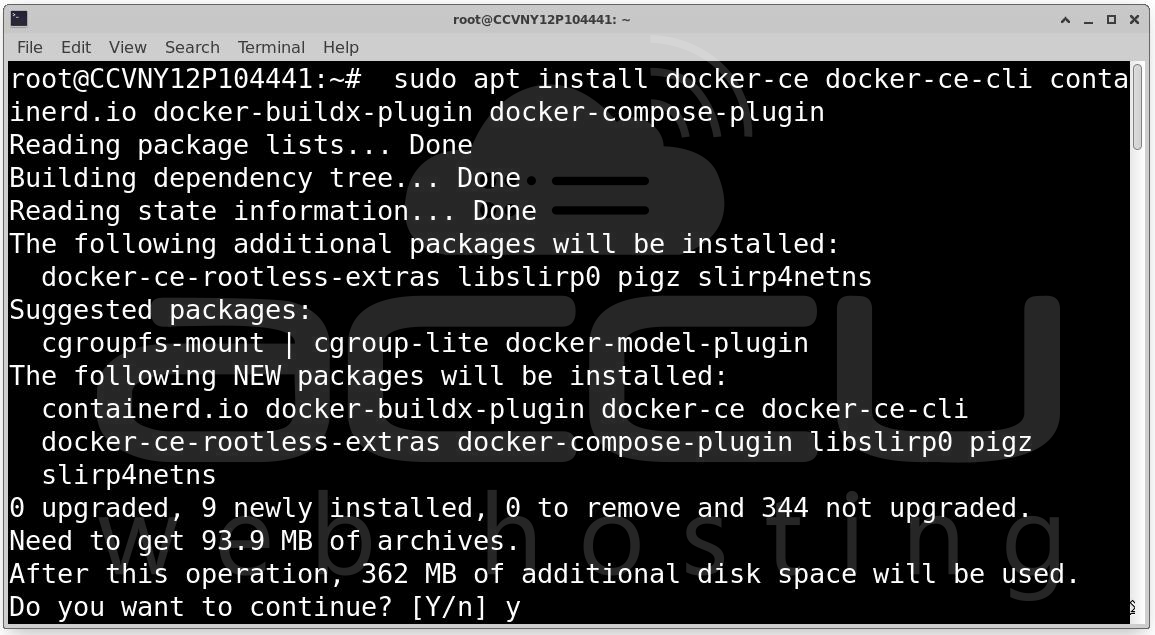
Step 5: Install Docker Components. Refresh your package list again to include the new Docker repository, then install the engine and the Compose plugin.
sudo apt update
sudo apt install docker-ce docker-ce-cli containerd.io docker-buildx-plugin docker-compose-plugin
Step 6: Check if Docker is running properly:
sudo systemctl status docker
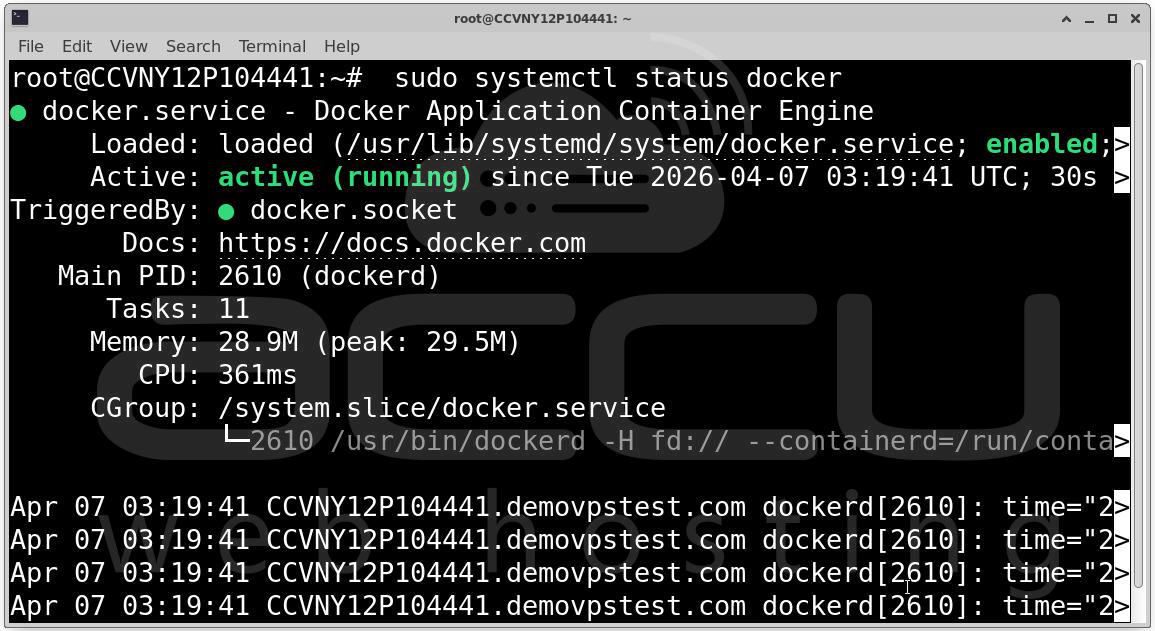
You should see a green "active (running)" status. This means your "engine room" is ready for AFFiNE.
Phase 3: Deploying AFFiNE
Now that the infrastructure is ready, let’s pull the AFFiNE deployment files.
Step 7: Create a dedicated folder for AFFiNE and move into it.
mkdir affine
cd affine/
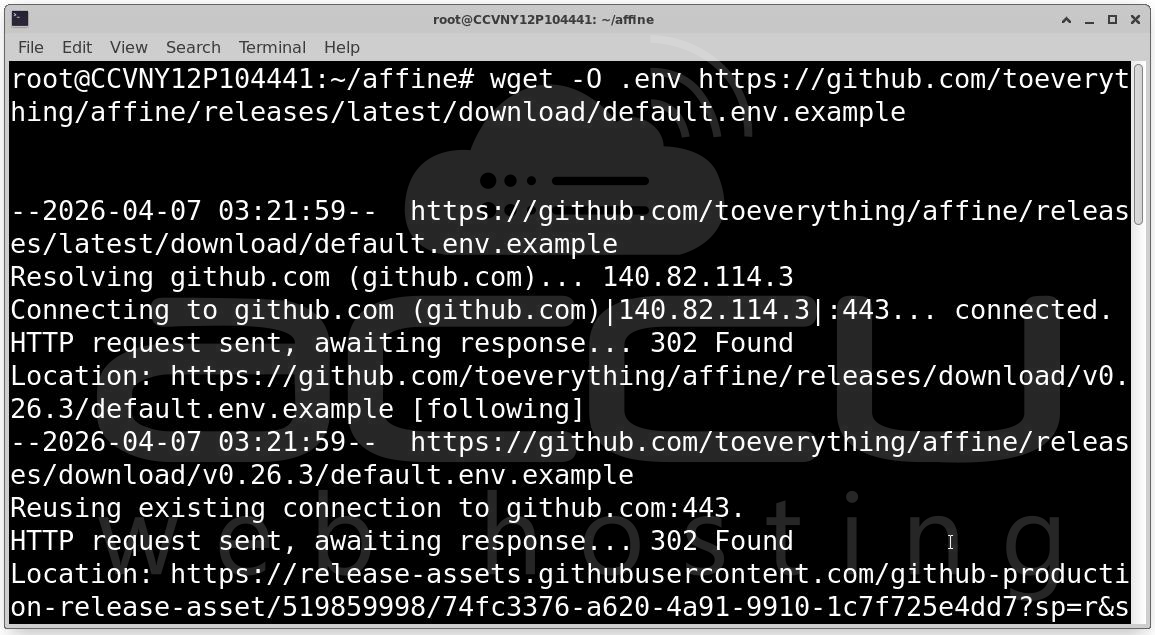
Step 8: AFFiNE provides a pre-configured docker-compose.yml and a .env.example file. We will use wget to fetch them directly from their GitHub releases.
Download the Docker Compose file: wget -O docker-compose.yml https://github.com/toeverything/affine/releases/latest/download/docker-compose.yml

Download the Environment template: wget -O .env https://github.com/toeverything/affine/releases/latest/download/default.env.example
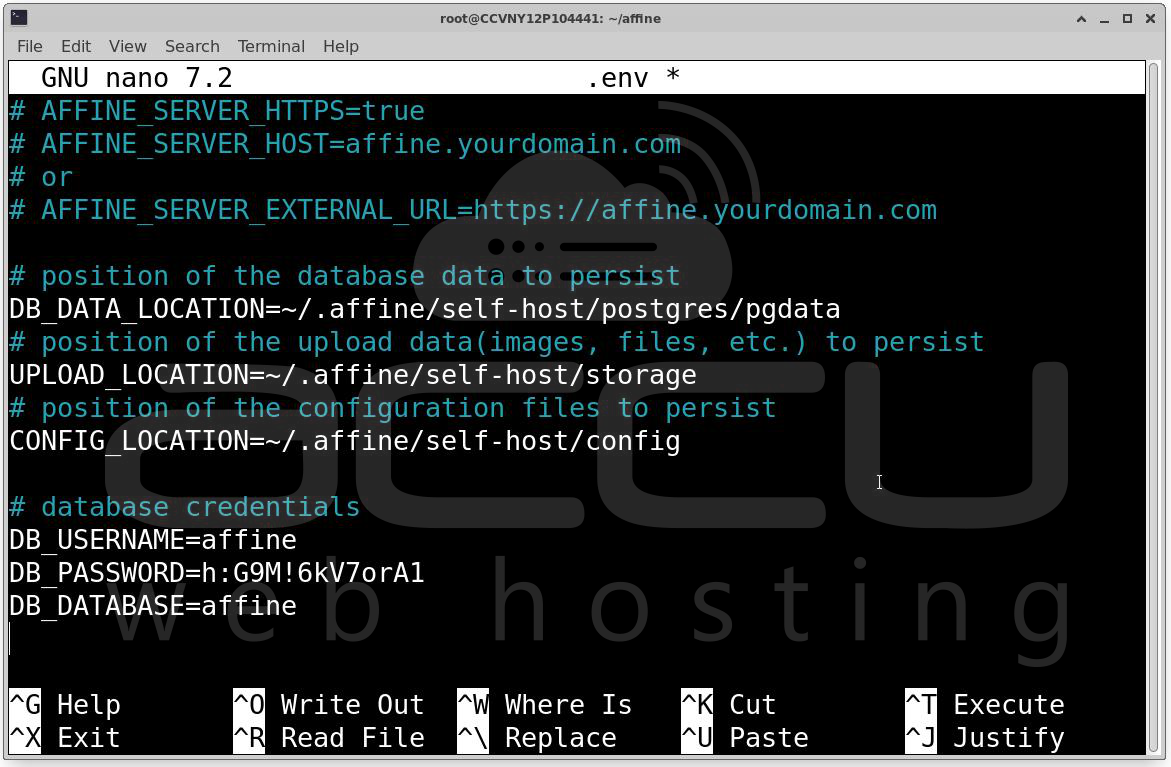
Step 9: Configure Environment Variables. This is the most critical step. You must edit the .env file to set your database passwords and storage locations. Use the nano editor:
nano .env
Key configurations to update:
-
Storage Locations: Ensure the paths for DB_DATA_LOCATION, UPLOAD_LOCATION, and CONFIG_LOCATION are set to places where your user has write permissions (usually within the ~/.affine directory).
-
Database Credentials: Change the default DB_PASSWORD to something secure.
-
External URL: If using a domain, set AFFINE_SERVER_EXTERNAL_URL=https://yourdomain.com.
Phase 4: Launching the Stack
With everything configured, it’s time to bring the containers to life.
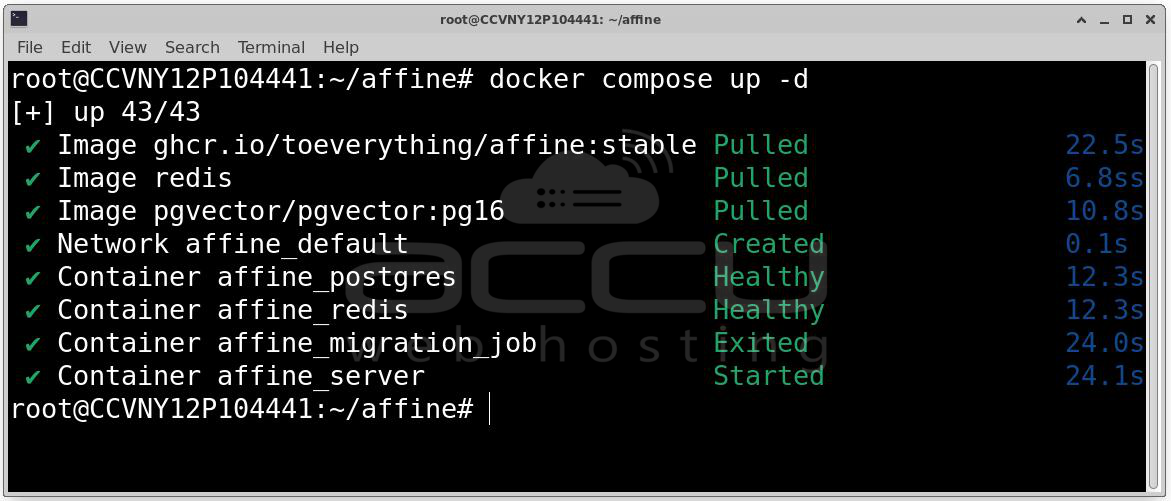
Step 10: Run Docker Compose. Execute the following command to pull the images and start the services in "detached" mode (running in the background):
docker compose up -d
You will see several things happening in your terminal:
-
Pulling Images: Docker downloads the AFFiNE stable image, Redis, and PgVector (PostgreSQL with vector support).
-
Creating Network: A private network affine_default is created for the containers to talk to each other.
-
Starting Containers:
-
affine_postgres: Your database.
-
affine_redis: For caching and performance.
-
affine_migration_job: A temporary container that sets up your database schema (it will show as "Exited" once finished).
-
affine_server: The main application.
-
Phase 5: Initial Web Configuration
1. The Welcome Screen: Navigate to http://your-server-ip:3010 (or your configured domain). You will be greeted by the Welcome to AFFiNE setup wizard. This interface is designed to help you initialize the admin account for your self-hosted instance. Click the Continue button to begin the three-step setup process.

2. Create the Admin Account: On the next screen, you will define the primary administrator for the server.
-
Name: Enter your preferred display name.
-
Email: Enter a valid administrator email address. This will be your primary login.
-
Password: Choose a strong password. AFFiNE recommends a length of 8-32 characters, including a mix of uppercase, lowercase, numbers, and symbols.
-
Click Continue to finalize the account creation.

Phase 6: Exploring the Admin Dashboard
After the setup is complete, you will be logged into the AFFiNE Admin Panel. This is the nerve center for managing your self-hosted instance.
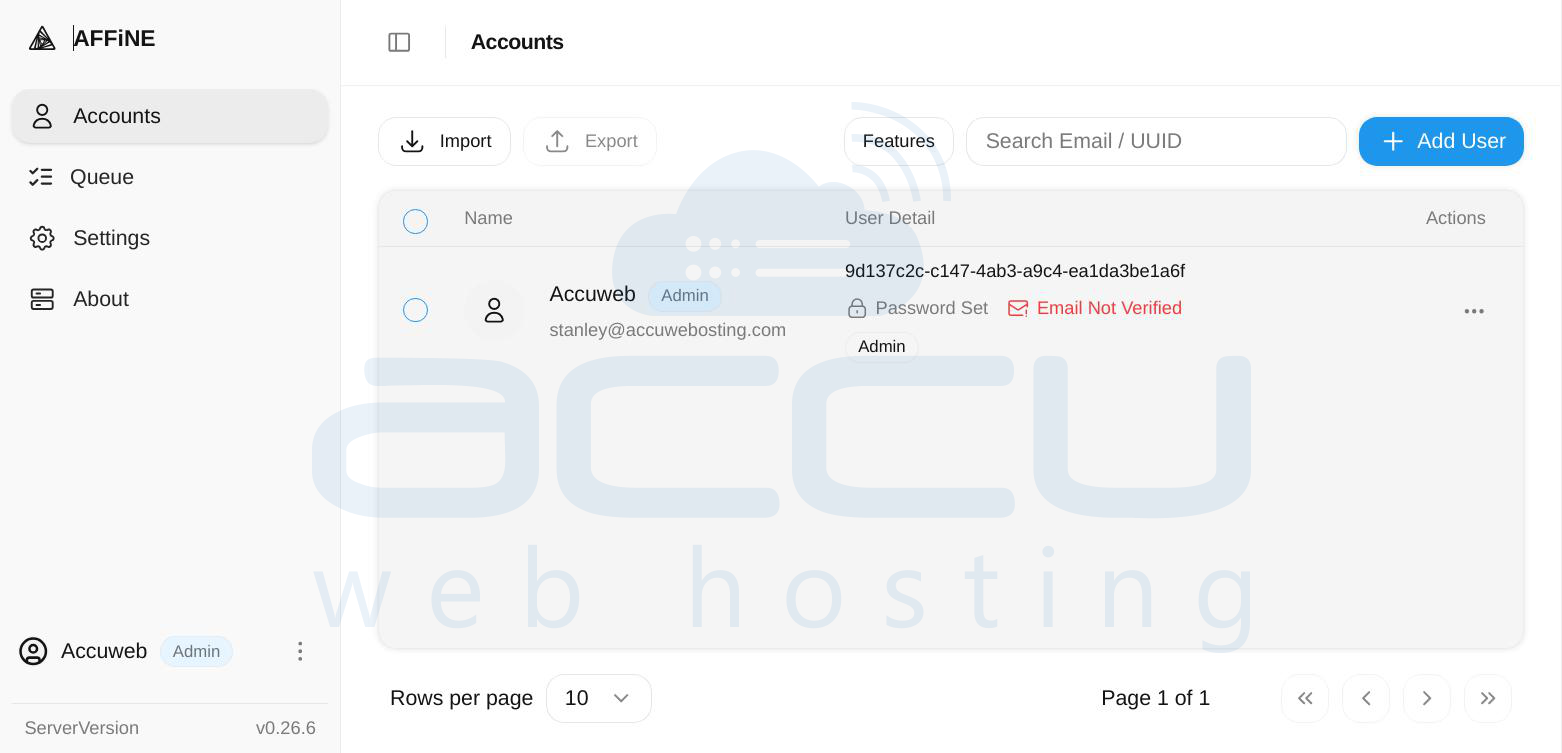
User Management
Under the Accounts tab, you can view all registered users. From here, you can:
-
Monitor Status: See which users have verified their emails or set their passwords.
-
Add Users: Use the + Add User button to manually invite team members to your instance.
-
Assign Roles: Manage who has "Admin" privileges versus standard user access.
System Overview
The sidebar provides quick access to other vital areas:
-
Queue: Monitor background tasks and synchronization jobs.
-
Settings: Configure global server settings, mail server (SMTP) details for notifications, and security preferences.
-
About: Verify your current version (e.g., v0.26.6) to ensure you are running the latest stable release.
Your Workspace is Ready! You have successfully transitioned from a raw Ubuntu server to a fully functional, self-hosted productivity suite. You can now start creating workspaces, notebooks, and whiteboards.
Congratulations! You are now in full control of your data and your digital workspace.
Conclusion
Setting up AFFiNE on Ubuntu gives you a professional-grade workspace with the peace of mind that comes from owning your data. By following this Docker-based approach, you've ensured that your installation is isolated, easy to back up, and simple to update.
