Introduction:
If you’re managing a VPS through the Virtualizor Reseller Panel, you may find that you need to increase the resources of a particular VPS to better meet your needs. Whether it’s adding more RAM, disk space, or CPU cores, this guide will walk you through the simple steps to adjust your VPS resources.
Step 1: Log in to Virtualizor
Log in to Virtualizor using the VPS management panel details you received via email, along with the server login credentials.
Step 2: Select the VPS
On the left-hand panel, click on the List VPS tab. This will display all your VPS instances.
Step 3: Access VPS Settings
1. Find the VPS for which you wish to increase the resources.
2. In the ACTION section, click the pencil icon to edit the VPS settings.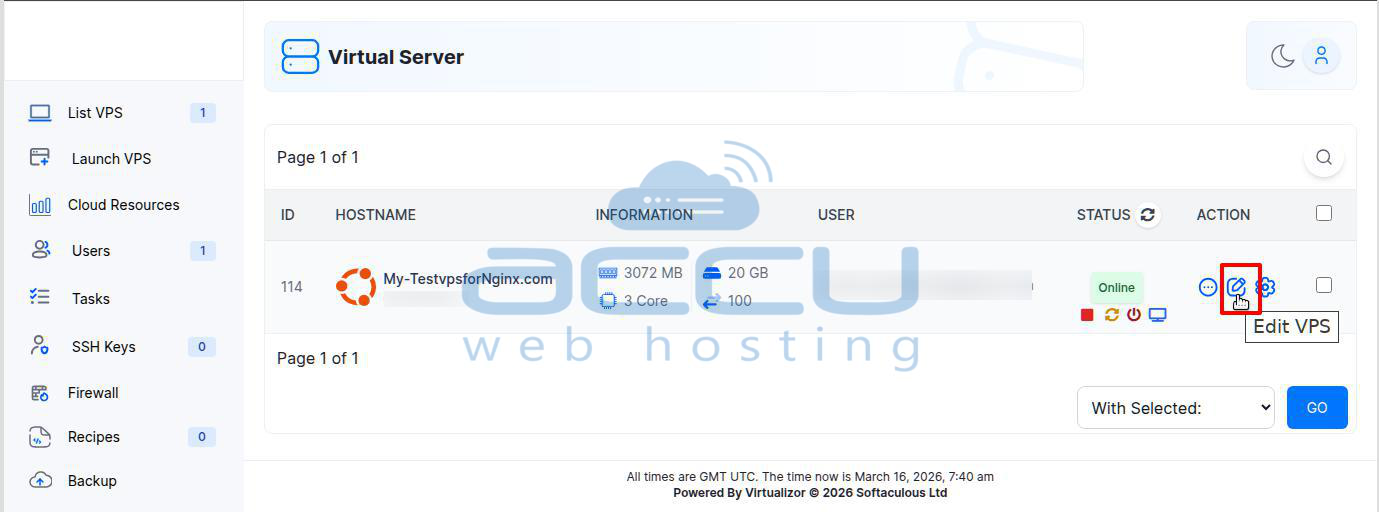
Step 4: Increase VPS Resources
1. Navigate to the Resource Allocation section.
2. Increase the VPS resources such as RAM, disk space, CPU cores, and bandwidth according to your needs.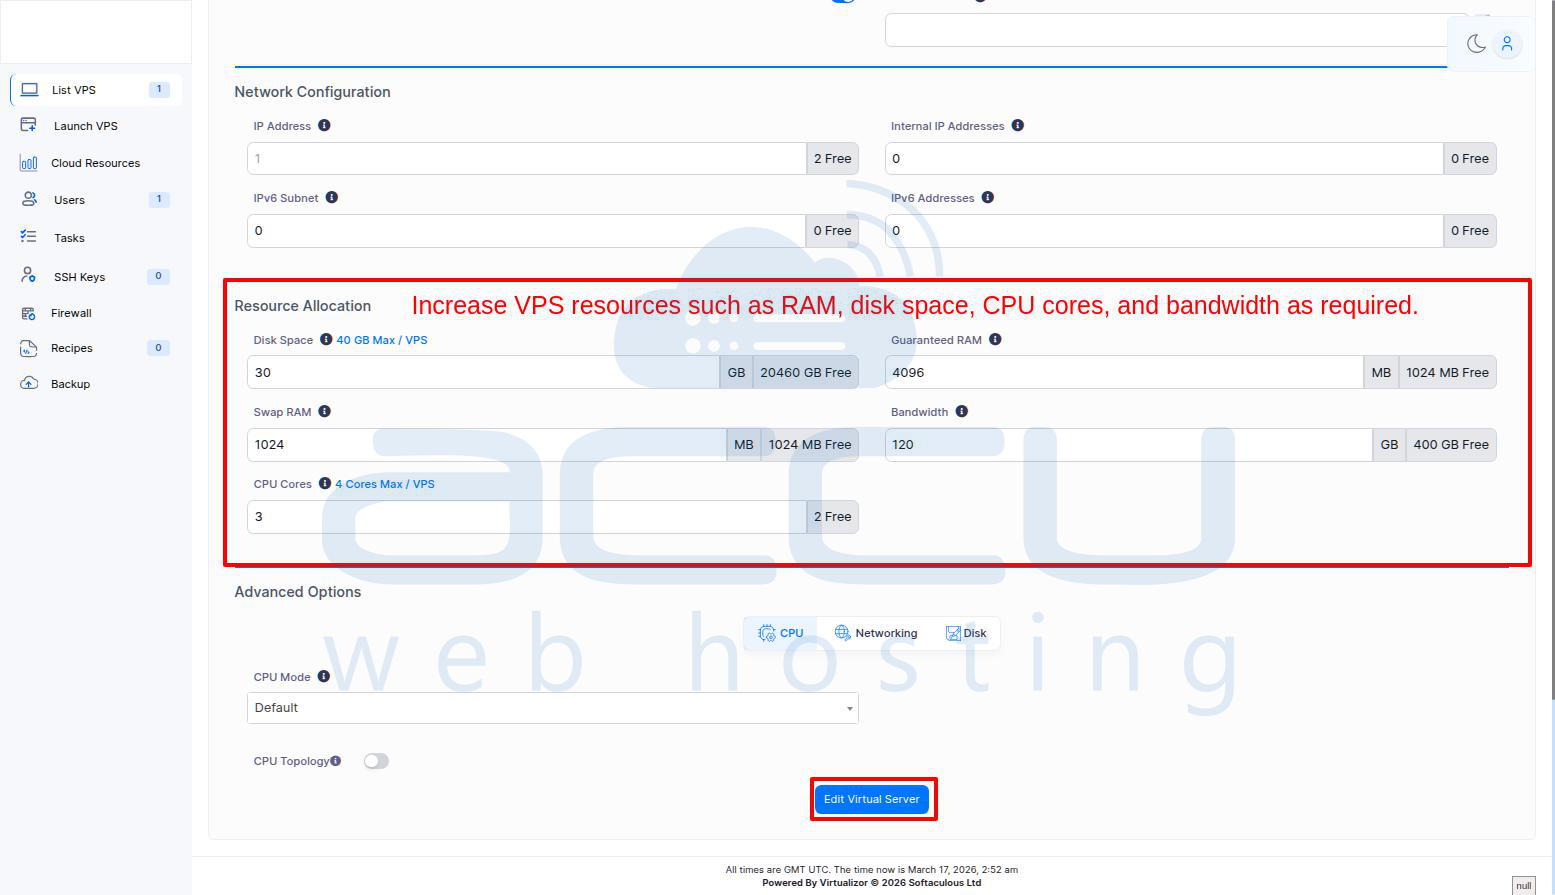
Note: You cannot increase resources beyond the limit specified for your account.
Step 5: Save the Changes
1. Click the Edit Virtual Server button at the bottom of the page to apply the changes.
You will receive a message confirming the update: "The Virtual Server has been successfully edited."
Step 6: Restart the VPS to apply changes.
Click on the Restart icon in List VPS to restart the VPS and apply resource changes to the VPS.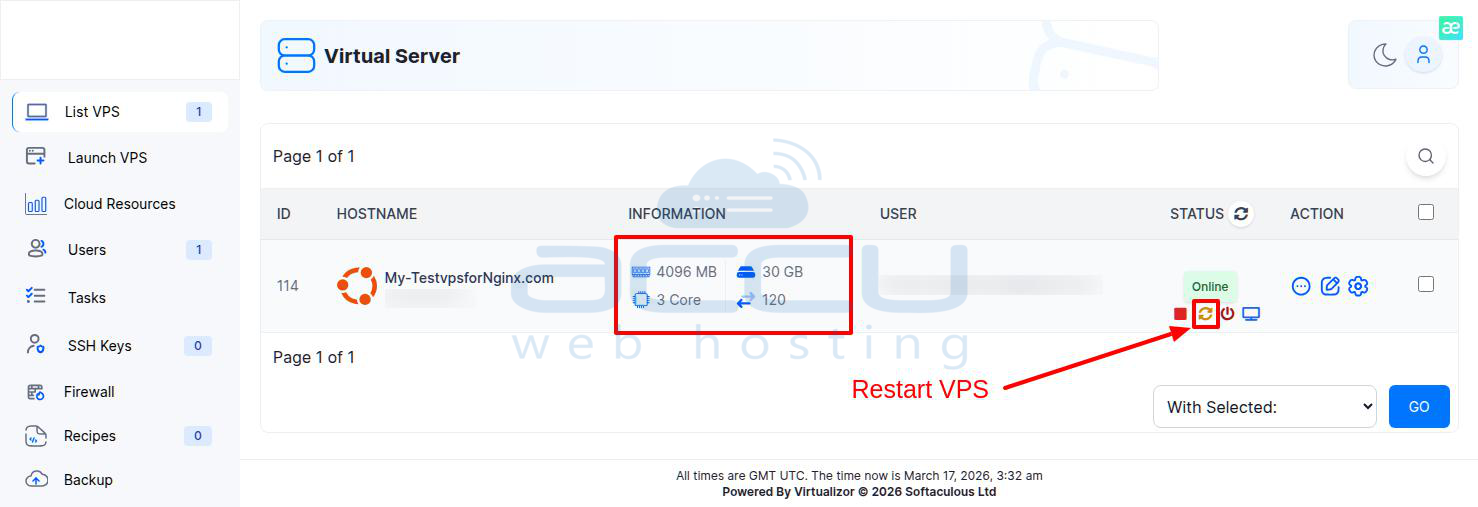
Step 7: Verify the Resources
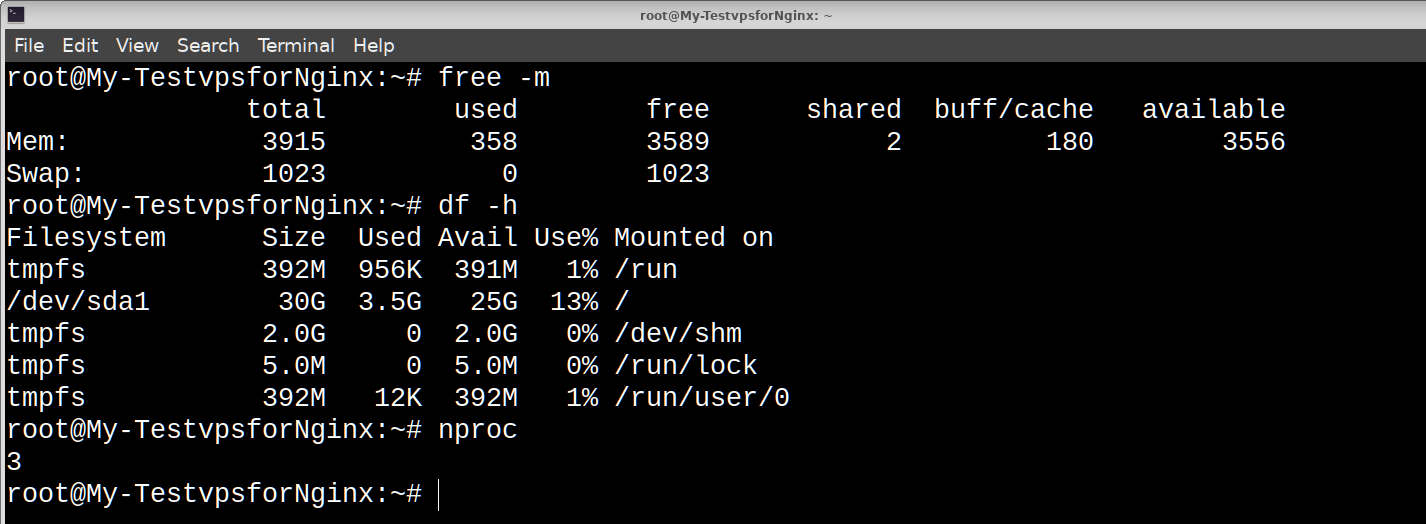
1. On the left-hand panel, click on the List VPS tab to display all your VPS instances.
2. Verify that the resources for the specific VPS are updated to the values you set. Also, connect your server via SSH and verify the updated resources.
Conclusion:
By following these straightforward steps, you can easily increase the resources of your VPS to match your requirements. Remember, if you ever need assistance with the process or run into any issues, our support team is always ready to help.
