How to create a user under the reseller account?
Step 1: Log in to the Virtualizor Reseller Panel
1. Open your web browser and navigate to the Virtualizor reseller panel login page: https://vmaster.accuwebhosting.com:4083/
2. Enter your username and password that were provided to you via your reseller login email.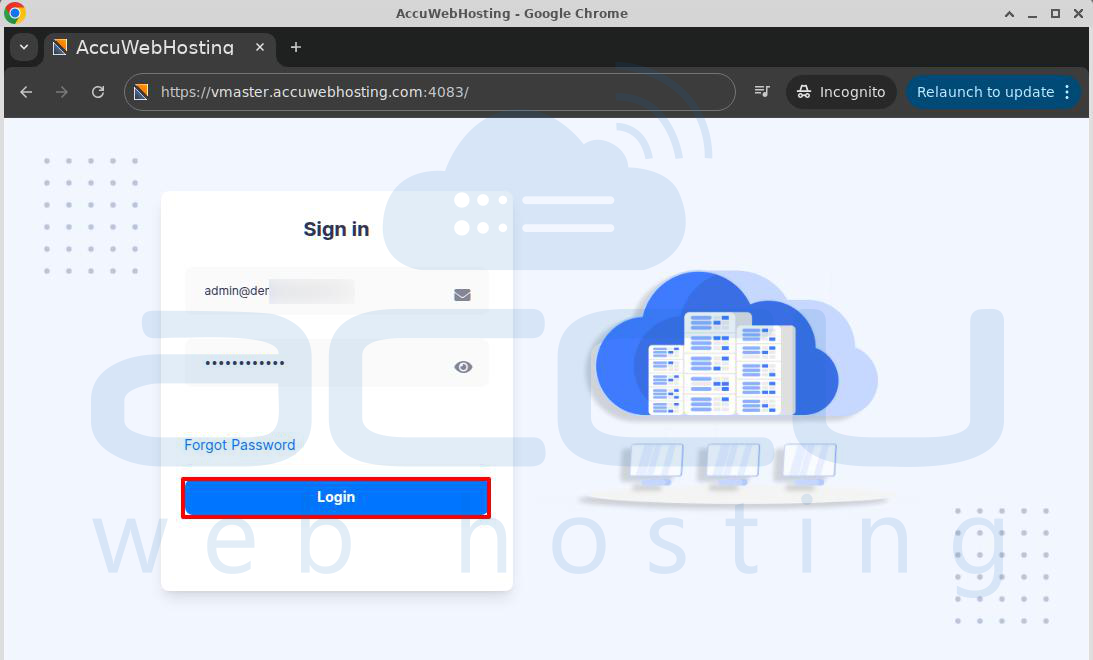
If you are unable to locate these details, please reach out to support through chat or support tickets, and our support team will assist you.
Step 2: Navigate to the "Users" Section
1. Once logged in, you will see the Virtualizor Reseller Dashboard.
2. On the left sidebar, click on Users. This will show you the list of users under your reseller account.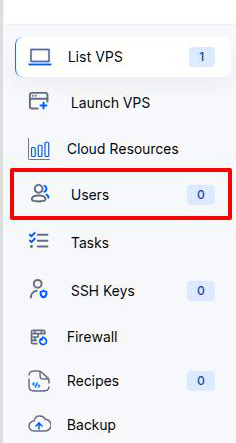
Step 3: Add a New User
1. After clicking Users, you will see two tabs at the top: Users and Add User.
2. Click on the Add User tab to begin creating a new user.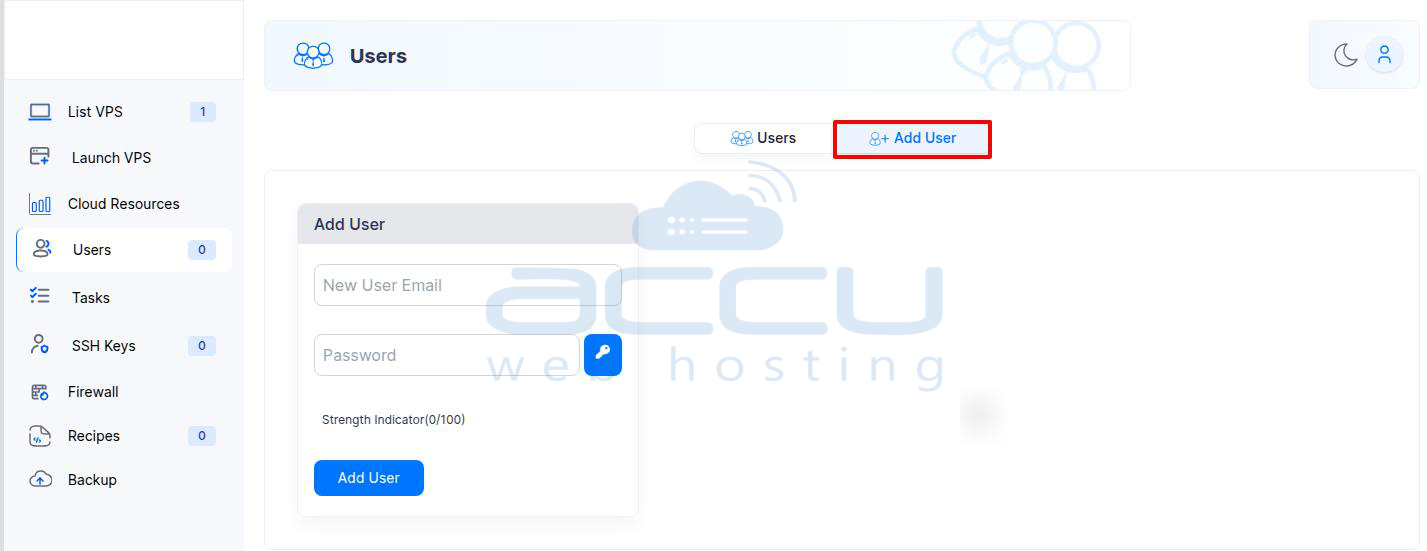
Step 4: Enter the User Details
1. You will be prompted to enter the new user's email address and password.
2. Ensure the password is strong, as this will be required to secure the user's account.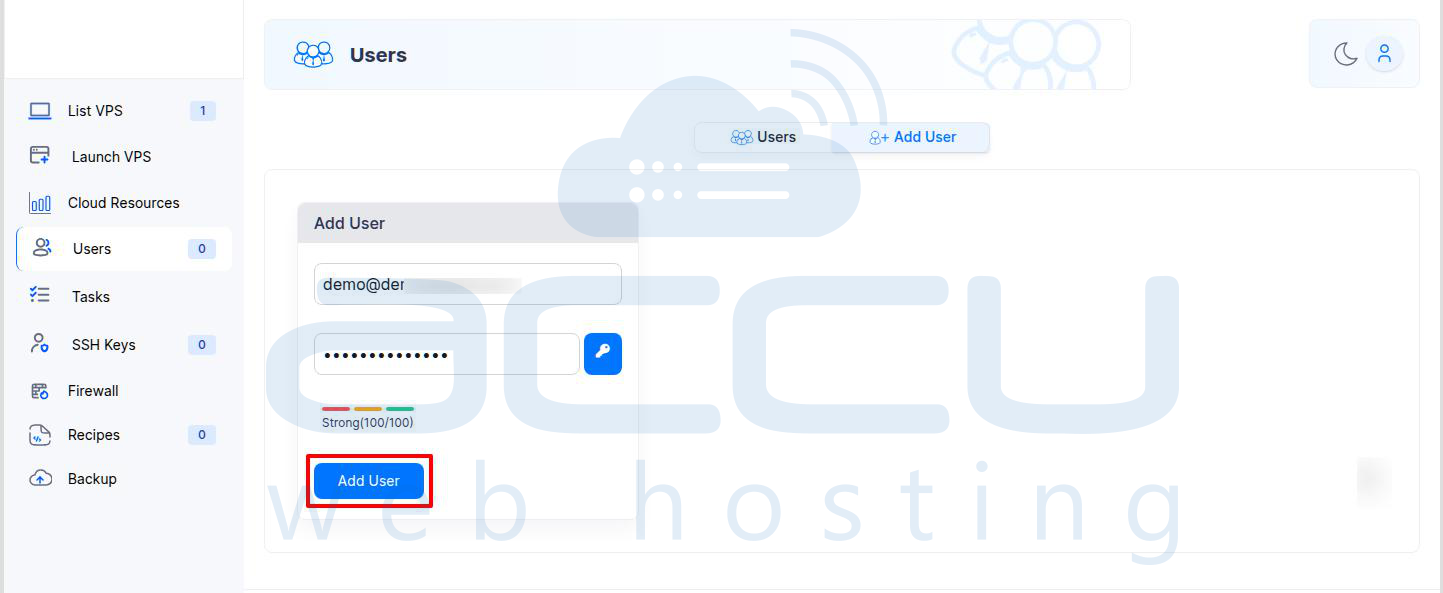
Step 5: Create the User
1. After entering the email and password, click on the Add User button.
2. You will see a confirmation message saying, “User has been added”. The new user is now successfully created under your reseller account.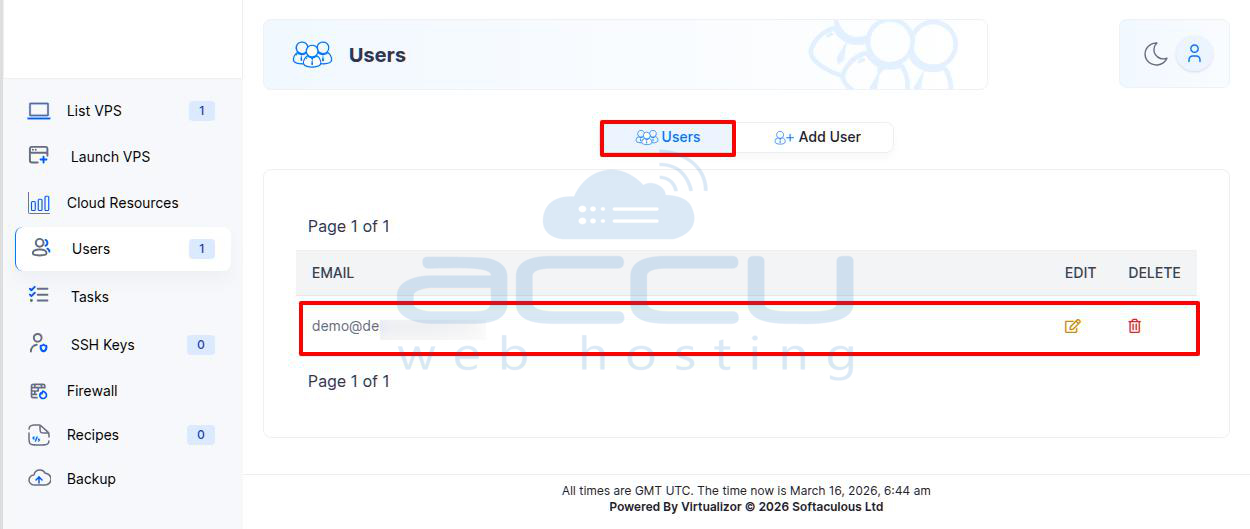
That’s it! You have successfully created a user under your reseller account in Virtualizor.
Step 6: Verify the User
1. To verify the new user account, navigate to the login page: https://vmaster.accuwebhosting.com:4083/
2. Enter the email address and password you just set for the user.
3. Click the Login button to ensure the new user can access their account.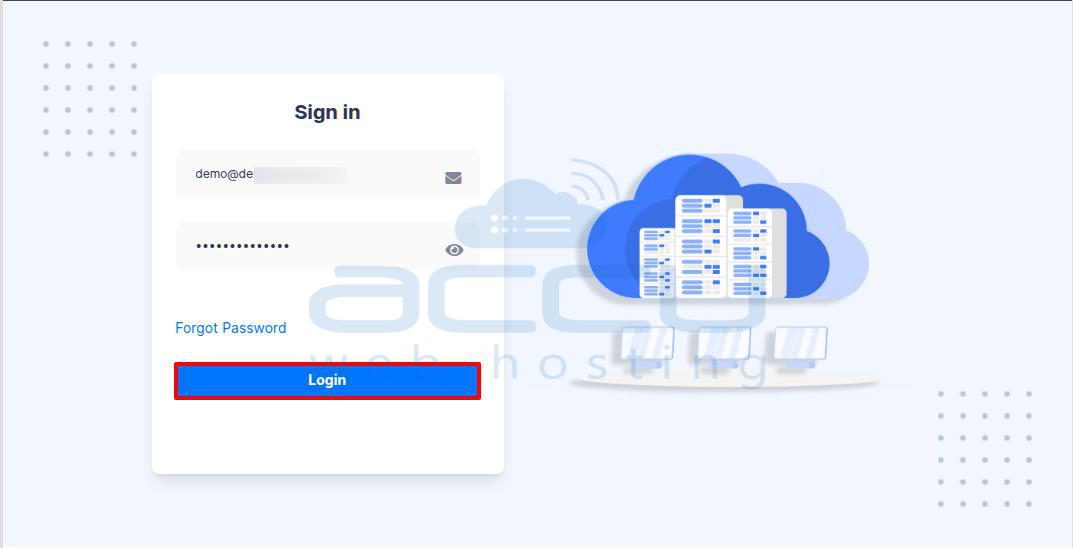
How to create a VPS under the reseller account?
Step 1: Open the Launch VPS Wizard
Click on the Launch VPS tab from the left sidebar. This will open the Launch VPS wizard.
Step 2: Select Your Server/Region
Choose the desired server/region for your VPS.
-
Hyderabad, India
-
New York, USA
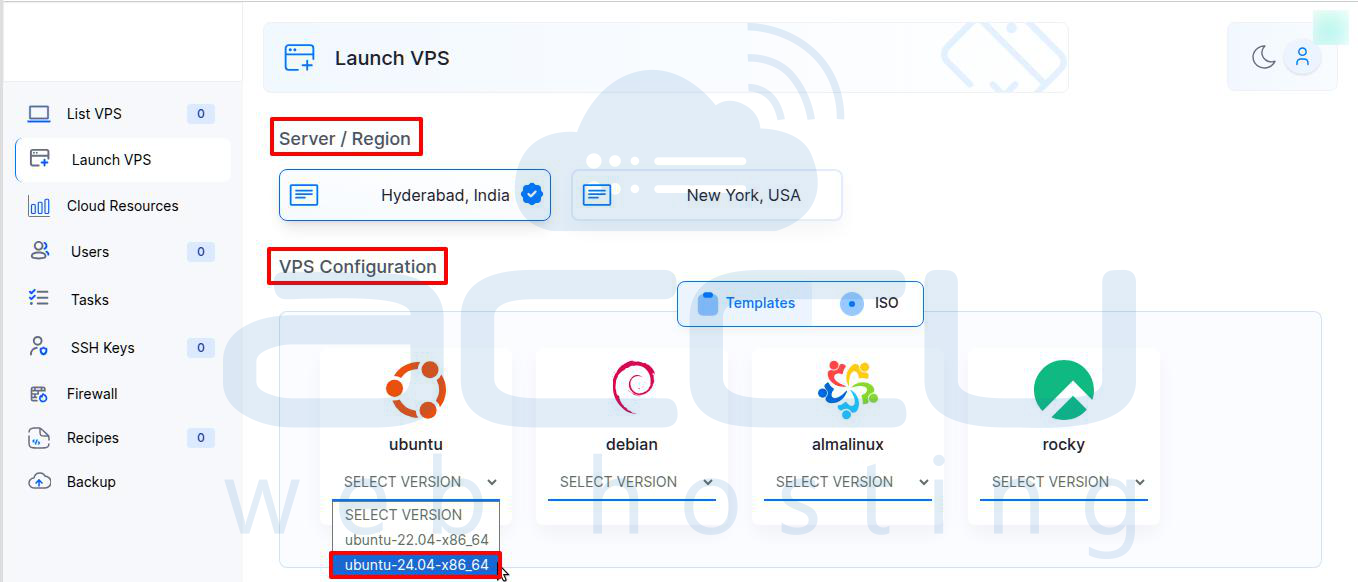
Step 3: Choose the Operating System
We support several Linux distributions and templates. In the VPS Configuration section, you'll see options for different operating systems, such as:
-
Ubuntu
-
Debian
-
AlmaLinux
-
Rocky Linux
Each of these operating systems has several versions available. Select the version that best fits your needs, such as the latest stable release.
Step 4: Configure Resource Allocation
Once you've selected your operating system, the next step is to allocate resources to your VPS.
Note: You cannot allocate or assign resources beyond the limits specified for the plan. The available limits are determined by the reseller plan.
-
Disk Space: Allocate the maximum disk space per VPS as per your reseller plan. Adjust according to your requirements.
-
RAM: Specify the amount of RAM.
-
CPU Cores: Assign CPU cores for your VPS.
-
Swap RAM: Optionally, allocate swap RAM, which is additional memory used when physical RAM is full.
-
Bandwidth: Set the bandwidth you need for the VPS. Adjust it according to the expected traffic.
Step 5: Configure Networking Options
In this section, you can configure the networking options for your VPS.
-
IP Address: Choose the number of IP addresses required for your VPS.
-
IPv6 Addresses: Currently, we do not offer IPv6 addresses.
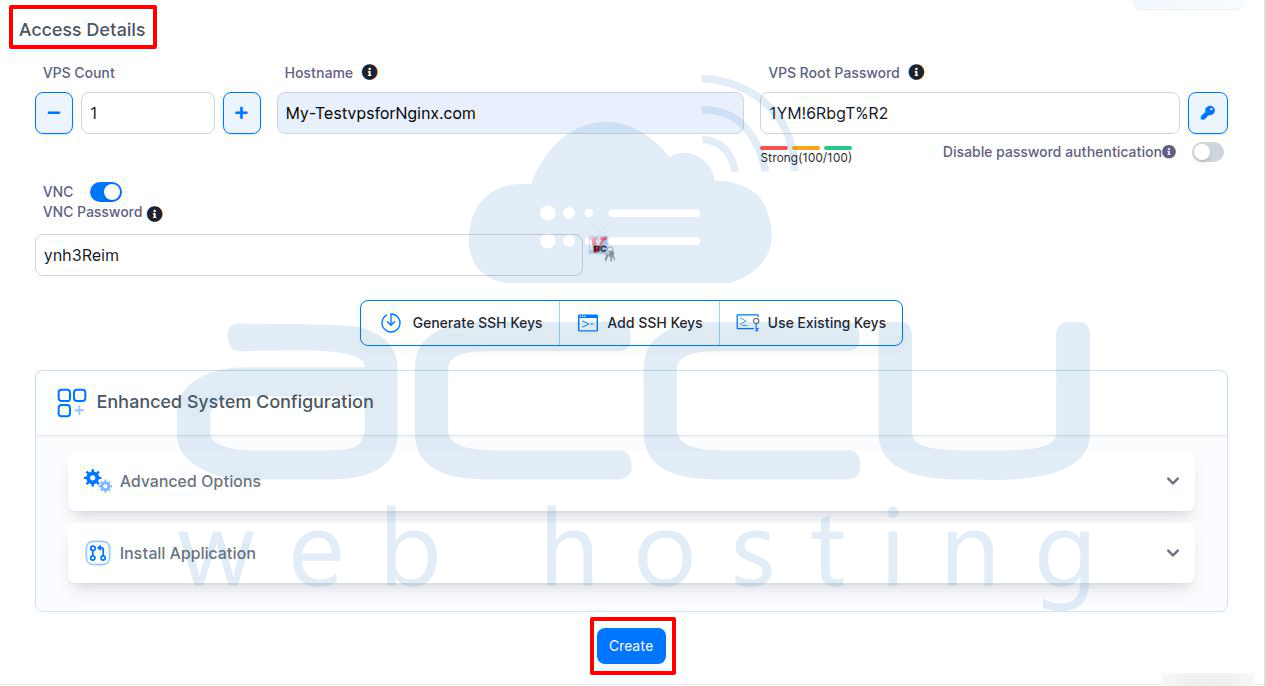
Step 6: Set Access Details
Next, set your access details.
-
VPS Count: Specify how many VPS instances you want to create.
-
Hostname: Provide a name for your VPS.
-
VNC: If needed, you can enable VNC for graphical remote access to your VPS.
-
VPS Root Password: Set a secure root password for your VPS.
Important Options for SSH Access:
Disable Password Authentication: If you want to disable password authentication (for better security), this option will prevent anyone from logging into your VPS using the root password. Only SSH key authentication will be allowed.
Highly recommended security measure for production environments.
Generate SSH Keys (Optional):
This option allows you to generate new SSH keys directly within Virtualizor. These keys will be used for secure access to your VPS. SSH key authentication is more secure than traditional password-based login.
Add SSH Keys (Optional):
If you already have SSH keys you wish to use, you can add existing SSH keys. You can paste the public key here, and Virtualizor will associate it with your VPS for secure access.
Use Existing Keys (Optional):
If you have pre-generated SSH keys, you can use existing keys by selecting them from the list of keys associated with your account.
Step 7: Finalize and Create VPS
Once you have reviewed all configurations, click the Create button. Virtualizor will initiate the process and set up the VPS with the resources and configurations.

In just a few moments, your server will be created with the selected configuration.
You can then navigate to the List VPS tab, where you'll find your newly created VPS and be able to manage it.
Moving VPS to a New User Account:
This VPS was created under your main reseller account. To transfer it to a newly created user, follow the steps below:
1. Click the Pencil Icon
Navigate to the ACTION section and click the pencil icon to edit the VPS.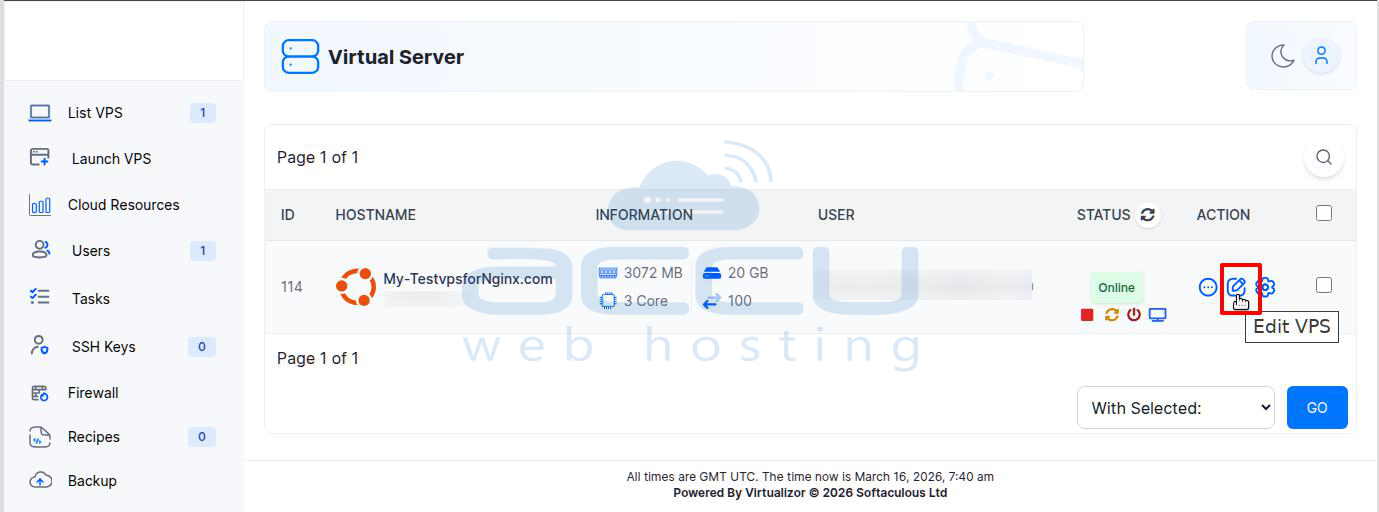
2. Select the New User
On the Edit VPS page, choose the desired user from the User dropdown list. This is the user under whom you would like to move or allow to manage the VPS.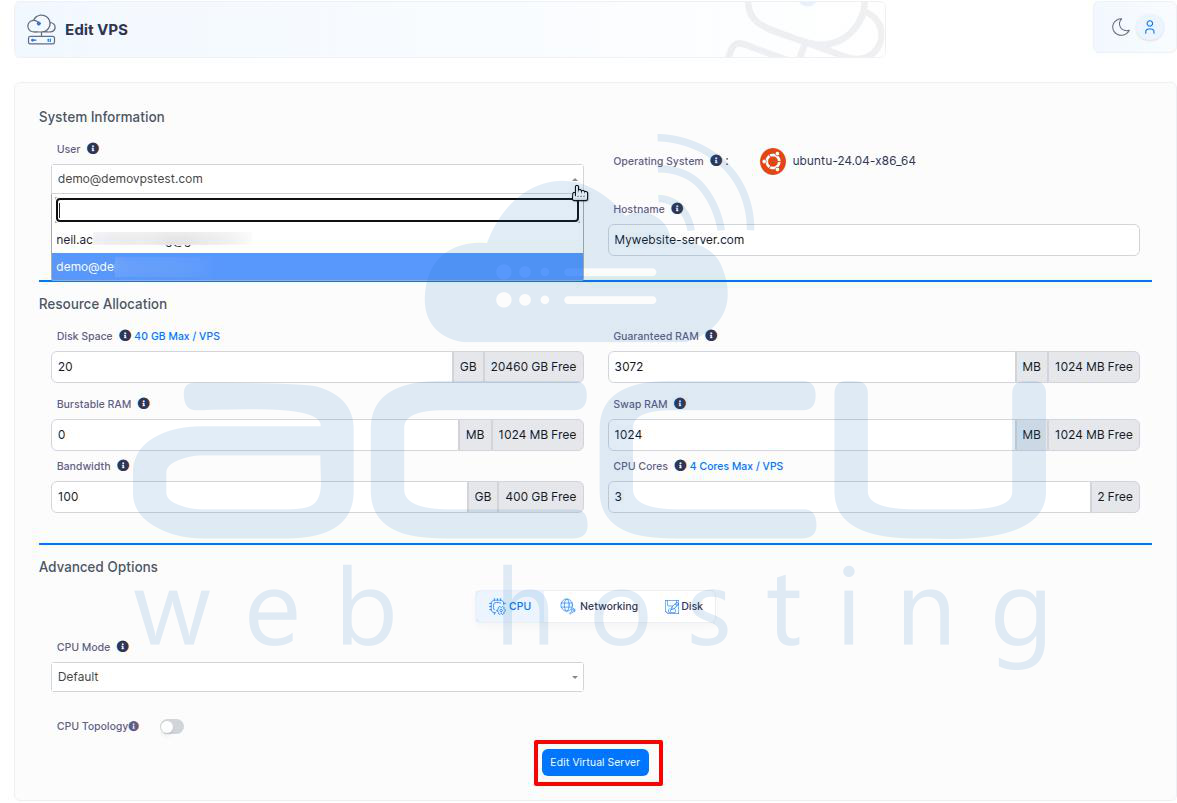
3. Save the Changes
Click on the Edit Virtual Server button at the bottom of the page to apply the changes.
After completing these steps, the VPS will be successfully transferred to the selected user account.
