How to Create a Reseller Account in Virtualizor?
Creating a reseller account in Virtualizor is a straightforward process.
Step 1: Log in to the Virtualizor Admin Panel.
Step 2: Navigate to Users > Add User
Once logged in, on the left sidebar, click on Users and then select Add User.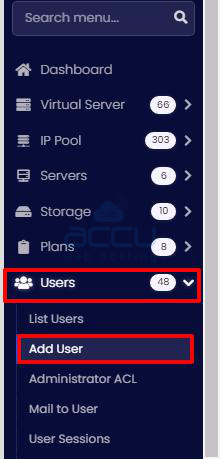
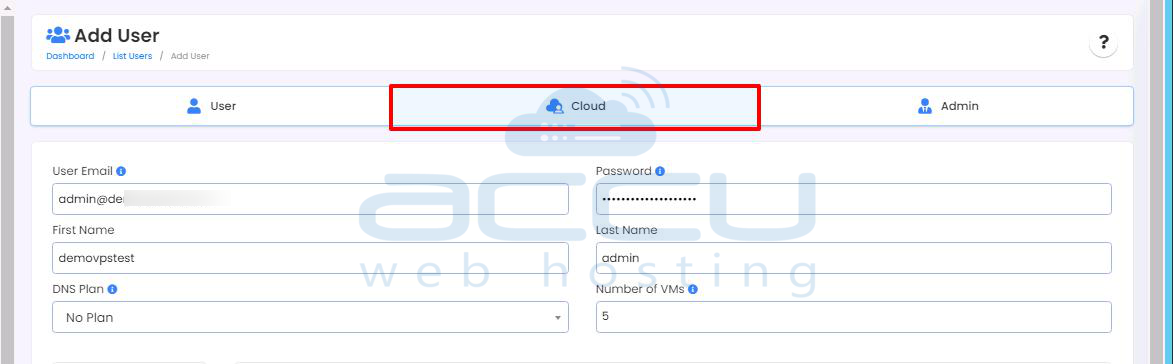
Step 3: Click on the Cloud Tab.
On the "Add User" page, you will see three tabs: User, Cloud, and Admin.
Click on the Cloud tab to configure the reseller account.
Step 4: Fill Out User Information
In the Cloud tab, fill in the following information for the reseller account:
-
User Email: Enter the email address of the reseller user.
-
Password: Set a password for the reseller user.
-
First Name: Enter the first name of the reseller user.
-
Last Name: Enter the last name of the reseller user.
-
DNS Plan: Leave this as No Plan.
-
Number of VMs: Set the maximum number of Virtual Machines (VMs) a reseller is allowed to create based on the reseller plan purchased by the client.
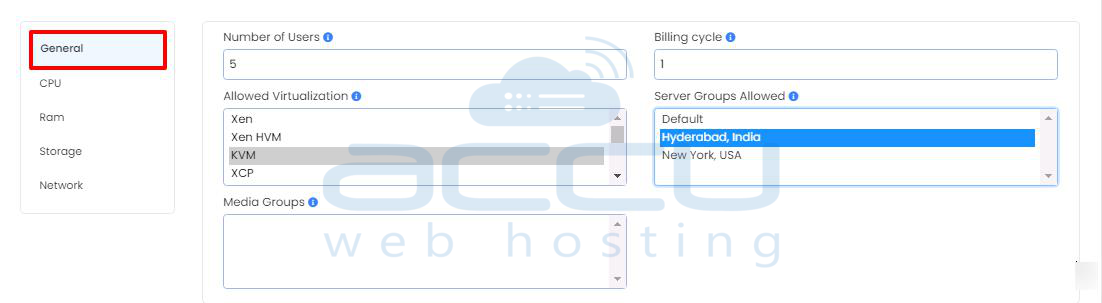
Step 5: General Configuration
Now, in the General section, configure the following:
-
Number of Users: Set this to the same value as the Number of VMs the reseller can create.
-
Billing Cycle: Set the billing cycle to 1.
-
Allowed Virtualization: Choose KVM.
-
Server Groups Allowed: Select the server location corresponding to where the client purchased the reseller plan (e.g., Hyderabad, India, or New York, USA).
-
Media Groups: This field is not required.
Step 6: CPU Configuration
In the CPU section, configure the following:
-
Default CPU Weight: Set to 1.
-
Max Cores / VPS: Set the number of virtual CPUs per instance as per the reseller plan the client purchased.
-
Default CPU % / Core: Set this to 100.
-
Total Cores: Specify the total number of CPU cores according to the reseller plan purchased by the client.

Step 7: RAM Configuration
In the RAM section, fill in the following details:
-
Max Ram: Set the maximum RAM based on the reseller plan purchased by the client.
-
Max Burst / Swap: Set to 4096 MB.

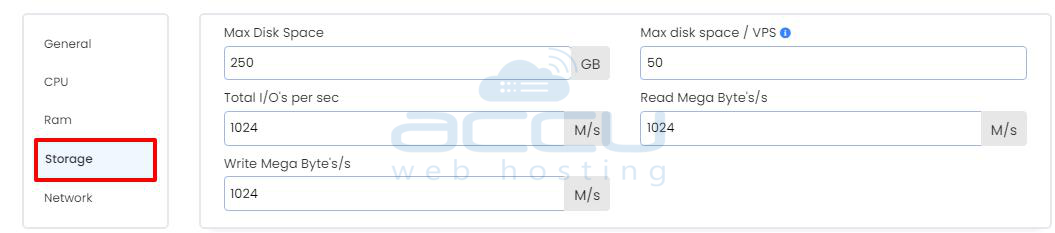
Step 8: Storage Configuration
Under the Storage section:
-
Max Disk Space: Set the total disk space according to the reseller plan purchased by the client.
-
Max disk space / VPS: Set the disk space allocated per VPS according to the reseller plan purchased by the client.
-
Total I/O's per sec: Set this to 1024.
-
Read Mega Byte's/s: Set to 1024.
-
Write Mega Byte's/s: Set to 1024.
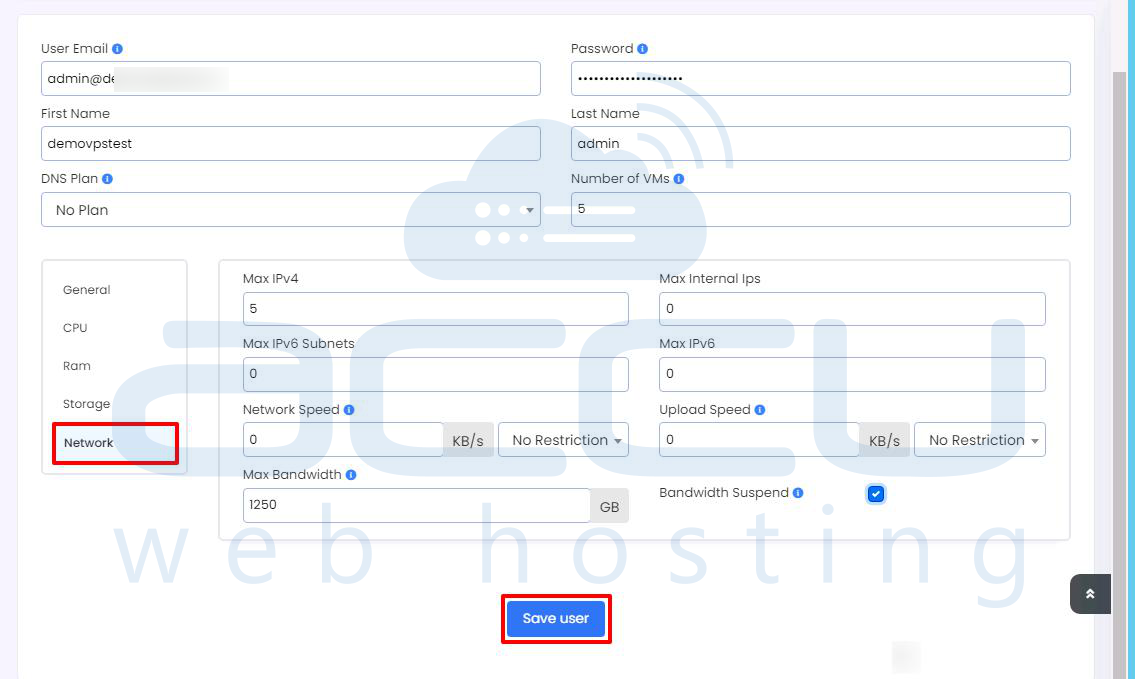
Step 9: Network Configuration
In the Network section, configure:
-
Max IPv4: Set this to the number of IPv4 addresses the reseller can use, according to the plan purchased by the client.
-
Max Internal Ips: Set to 0.
-
Max IPv6 Subnets: Set to 0.
-
Max IPv6: Set to 0.
-
Network Speed: Set to 0 (or configure as per the reseller plan).
-
Upload Speed: Set to 0 (or configure as per the plan).
-
Max Bandwidth: Set the bandwidth allocation as per the reseller plan purchased by the client.
-
Bandwidth Suspend: Check the box to suspend bandwidth when necessary.
Step 10: Verify Configuration
Ensure that all the configuration settings and resources match the reseller plan the client purchased.
Step 11: Save the Reseller Account
Once you have verified all the configurations, click on the Save user button at the bottom of the page to create the reseller account.
After creating the reseller account, log in to the account to verify the login details.
That's all. You have successfully created a reseller account in Virtualizor.
By following these steps, you will be able to successfully create a reseller account in Virtualizor. This will allow the reseller to manage their own Virtual Machines (VMs) based on the allocated resources as per their plan.
