Introduction
By default, Windows Server uses a self-signed certificate for Remote Desktop (RDP) connections, which can cause security warnings for users. Installing a trusted SSL certificate secures the connection and removes these warnings. The steps below show how to install and bind an SSL certificate to the RDP service.
Step 1: Import the SSL Certificate
1. Press Windows + R, type mmc, and press Enter.
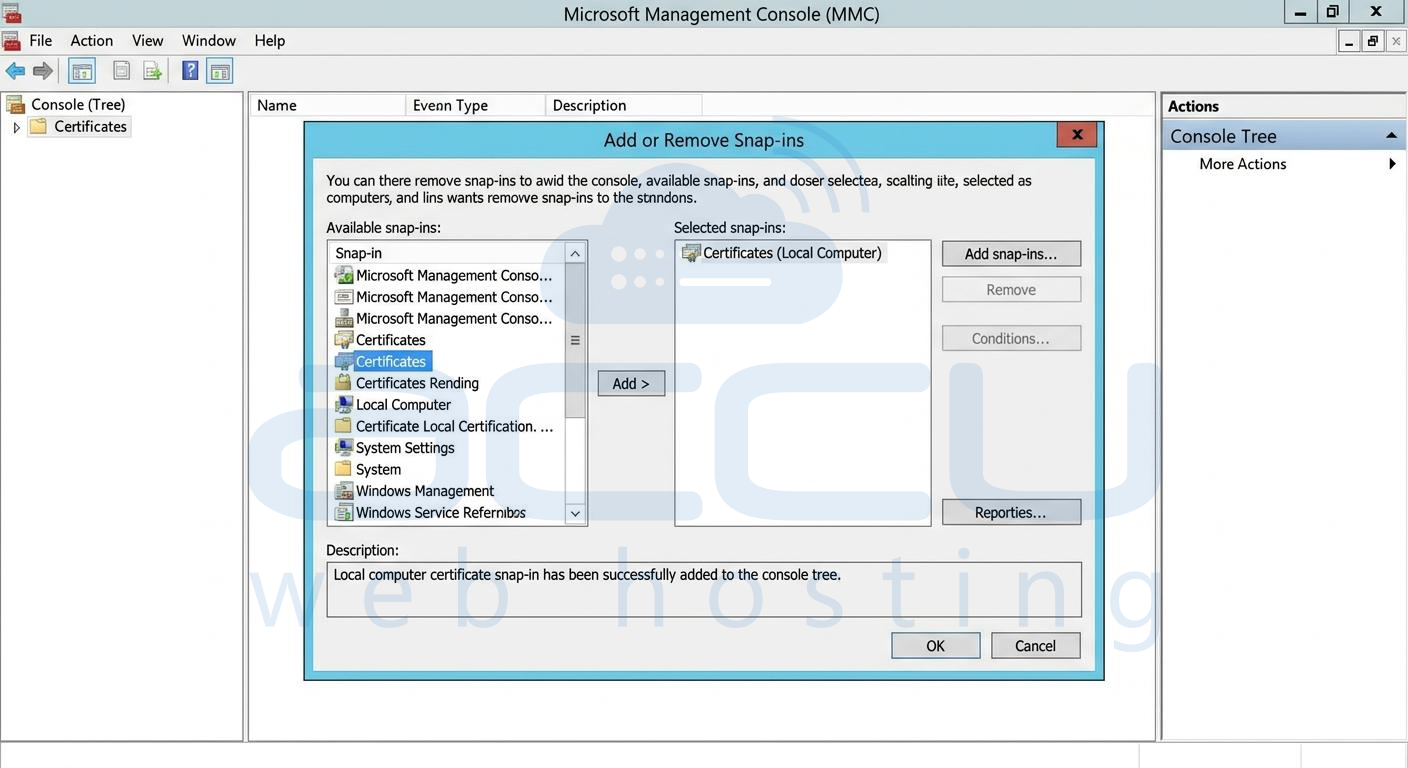
2. Click File → Add/Remove Snap-in.
3. Select Certificates and click Add.
4. Choose Computer account → Next → Local computer → Finish.
5. Click OK.
Step 2: Import the .PFX Certificate
1. Navigate to:
Certificates (Local Computer)
→ Personal
→ Certificates
2. Right-click Certificates.
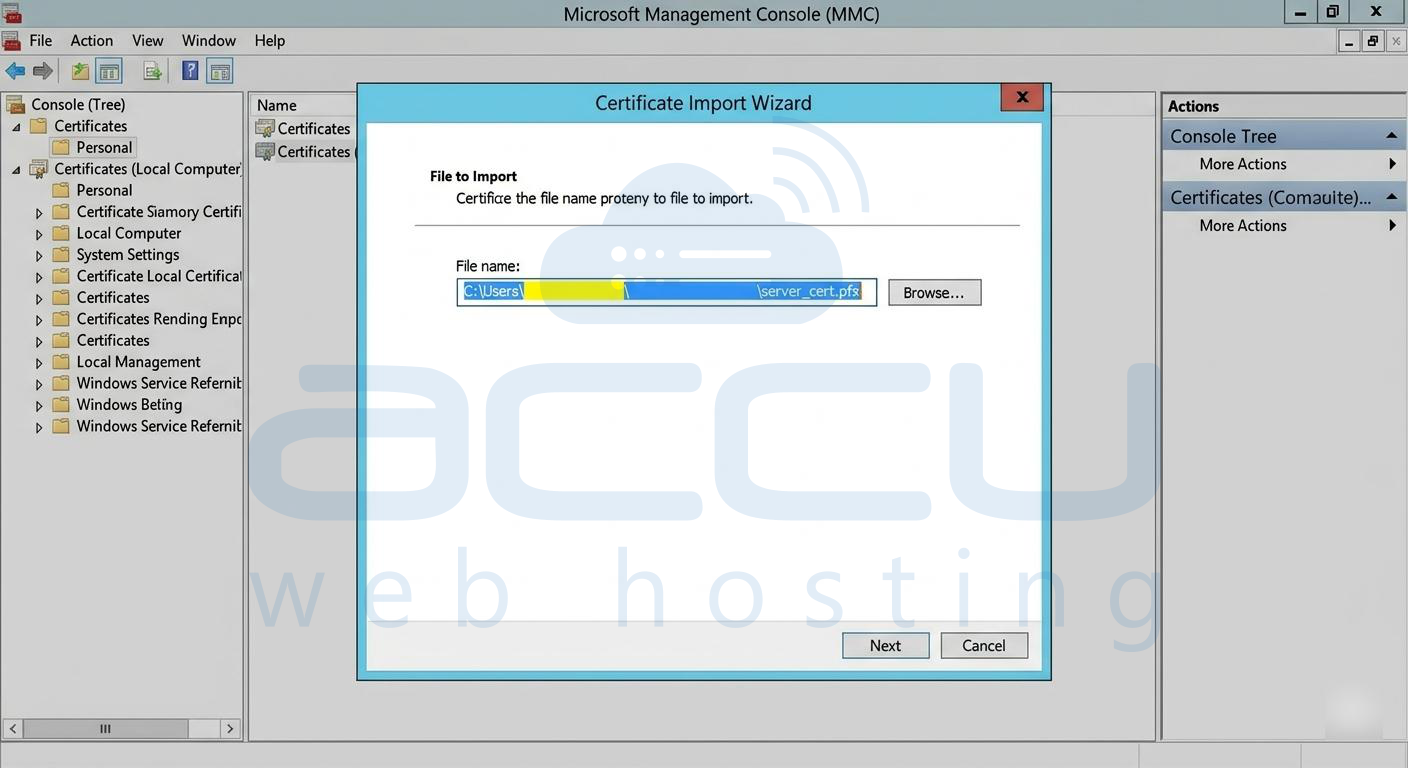
3. Select All Tasks → Import.
4. Browse and select the .pfx SSL certificate file.
5. Enter the certificate password if prompted.
6. Complete the Certificate Import Wizard.
Step 3: Copy the Certificate Thumbprint
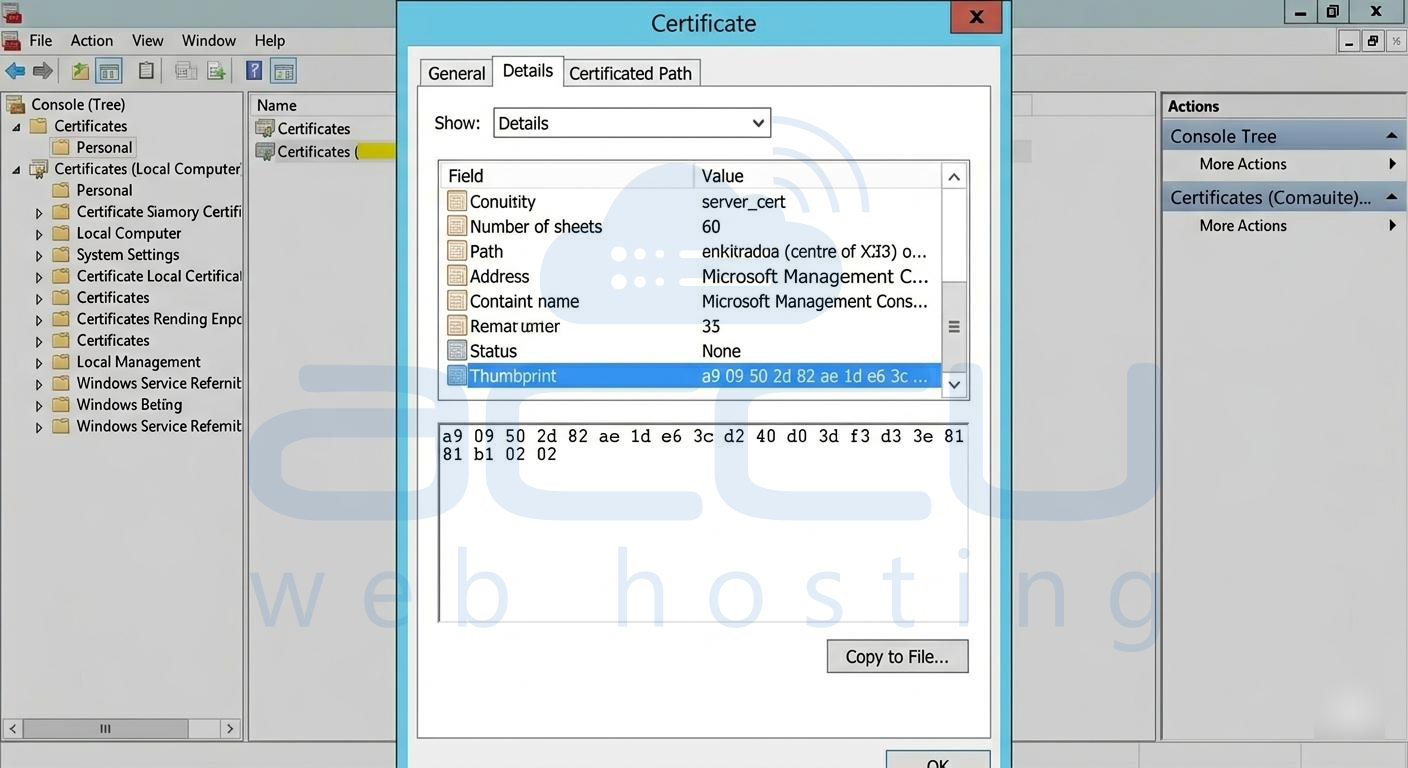
1. Double-click the imported certificate.
2. Go to the Details tab.
3. Locate Thumbprint.
4. Copy the thumbprint and remove all spaces.
Step 4: Bind the Certificate to RDP
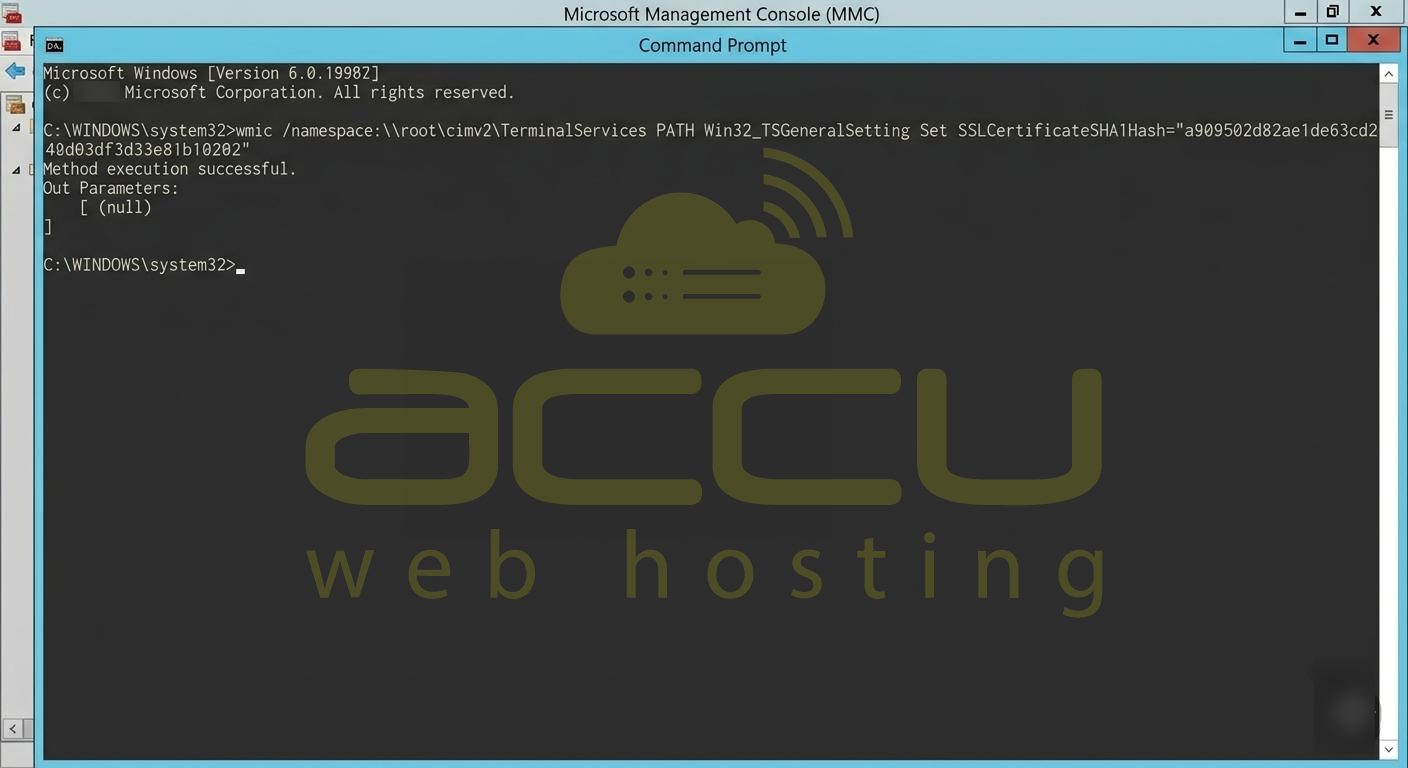
1. Open Command Prompt as Administrator.
2. Run the following command:
wmic /namespace:\\root\cimv2\TerminalServices PATH Win32_TSGeneralSetting Set SSLCertificateSHA1Hash="THUMBPRINT"
3. Replace THUMBPRINT with the copied certificate thumbprint.
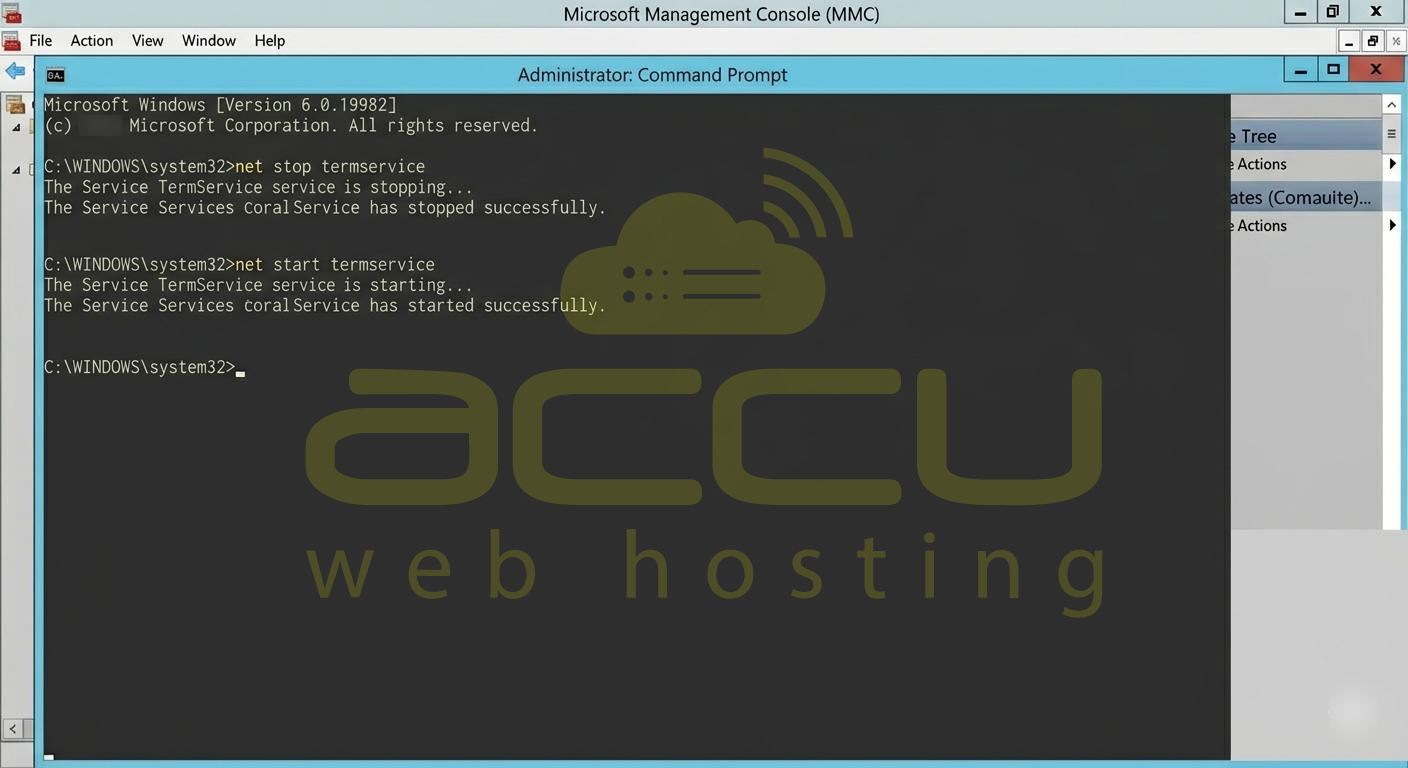
Step 5: Restart Remote Desktop Service
Run the following commands:
net stop termservice
net start termservice
Alternatively, restart the server.
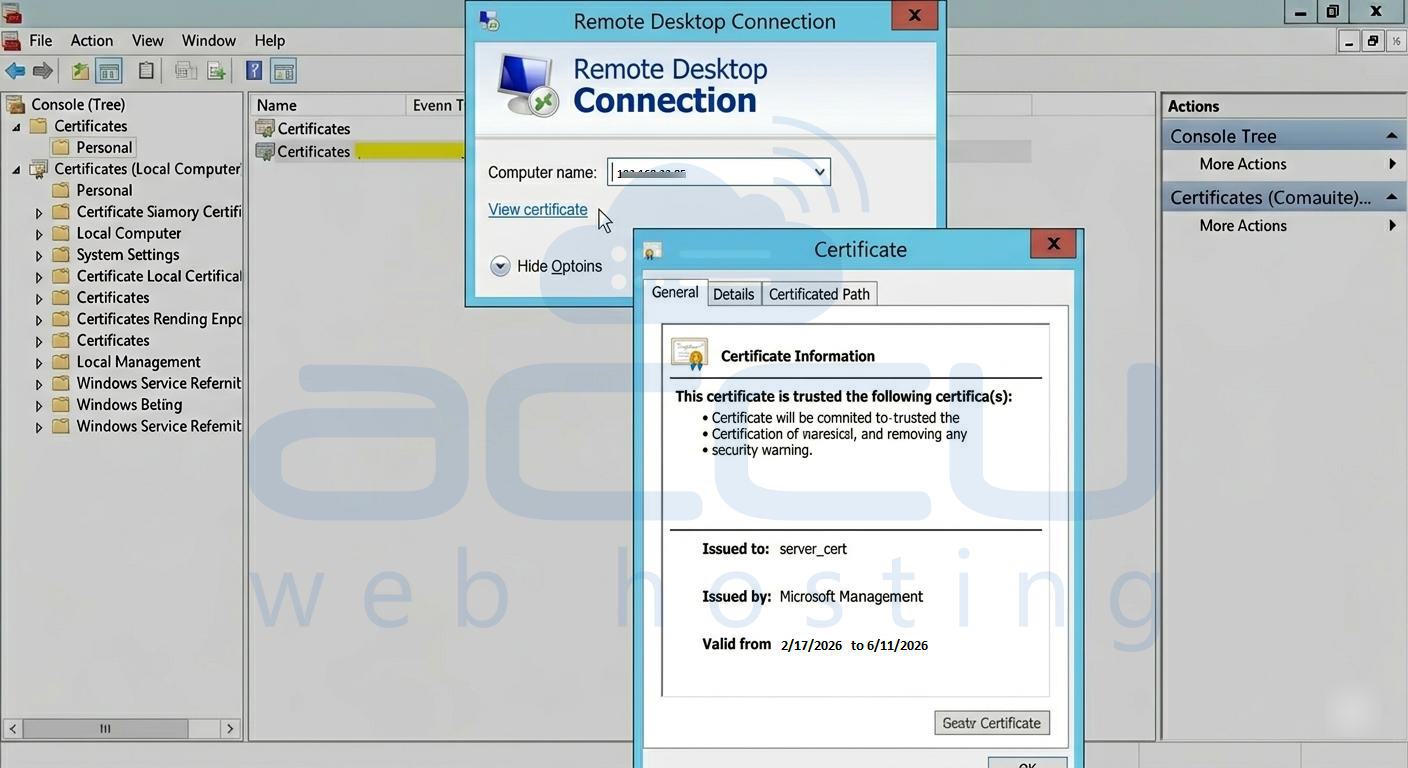
Step 6: Verify the Certificate
1. Open Remote Desktop Connection.
2. Connect to the server.
3. Check the certificate details to confirm the installed SSL certificate is being used.
Conclusion
Installing an SSL certificate for Remote Desktop ensures secure encrypted connections and removes browser or client security warnings. By importing the certificate and binding it to the RDP service, administrators can quickly secure remote access to their Windows Server.
