How to Create a VPS in Virtualizor Panel?
Step 1: Log in to the Virtualizor Panel
Log in to the Virtualizor panel using the login details you received.
Step 2: Open the Launch VPS Wizard
Click on the Launch VPS tab from the left sidebar. This will open the Launch VPS wizard.
Step 3: Select Your Server/Region
Choose the desired server/region for your VPS.
-
Hyderabad, India
-
New York, USA
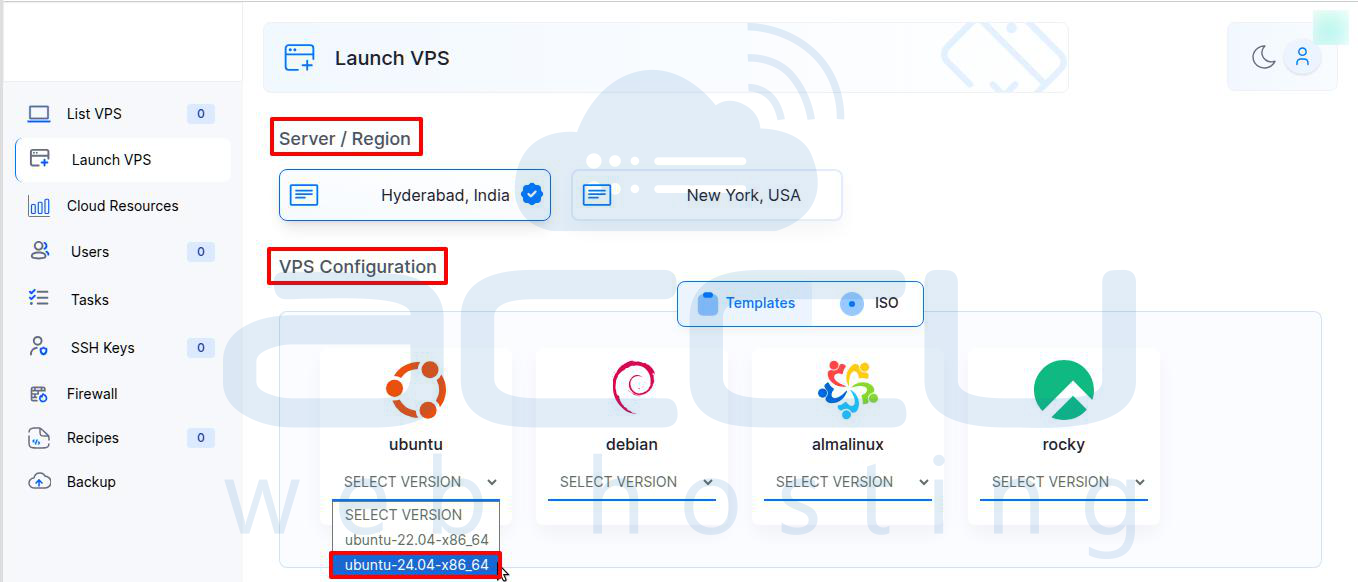
Step 4: Choose the Operating System
We support several Linux distributions and templates. In the VPS Configuration section, you'll see options for different operating systems, such as:
-
Ubuntu
-
Debian
-
AlmaLinux
-
Rocky Linux
Each of these operating systems has several versions available. Select the version that best fits your needs, such as the latest stable release.
Step 5: Configure Resource Allocation
Once you've selected your operating system, the next step is to allocate resources to your VPS.
Note: You cannot allocate or assign resources beyond the limits specified for the plan. The available limits are determined by the reseller plan.>
-
Disk Space: Allocate the maximum disk space per VPS as per your reseller plan. Adjust according to your requirements.
-
RAM: Specify the amount of RAM.
-
CPU Cores: Assign CPU cores for your VPS.
-
Swap RAM: Optionally, allocate swap RAM, which is additional memory used when physical RAM is full.
-
Bandwidth: Set the bandwidth you need for the VPS. Adjust it according to the expected traffic.
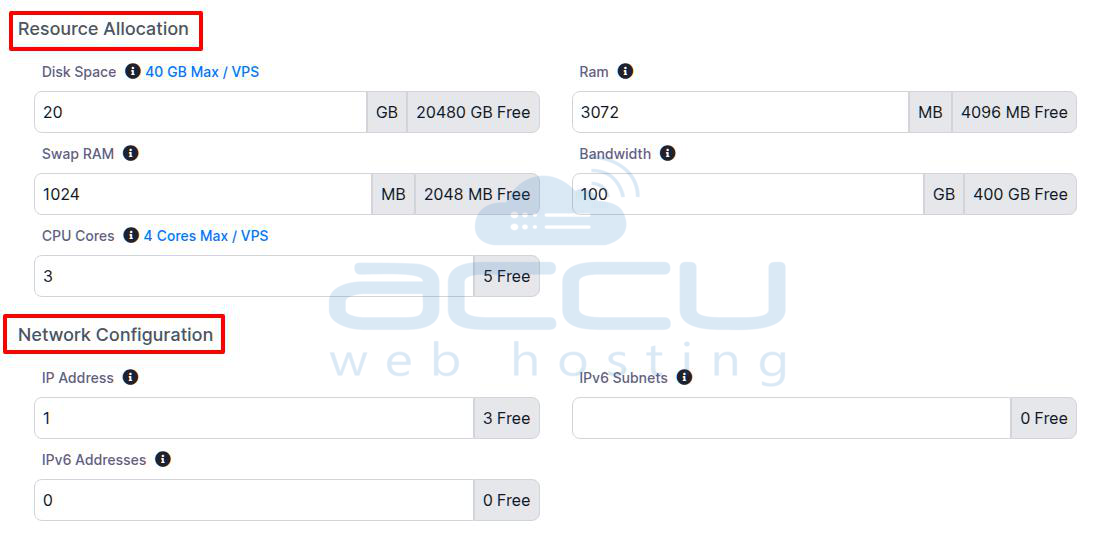
Step 6: Configure Networking Options
In this section, you can configure the networking options for your VPS.
-
IP Address: Choose the number of IP addresses required for your VPS.
-
IPv6 Addresses: Currently, we do not offer IPv6 addresses.
Step 7: Set Access Details
Next, set your access details.
-
VPS Count: Specify how many VPS instances you want to create.
-
Hostname: Provide a name for your VPS.
-
VNC: If needed, you can enable VNC for graphical remote access to your VPS.
-
VPS Root Password: Set a secure root password for your VPS.
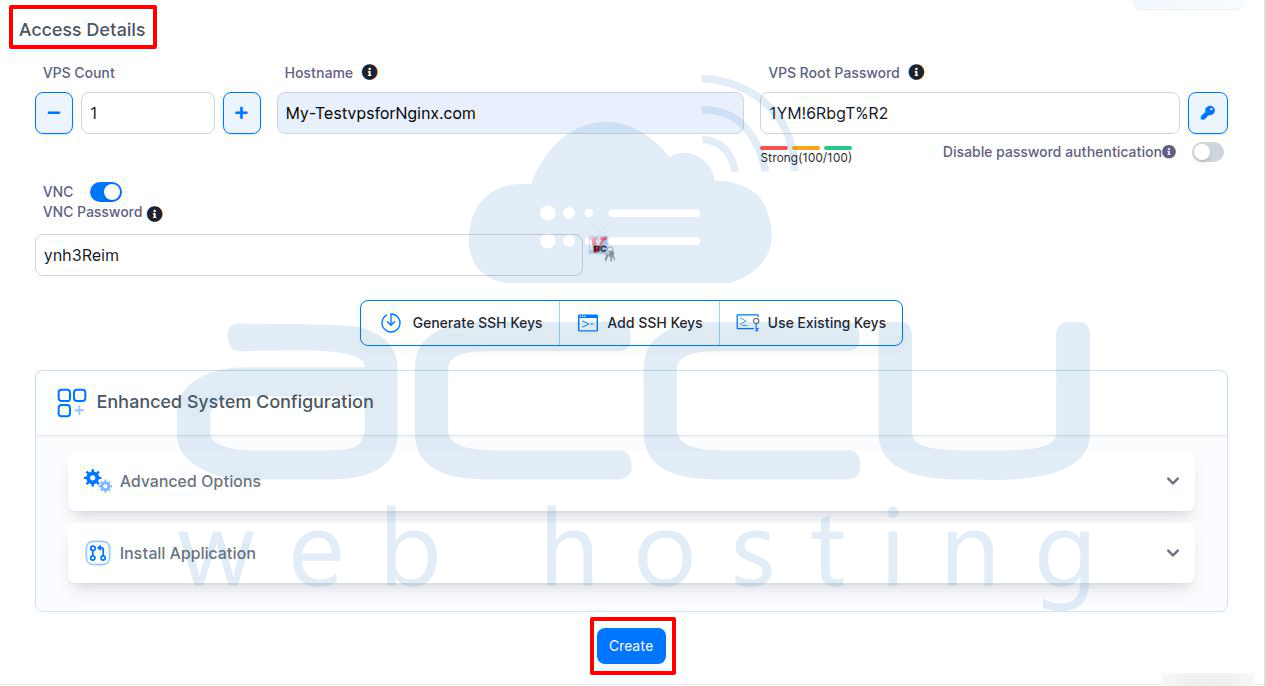
Important Options for SSH Access:
Disable Password Authentication: If you want to disable password authentication (for better security), this option will prevent anyone from logging into your VPS using the root password. Only SSH key authentication will be allowed.
Highly recommended security measure for production environments.
Generate SSH Keys (Optional):
This option allows you to generate new SSH keys directly within Virtualizor. These keys will be used for secure access to your VPS. SSH key authentication is more secure than traditional password-based login.
Add SSH Keys (Optional):
If you already have SSH keys you wish to use, you can add existing SSH keys. You can paste the public key here, and Virtualizor will associate it with your VPS for secure access.
Use Existing Keys (Optional):
If you have pre-generated SSH keys, you can use existing keys by selecting them from the list of keys associated with your account.
Step 8: Finalize and Create VPS
Once you have reviewed all configurations, click the Create button. Virtualizor will initiate the process and set up the VPS with the resources and configurations.

In just a few moments, your server will be created with the selected configuration.
You can then navigate to the List VPS tab, where you'll find your newly created VPS and be able to manage it.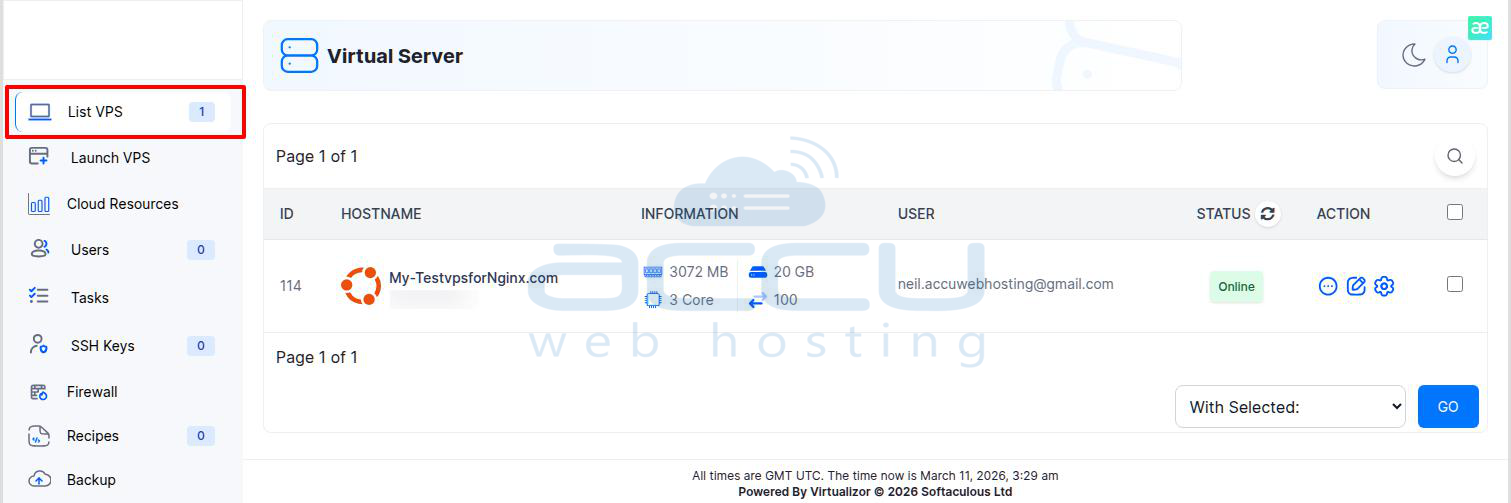
Conclusion:
Creating a VPS in Virtualizor is simple and efficient. By following these steps, you can customize your VPS with the right operating system, resources, and security settings.
