The DNS_PROBE_FINISHED_NXDOMAIN error appears when a browser cannot resolve a domain name into its corresponding IP address. In simple technical terms, the Domain Name System (DNS) lookup process failed, and the domain was reported as non-existent. Because DNS resolution is a fundamental layer of internet communication, any failure at this stage prevents the browser from establishing a connection to the hosting server. Understanding the technical meaning of this error and applying structured troubleshooting methods ensures accurate diagnosis and efficient resolution.
DNS_PROBE_FINISHED_NXDOMAIN Explained
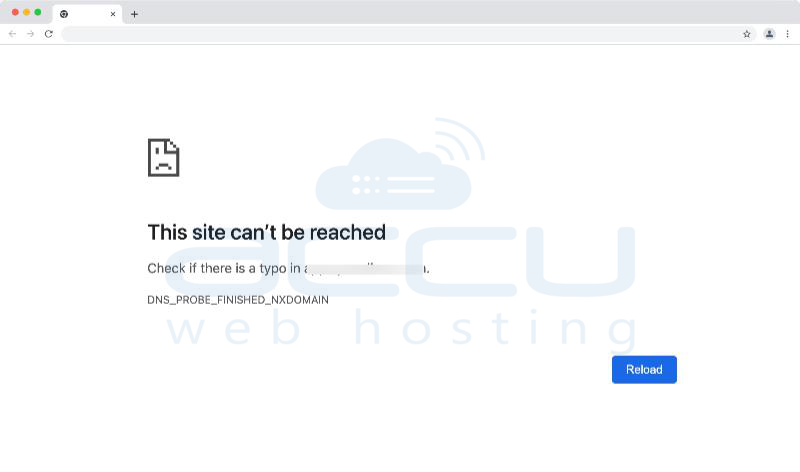
The term NXDOMAIN stands for “Non-Existent Domain.” It is an official DNS response code returned by a DNS server when the requested domain name cannot be found in the DNS system. When this occurs, the browser displays DNS_PROBE_FINISHED_NXDOMAIN, indicating that the DNS probing process completed but failed to locate the domain.
What Causes This Error?
The DNS_PROBE_FINISHED_NXDOMAIN error may originate from client-side configuration issues, network-level interruptions, ISP DNS problems, or domain-related misconfiguration.
On the client side, corrupted DNS cache entries can cause outdated records to be used during lookup. Incorrect IP configuration settings, modified hosts files, VPN interference, firewall restrictions, and browser experimental settings may also disrupt DNS queries. Identifying the root cause requires systematic testing rather than random adjustments.
How to Fix the DNS_PROBE_FINISHED_NXDOMAIN Error?
Below is a complete step-by-step technical resolution guide written in continuous detailed instructions for clarity.
1. Flush the DNS Cache
DNS cache stores previously resolved domain records locally. If these cached entries are outdated or corrupted, resolution fails even if the domain is correctly configured.
Flush the DNS Cache on Windows OS
On Windows, open the Start menu and search for Command Prompt. Right-click on it and select the option to run as Administrator.
Once the elevated command window opens, type ipconfig /flushdns and press Enter.
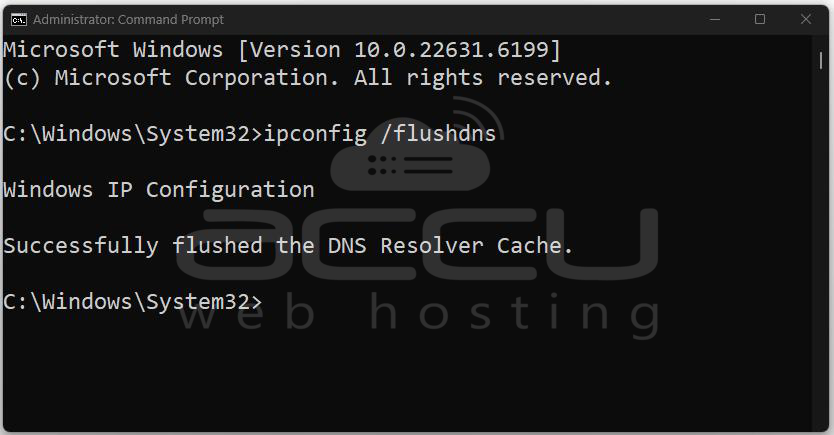
The system will display a confirmation message indicating that the DNS Resolver Cache has been successfully flushed. After completing this step, close the command window and restart your browser before testing the website again.
Flush the DNS Cache on macOS
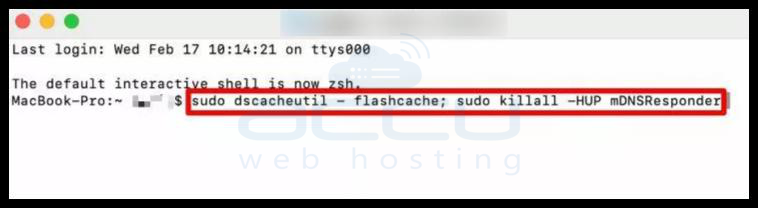
On macOS, open the Terminal application. Enter the command sudo dscacheutil -flushcache; sudo killall -HUP mDNSResponder and press the Return key. You will be prompted to enter your system password. After authentication, the DNS cache will be cleared. Restart your browser and verify whether the issue persists.
Flush the DNS Cache on Google Chrome
In Google Chrome, DNS caching also occurs internally within the browser. To clear this cache, open Chrome and type chrome://net-internals/#dns into the address bar. On the page that appears, click the “Clear host cache” button. Close and reopen Chrome to ensure the internal DNS cache is reset.

2. Verify Whether the Problem Is Local
Before proceeding with advanced troubleshooting, confirm whether the issue is limited to your device. Attempt to access the website using a different device connected to the same network. Then test again using mobile data instead of Wi-Fi. You may also try accessing the website through a VPN or online proxy service. If the website loads successfully elsewhere, the problem is isolated to your local configuration. If it fails across all environments, the issue likely lies with the domain or hosting configuration.
3. Release and Renew IP Address (Windows)
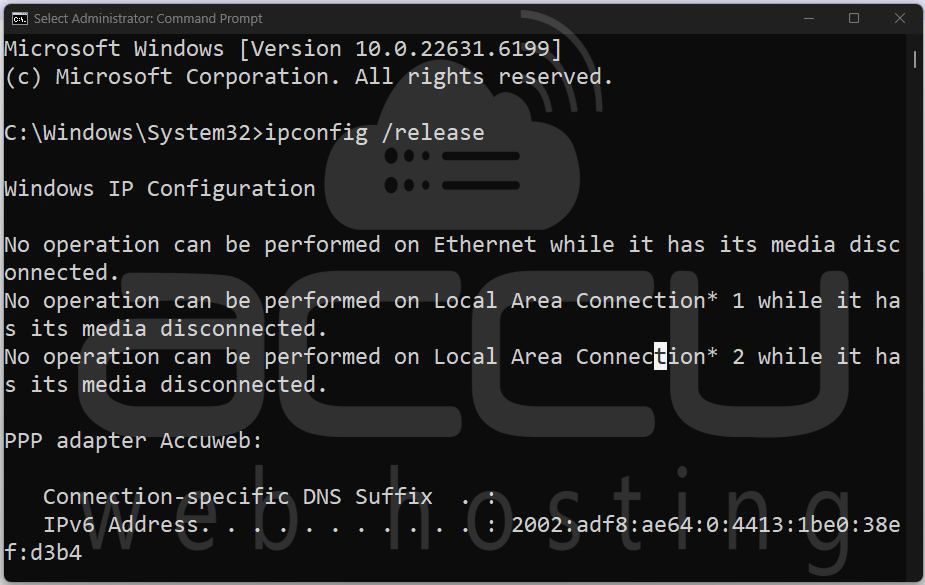
IP configuration errors may prevent proper DNS communication. To refresh your IP settings, open Command Prompt as Administrator and type ipconfig /release followed by pressing Enter. After the release process completes, type ipconfig /renew and press Enter again. This sequence forces the system to obtain a new IP address from the DHCP server. Restart the computer and test the website again.
4. Change DNS Servers
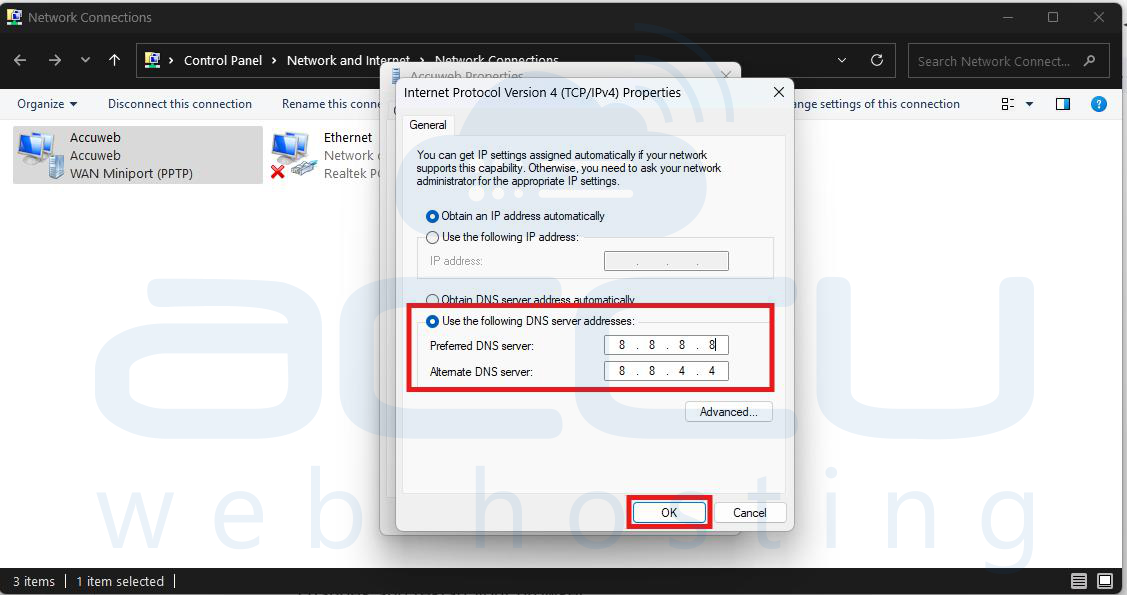
If your Internet Service Provider’s DNS servers are unresponsive or misconfigured, switching to a public DNS service often resolves the issue. Reliable public DNS servers include Google DNS at 8.8.8.8 and 8.8.4.4, and Cloudflare DNS at 1.1.1.1 and 1.0.0.1.
Change DNS Servers on Windows OS
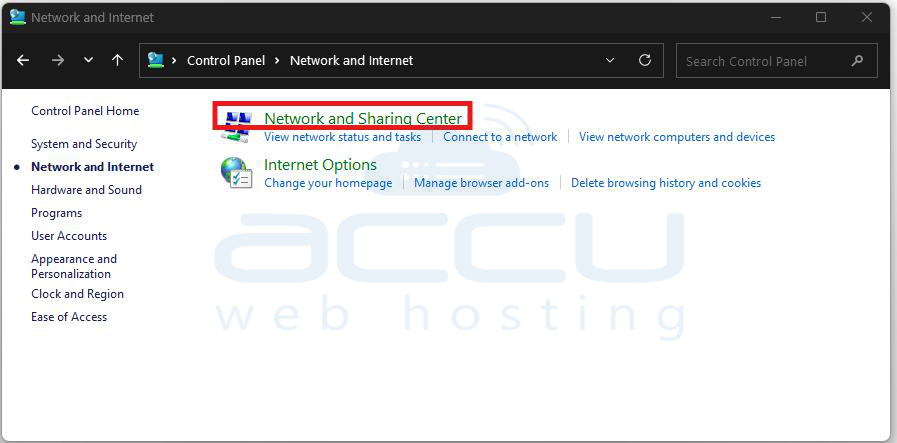
On Windows, open the Control Panel and navigate to Network and Internet, then select Network and Sharing Center. Click on Change Adapter Settings.
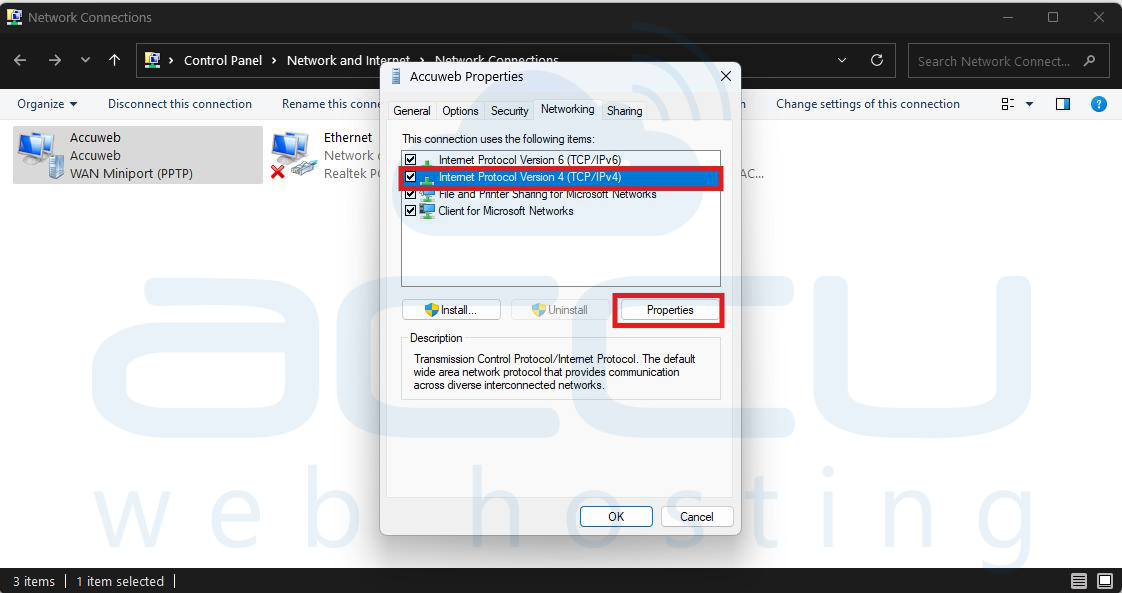
Right-click your active network connection, and select Properties. Choose Internet Protocol Version 4 (TCP/IPv4), then click Properties.
Select the option to use the following DNS server addresses and manually enter the preferred and alternate DNS values. Save the changes and restart your browser.
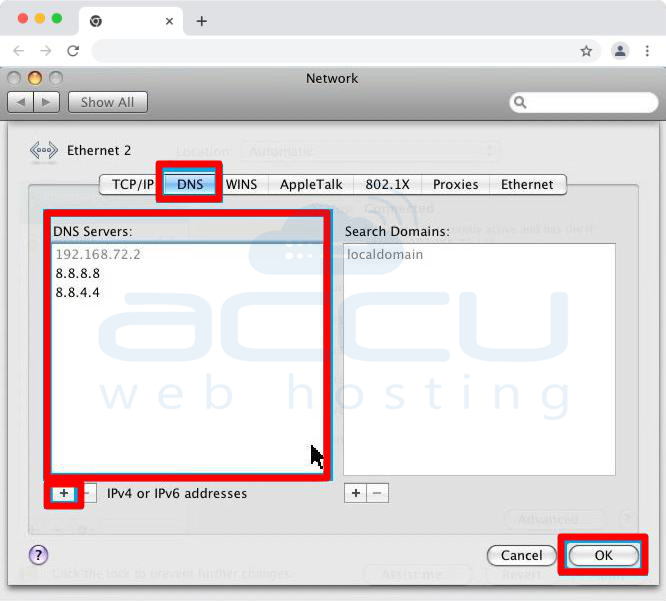
Change DNS Servers on macOS
On macOS, open System Settings and go to Network. Select your active connection and click Advanced. Open the DNS tab and add the new DNS server addresses. Apply the changes and restart your browser.
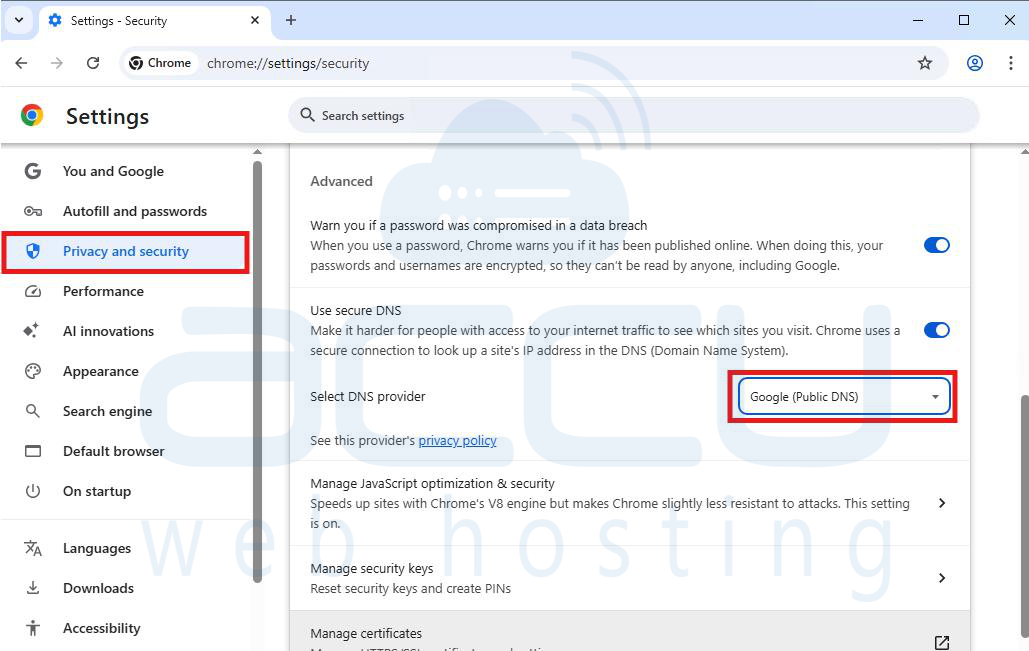
Change DNS Servers on Google Chrome
Within Google Chrome, secure DNS settings can be modified by navigating to chrome://settings/security. Under the Advanced section, enable custom DNS and choose a preferred provider.
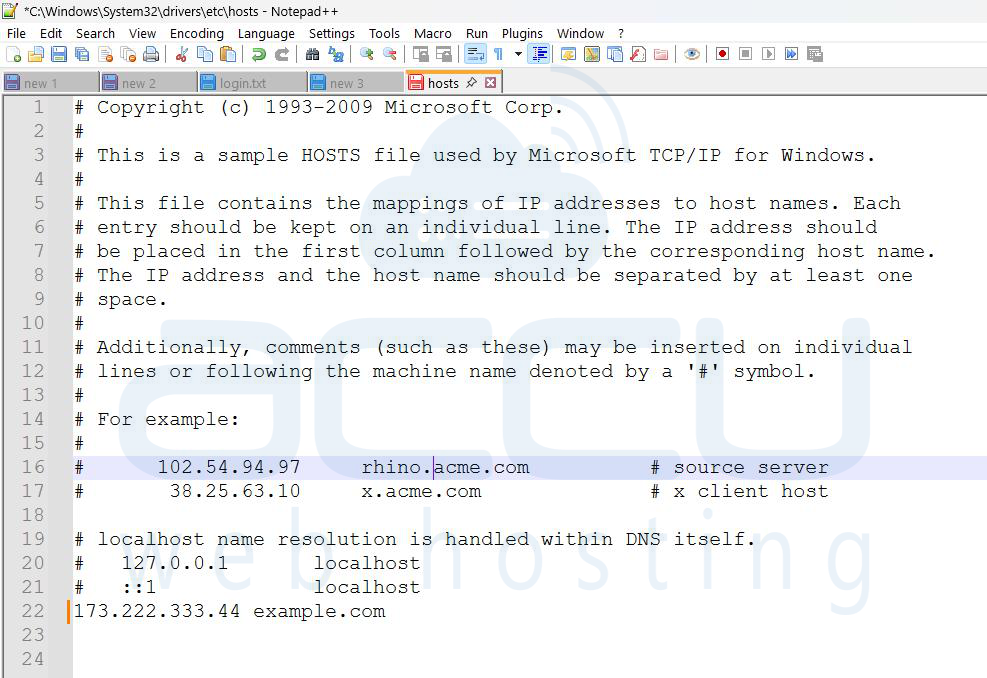
5. Check the Local Hosts File
The hosts file allows manual mapping of domain names to IP addresses. If a domain is incorrectly listed in this file, DNS resolution will fail.
On Windows, navigate to C:\Windows\System32\drivers\etc\hosts and open the file using Notepad with administrative privileges. Review the file for any entries referencing the affected domain. If found, delete the line, save the file, and restart the browser.
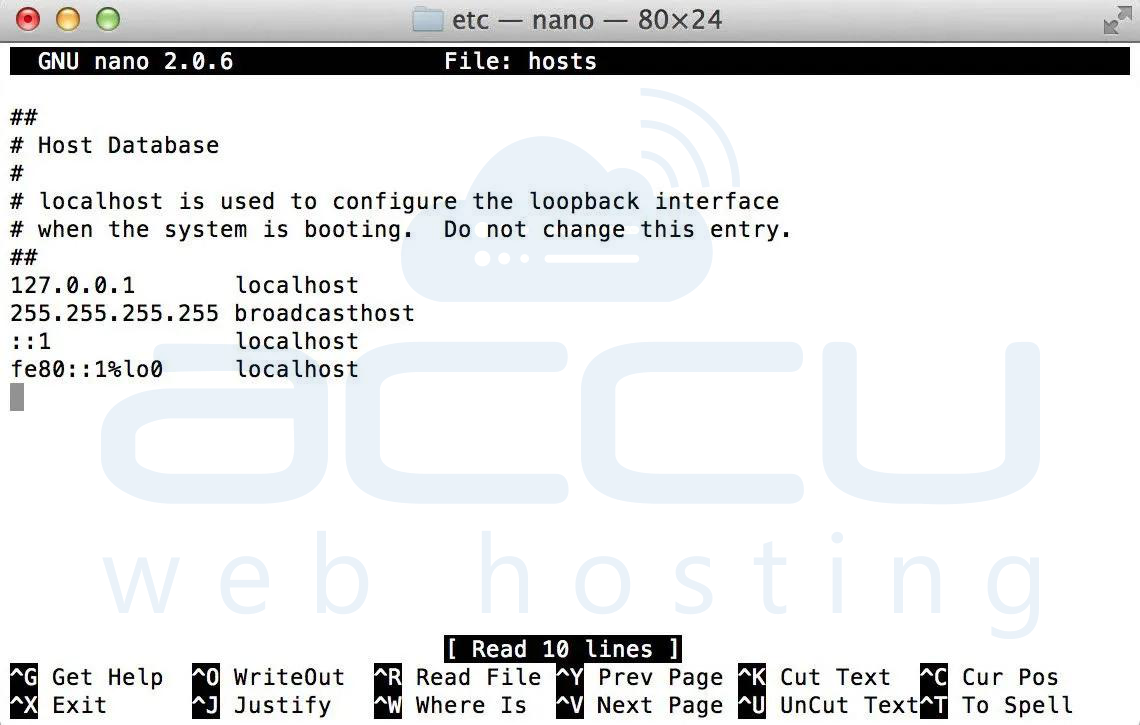
On macOS, open Terminal and type sudo nano /private/etc/hosts. Locate any lines that reference the domain and remove them. Save the changes and restart your browser.
6. Disable VPN or Antivirus Software Temporarily
VPN applications and antivirus programs often intercept DNS traffic or route queries through custom resolvers. Temporarily disable your VPN connection and security software, then attempt to load the website again. If the site becomes accessible, review the DNS filtering or firewall settings within the software configuration.

7. Restart Router and Modem
Routers maintain DNS and network routing tables. Temporary firmware glitches may interrupt DNS resolution. Power off both the modem and router. Wait at least thirty seconds before turning the modem back on. Once the modem reconnects fully to the ISP, power on the router. After network connectivity stabilizes, test the website again.

8. Restart DNS Client Service (Windows)
The DNS Client service handles DNS caching and resolution. Restarting it may resolve internal conflicts. Open Command Prompt as Administrator and enter net stop dnscache, then press Enter. After the service stops, type net start dnscache and press Enter again. Restart your system and test the connection.

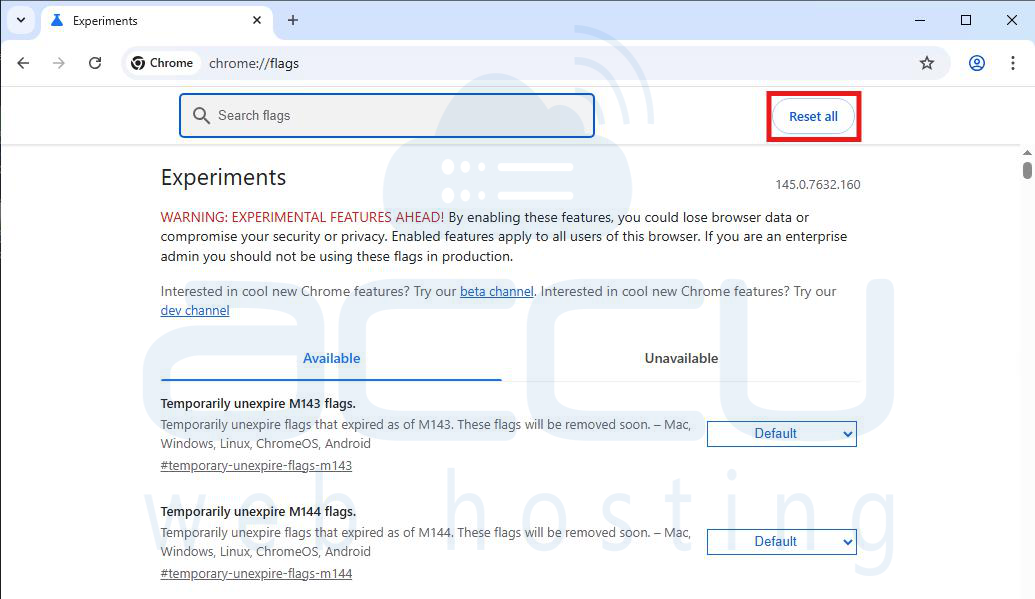
9. Reset Chrome Flags
Experimental browser features can interfere with DNS behavior. Open Chrome and type chrome://flags in the address bar. Click the Reset All button at the top of the page. Close and reopen the browser to apply default settings.
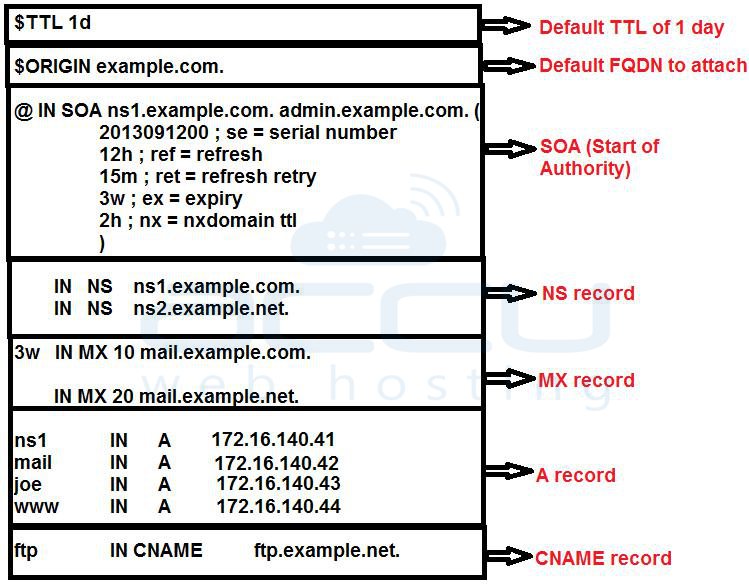
10. Verify DNS Records (For Domain Owners)
If you manage the website, confirm that the DNS zone configuration is correct. Ensure that the A record points to the correct server IP address. Verify that nameservers are properly assigned and match your hosting provider’s configuration. Confirm that the domain has not expired and that DNS propagation has completed if changes were recently made. Incorrect DNS records are one of the most common causes of NXDOMAIN errors on live websites.
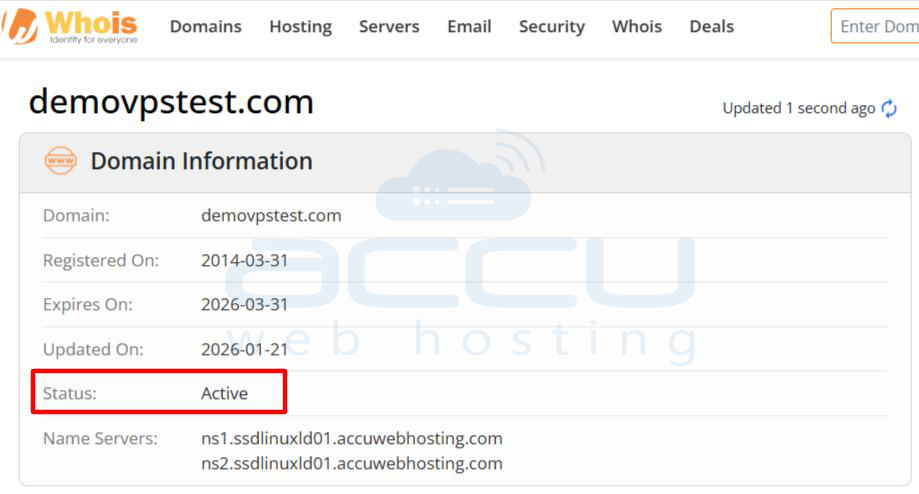
11. Confirm Domain Status
Log into your domain registrar dashboard and verify that the domain is active. Domains may become inactive due to expiration, billing issues, or registrar suspension. Ensure that automatic renewal is enabled and that WHOIS verification requirements are fulfilled.
12. Contact Your Internet Service Provider
If all troubleshooting steps fail and the domain is confirmed to be active and correctly configured, contact your ISP to verify whether their DNS infrastructure is experiencing outages or filtering issues.
Conclusion
The DNS_PROBE_FINISHED_NXDOMAIN error indicates a DNS resolution failure where the domain name cannot be translated into an IP address. The root cause may lie within local system configuration, network hardware, ISP DNS services, or domain-level misconfiguration.
Systematic troubleshooting beginning with local cache clearing and progressing toward DNS record verification, ensures accurate identification of the problem source. In most scenarios, flushing DNS cache, changing DNS servers, restarting network equipment, or correcting DNS records resolves the issue effectively.
