Install Let’s Encrypt SSL on an RDP Server and Connect Using a Hostname
Securing Remote Desktop Protocol (RDP) with a trusted SSL/TLS certificate is essential for modern infrastructure. By default, Windows Server uses a self-signed certificate for RDP connections. While functional, self-signed certificates trigger security warnings and reduce user trust. More importantly, they do not provide public trust validation.
Using a trusted certificate from Let’s Encrypt eliminates warning messages, encrypts credentials securely, and ensures identity validation when connecting through a hostname. This guide explains how to install a Let’s Encrypt SSL certificate on a Windows RDP server and configure access using the hostname.
Prerequisites
Before starting, confirm the following:
- A Windows Server with Remote Desktop Services enabled
- Administrator access to the server
- Public DNS record pointing to the server IP
- Port 3389 open in firewall (or custom RDP port)
- Port 80 open temporarily for Let’s Encrypt validation
Port 80 is required for HTTP validation during certificate issuance. It can remain open or be restricted after successful installation.
Steps to Install Let’s Encrypt SSL on an RDP Server and Connect Using a Hostname
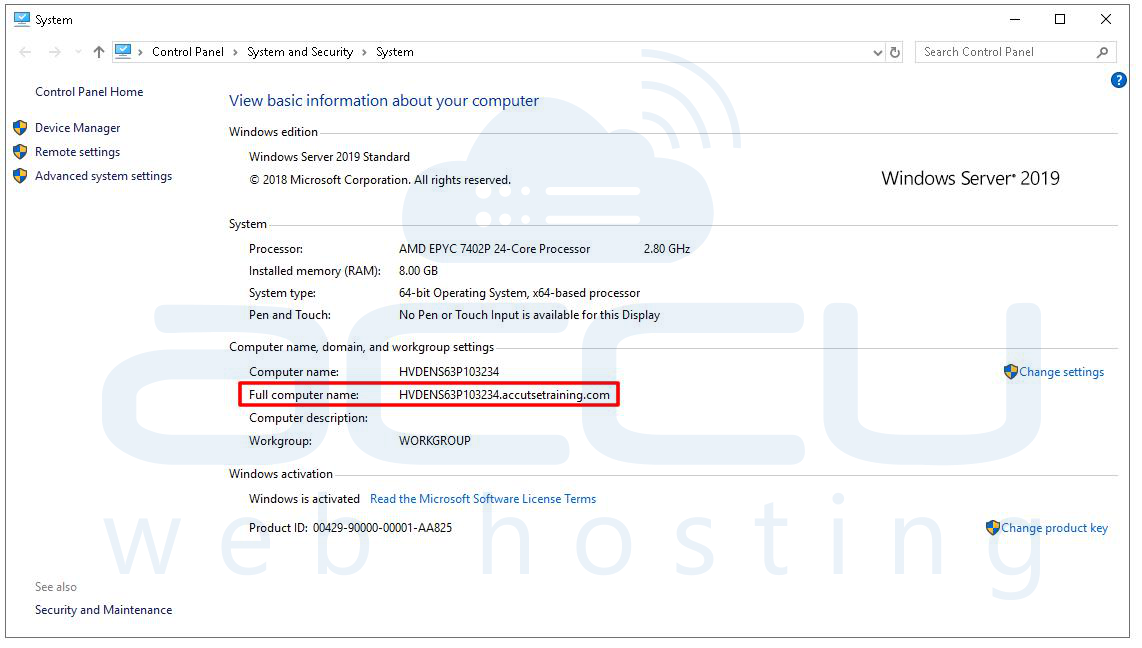
Step 1: Check Server Host Name. Open File Explorer. Right-click on this PC. Select Properties. Under Device name, you will see the full computer name. It is your server host name.
This name helps confirm system identity but should not be confused with the public DNS hostname. Your public hostname must match the DNS A record you will create in the next step.
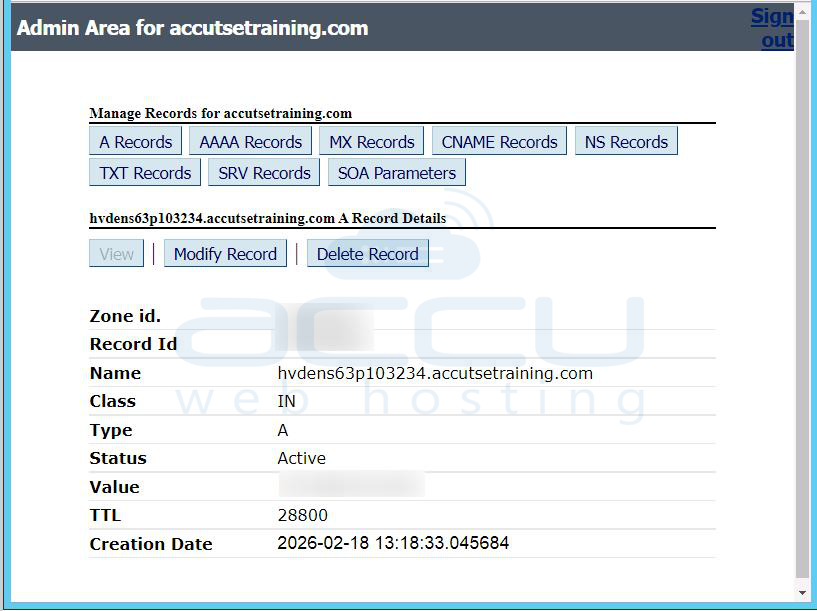
Step 2: DNS Configuration. Create an A record in your DNS manager.
Type: A
Hostname: Server hostname like, hvdens63p103234.accutsetraining.com
Points To: Your Public Server IP
Ensure the hostname resolves publicly to the correct external IP address of your server.
Important technical note:
- The hostname used in the SSL certificate must exactly match this DNS record.
- Any mismatch will cause certificate validation errors.
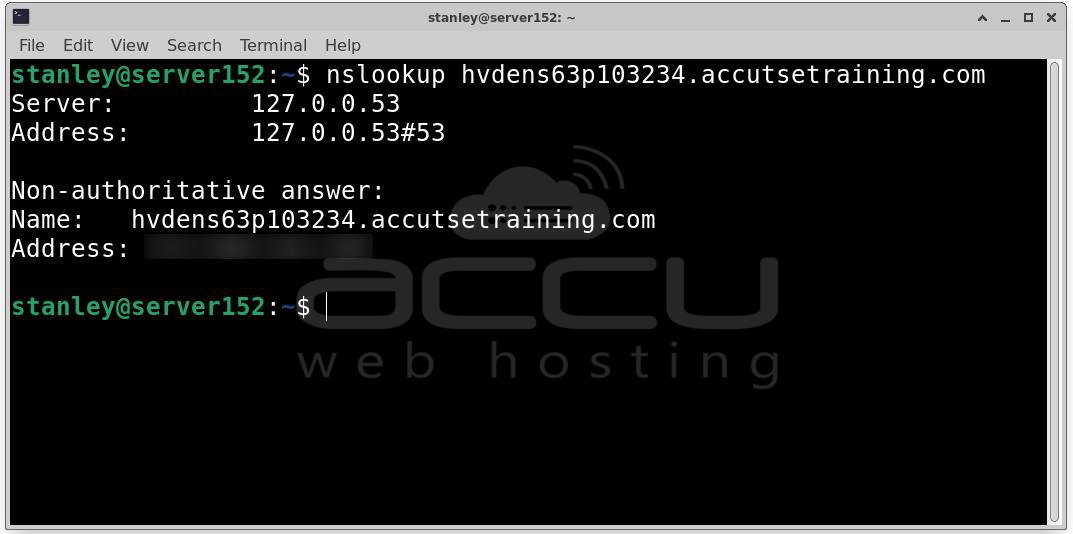
Step 3: Verify DNS Propagation. After creating the A record, verify resolution.
Run: nslookup server_hostname
Example: nslookup hvdens63p103234.accutsetraining.com
DNS Records may take some time to propogate.
Expected result:
- The hostname resolves to your public server IP.
- No NXDOMAIN or resolution errors appear.
If DNS does not resolve correctly, certificate validation will fail.
Step 4: Install Let’s Encrypt Client (Win-ACME). Windows does not natively support Let’s Encrypt, so use Win-ACME.
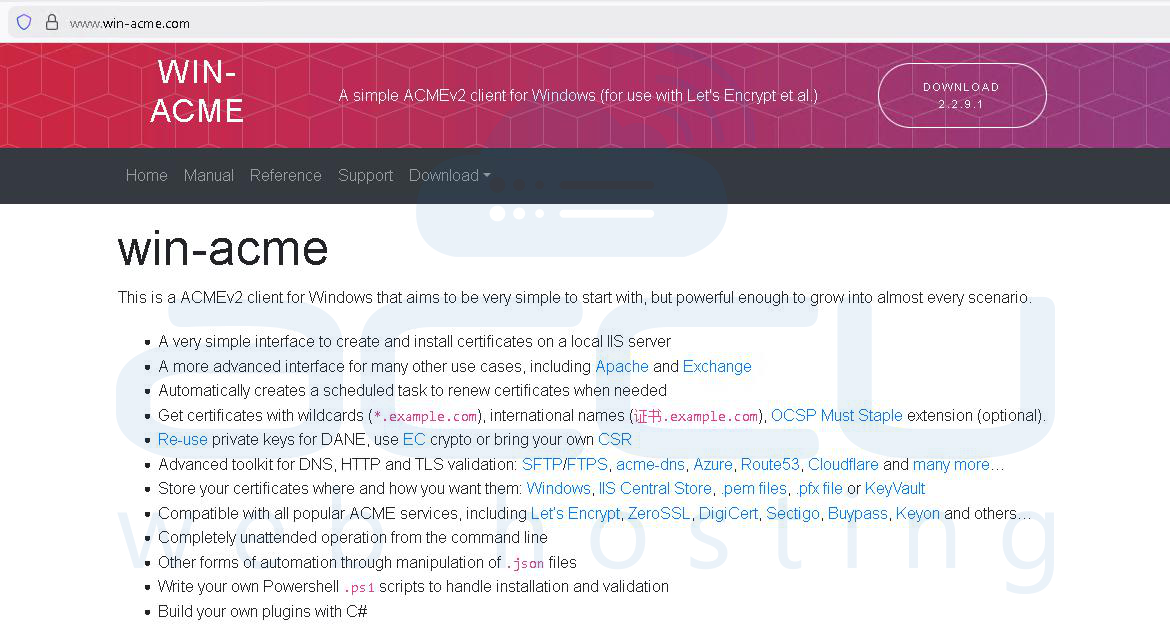
Download Win-ACME: Website: https://www.win-acme.com/
Win-ACME is a Windows ACME client that automates Certificate generation, Validation, Installation and Renewal scheduling.
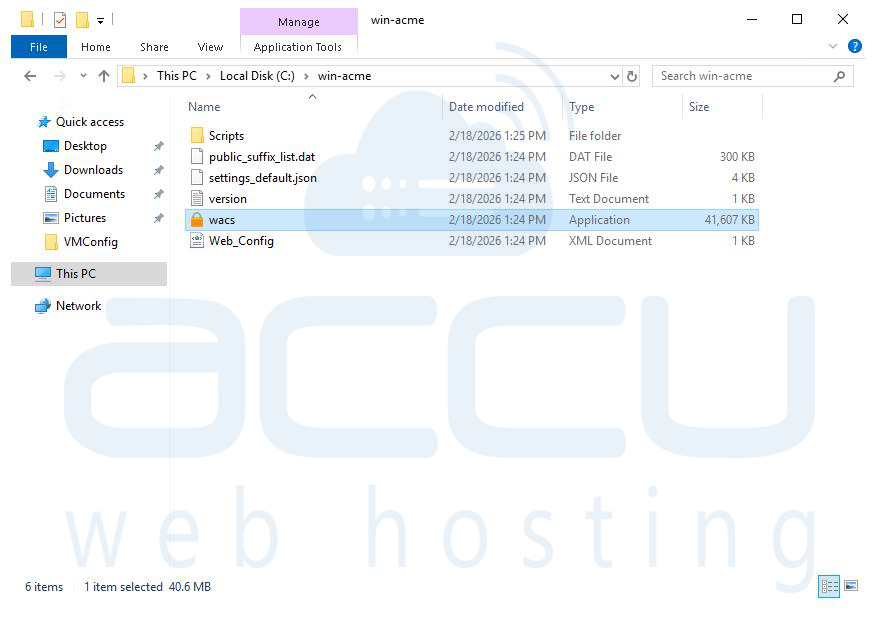
Step 5: Download and Extract. Download the latest release.
Extract to: C:\win-acme
This ensures easy access and administrative control.
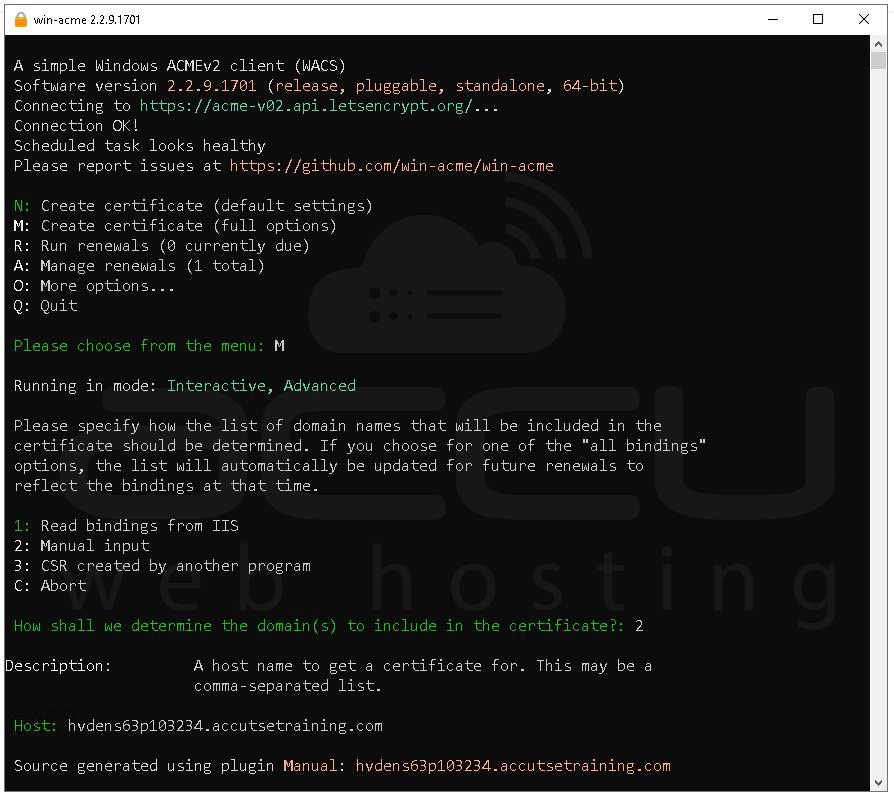
Step 6: Run Win-ACME. Navigate to: C:\win-acme and run wacs.exe The interactive menu will appear.
Step 7: Generate Let’s Encrypt SSL Certificate. Inside win-acme:
How shall we determine the domain(s) to include in the certificate?
Select: M → Create certificate (full options)
Choose: 2 → Manual input
Enter hostname: Enter your server hostname. Like, hvdens63p103234.accutsetraining.com
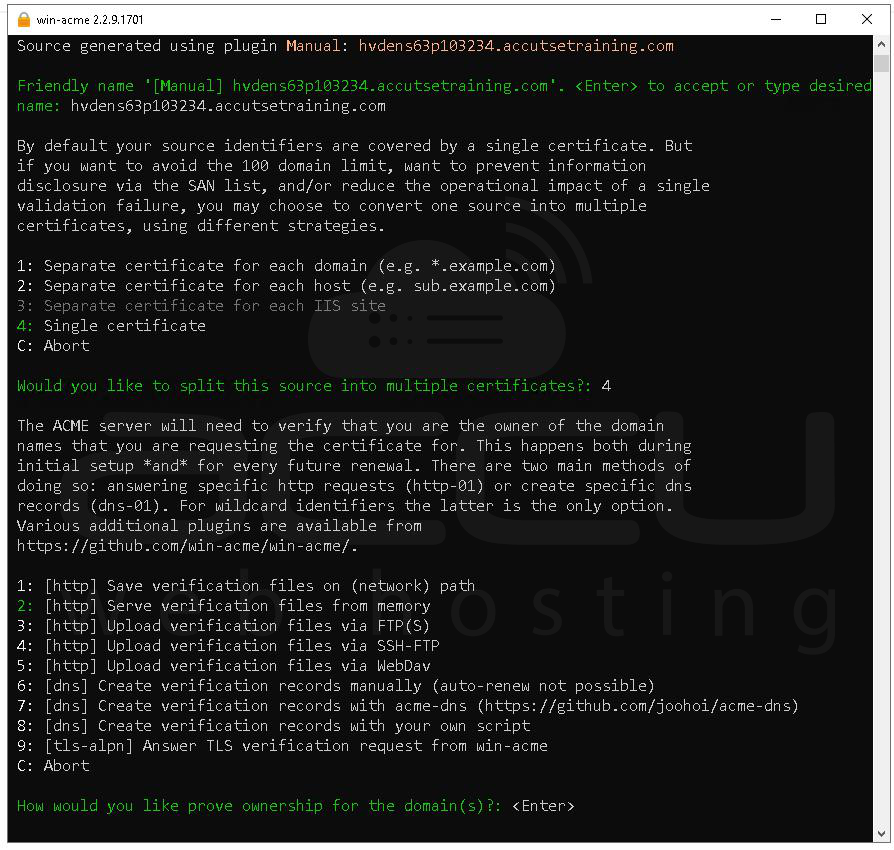
Would you like to split this source into multiple certificates?
Choose: Single certificate
How would you like to prove ownership for the domain(s)?
Select validation method: HTTP validation
HTTP validation requires port 80 to be accessible publicly.
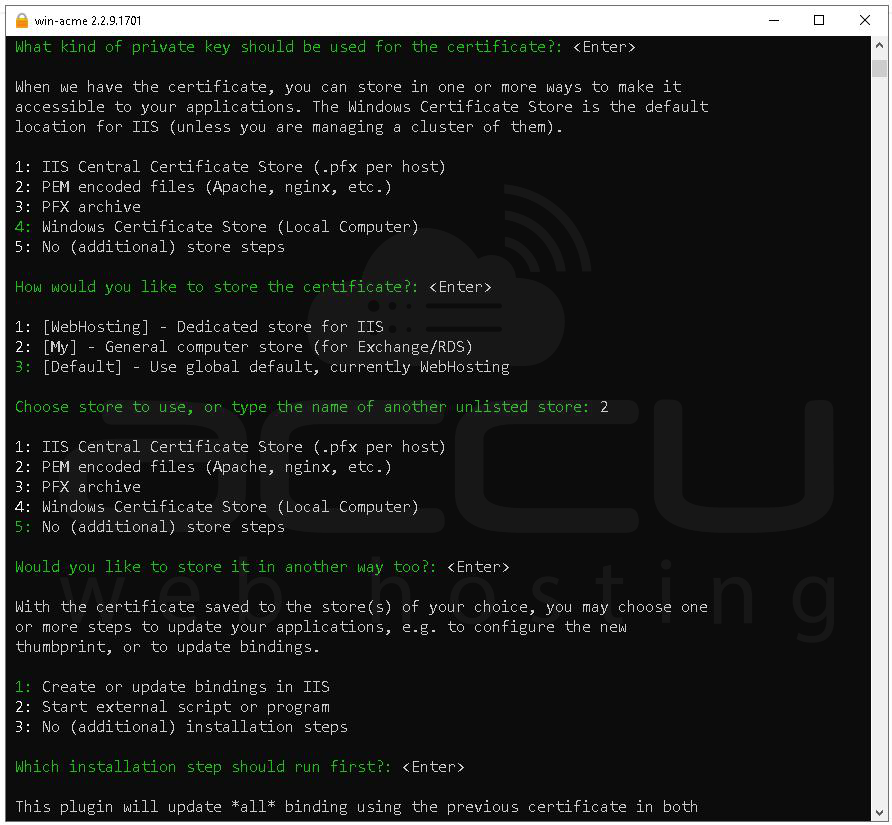
When prompted for storage:
How would you like to store the certificate?
Select: Windows Certificate Store (Local Computer)
Choose store to use: Then choose: My (Personal) store
This is critical. RDP requires: Local Computer → Personal (My)
Once all details are done ssl will be installed on hostname.
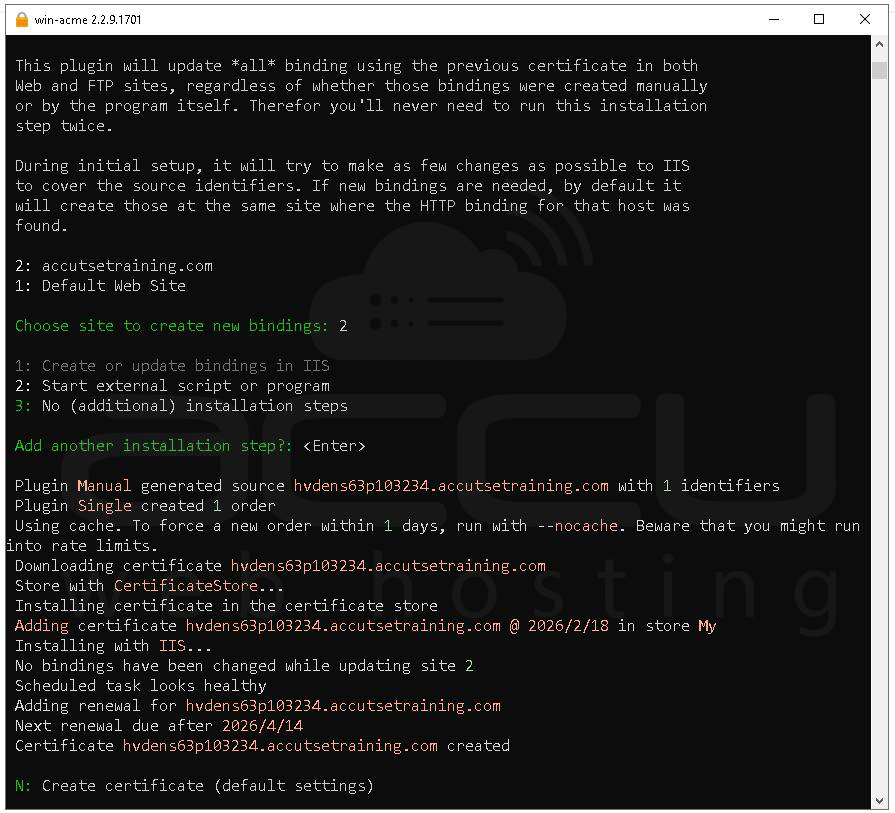
What Happened
- Let’s Encrypt validated the domain.
- Certificate was created successfully.
- It was installed in Local Computer → Personal (My).
- Renewal task was created.
- IIS bindings were checked (no changes needed).
- Certificate creation was successful.
Let’s Encrypt certificates are valid for 90 days. Win-ACME automatically creates a scheduled task for renewal.
Step 8: Verify Certificate Installation. After completion, the certificate will be available in:
Local Computer → Personal → Certificates
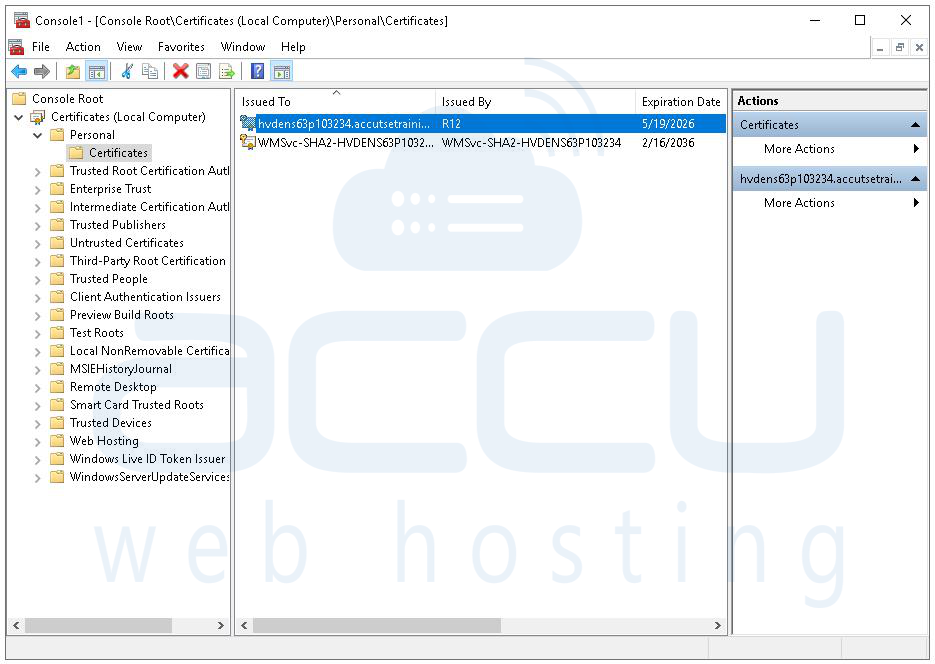
You can open: certlm.msc. Locate the certificate and verify issued To matches your hostname, has a private key and valid expiration date.
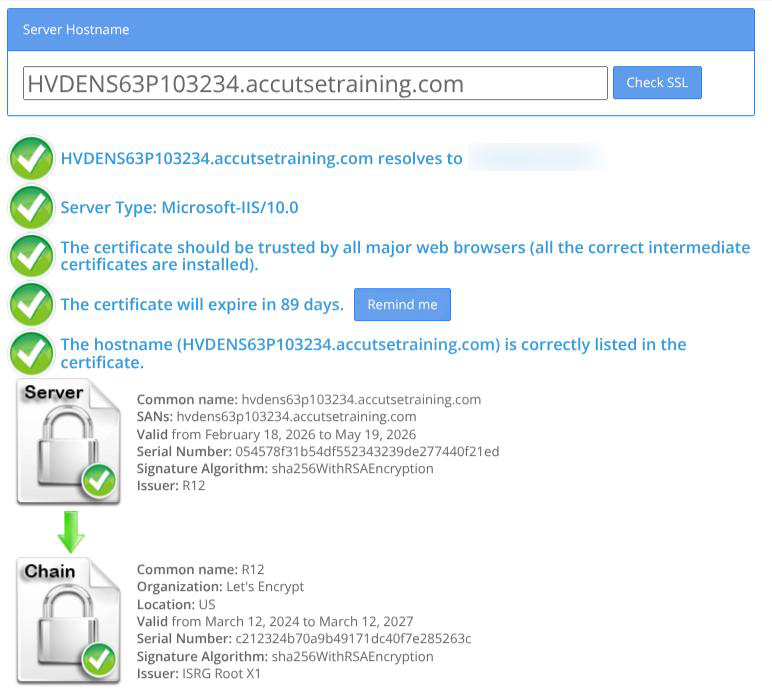
Also verify ssl status from the ssl checker. You can use any public SSL checker to confirm the certificate chain is valid, domain resolves correctly and Certificate is publicly trusted.
Step 9: Bind SSL Certificate to RDP Service. By default, RDP uses a self-signed certificate. Replace it with the new certificate. Get Certificate Thumbprint.
Open: mmc -> Add Certificates (Local Computer).
Go to: Personal → Certificates
Open your new certificate. Copy the Thumbprint and remove spaces.
Example: a1b2c3d4e5f6g7h8...
This value will be used to bind the certificate.

Step 10: Bind Certificate Using PowerShell. Run PowerShell as Administrator.
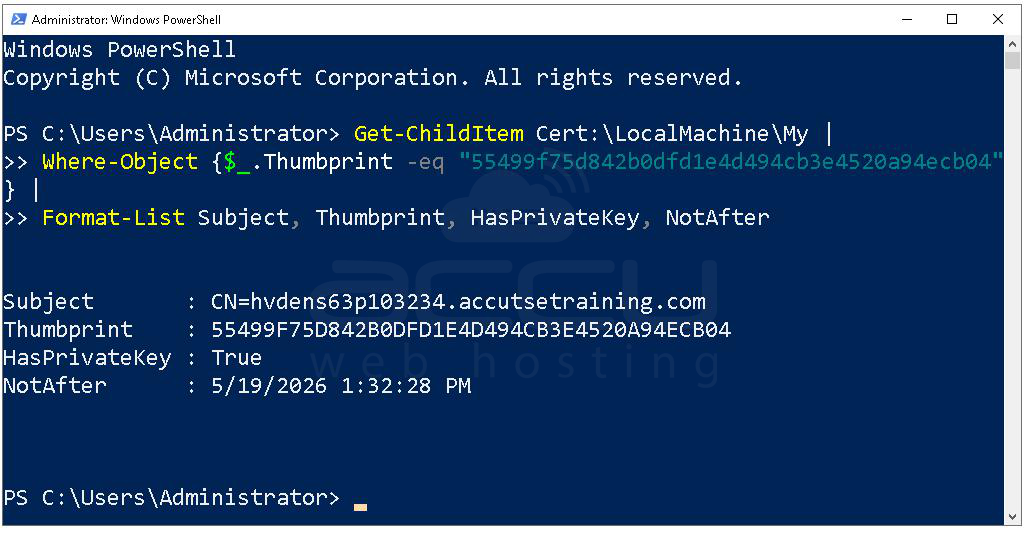
Confirm Certificate Exists in Correct Store:
Get-ChildItem Cert:\LocalMachine\My |
Where-Object {$_.Thumbprint -eq "PASTE_THUMBPRINT_HERE"} |
Format-List Subject, Thumbprint, HasPrivateKey, NotAfter
Expected:
- Subject = CN=hostname
- HasPrivateKey = True
- NotAfter = Valid future date
If HasPrivateKey is False, RDP cannot use the certificate.
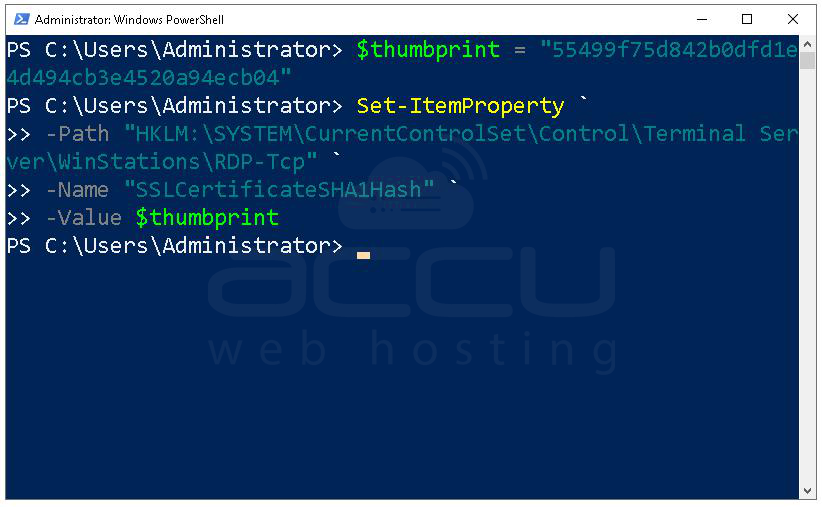
Step 11: Apply Thumbprint to RDP Listener. After Certificate Is Confirmed in Store:
Run PowerShell as Administrator and run:
$thumbprint = "PASTE_THUMBPRINT_HERE"
Set-ItemProperty `
-Path "HKLM:\SYSTEM\CurrentControlSet\Control\Terminal Server\WinStations\RDP-Tcp" `
-Name "SSLCertificateSHA1Hash" `
-Value $thumbprint
This updates the RDP listener to use the specified certificate.
Step 12: Restart RDP Service.
Restart-Service TermService -Force
Alternatively, restart the server to ensure proper binding.
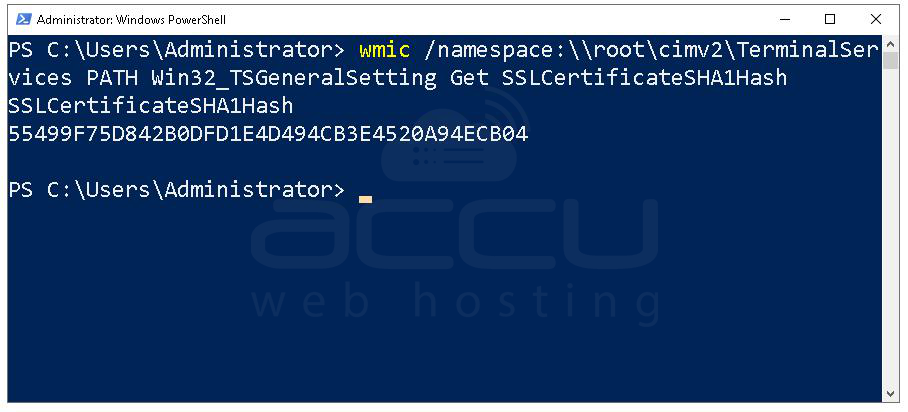
Step 13: Verify RDP Is Actually Bound to That Thumbprint
Run:
wmic /namespace:\\root\cimv2\TerminalServices PATH Win32_TSGeneralSetting Get SSLCertificateSHA1Hash
It must return THUMBPRINT. If it shows a different value, binding fails.
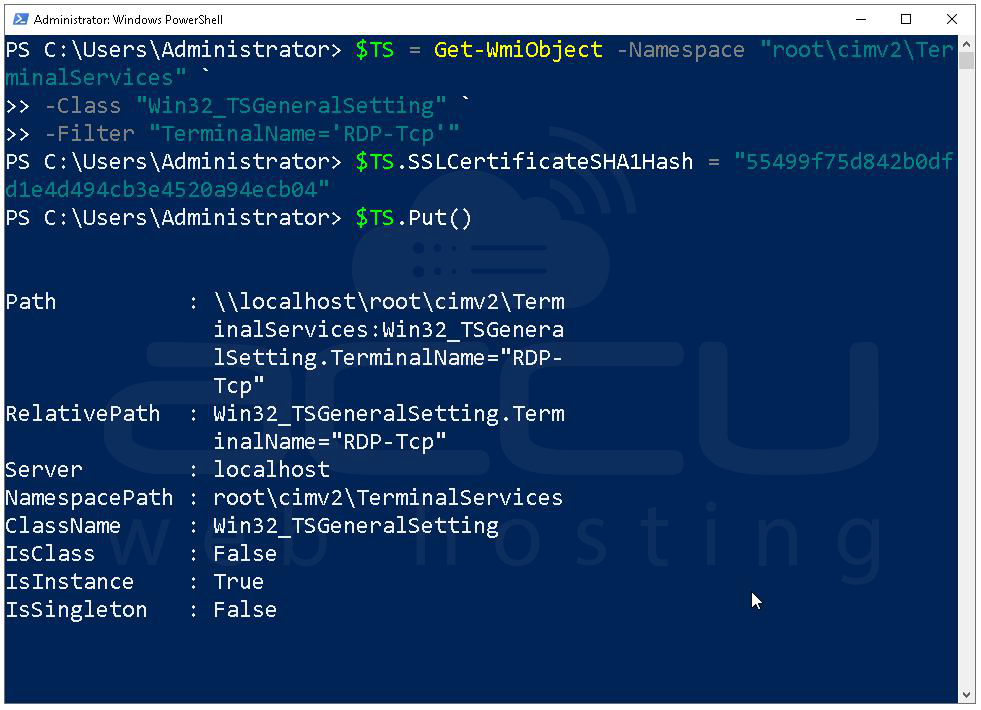
Force Bind Using WMI (More Reliable Method): Sometimes registry binding is ignored. Use WMI instead:
$TS = Get-WmiObject -Namespace "root\cimv2\TerminalServices" `
-Class "Win32_TSGeneralSetting" `
-Filter "TerminalName='RDP-Tcp'"
$TS.SSLCertificateSHA1Hash = "PASTE_THUMBPRINT_HERE"
$TS.Put()
Step 14: Connect RDP to Ussing the Hostname. Open Remote Desktop Connection (mstsc). Enter: Your server hostname. Ex. hvdens63p103234.accutsetraining.com. If you have different RDP port, use hostname:port.
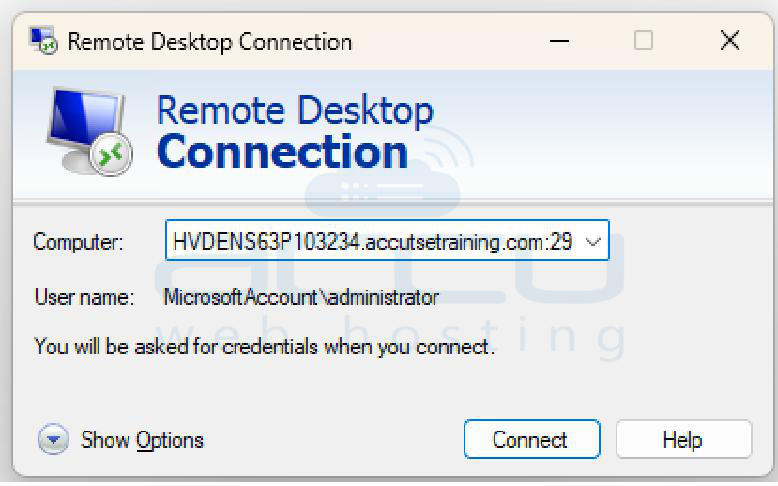
Do NOT use the IP address. If you use the IP address Hostname mismatch will occur and certificate validation may fail. Enter username and password. Click Connect. If configured correctly no certificate warning and connection secured with trusted SSL.
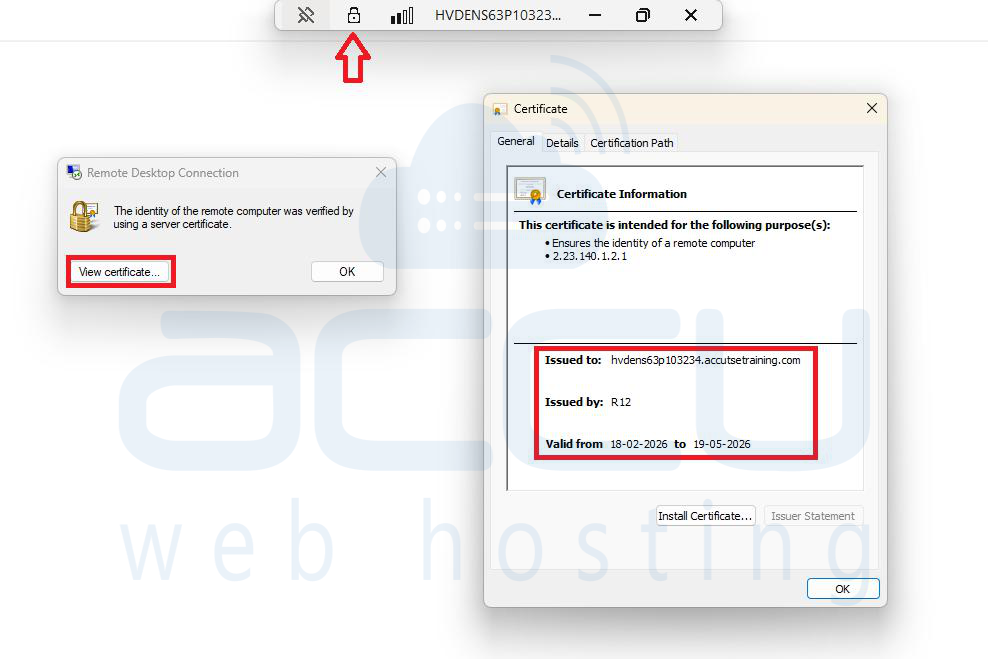
Step 15: Verify Certificate Used in RDP Connection. After connecting, look at the top of the RDP session window.
You should see: 🔒 Lock icon
Click the lock icon.
If the connection is secure, you will see: “The identity of the remote computer was verified by using a server certificate.”
This confirms TLS encryption is active. Click “View Certificate”.
The Certificate window will open.
Now verify the following fields carefully.
Inside the General tab, check: Issued To
Must match exactly: your server hostname. hvdens63p103234.accutsetraining.com
If it shows:
- IP address → Incorrect connection method
- Server internal name → Wrong certificate bound
- Self-signed issuer → Binding failed
Also verify:
- Issued By shows Let’s Encrypt intermediate authority.
- Valid dates are active.
- Certification Path shows trusted chain.
If all checks are correct Your RDP server is now secured with a trusted Let’s Encrypt SSL certificate and properly configured to use the hostname for encrypted connections.
Conclusion
Installing Let’s Encrypt SSL on an RDP server improves security, removes browser-style warnings, and ensures encrypted remote sessions using a publicly trusted certificate authority. The process involves DNS configuration, Certificate generation via Win-ACME, Installing into the correct Windows store, Binding the certificate to RDP, Restarting the RDP service and Verifying hostname-based secure connection. By following these steps exactly as described, your Windows RDP server will use a trusted SSL certificate instead of a self-signed one, ensuring secure and professional remote access.
