Installing FreePBX on Debian 12 allows you to set up a powerful and flexible PBX (Private Branch Exchange) system for managing voice communication over the internet. FreePBX is a popular open-source platform that integrates with Asterisk, providing both a user-friendly interface and robust functionality. This guide will walk you through the step-by-step process of installing FreePBX on a Debian 12 server, configuring extensions, SIP trunks, and call routes, so you can start handling both inbound and outbound calls efficiently.
FreePBX Installation Requirements for Debian 12
-
CPU: 1 GHz (minimum), 2 GHz dual-core (recommended)
-
RAM: 1 GB (minimum), 2 GB (recommended)
-
Storage: 10 GB free (minimum), 20 GB (recommended)
-
OS: Debian 12
-
Network: Static IP, open ports 5060-5061 (SIP), 10000-20000 (RTP)
-
Root Access
-
VoIP Provider (for SIP trunks)
These specs ensure a smooth installation and operation of FreePBX.
Install FreePBX on Debian 12
Step 1: Connect to Your VPS. You need to connect to your Virtual Private Server (VPS) as the root user. Open Terminal and type the following command, replacing <your_vps_ip> with your actual VPS IP:
ssh root@<your_vps_ip>
Step 2: Once connected to your server, you need to navigate to the /tmp directory. This is where the FreePBX installation script will be downloaded.
Enter the following command: cd /tmp
Step 3: Now, download the installation script from GitHub. This script will automate the setup of FreePBX and related dependencies like Asterisk, Apache, and MariaDB.
Run the following command to download the script:
Wget https://github.com/FreePBX/sng_freepbx_debian_install/raw/master/sng_freepbx_debian_install.sh -O /tmp/sng_freepbx_debian_install.sh
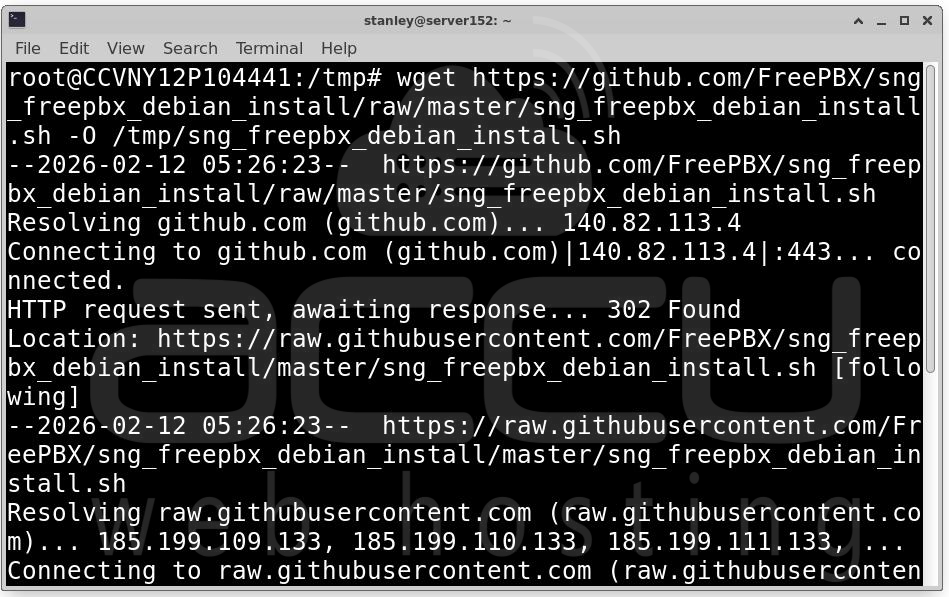
This will download the script to your server's /tmp directory, saving it as sng_freepbx_debian_install.sh.
Step 4: With the script downloaded, you can now start the FreePBX installation process.
Run the following command to begin the installation:
bash /tmp/sng_freepbx_debian_install.sh
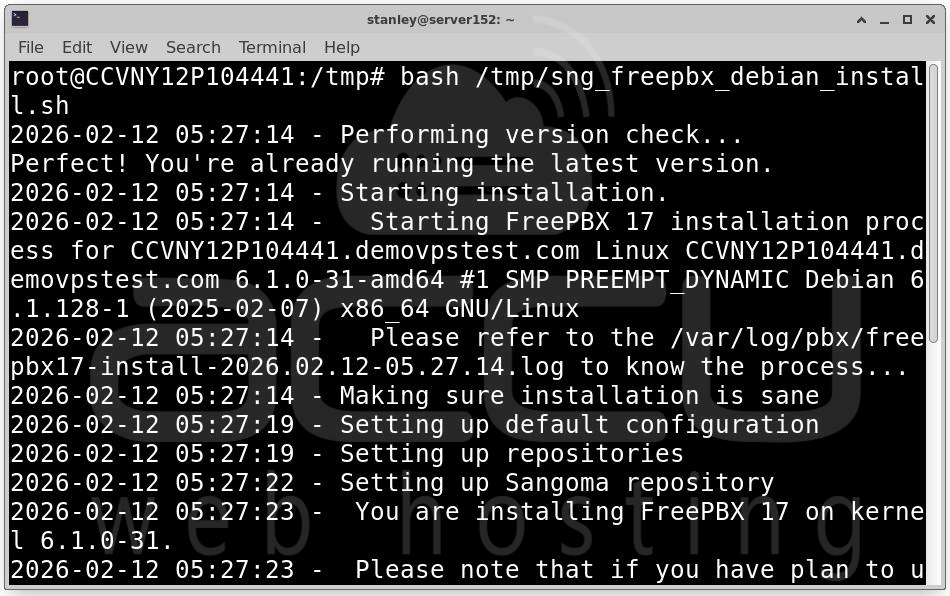
This will execute the installation script, which will automatically begin downloading and installing the necessary software packages for FreePBX.
Step 5: The installation process may take some time, depending on your server's hardware and internet connection speed. It can take anywhere from 30 minutes to an hour or more.
During the installation, the script will:
-
Install and configure Asterisk (the core PBX software).
-
Set up Apache (the web server for managing the FreePBX interface).
-
Install MariaDB (the database server to handle data storage for FreePBX).
-
All of these components are required for FreePBX to function properly.
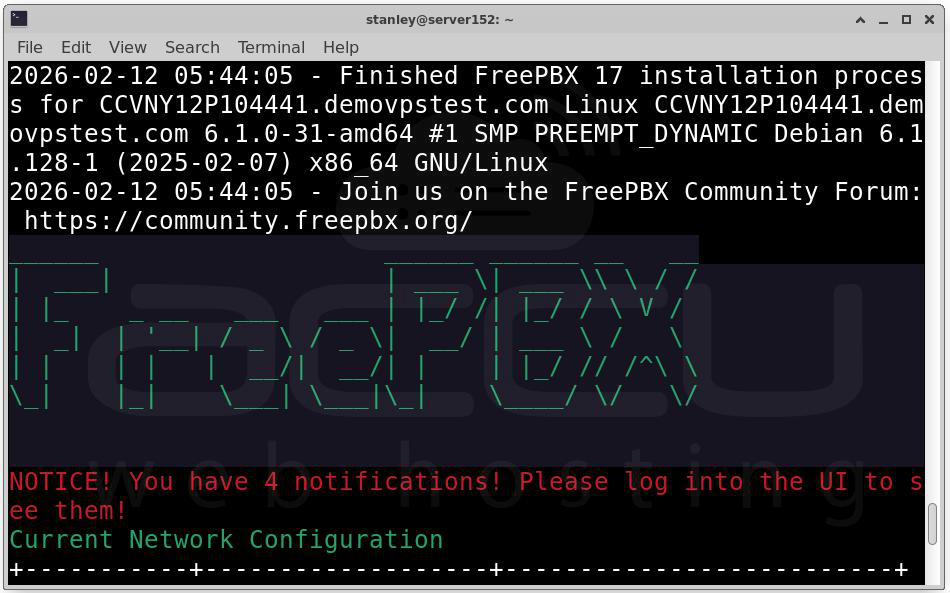
Step 6: Once the installation has successfully finished, you will see a confirmation screen in the terminal, indicating that FreePBX has been installed.
Complete the FreePBX Installation
To finalize your FreePBX installation, follow these steps, regardless of your installation method:
Step 1: Open a web browser and navigate to the FreePBX login page by entering your VPS IP address.
Step 2: Fill out the required fields:
-
Username: Enter the admin username for FreePBX.
-
Password: Use the default password for the admin account.
-
Notification Email: Provide an email address to receive system notifications.
-
System Identifier: Set a name for your FreePBX server, ideally matching your VPS hostname.
Step 3: Review and adjust modules and update settings. If unsure, you can leave them as the default. Click Setup System to complete the process.

Initial Setup and Configuration of FreePBX
When you first access the FreePBX web interface, you might encounter several activation screens. Feel free to skip them and come back to them later.
Basic Configuration
Before you can start using FreePBX for phone communication, you’ll need to configure a few essential settings.
Setting Up Extensions
Extensions in FreePBX act as endpoints for making internal calls and connecting to external services. To set up extensions:
Step 1: Log in to the FreePBX admin dashboard as an admin.
Step 2: From the top menu, navigate to Connectivity > Extensions.
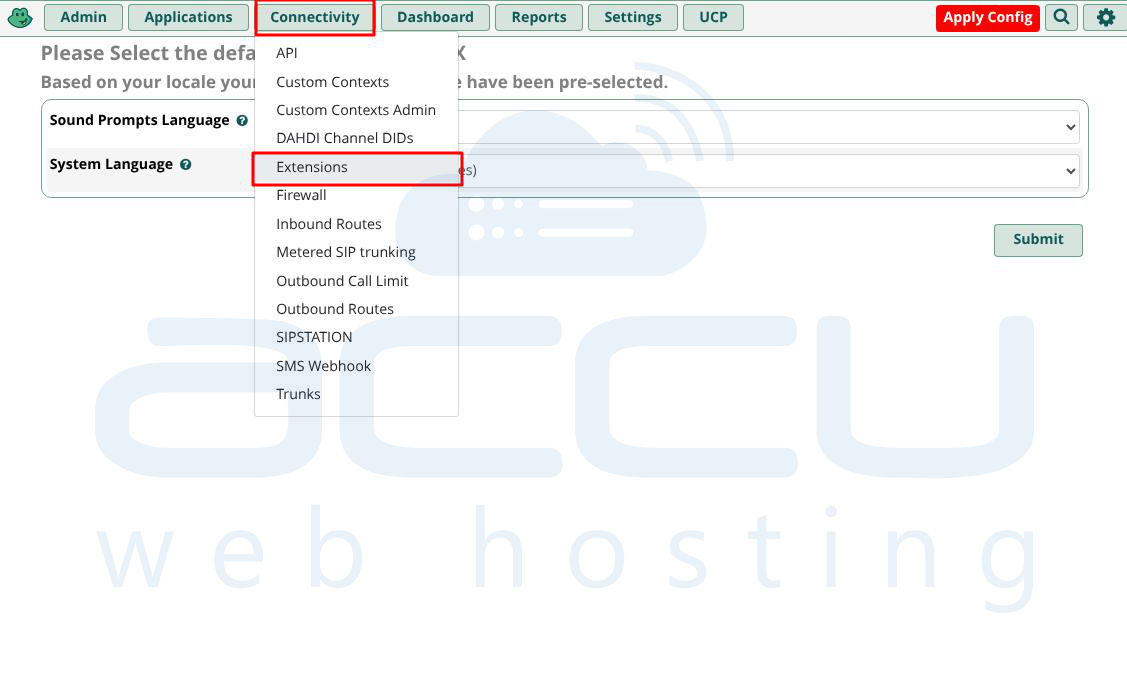
Step 3: Click Add Extension to input the details for your extensions. For a basic setup, select Quick Create Extensions.

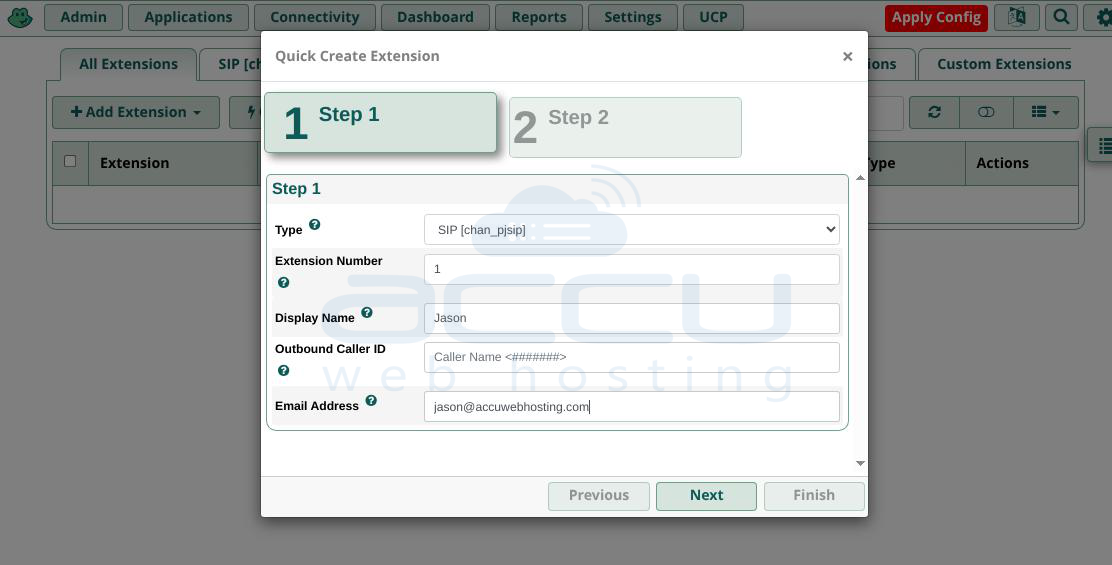
On the Step 1 page, adjust the following settings:
-
Extension Type: Choose the communication protocol. Select SIP [chan_pjsip], which is the most commonly used.
-
Extension Number: Enter a three to five-digit number (avoid starting with 1 to prevent conflicts).
-
Display Name: Enter the name of the extension’s owner.
-
Outbound Caller ID: Set the caller ID for outgoing calls (can be left empty for now).
-
Email Address: Provide the email address of the extension owner.
Step 4: Click Next to move to the next configuration page.
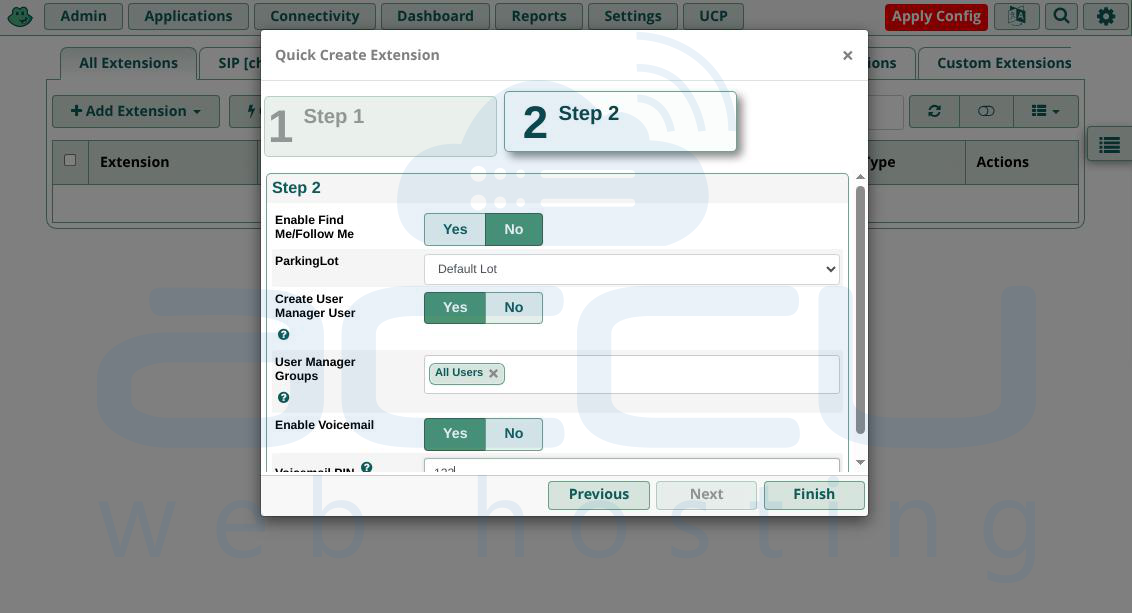
Step 5: On the Step 2 page, adjust these settings:
-
Enable Find Me/Follow Me: This feature redirects calls to another phone if the extension doesn’t answer.
-
ParkingLot: This feature allows unanswered calls to be parked in a queue and forwarded to other extensions. The default is Default Lot.
-
Create User Manager User: Toggle this option to add the user to the User Manager list.
-
User Manager Groups: Choose the user group for the new extension.
-
Enable Voicemail: Enable voicemail for this extension.
-
Voicemail PIN: Set a password for accessing voicemail.
Step 6: Click Finish to save your settings.
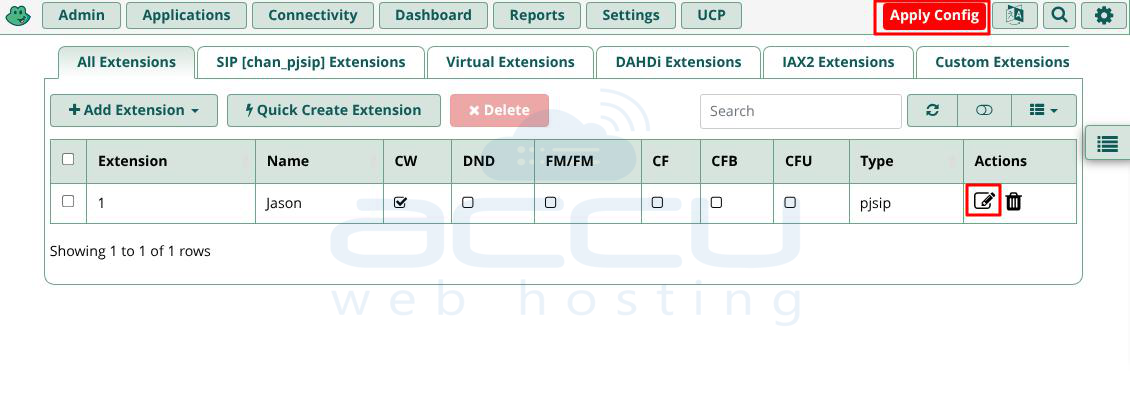
To add more extensions, repeat the steps above. To modify the settings of an existing extension, go to the All Extensions tab and click the Edit icon under the Action column.
Step 7: Finally, after any changes to FreePBX settings, don't forget to click the Apply Config button in the top right corner to save the changes.
Configuring SIP Trunks
Session Initiation Protocol (SIP) allows your internal phone system to make outbound calls to external numbers over the internet. A trunk is a connection endpoint that supports multiple communication channels, including phones.
Before you begin, you'll need an external VoIP service from a SIP trunk provider (e.g., Voxtelesys) to route digital data from the internet to your analog phone service.
Once you have a VoIP service, follow these steps to configure SIP trunks in FreePBX:
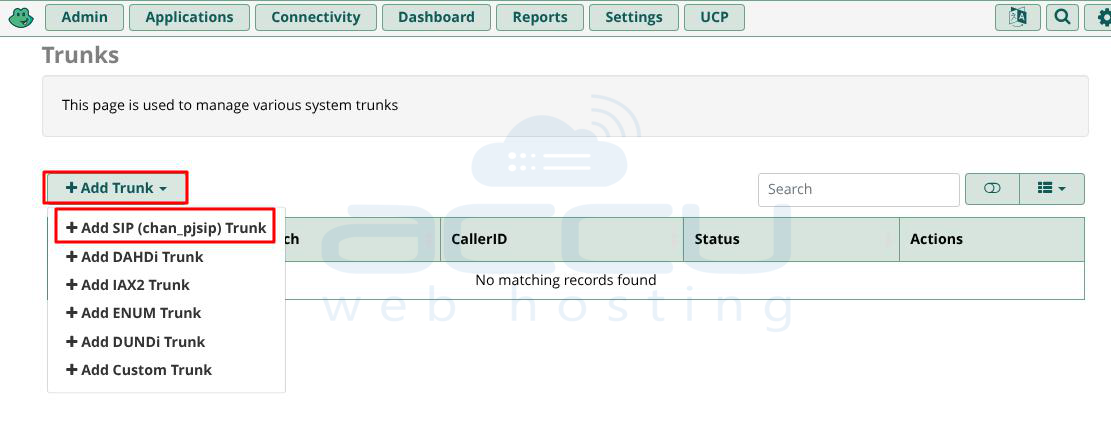
Step 1: Log in to your FreePBX Dashboard. Navigate to Connectivity > Trunks.
Step 2: Click Add Trunk and choose Add SIP (chan_pjsip) Trunk.
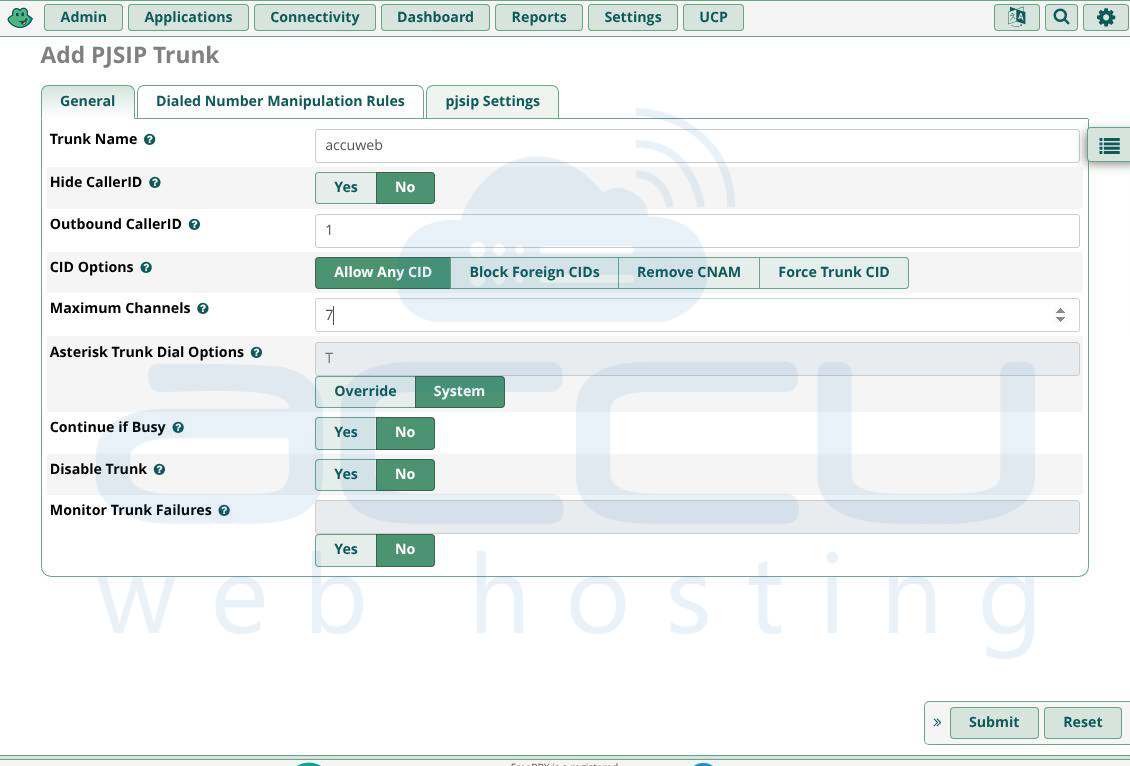
Step 3: Configure General Settings. Under the General tab, fill in the following details:
-
Trunk Name: Assign a name to your trunk.
-
Outbound Caller ID: Set the caller ID for outbound calls.
-
Maximum Channels: Specify the maximum number of concurrent calls.
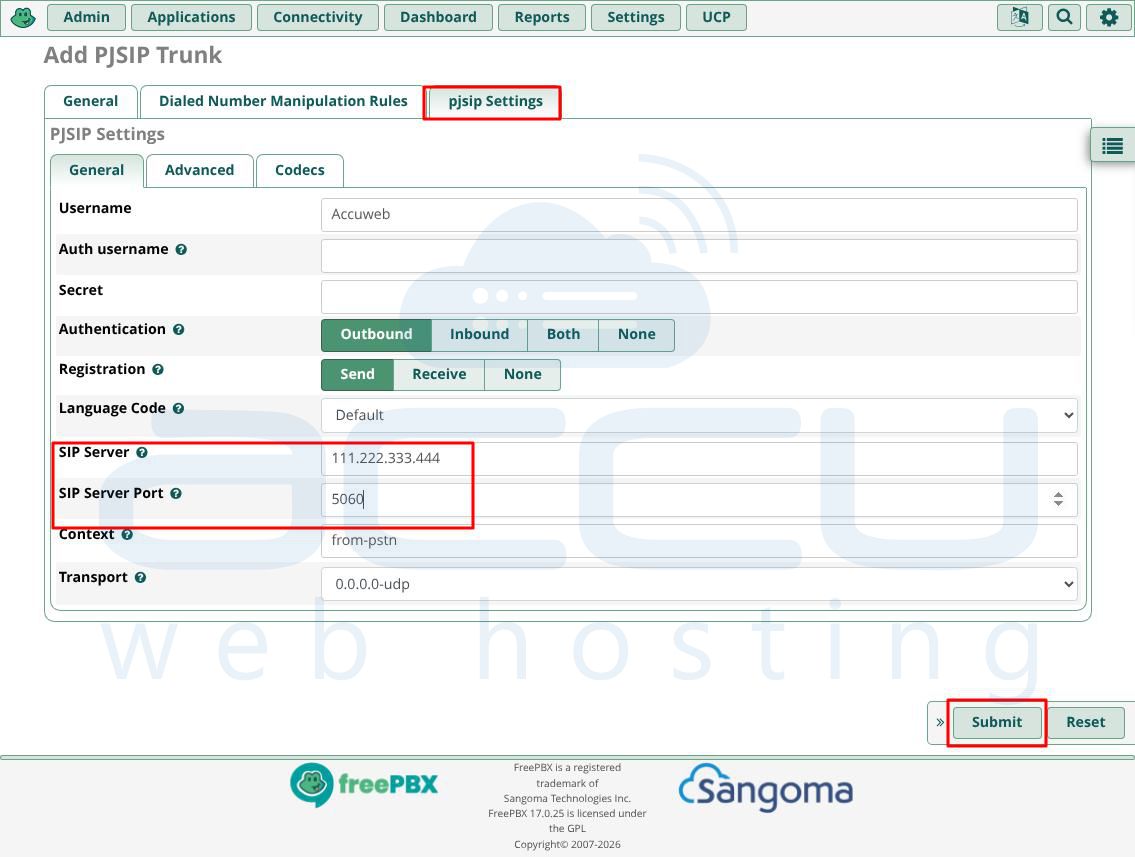
Step 4: Enter SIP Settings. Go to the PJSIP Settings tab and input the necessary information provided by your SIP trunk provider, such as: SIP Username, Server IP Address and Port.
Step 5: Save Changes. Click Submit to save your trunk configuration.
With your SIP trunk configured, you can now route external calls through your VoIP service.
Configuring Outbound and Inbound Routes
Routes in FreePBX determine how calls are handled within your phone system—whether they are directed to an extension, group, voicemail, or another destination. Inbound routes control how incoming calls are processed, while outbound routes handle outgoing calls.
Routes allow you to set rules that direct calls based on specific criteria. For example, if Extension A doesn’t answer, you can configure the system to route the call to Extension B. This helps balance call distribution and reduce missed calls.
Setting Up Inbound Routes in FreePBX
To configure inbound routes (for incoming calls):
Step 1: From the FreePBX admin menu, go to Connectivity > Inbound Routes.
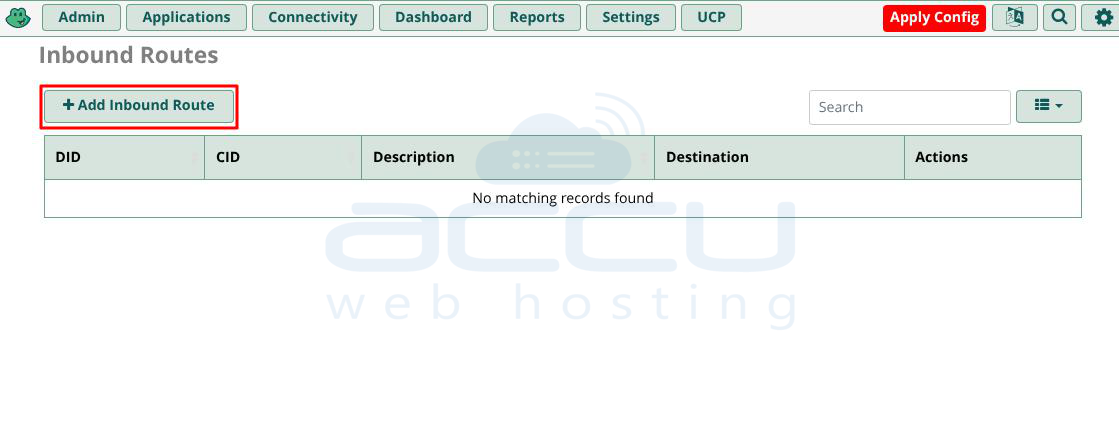
Step 2: Click Add Inbound Route.
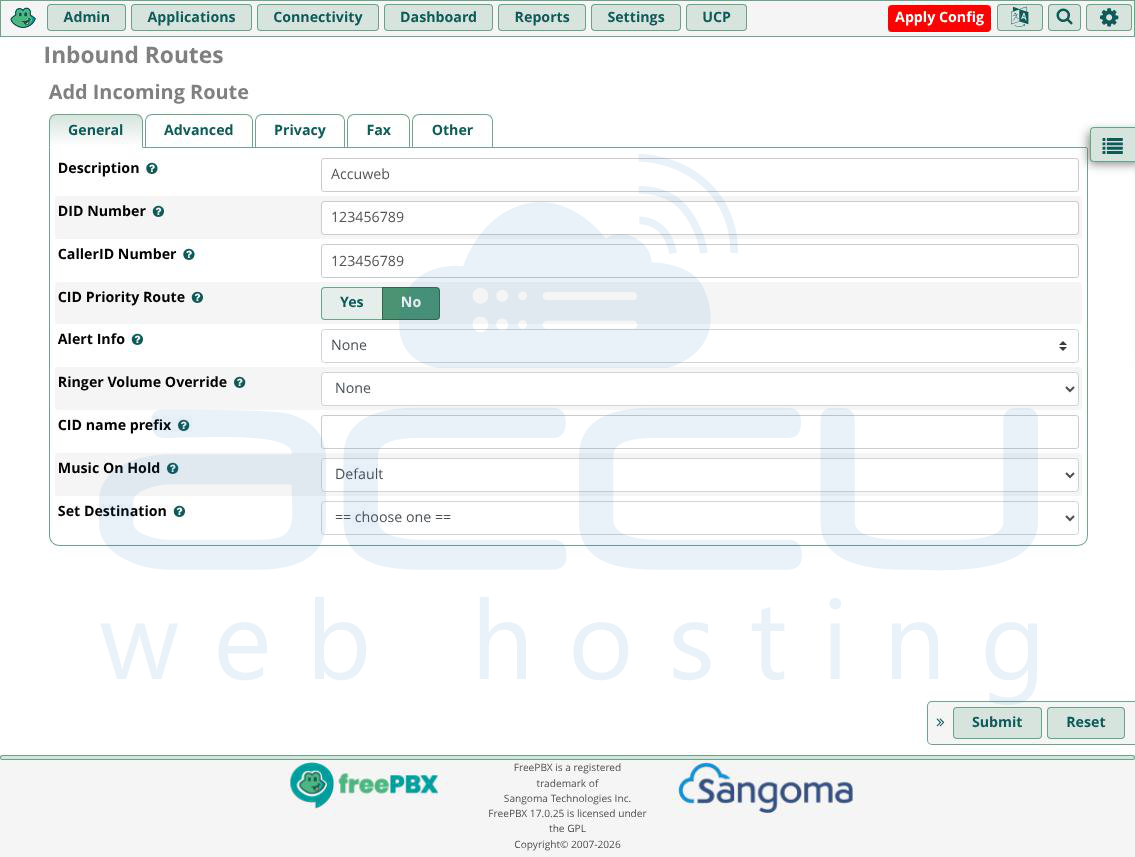
Step 3: Enter the following information:
-
Description: Name your incoming route.
-
DID Number: Enter the number that external callers will use to reach this route (provided by your VoIP or DID service provider).
-
Set Destination: Choose the destination for incoming calls (e.g., an extension, group, or voicemail).
Step 4: Click Submit to save your settings.
Setting Up Outbound Routes in FreePBX
To configure outbound routes (for outgoing calls), you’ll need a SIP trunk, as it’s used to route calls to the public phone network:
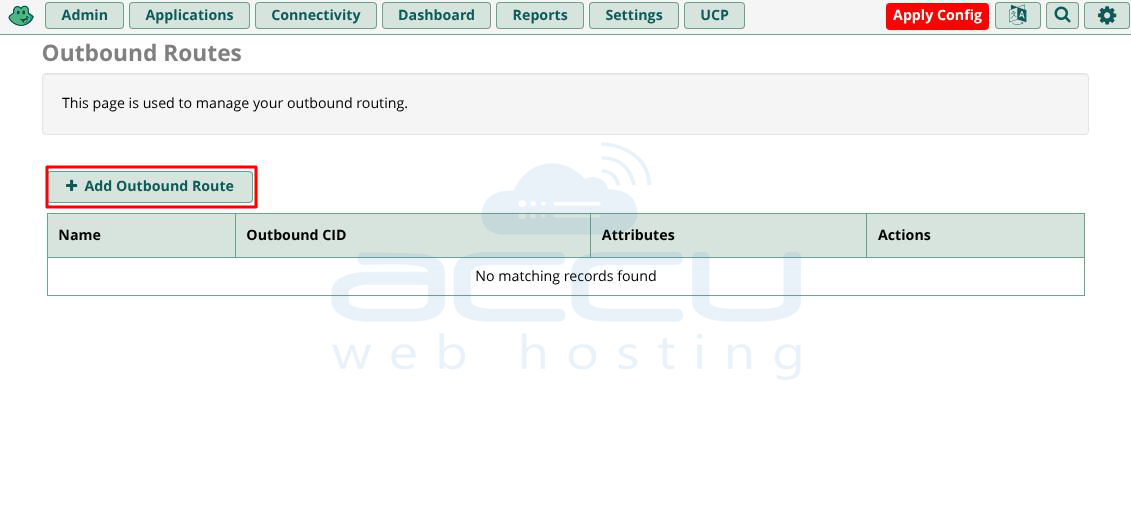
Step 1: From the FreePBX admin dashboard, go to Connectivity > Outbound Routes.
Step 2: Click Add Outbound Route.
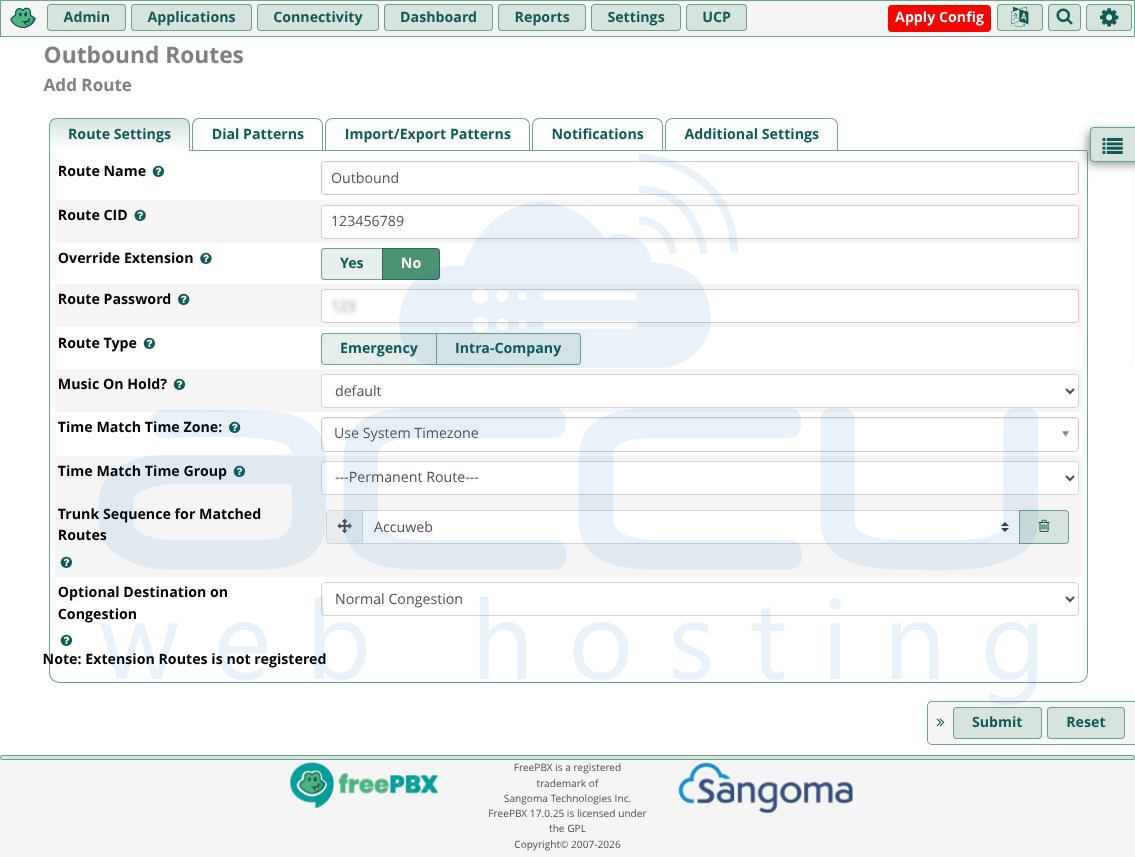
Step 3: Enter the following information:
Route Name: Name your outbound route.
Route CID: Set the caller ID that will display when dialing out.
Trunk Sequence for Matched Routes: Choose the SIP trunk to use for this route to connect to the public phone system.
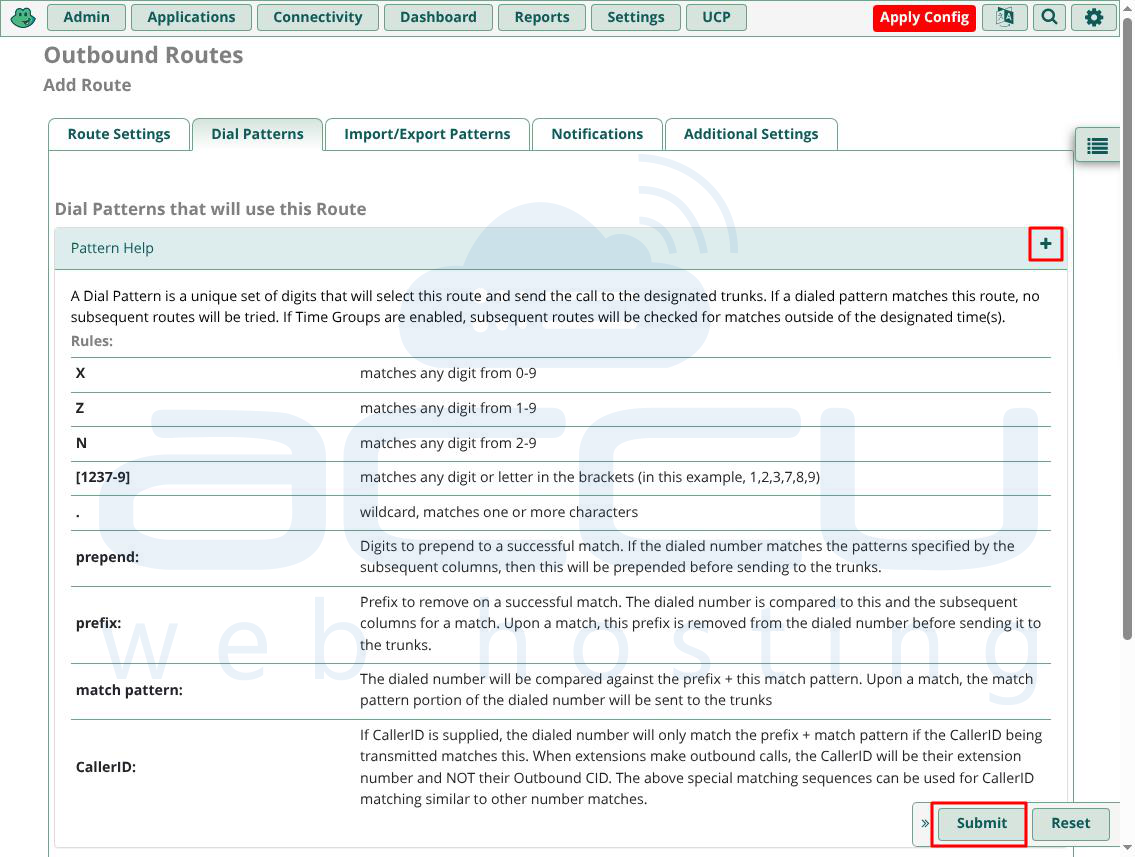
Step 4: Navigate to the Dial Patterns tab and specify the phone numbers that can be dialed through this route. Click the + icon to view the guide for formatting dial patterns.
Step 5: Click Submit to save your settings.
Now, your FreePBX system is configured to handle both inbound and outbound calls, allowing phones in your network to make and receive calls from the public line.
Conclusion
Once you've completed the installation and configuration of FreePBX on your Debian 12 server, your phone system is ready to manage calls within your network and to external numbers via SIP trunks. With a configured system of extensions, outbound and inbound routes, and SIP trunks, you can effectively manage your communications infrastructure. FreePBX offers a wide range of additional features that you can explore as your needs grow, making it a versatile solution for businesses of any size. With this setup, you're now ready to begin using your FreePBX system for seamless voice communication.
