Introduction:
This article explains what a Cloud Bot (OpenClaw / ClawBot) is, why it should be deployed on a private VPS, and how to install, configure, and control it using Telegram.
A Cloud Bot is an AI-powered system agent that can execute commands, manage services, deploy applications, and interact with the operating system on your behalf.
Important: Because this bot has full system access, it should never be installed on a personal machine.
What Is a Cloud Bot?
A Cloud Bot is an AI agent with full operating system access. Unlike traditional chatbots, it can:
-
Execute shell commands
-
Install software packages
-
Manage Docker containers
-
Deploy web servers (Nginx, Apache)
-
Create and run Node.js applications
-
Interact with the file system and system users
In practice, it acts like a remote system administrator or assistant controlled through chat interfaces such as Telegram.
Why Use a Private VPS?
Installing a Cloud Bot on a VPS provides isolation and security.
Benefits of Using a VPS:
-
No access to personal files or local data
-
Full root privileges
-
Safe environment for experimentation
-
Persistent server available 24/7
-
Ideal for developers and automation tasks
Using a VPS ensures that even if the bot misbehaves or executes unintended actions, your personal system remains unaffected.
Prerequisites:
Before starting, ensure you have:
-
A VPS running Ubuntu 22.04 or Ubuntu 24.04
-
Root or sudo access
-
SSH access to the server
-
An OpenAI API key (or another supported AI provider)
-
A Telegram account
Step 1: Access the VPS via SSH
Connect to your VPS using SSH:
ssh root@YOUR_VPS_IP
Once logged in, update the system packages:
apt-get update && apt-get upgrade -y
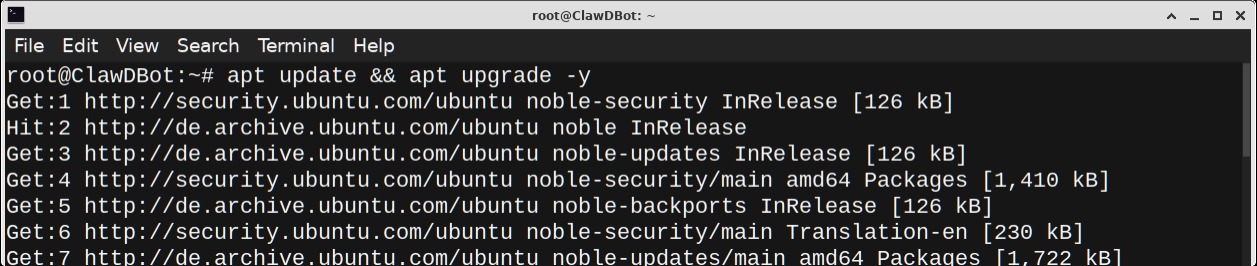
This ensures all repositories and packages are up to date.
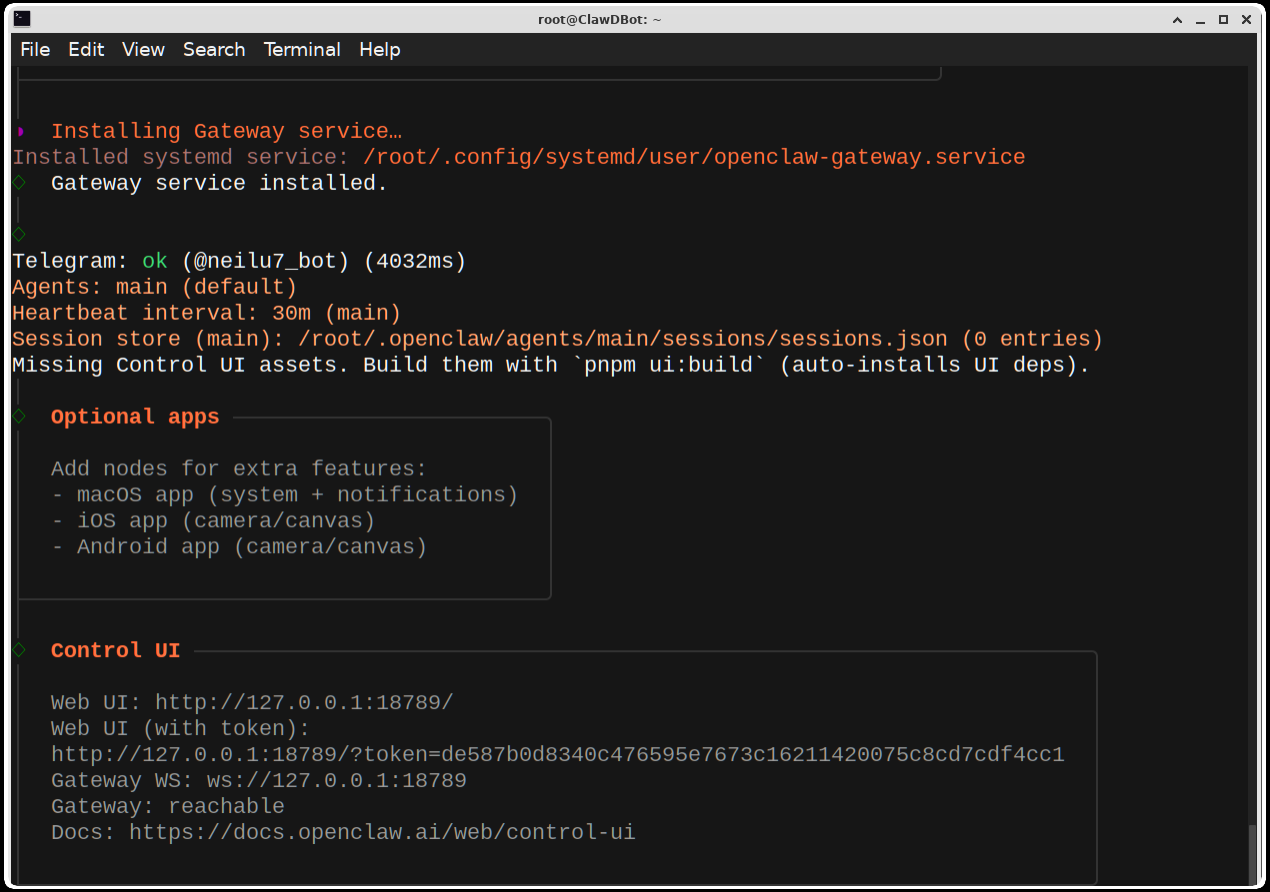
Step 2: Install OpenClaw (Cloud Bot)
OpenClaw provides a single-command installer that automatically:
-
Installs Node.js
-
Installs OpenClaw
-
Configures required dependencies
Run the following installation command provided in the official OpenClaw documentation.
curl -fsSL https://openclaw.ai/install.sh | bash
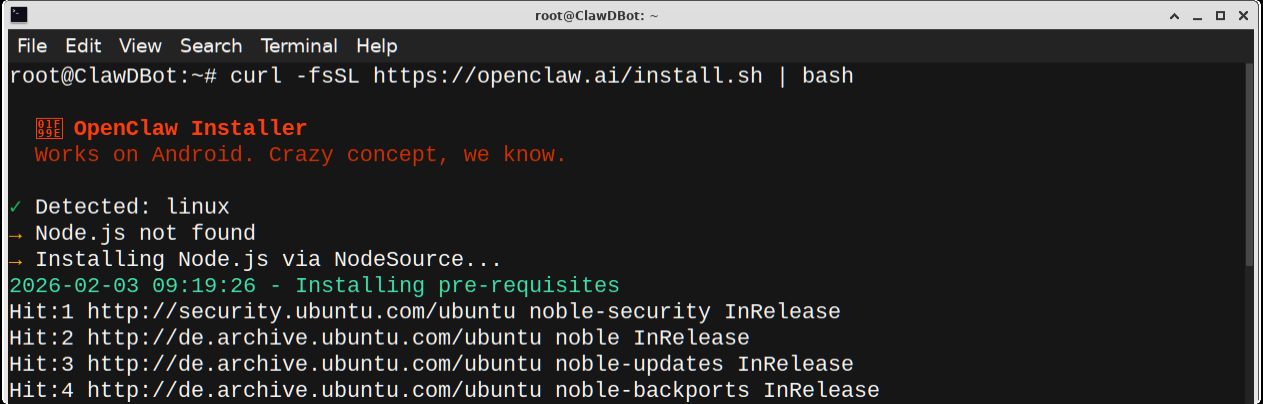
Note: Installation may take several minutes. Do not interrupt the process.
Step 3: Initial Configuration
After installation, OpenClaw launches an onboarding wizard.
During onboarding:
1. Confirm that you want to continue(I understand this is powerful and inherently risky. Continue?)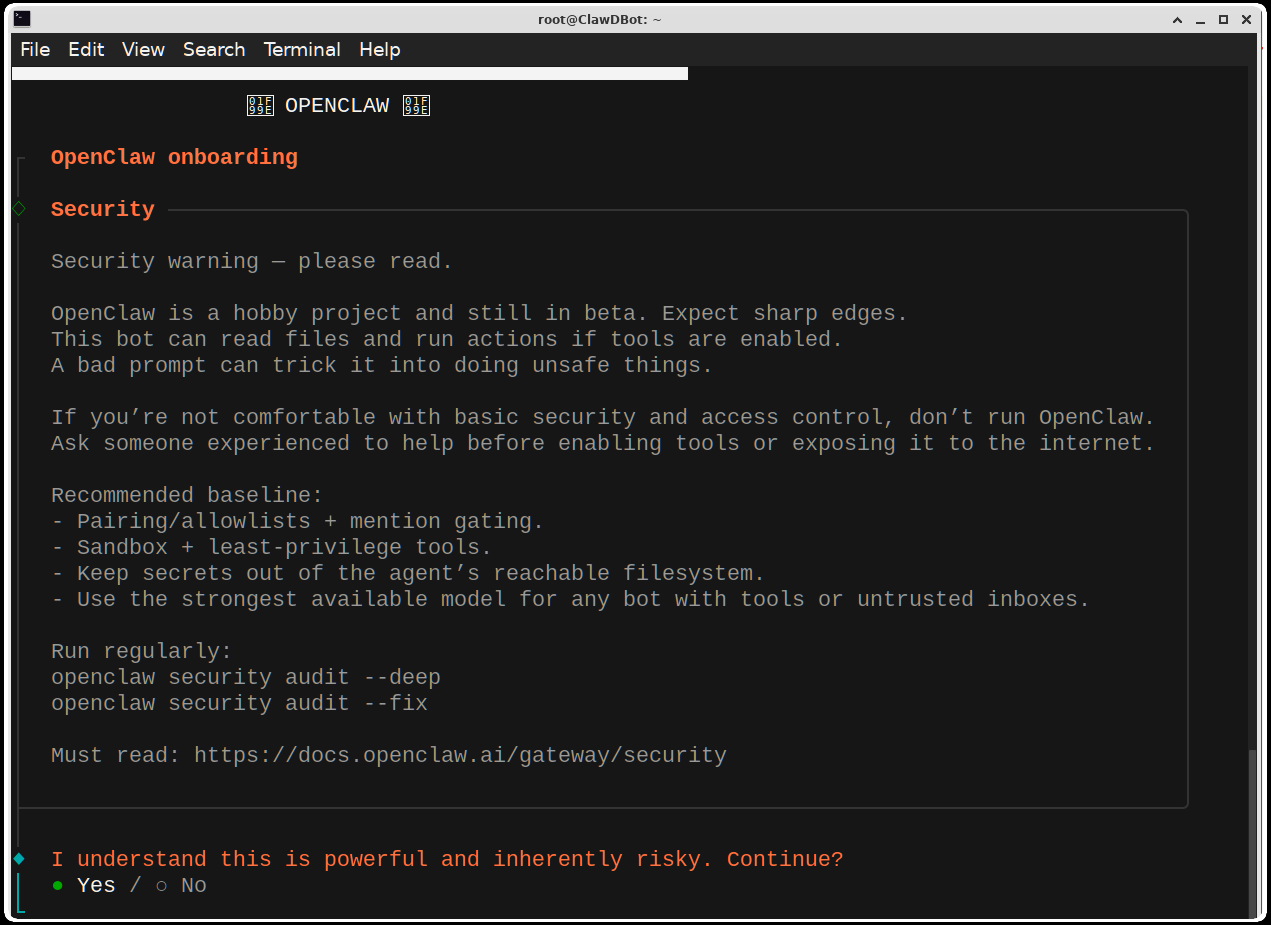
2. Onboarding mode:
QuickStart (Configure details later via openclaw configure.)
3. Select a Model/auth provider (e.g., OpenAI)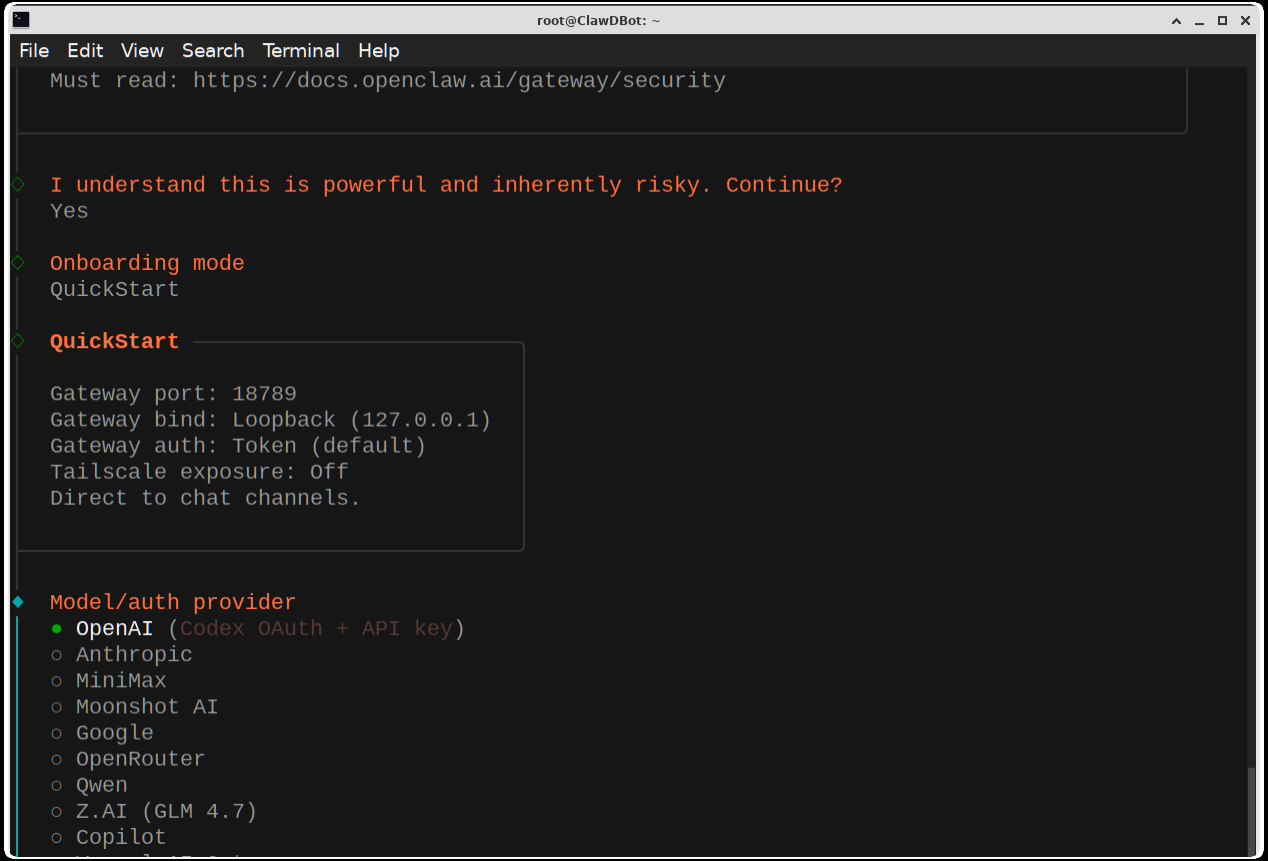
4. Select OpenAI auth method to OpenAI API key and paste your OpenAI API key
5. Choose a Default model of OpenAI.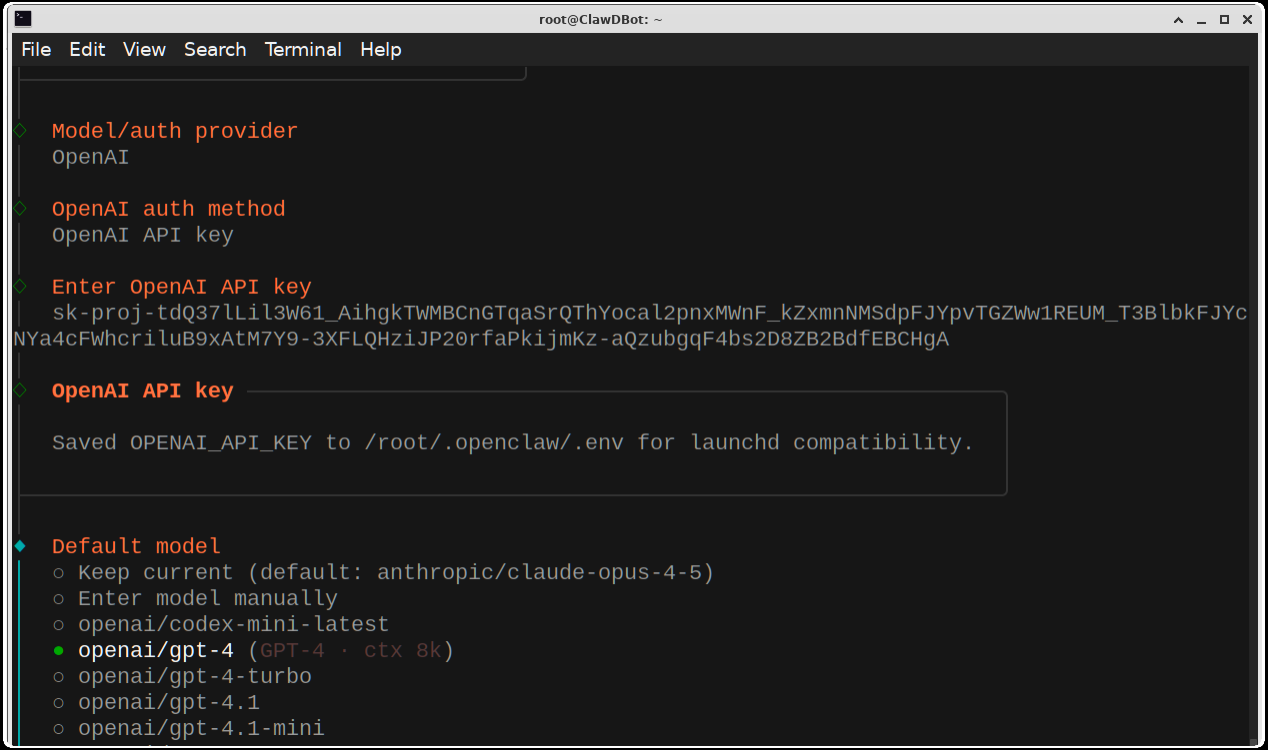
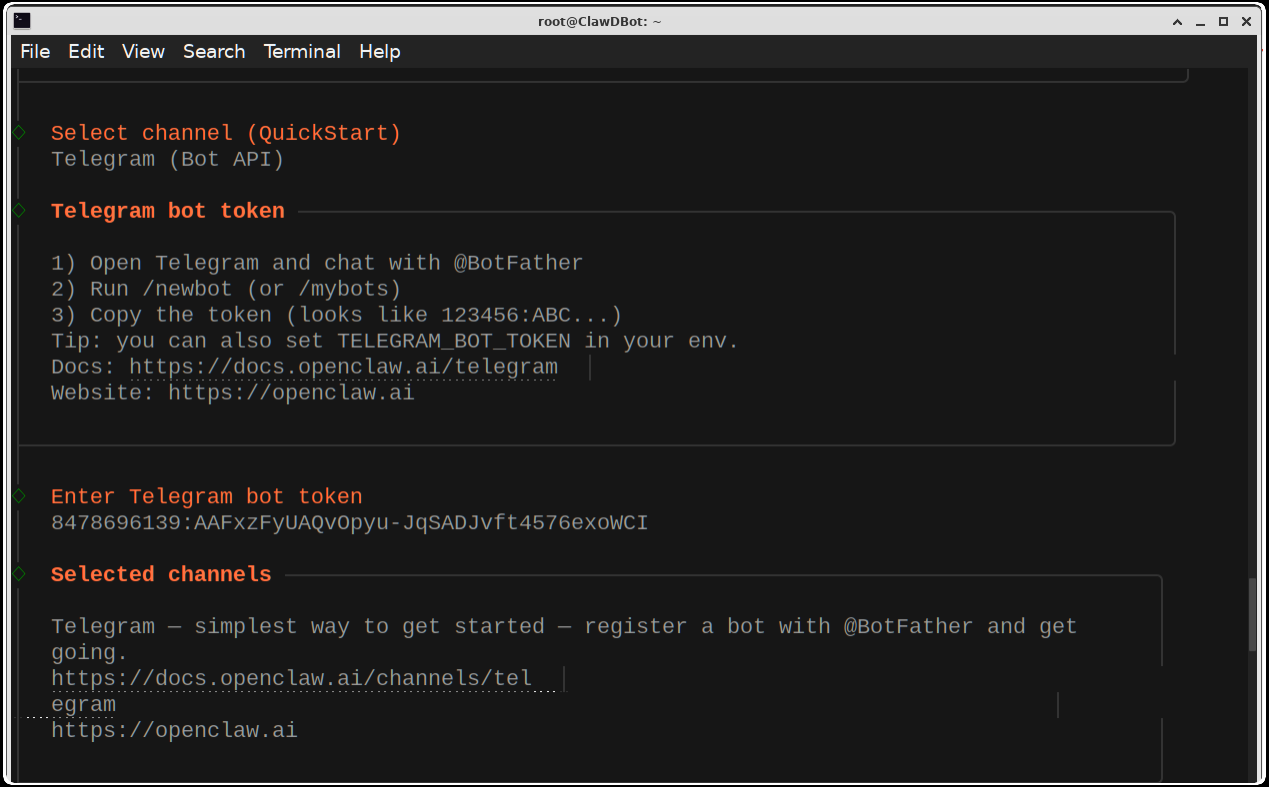
6. Select channel (QuickStart) integration options (Telegram, WhatsApp, or Discord)
Step 4: Create a Telegram Bot
To control the Cloud Bot via Telegram, you must create a Telegram bot.
Steps:
1. Open Telegram
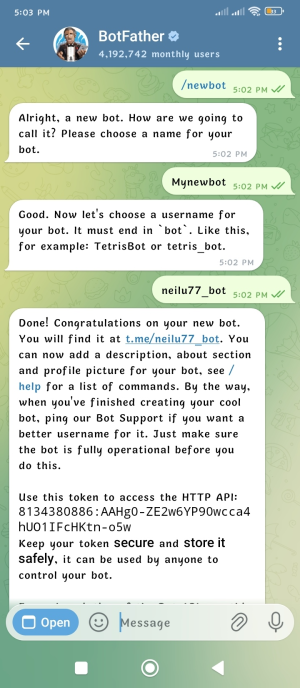
2. Search for BotFather
3. Start a chat and run:
/newbot
4. Provide:
- Bot name
- Unique bot username
5. Copy the Bot Token generated by BotFather
Paste this token into the OpenClaw configuration when prompted for the Enter Telegram bot token.
Step 5: Enable and Configure the Gateway
The Gateway Service enables communication between the Cloud Bot and external interfaces such as Telegram and the Web UI.
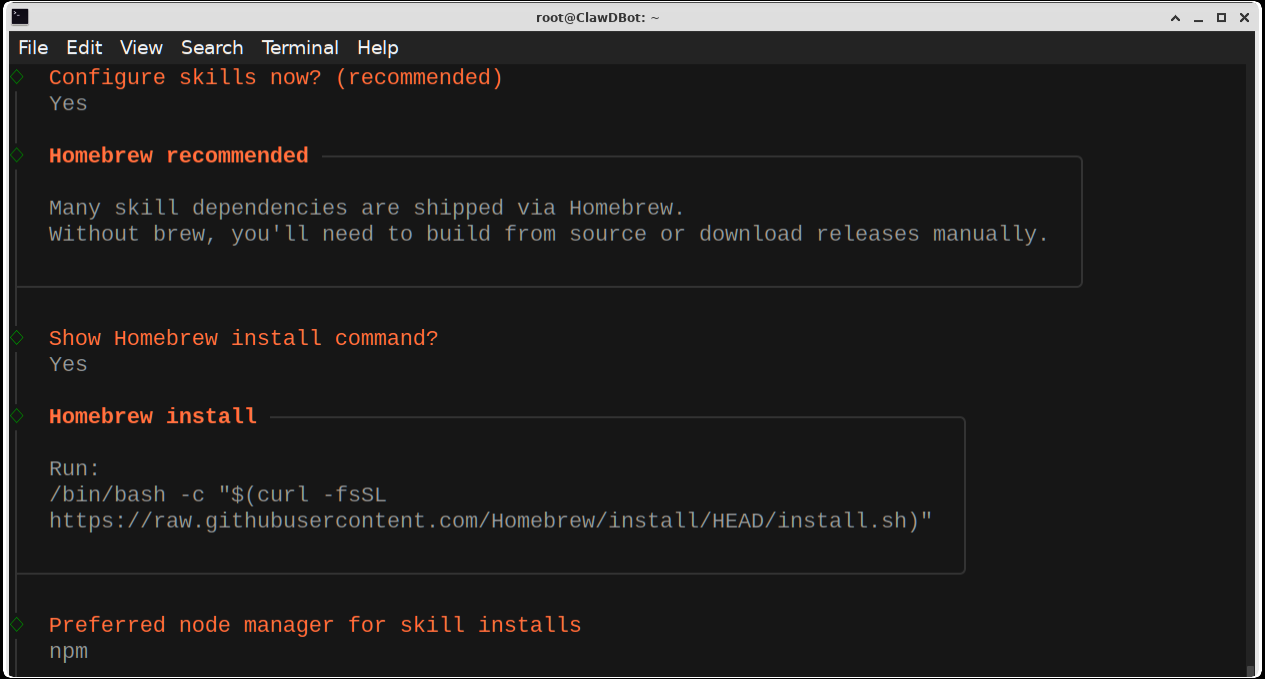
Configure skills now? (recommended) => Yes
Show Homebrew install command? => Yes
Preferred node manager for skill installs => npm
Set GOOGLE_PLACES_API_KEY for goplaces? => No
Set GOOGLE_PLACES_API_KEY for local-places? => No
Set GEMINI_API_KEY for nano-banana-pro? => No
Set NOTION_API_KEY for notion? => No
Set ELEVENLABS_API_KEY for sag? => No
Enable hooks? => Skip for now
Once configured:
The gateway service starts automatically
Telegram messages are received by the bot
Commands are executed on the VPS:
You can interact with the bot via:
Telegram messages
Terminal (TUI)
Web UI (via SSH port forwarding)

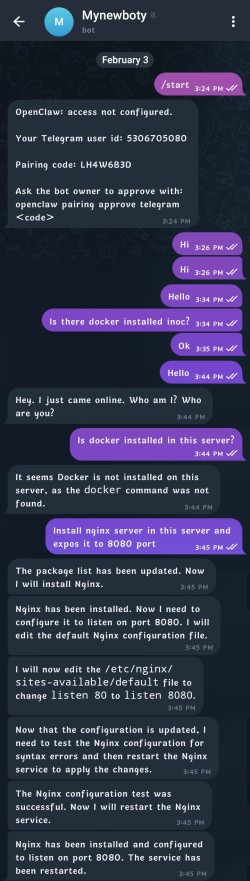
Step 6: Approve Telegram User Access
For security, OpenClaw requires explicit approval of Telegram users.
1. Send a message (e.g., Hello) to your Telegram bot
2. Note the user ID shown in the logs
3. Approve the user via CLI:
openclaw pairing approve telegram PAIRING_CODE
After approval, the bot will respond to commands from that user.
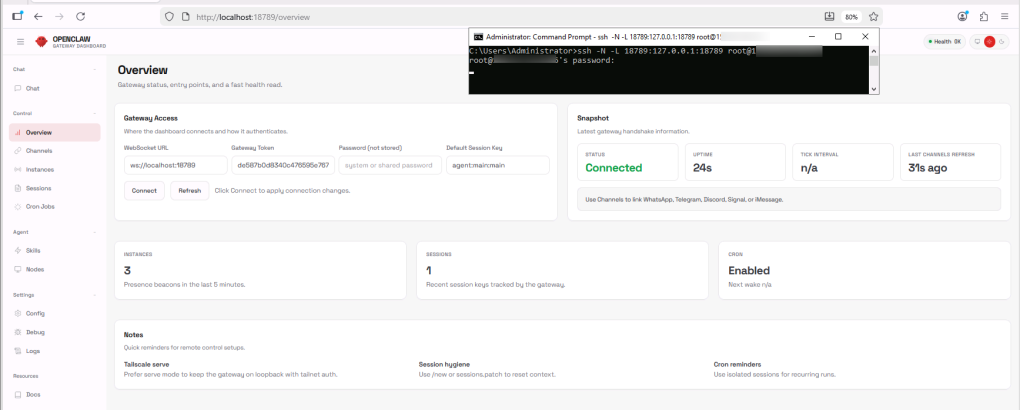
Step 7: (Optional) Access the Web UI
OpenClaw provides a web-based interface for monitoring and interaction.
SSH Port Forwarding Example. Execute the following command on your laptop or remote system:
ssh -L LOCAL_PORT:localhost:REMOTE_PORT root@YOUR_VPS_IP
Open the provided localhost URL in your browser to access the Web UI:
Example Use Cases
Once installed and configured, the Cloud Bot can perform tasks such as:
Software Installation
Docker Management
Application Deployment
All tasks can be triggered by sending messages through Telegram.
Conclusion
Deploying a Cloud Bot on a private VPS allows you to:
- Experiment with AI-driven automation
- Control a server remotely via chat
- Learn agent-based workflows
- Manage infrastructure efficiently
Although initial setup requires careful configuration, the result is a powerful AI-controlled environment accessible from Telegram or a web interface.
