Introduction:
Ping, also known as an ICMP Echo Request, is a generally used network diagnostic tool that helps determine whether a computer or server is reachable over a network. It works by sending an ICMP Echo Request message to a remote system and waiting for an ICMP Echo Reply to confirm connectivity.
By default, Windows Firewall restricts incoming ICMP Echo Requests as a security measure to protect the server from potential ping-based attacks. However, if required, you can manually enable or disable Ping (ICMP Echo Requests) in the Windows Server 2025 Firewall by following the steps outlined below.
How to Enable Ping (ICMP Echo Requests) in Windows Server 2025 Firewall
Step 1: Connect to your Windows Server 2025 using Remote Desktop (RDP).
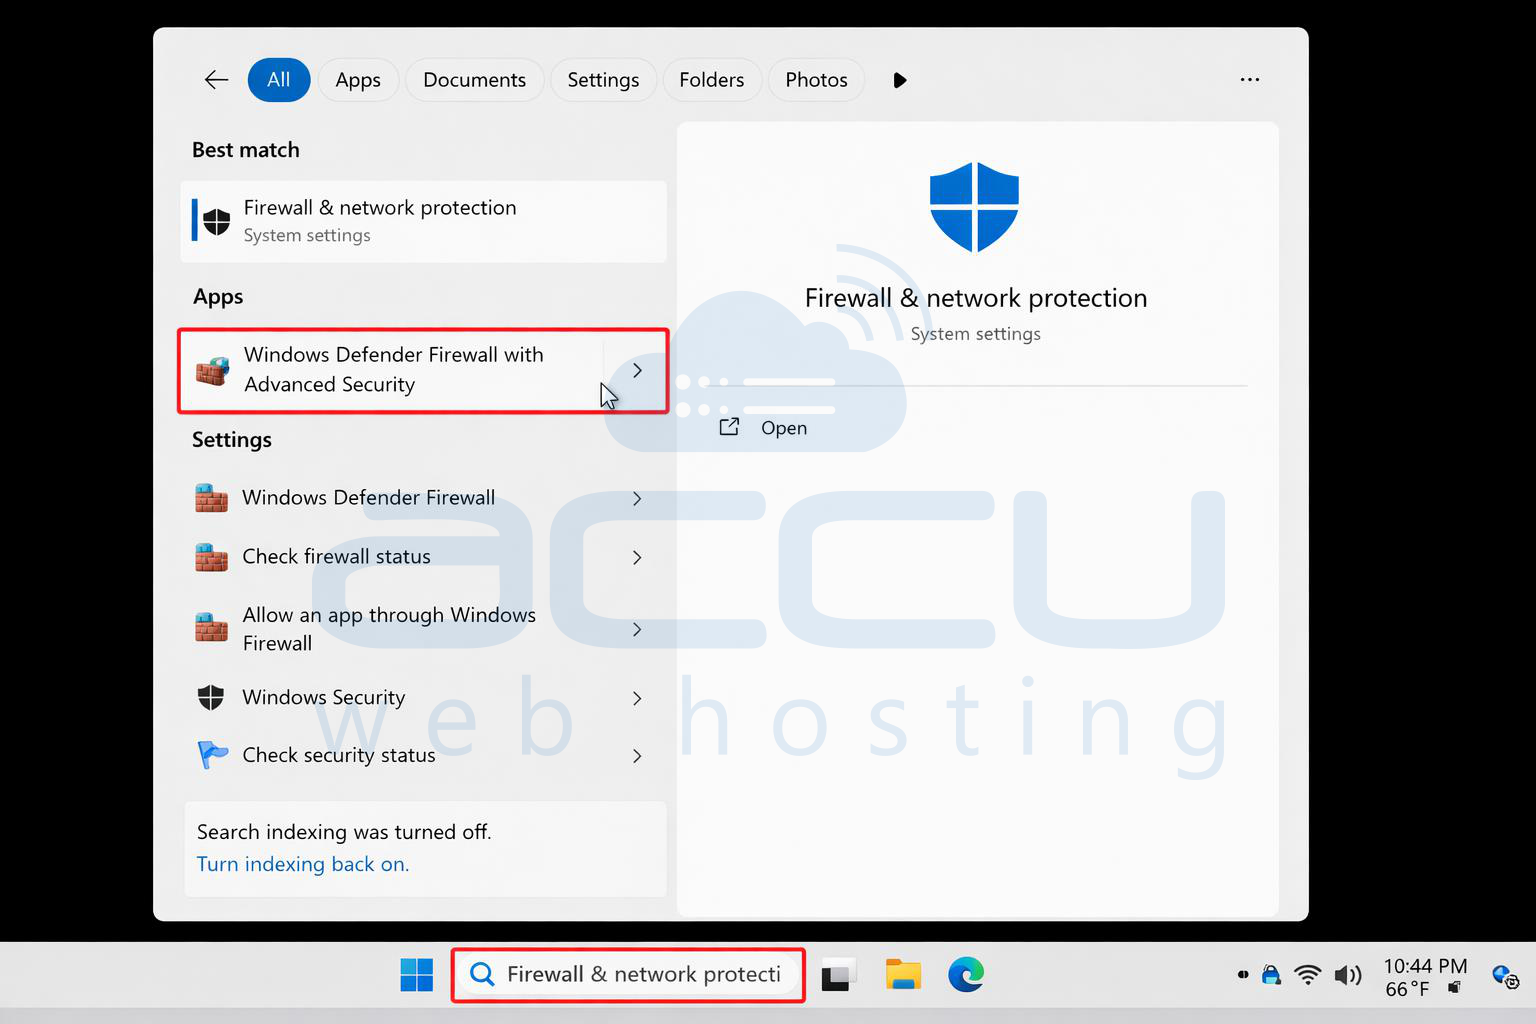
Step 2: Search for Windows Defender Firewall with Advanced Security using the Windows search bar and open it.
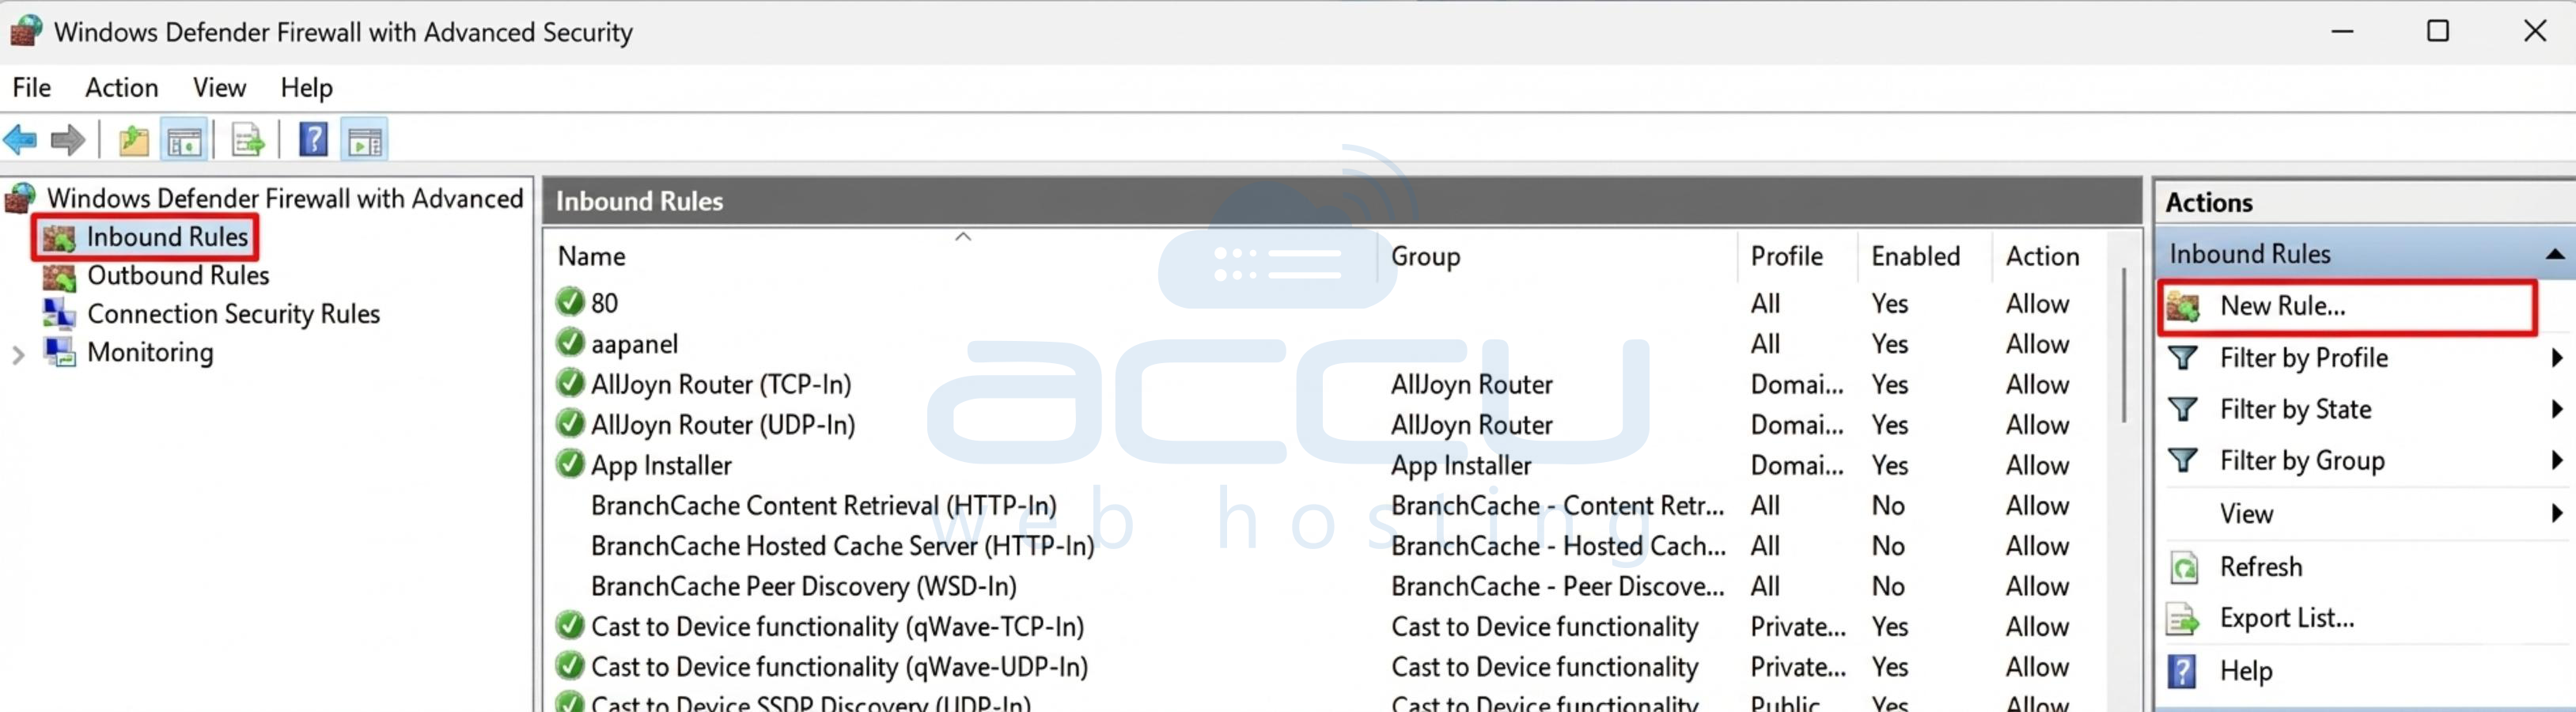
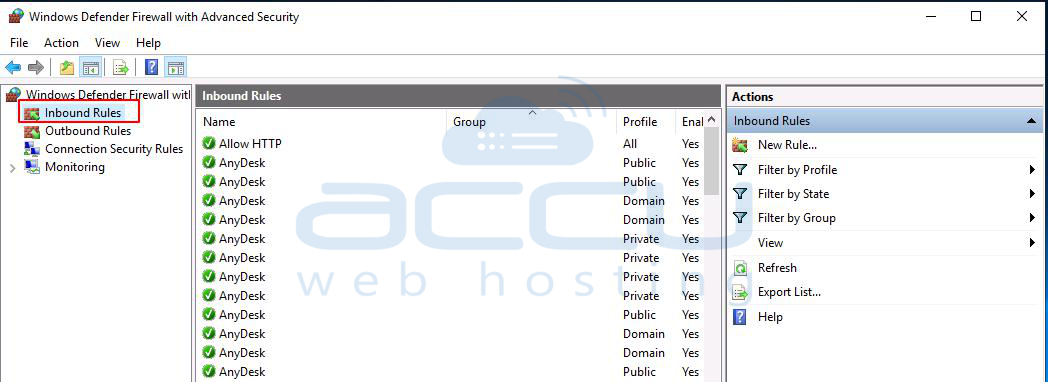
Step 3: In the Windows Defender Firewall with Advanced Security window, click on Inbound Rules.

Step 4: By default, the ICMP rule is already present in the firewall. Look for the rule named: File and Printer Sharing (Echo Request – ICMPv4-In) under Inbound Rules.
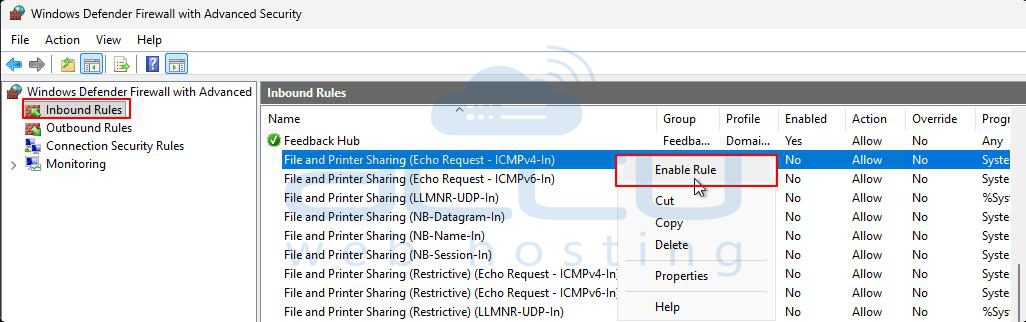
Step 5: If the rule is disabled, right-click on the rule and select Enable Rule.
Step 6: After enabling the rule, verify ICMP connectivity using the following command:
ping <your-server-IP>
Example:
ping 173.2xx.1xx.xxx

If you receive ping reply statistics, ICMPv4 is now enabled on the server.
How to Add the ICMP Rule (If It Is Not Available):
If the File and Printer Sharing (Echo Request – ICMPv4-In) rule is not present, you can manually create it by following the steps below:
Step 1: In Windows Defender Firewall with Advanced Security, click on Inbound Rules, then click New Rule from the Actions pane.
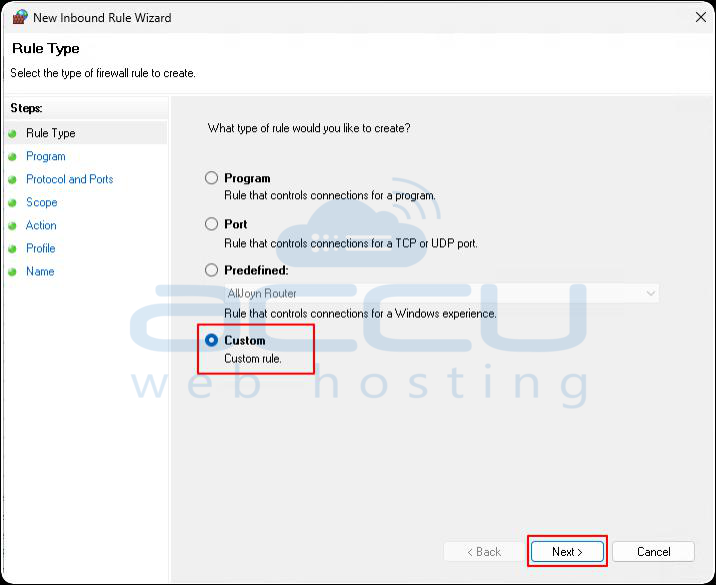
Step 2: Select Custom and click Next.
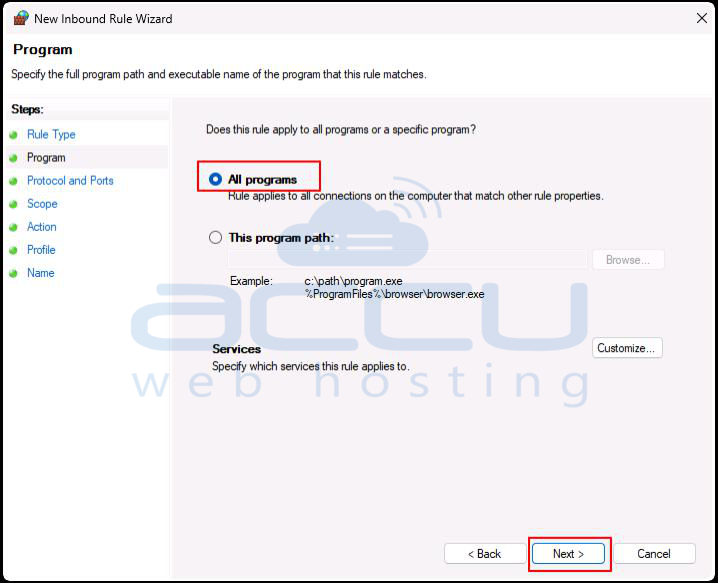
Step 3: Choose All programs, then click Next.
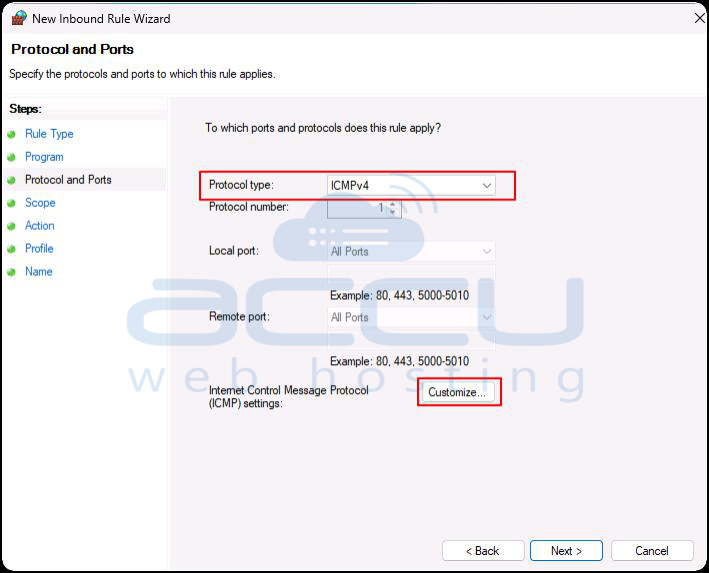
Step 4: Select the Protocol type as ICMPv4 and click the Customize button.
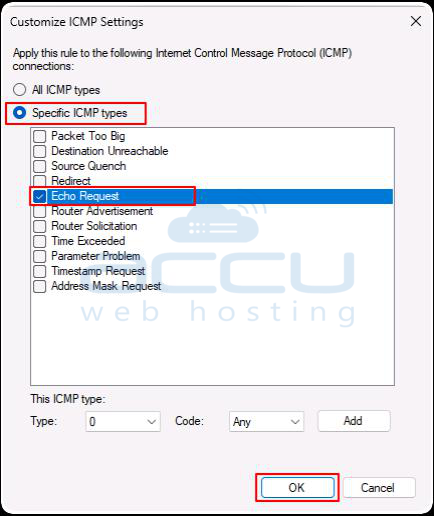
Step 5: Select Specific ICMP types, choose Echo Request, click OK, and then click Next.
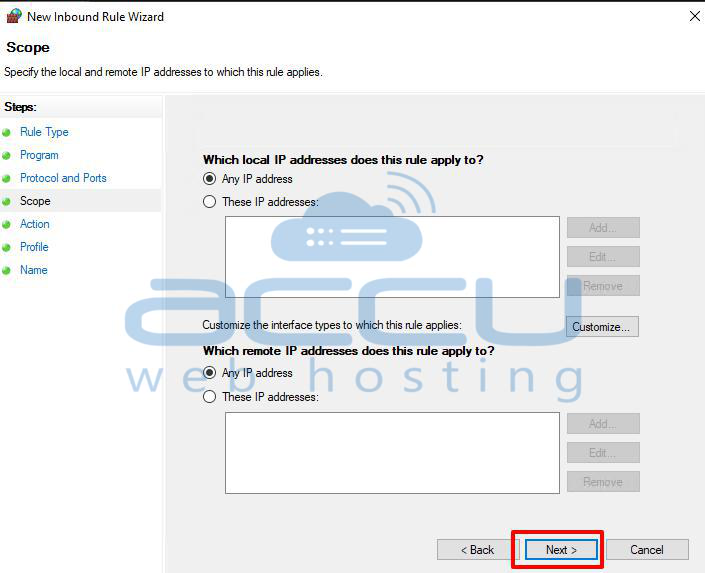
Step 6: Under which local IP addresses does this rule apply to? And which remote IP addresses does this rule apply to? Select either:
-
Any IP address, or
-
These IP addresses (specify the IP addresses you want to allow)
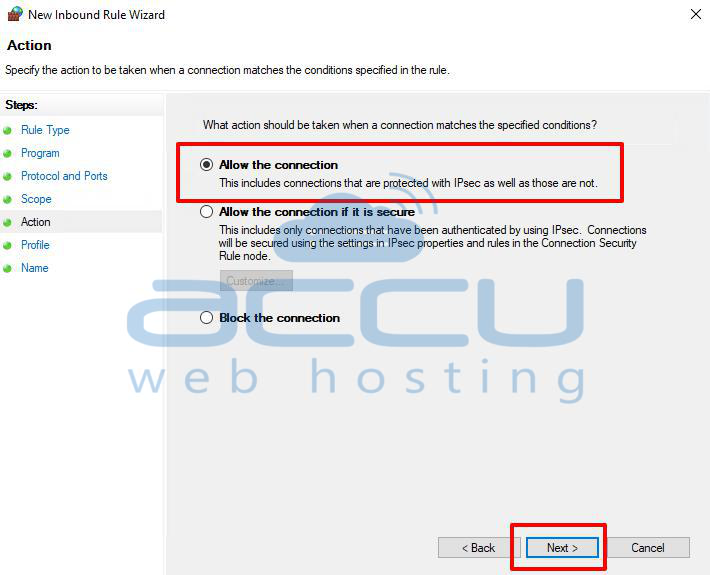
Step 7: Select Allow the connection and click Next.
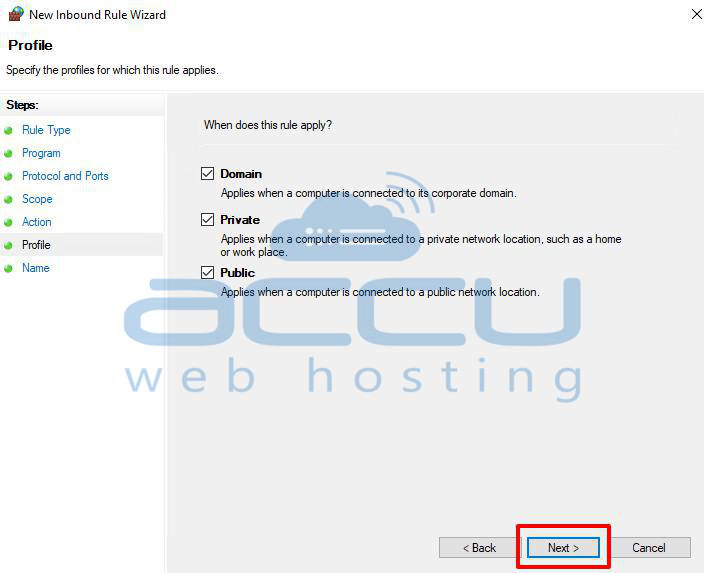
Step 8: Choose the network profiles (Domain, Private, and/or Public) where the rule should apply, then click Next.
Step 9: Provide a name for the rule and an optional description, then click Finish.

How to Disable Ping (ICMP Echo Requests) in Windows Server 2025 Firewall
Step 1: Open Windows Defender Firewall with Advanced Security and go to Inbound Rules.
Step 2: Right-click on File and Printer Sharing (Echo Request – ICMPv4-In) and select Disable Rule.

Step 3: Verify that ICMP is disabled by running the following command:
ping <your-server-IP>
If you do not receive any ping replies, ICMPv4 has been successfully disabled on the server.
Conclusion:
Enabling or disabling Ping (ICMP Echo Requests) in Windows Server 2025 is a simple but important firewall setting. Allowing ping can help you test network connectivity and troubleshoot server issues, while disabling it can improve security by hiding your server from unnecessary network scans.
By following the steps mentioned in this article, you can easily turn ping on or off based on your requirements.
