FASTPANEL is a modern hosting control panel that simplifies server administration by automating the installation and management of essential hosting services such as web servers, databases, and FTP. This guide explains each step in detail, starting from server preparation to full service configuration.
Prerequisites
Before installing FASTPANEL, you must ensure your server meets all prerequisites.
FASTPANEL can only be installed on a clean OS. This means No Apache, Nginx, MySQL, PHP, or FTP should be preinstalled, No existing control panels (cPanel, Plesk, DirectAdmin, etc.). Fresh OS installation only.
System Requirements
Ensure your server meets the minimum requirements:
- RAM: 1 GB (2 GB recommended)
- Disk Space: 5 GB free
- CPU: 1 core, 1 GHz or higher
- Access: Root access required
- Server Type: VPS or Dedicated server
Supported Operating System
FASTPANEL supports 64-bit Linux systems only.
Supported OS Versions:
Debian: Debian 9, Debian 10, Debian 11, Debian 12
Ubuntu: Ubuntu 18.04, Ubuntu 20.04, Ubuntu 22.04, Ubuntu 24.04
RHEL-Based: CentOS 7, AlmaLinux 8, Rocky Linux 8
Steps to install FASTPANEL
Step 1: After OS installation, connect to the server using SSH with root access.
Command: ssh [email protected]
Replace your.server.ip with your actual server IP address. If prompted, enter the root password.
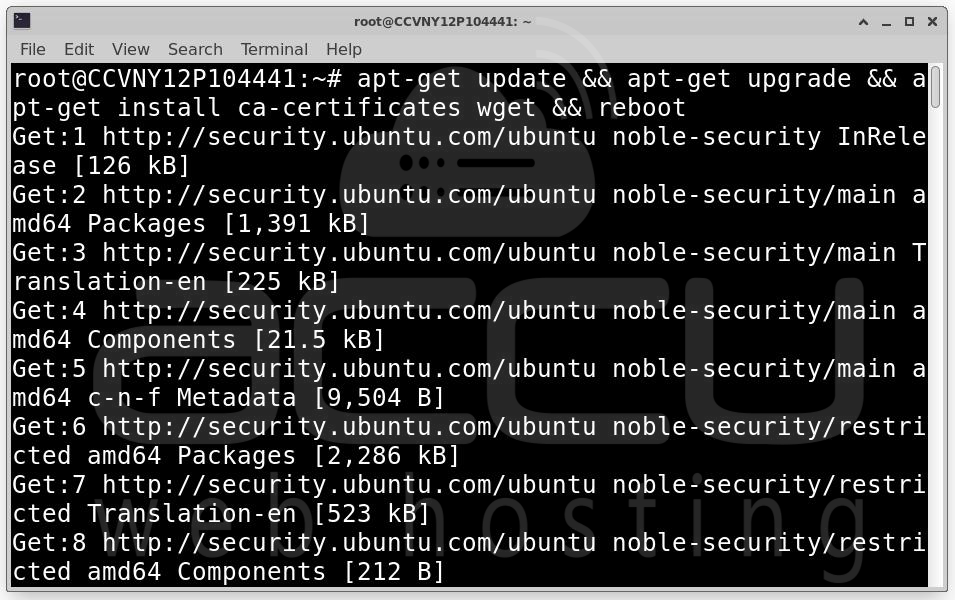
Step 2: Update the Operating System. Updating the system ensures Latest security patches, Compatibility with FASTPANEL, Required tools are available
For Debian / Ubuntu: apt-get update && apt-get upgrade && apt-get install ca-certificates wget && reboot
For CentOS / AlmaLinux / Rocky Linux: yum makecache && yum update && yum install ca-certificates wget && reboot
Step 3: Once the server is clean, updated, and rebooted, begin the installation. Run the Installation Command
wget https://repo.fastpanel.direct/install_fastpanel.sh -O - | bash -
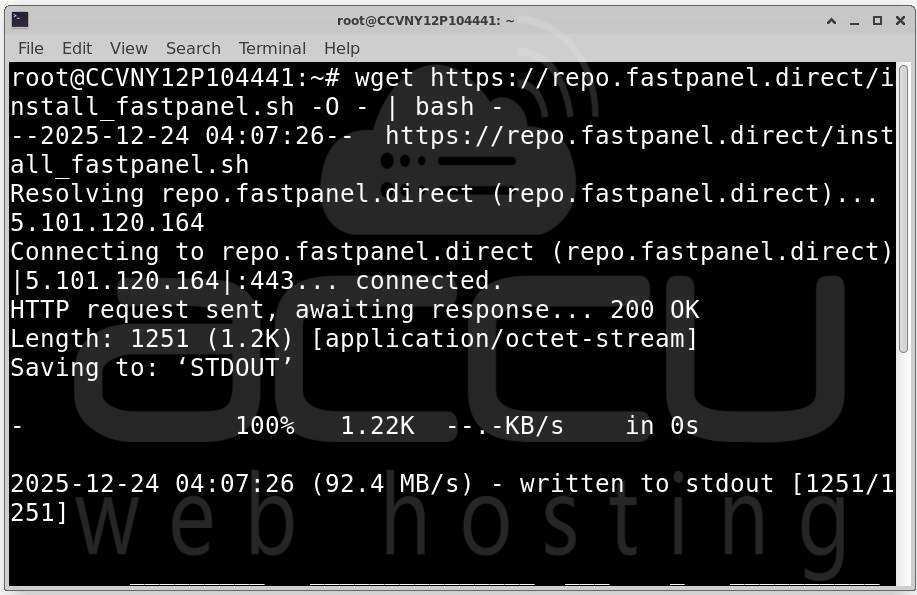
During Installation, FASTPANEL automatically installs Apache, Nginx, MySQL, PHP, ProFTPD. Installation may take several minutes.
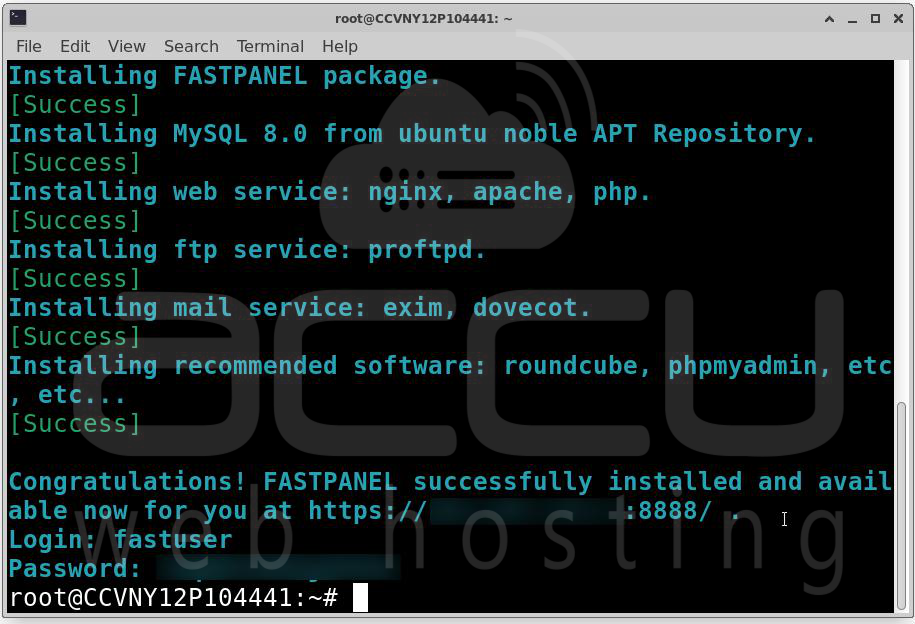
Step 4: After installation, you will see a message similar to:
Congratulations! FASTPANEL successfully installed and available for you at https://1.2.3.4:8888
Login: fastuser
Password: password
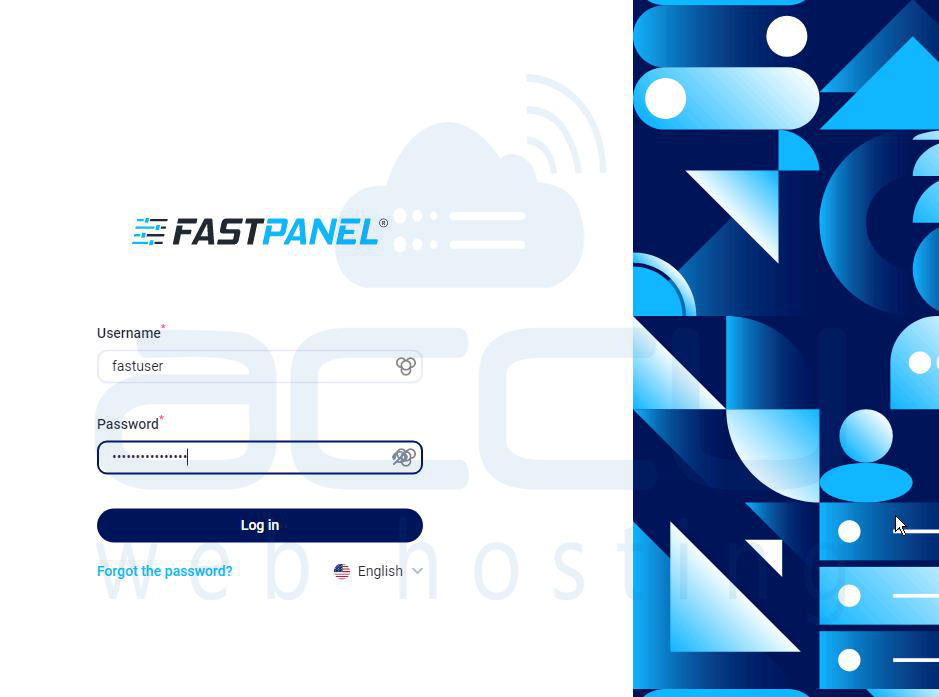
Step 6: Login into FASTPANEL. Accept browser security warning (self-signed SSL) Enter the provided username and password.
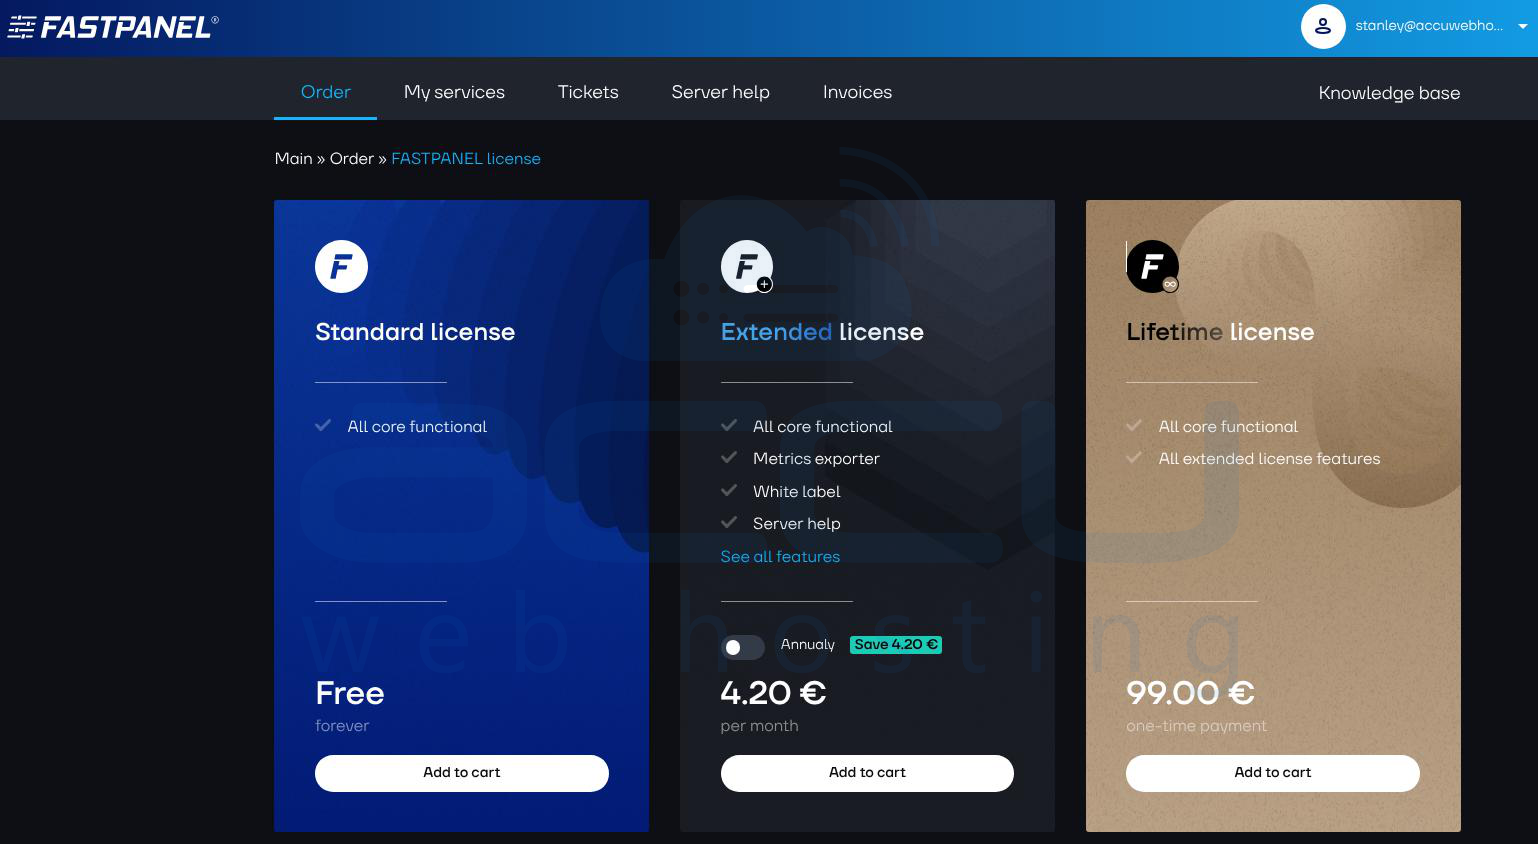
Step 7: On first login, FASTPANEL requires license activation. Activation Steps, enter your email address, Receive license details via email and apply the license in the panel. You can purchase a license here: https://cp.fastpanel.direct/login
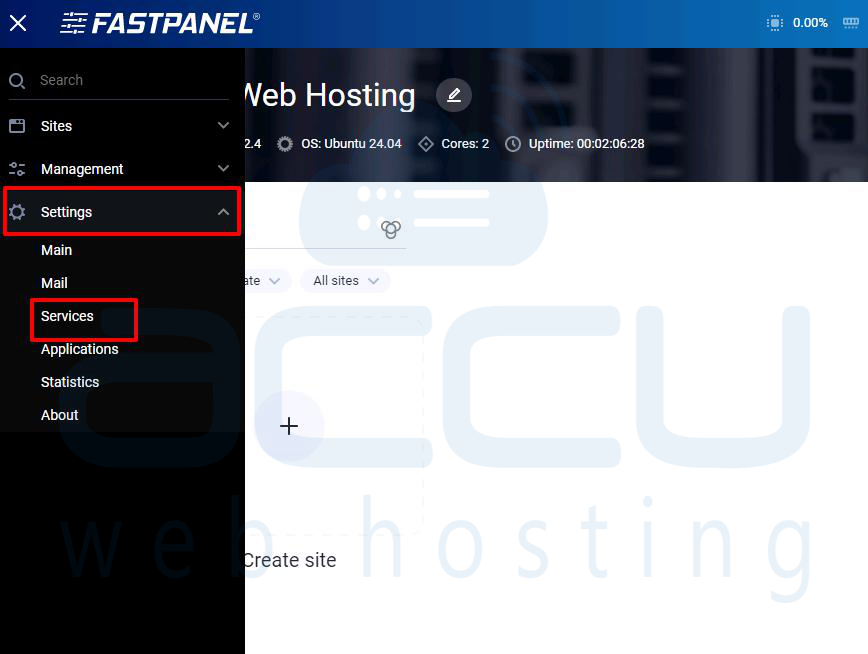
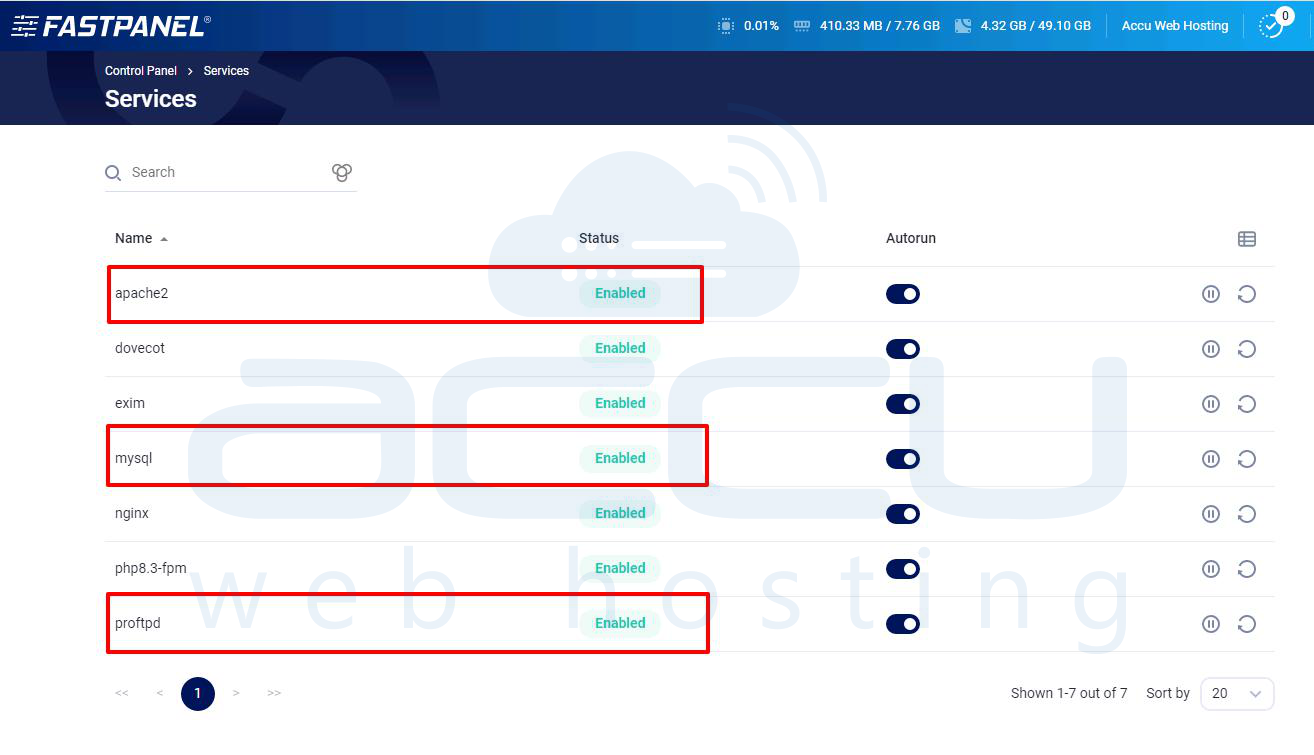
Step 8: After login, you will see the FASTPANEL dashboard. Go to Settings → Services. This section lists all system services managed by FASTPANEL.
Step 9: Ensure the apache2 and nginx services are Installed, Running and Enabled. FASTPANEL Uses Nginx acts as a reverse proxy and Apache handles PHP and dynamic content. You do not need to configure ports, virtual hosts, or modules manually.
Step 10: Verify Database Server (MySQL). FASTPANEL installs and configures MySQL automatically.
Step 11: Verify FTP Server (ProFTPD). ProFTPD allows secure file uploads for websites.
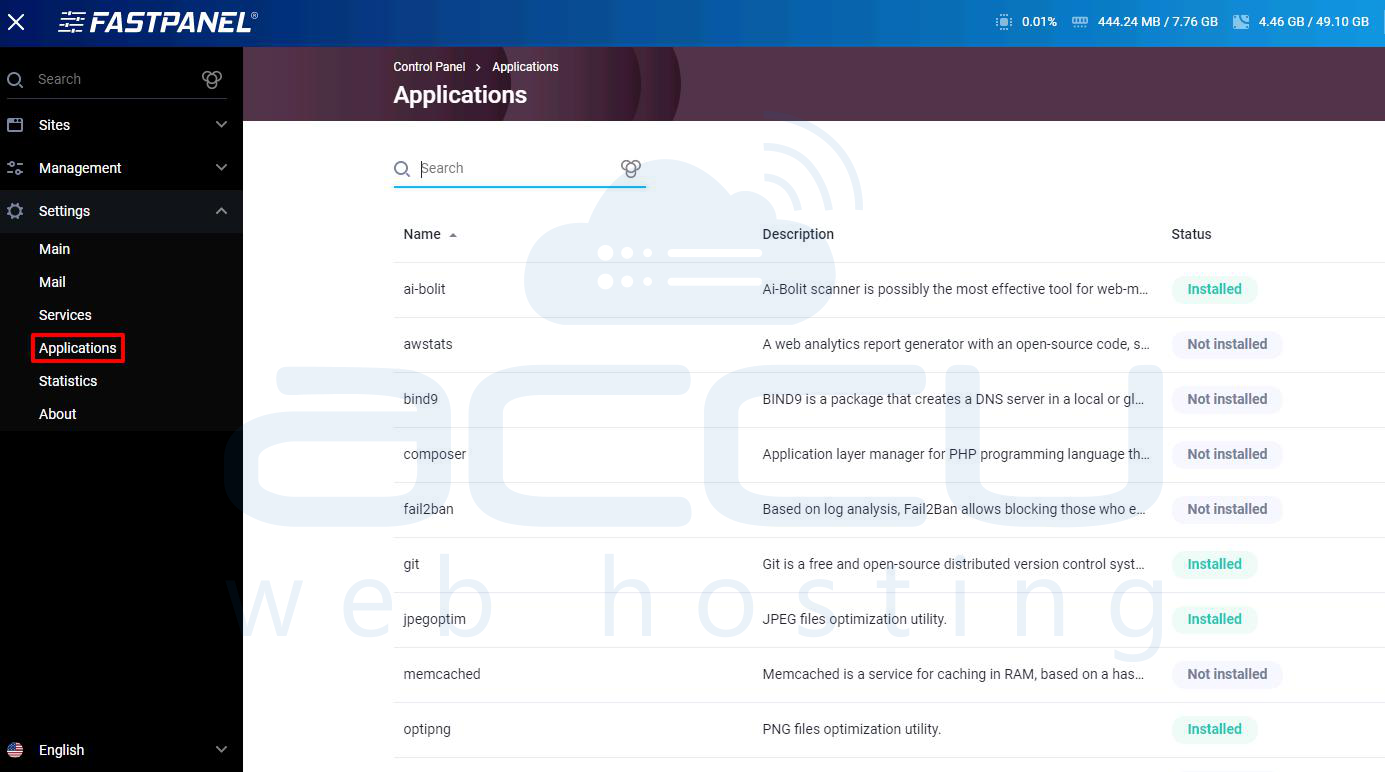
Step 12: If any service is missing go to Settings → Applications. Locate the required service and Click Install. FASTPANEL handles all dependencies automatically.
Conclusion
By following the above steps, FASTPANEL has been successfully installed on a clean server and fully configured, including activation of the control panel, setup of the web server (Apache with Nginx), database server (MySQL), and FTP server (ProFTPD). The key advantage of FASTPANEL is that no manual service installation or command-line configuration is required, as all components are managed centrally through a single interface. Your FASTPANEL hosting environment is now fully operational and ready for production use.
