ISPmanager supports two main mail components: Exim and Dovecot. Exim functions as the SMTP server responsible for sending outgoing emails from user mailboxes. Dovecot serves as the POP3/IMAP server that delivers emails to users and manages authentication and disk quota handling.
ISPmanager also supports additional mail-related services such as Greylisting, OpenDKIM, SpamAssassin, ClamAV, Sieve, AfterLogic, and RoundCube for enhanced email security, filtering, and webmail access. In this guide, we will guide you on how to Install and Configure Email Server with ISPmanager Hosting Panel.
System requirements
Before you begin, make sure your server meets the required system specifications. Only server versions of operating systems with x64 architecture are supported. You may use:
- AlmaLinux 8 or 9
- Debian 11 or 12
- Ubuntu 22.04 or 24.04 (recommended)
- Rocky Linux 8.
Desktop editions of these operating systems are not supported. The server should have at least one CPU core, 2 GB of RAM, and 10 GB of disk space.
Steps to install ISPmanager
Step 1: To install ISPmanager, start by connecting to your server through SSH using a superuser account.
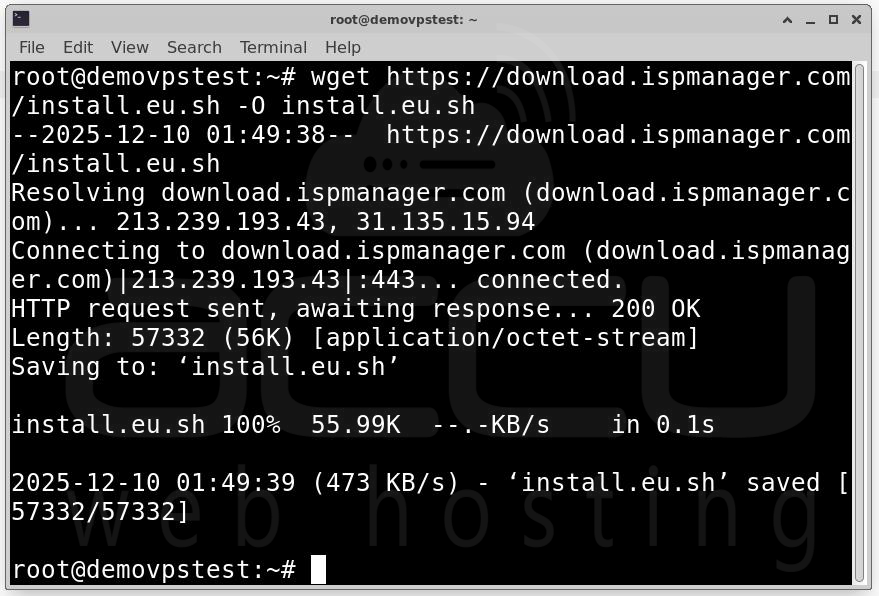
Step 2: Once logged in, download the installation script using the command:
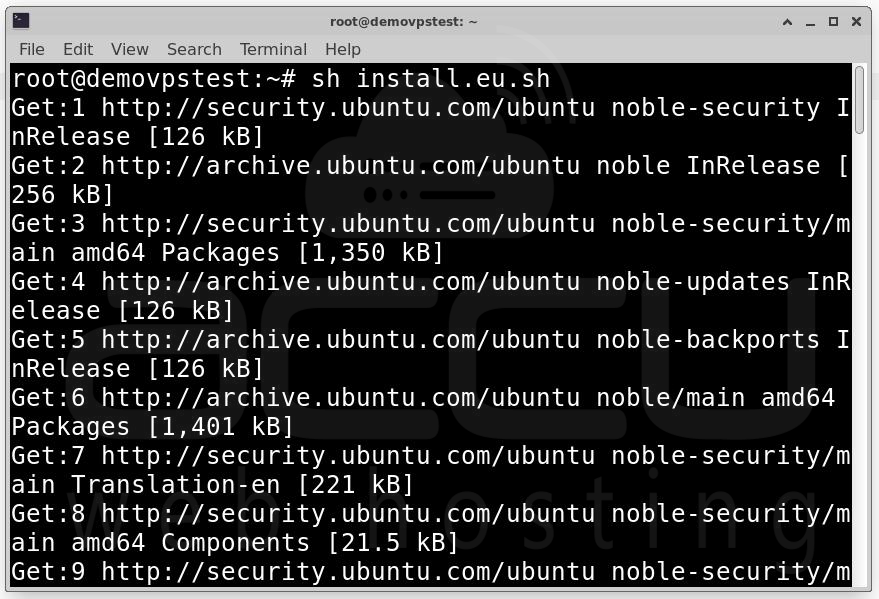
Step 3: After downloading the script, run it with:
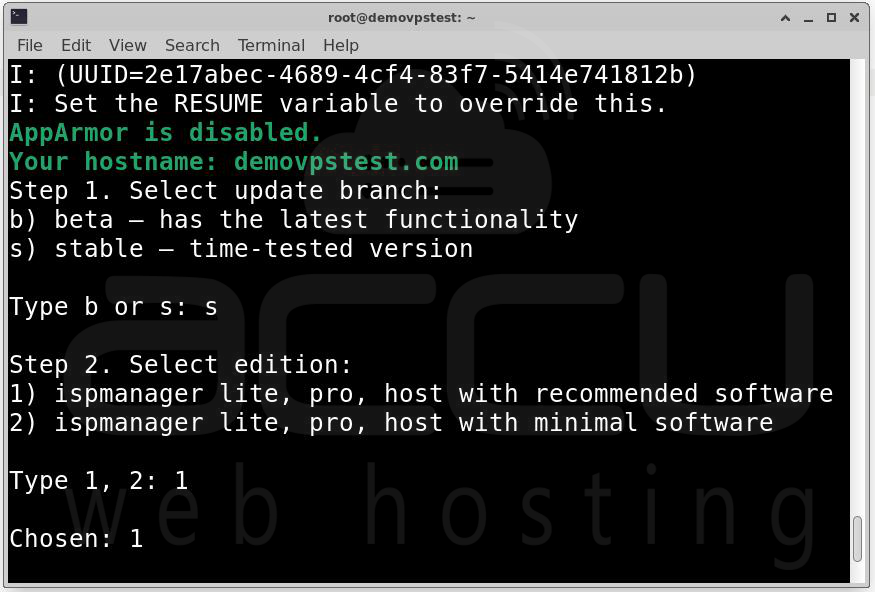
Step 4: The installer will ask you to select an update branch.
b) beta — a branch with the latest updates but still in beta testing
s) stable — a branch that successfully passed beta testing
Type b for the beta branch, which contains the newest but not fully tested features, or s for the stable branch, which includes updates that have passed all testing stages.
1) ispmanager lite, pro, host with recommended software
2) ispmanager lite, pro, host with minimal software
After choosing the update branch, the installer will ask you to select the ISPmanager edition. You may choose between the version with recommended software or the minimal version.
Step 5: If you select the recommended edition, the next step is choosing the web server.
1) Nginx + Apache (MPM-ITK)
2) OpenLiteSpeed
3) LiteSpeed (commercial web server)
You can select Nginx + Apache (MPM-ITK), OpenLiteSpeed, or LiteSpeed (commercial).
1) SQLite — for 5–10 sites and 5–10 users
2) MySQL — recommended for projects with more than 5–10 sites and 5–10 users
The installer will then ask you to choose the database type for the panel. SQLite is suitable for small installations with about 5–10 sites and users, while MySQL is recommended if you expect to manage more.

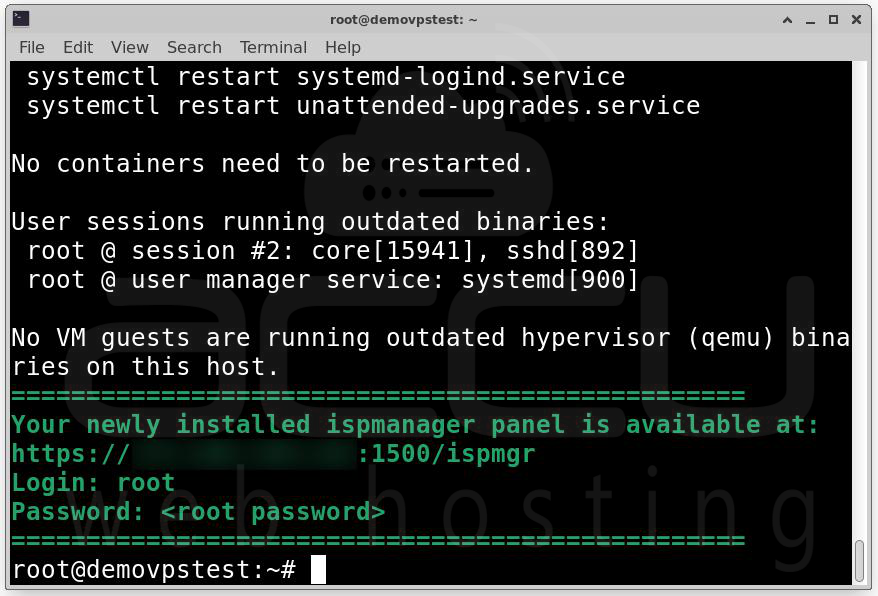
Step 6: After making your selections, wait for the installation to complete. Once finished, the ISPmanager panel will be available at:
https://IP-address:1500/ispmgr
Log in using the username "root" and your server’s root password.
Steps to install and configure mail server
After installation, the next step is configuring the mail server.
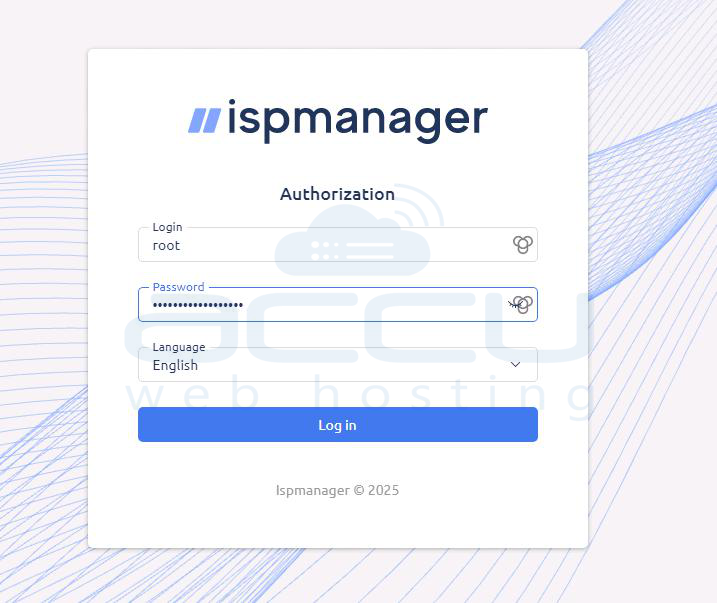
Step 1: Log in to the ISPmanager panel
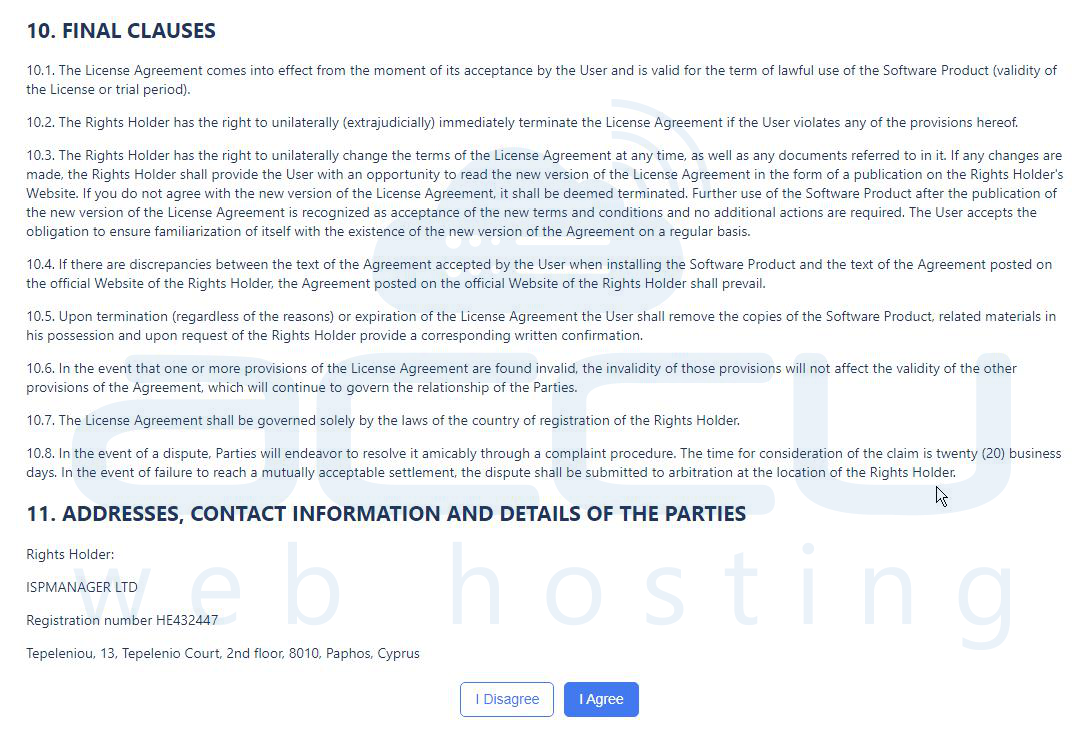
Step 2: Accept the terms and conditions.
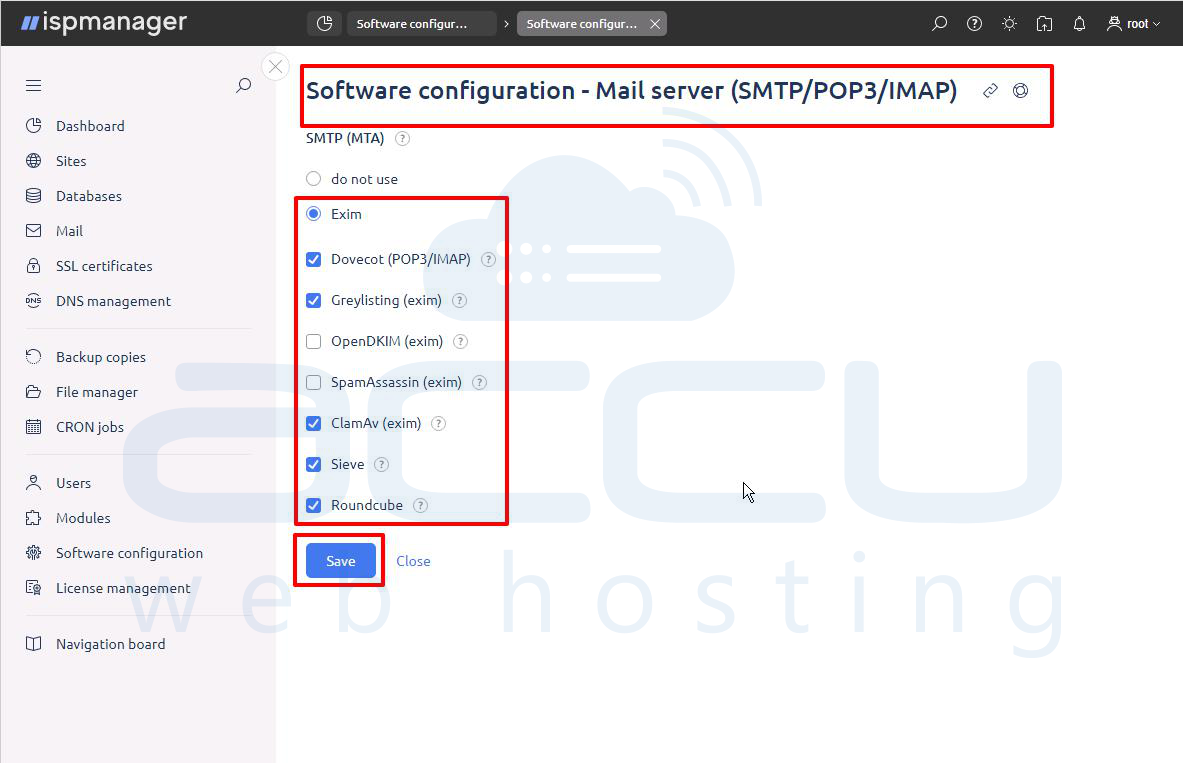
Step 3: To begin the mail server setup, navigate to Settings → Software configuration, find Mail server (SMTP/POP3/IMAP), and click Software Settings.
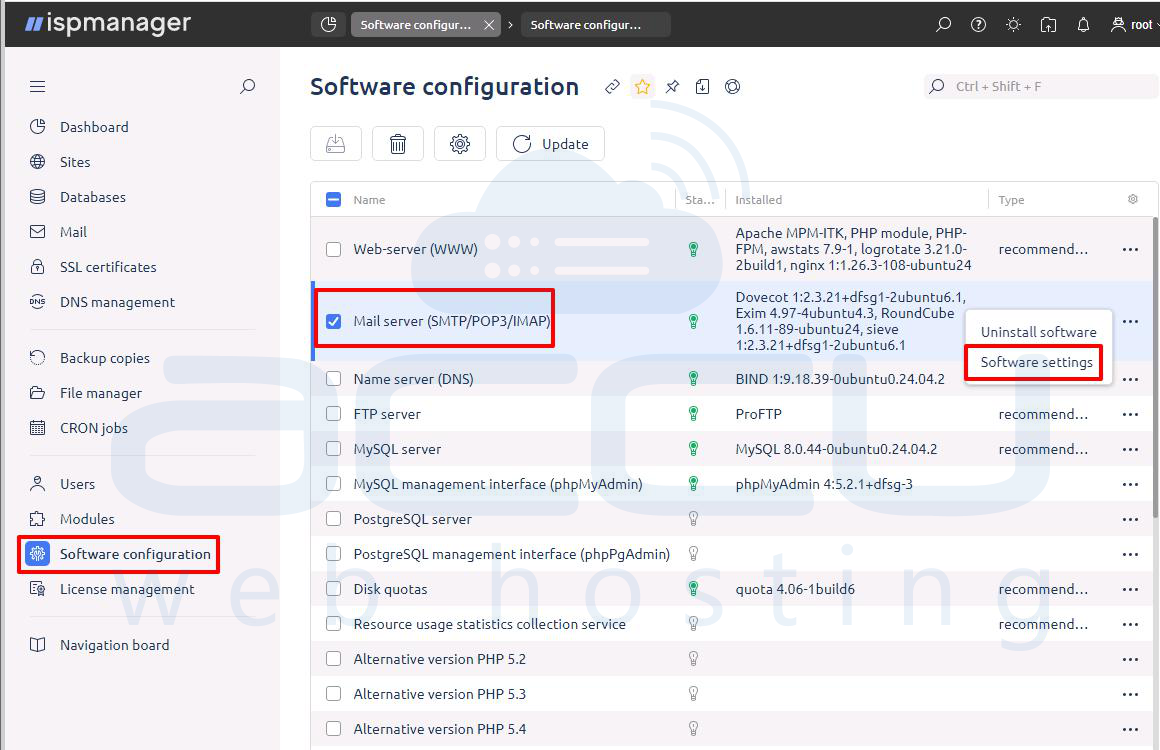
Step 4: In the mail server configuration window, select Exim as the SMTP (MTA) server.
Step 5: Next, enable the Dovecot (POP3/IMAP) option. Activating Dovecot ensures that mailboxes can receive email and that users can authenticate via IMAP, POP3, or SMTP. Without Dovecot, users would not be able to access their mailboxes.
Step 6: Once Exim and Dovecot are enabled, you may activate additional packages depending on your needs.
Greylisting temporarily rejects unrecognized mail servers to help reduce spam.
OpenDKIM allows digital signing and verification of emails using private and public keys, improving email deliverability and authenticity.
SpamAssassin provides intelligent spam filtering by analyzing incoming messages and assigning a spam score.
ClamAV is an antivirus engine used to scan emails and attachments for malware.
Sieve allows custom filtering rules for incoming mail, such as moving emails into folders or defining auto-replies.
RoundCube provides a browser-based email client that allows users to log in, read, and send mail directly from the web.
Step 7: After selecting all required components, click Save.
ISPmanager will install the services and apply the configurations automatically. The installation may take several minutes depending on the number of components selected.
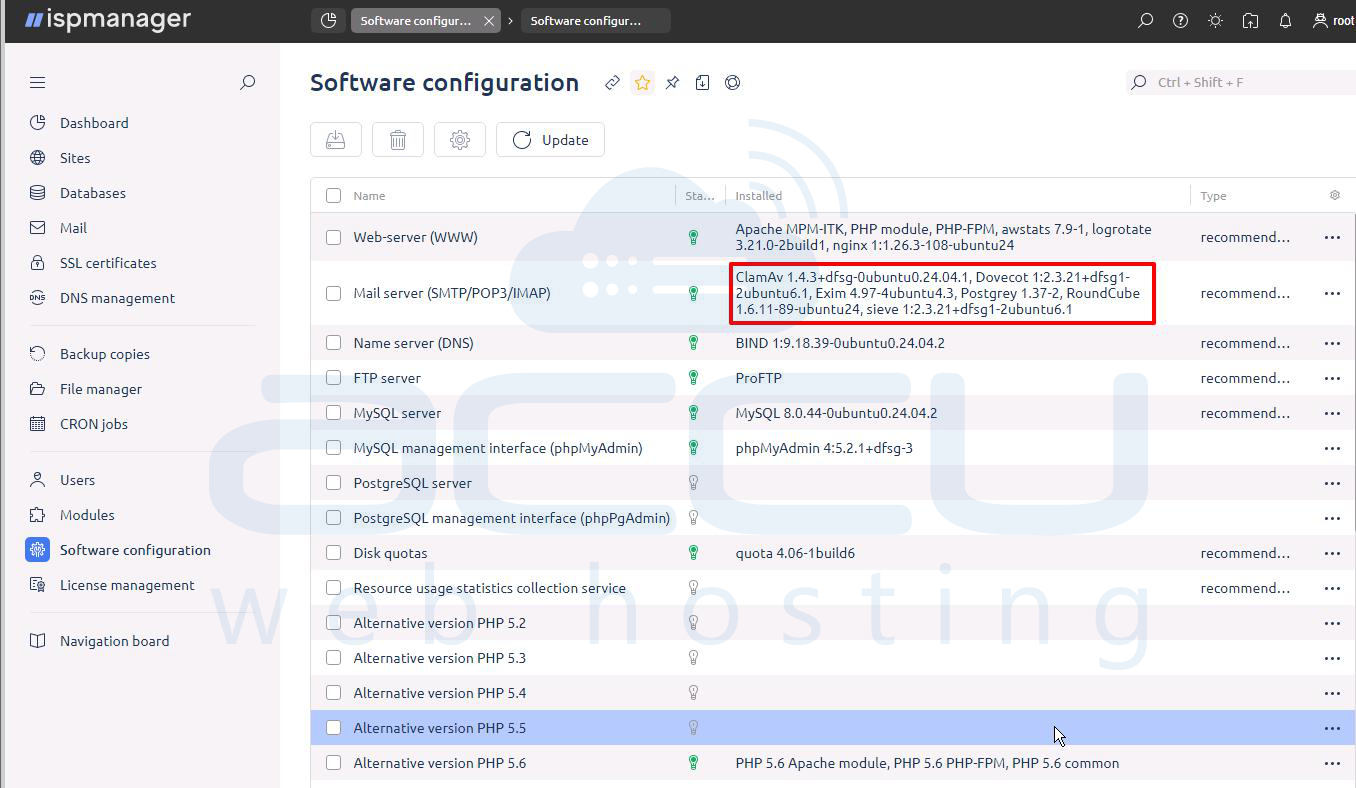
Once completed, your email server will be fully operational, and you can begin creating mail domains and mailboxes.
Setup DNS Records for the Mail Server
After installing ISPmanager and configuring the mail server, go to your domain’s DNS zone and add the required DNS records.
A record: Create an A record pointing the mail hostname (such as mail.example.com) to your server’s IP address.
MX record: Add an MX record for the domain that directs mail to the same mail hostname you created with the A record.
SPF: Then create an SPF TXT record to authorize your server to send email; for example: `v=spf1 a mx ip4:YOUR.SERVER.IP -all`.
Finally, enable DKIM inside ISPmanager, copy the generated DKIM TXT record, and add it to your DNS zone. Once these entries propagate, your mail server will be ready to send and receive emails correctly.
Setup Domain, Mail Domain, Mailbox & Test Email in ISPmanager
1. Create and Configure the Website
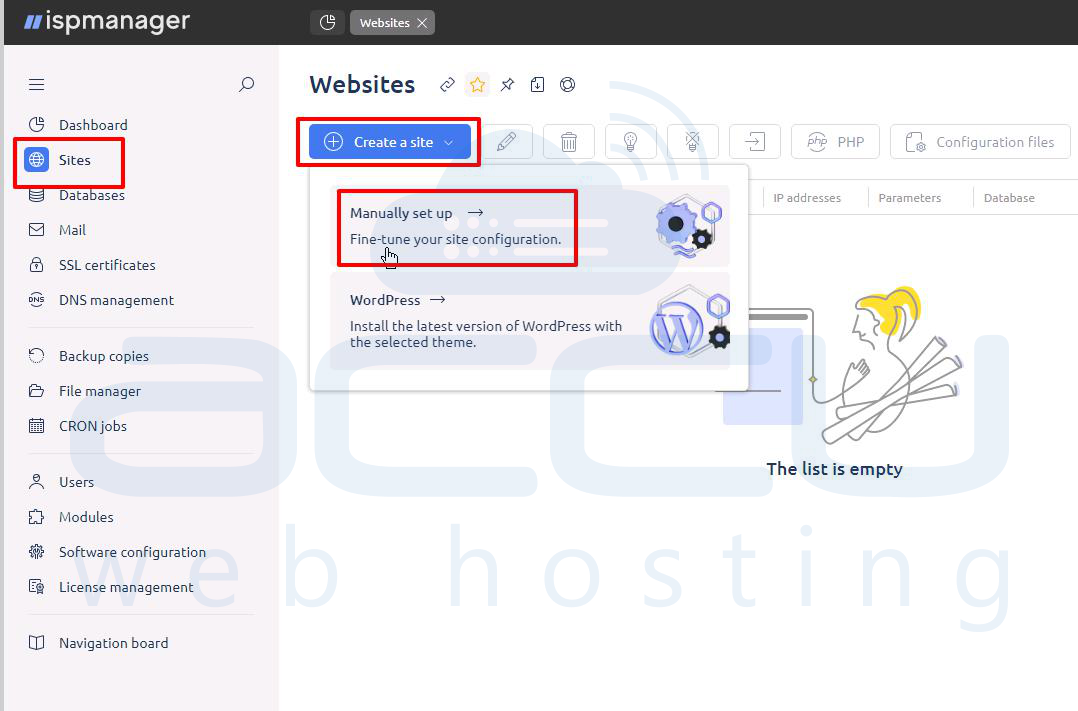
Step 1: Start by opening the Sites section in ISPmanager and click Create a site. Choose Manually set up so you can enter all necessary details.
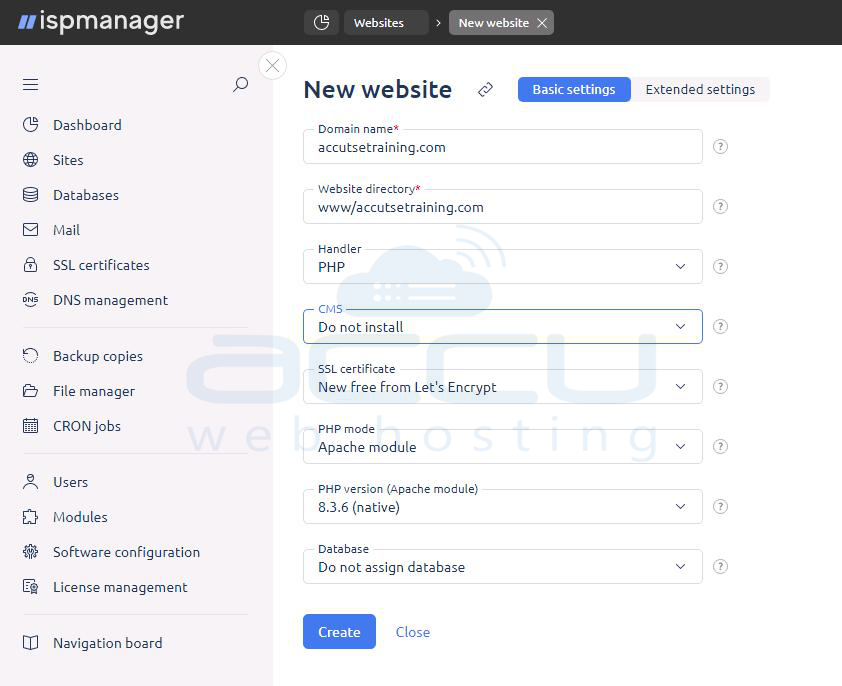
Step 2: In the website setup form, type the domain name, and specify a directory where the website files will be stored. Select PHP as the handler, and choose For secure access, select New free from Let’s Encrypt to automatically generate an SSL certificate. Choose the PHP mode and version required for your site.
Once all options are filled in, click Create to finalize the website setup.
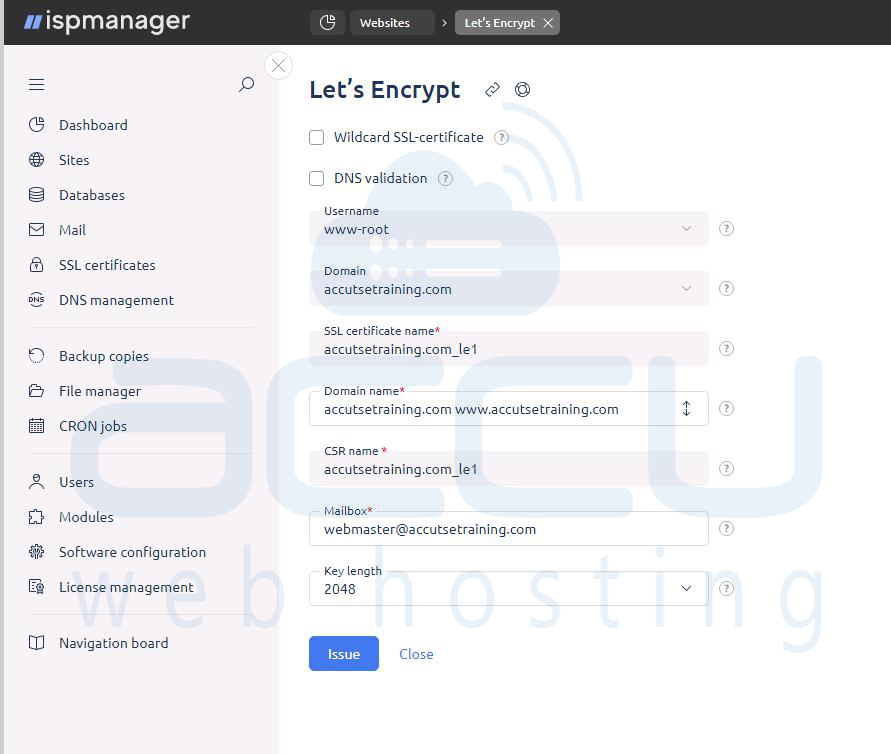
Step 3: After the site is created, go to the SSL certificates section to issue the certificate. Select Let’s Encrypt, uncheck wildcard and DNS validation options, verify that both the domain and “www” version are listed, and enter a valid mailbox. Confirm the key length (2048) and click Issue to complete SSL generation.
2. Create the Mail Domain
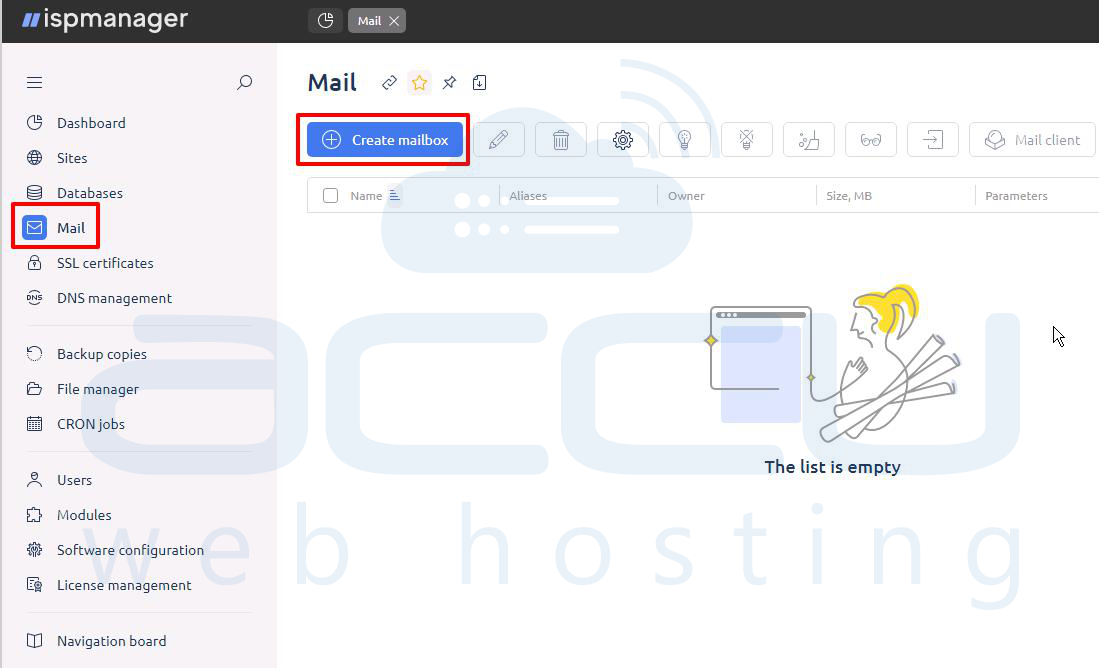
Step 1: Open the Mail section in ISPmanager. If this is the first email setup for the domain, click Create mailbox, which will take you to the mail domain creation page.
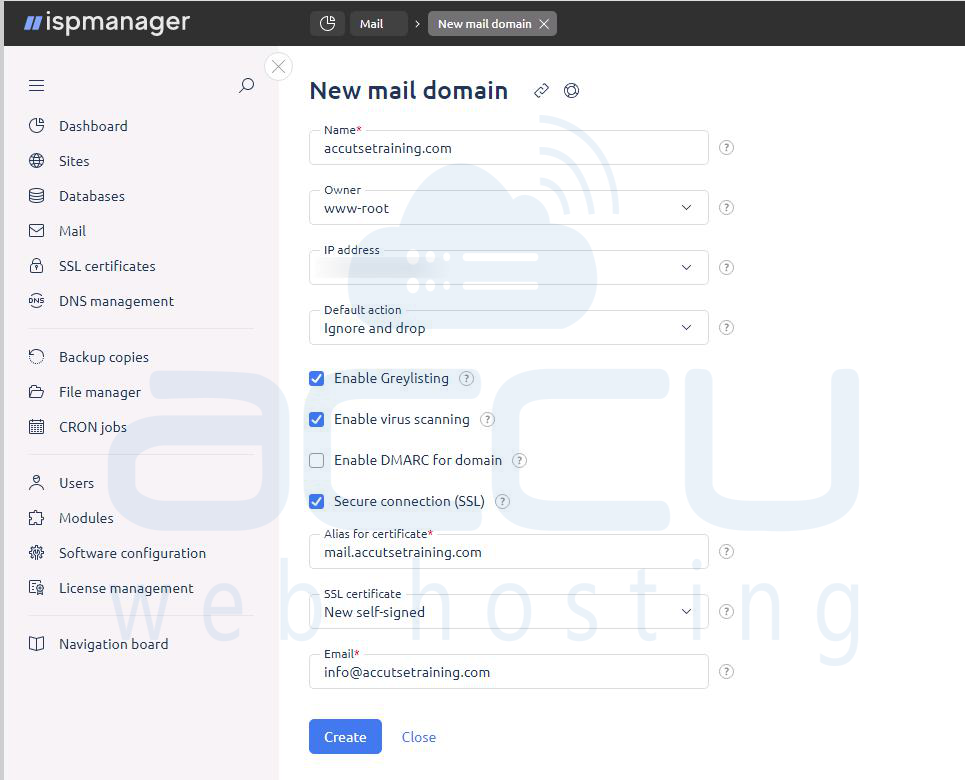
Step 2: Enter your domain name, make sure the owner and IP address are correct, and select a default action for invalid recipients, typically “Ignore and drop.”
Step 3: Enable Greylisting for spam control, and Virus scanning to protect incoming mail. Also enable Secure connection (SSL) so the mail service operates over encrypted channels.
Step 4: Select an SSL certificate, either a self-signed one or the Let’s Encrypt certificate issued earlier. Provide an administrative contact email if required and click Create to add the mail domain.
3. Create the Email Account
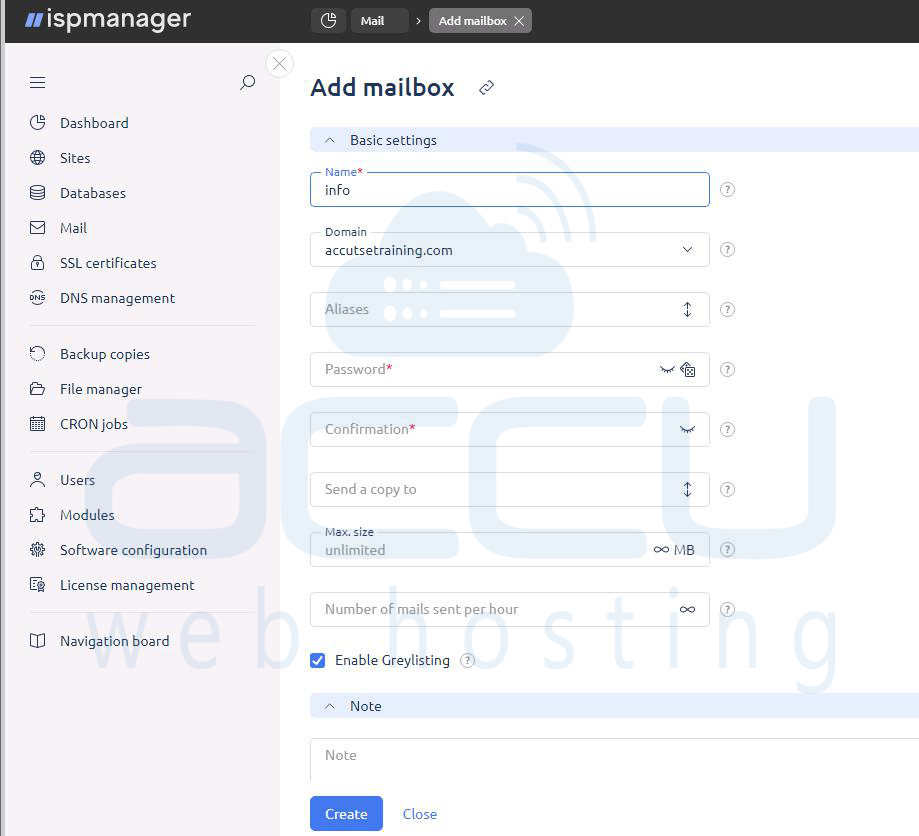
Step 1: Once the mail domain is ready, return to the Mail section and click Create mailbox to add an actual email account.
Step 2: Enter the mailbox name such as info, which creates the address [email protected]. Set a strong password and adjust optional settings like mailbox size and hourly email-sending limits. Leave Greylisting enabled for additional protection.
Step 3: Step Click Create, and the mailbox will appear in the list, confirming it has been created successfully.
4. Open Webmail and Test Sending Email
Step 1: To test the new email address, select the mailbox from the Mail section and choose Open the mail web client from the dropdown menu.
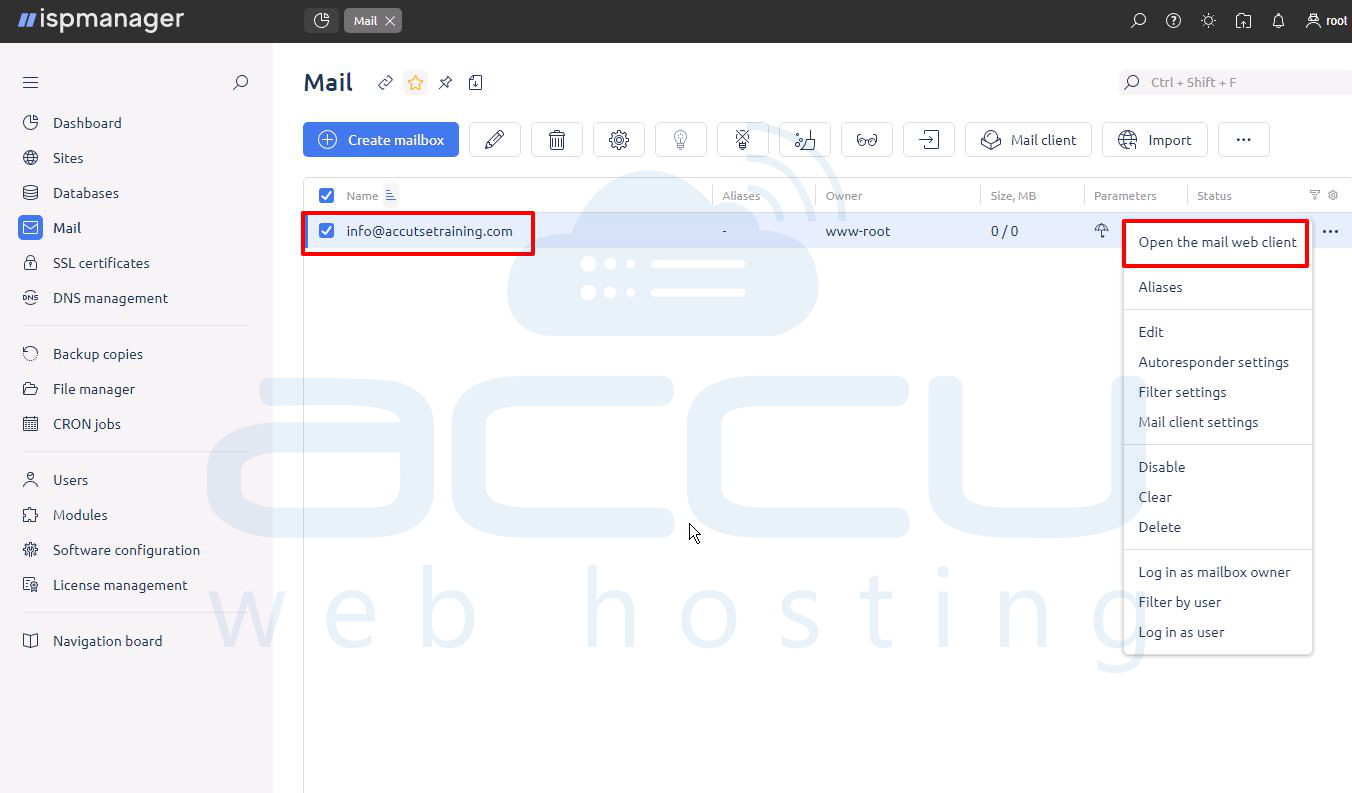
Step 2: This opens the webmail interface.
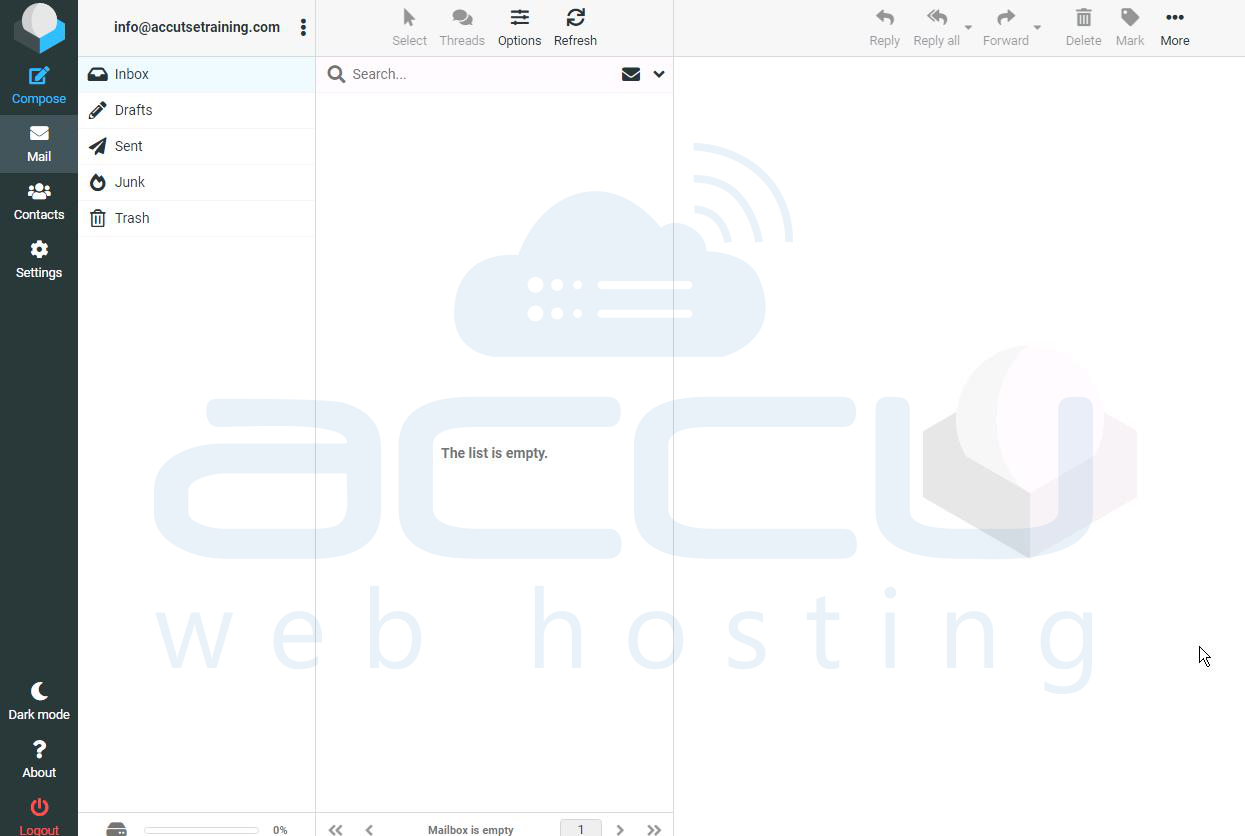
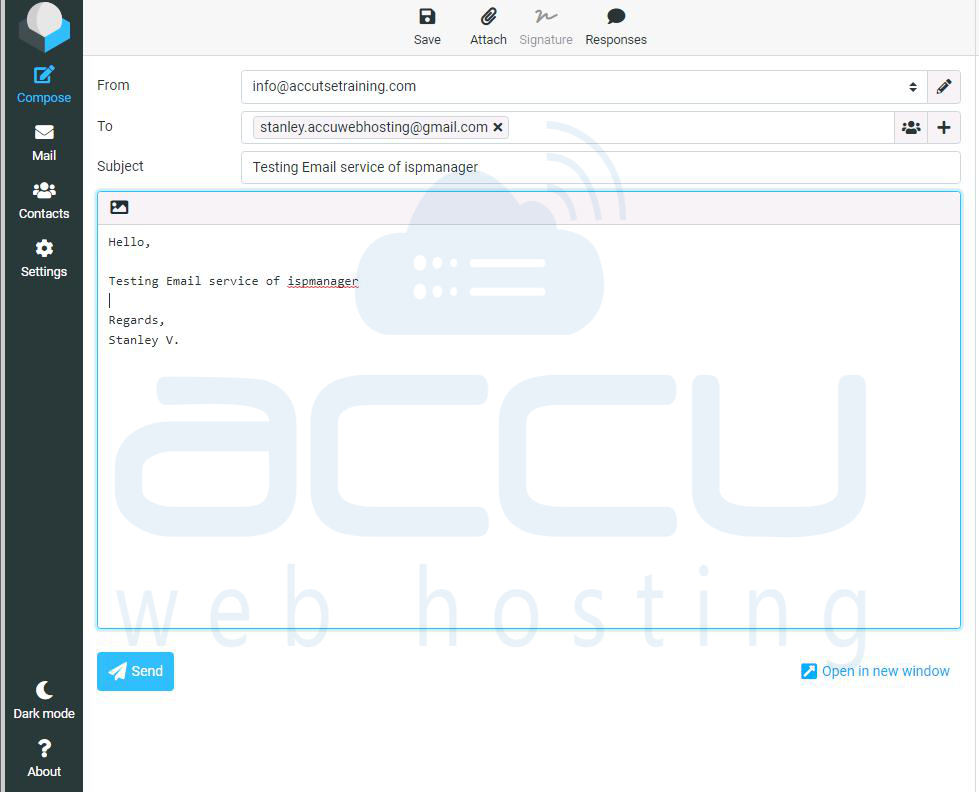
Step 3: Once inside, click Compose, enter the details for a test message.
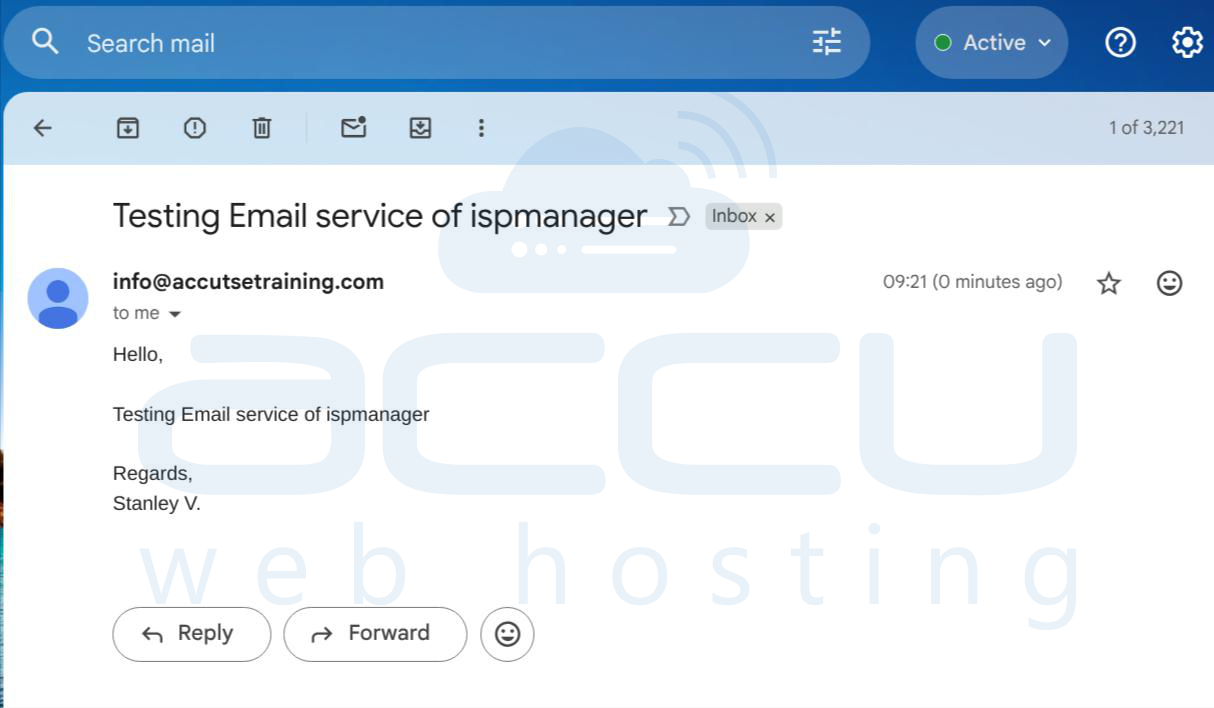
Step 4: Check the external email account to confirm the message has been delivered. If it appears successfully, your domain, mail domain, and mailbox are all fully configured and functioning correctly.
Conclusion
Installing and configuring an email server with ISPmanager is straightforward when following the proper steps. By setting up Exim as the SMTP server and Dovecot as the POP3/IMAP server, along with optional tools like Greylisting, and RoundCube, you can create a secure and fully functional email environment. After installation, configuring the domain, mail domain, mailbox, and DNS records ensures reliable sending and receiving of emails.
