
Let's Encrypt provides a free, automated, and open Certificate Authority (CA) to help website owners secure their domains with SSL certificates. If you’re using ISPManager, a popular web hosting control panel, you can easily install a Let's Encrypt SSL certificate for your website. In this guide, we will walk you through the process of securing your website with a free SSL certificate, ensuring encrypted communication between your site and its visitors, which boosts security and improves your site's SEO ranking.
Steps to install Let's Encrypt SSL for a website in the ISPManager Hosting Control Panel
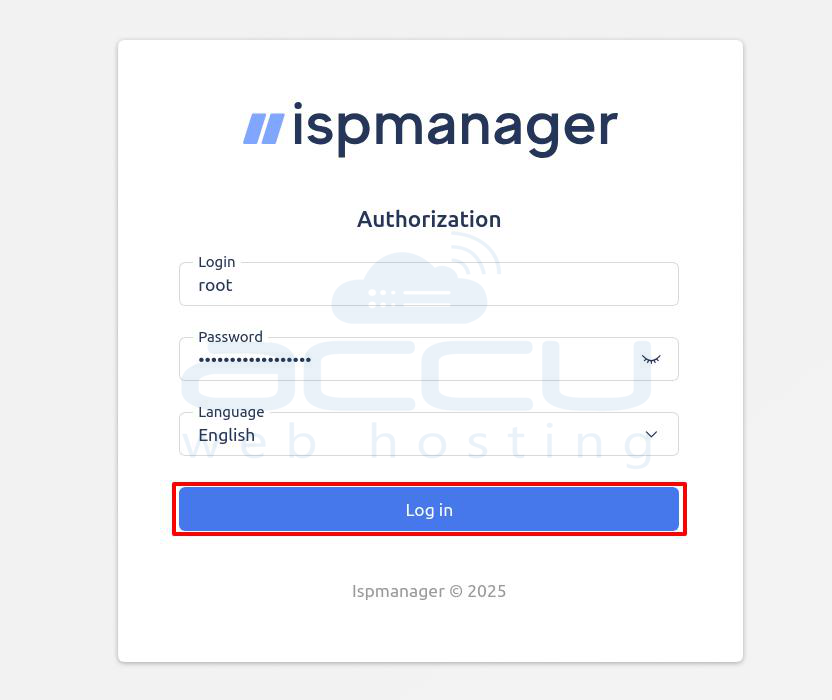
Step 1: The first step is to access the control panel. Go to the ISPmanager login page. Enter your Login (e.g., root) and Password. Click the Log in button.
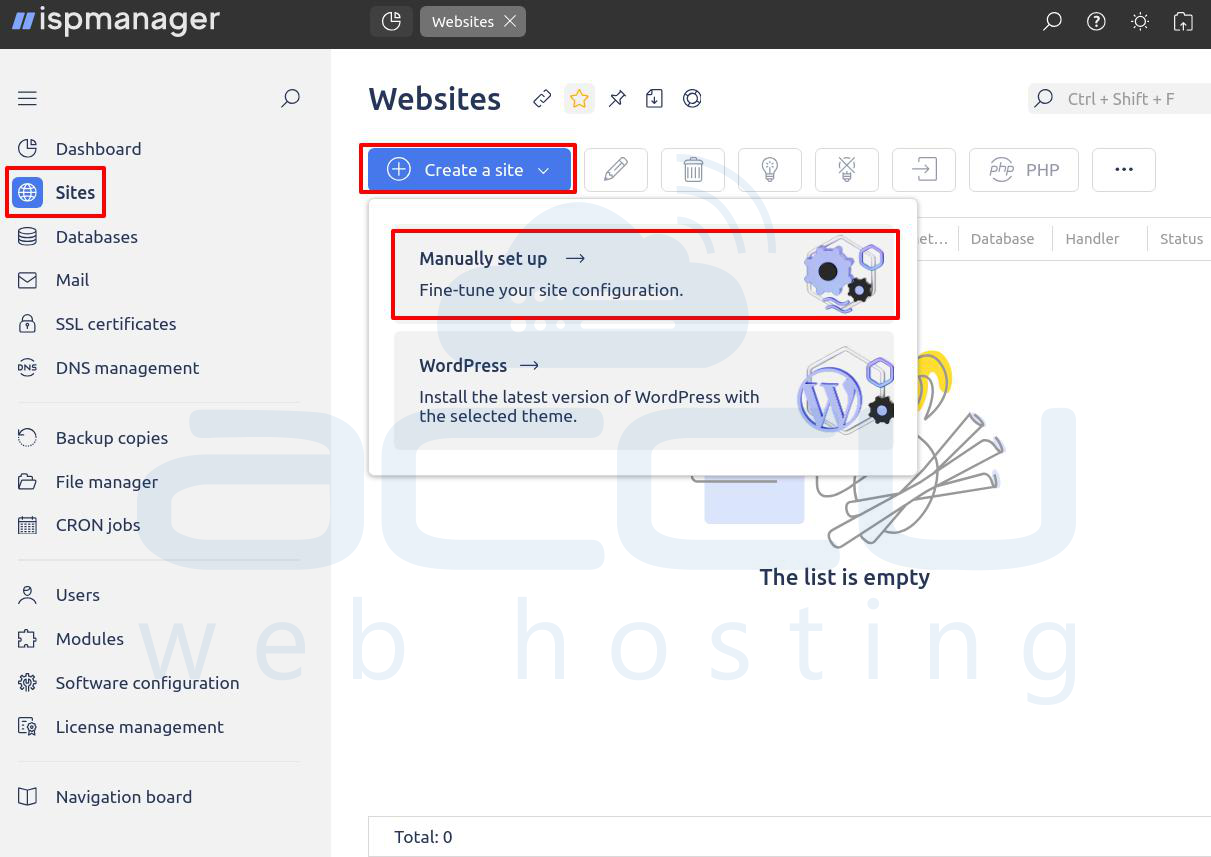
Step 2: Once logged in, you need to start the process of creating a new website. In the main navigation menu on the left, click on Sites (or Websites). On the "Websites" page, click the Create a site button. From the dropdown, select Manually set up to fine-tune your site configuration.
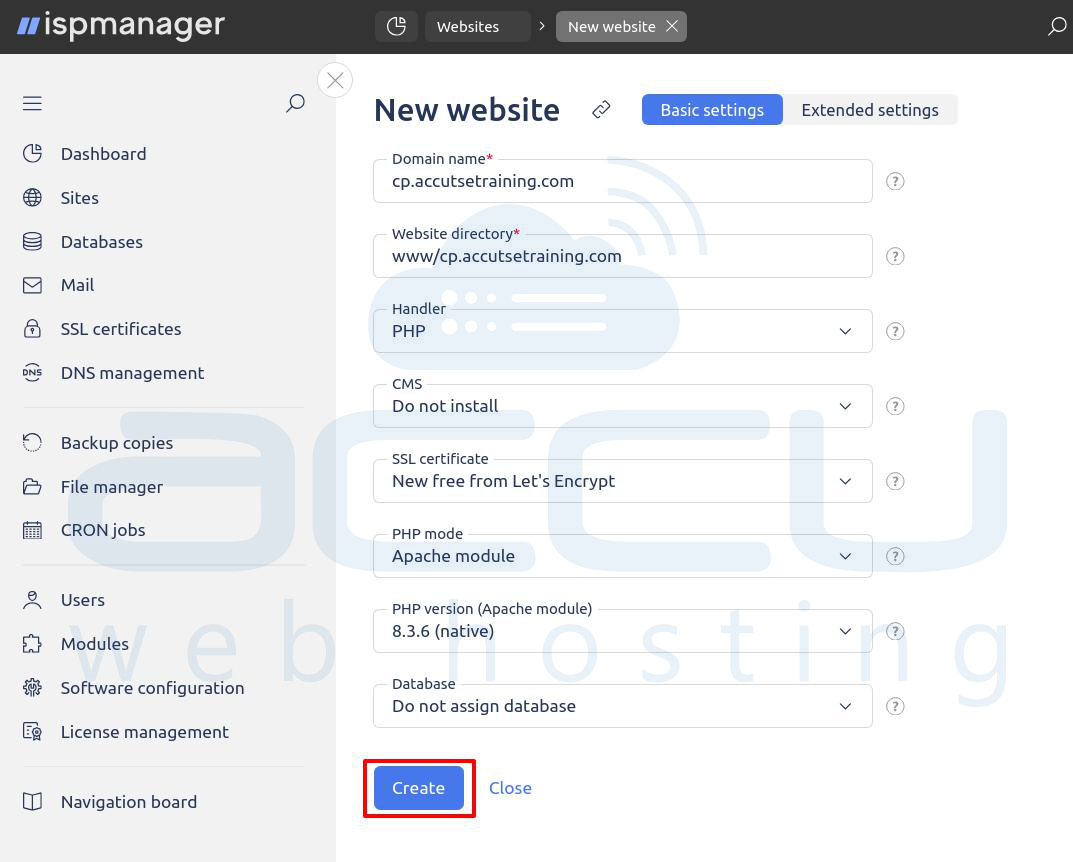
Step 3. Fill in the necessary details for your new website. Enter the Domain name, Website directory, select your desired Handler, PHP mode, and PHP version. In the SSL certificate field, choose New free from Let's Encrypt. Click the Create button.
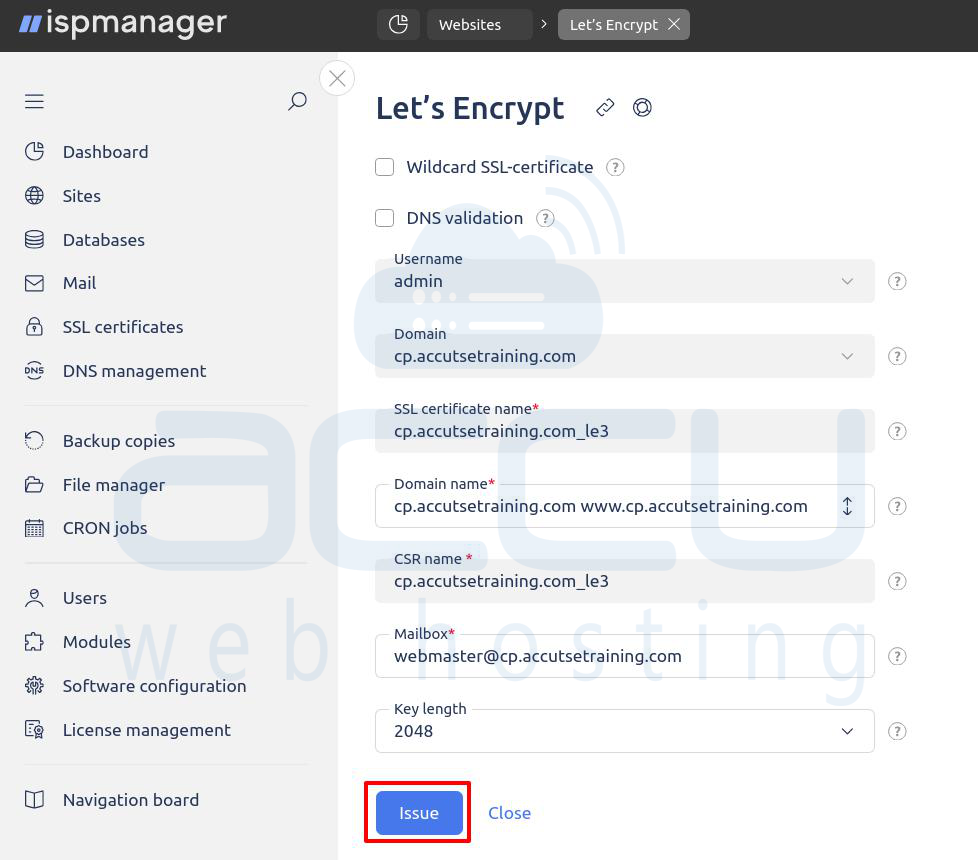
Creating the site will automatically open the Let's Encrypt certificate issuance form.
Step 4: The final step is to confirm and issue the certificate: Review the pre-filled details in the "Let's Encrypt" window.
- Domain: The domain name you entered.
- SSL certificate name: A descriptive name for the certificate.
- Domain name (in the certificate): The domain(s) to be covered by the certificate.
- CSR name: The name for the Certificate Signing Request.
- Mailbox: The email address used for contact and renewal notifications
- Key length: (e.g., 2048).
If all information is correct, click the Issue button to generate and install the free SSL certificate from Let's Encrypt. Your website will now be created and secured with a free SSL certificate. Make sure your domain is pointing to your server IP address. If domain is not pointing to your server, SSL installation process will fail.
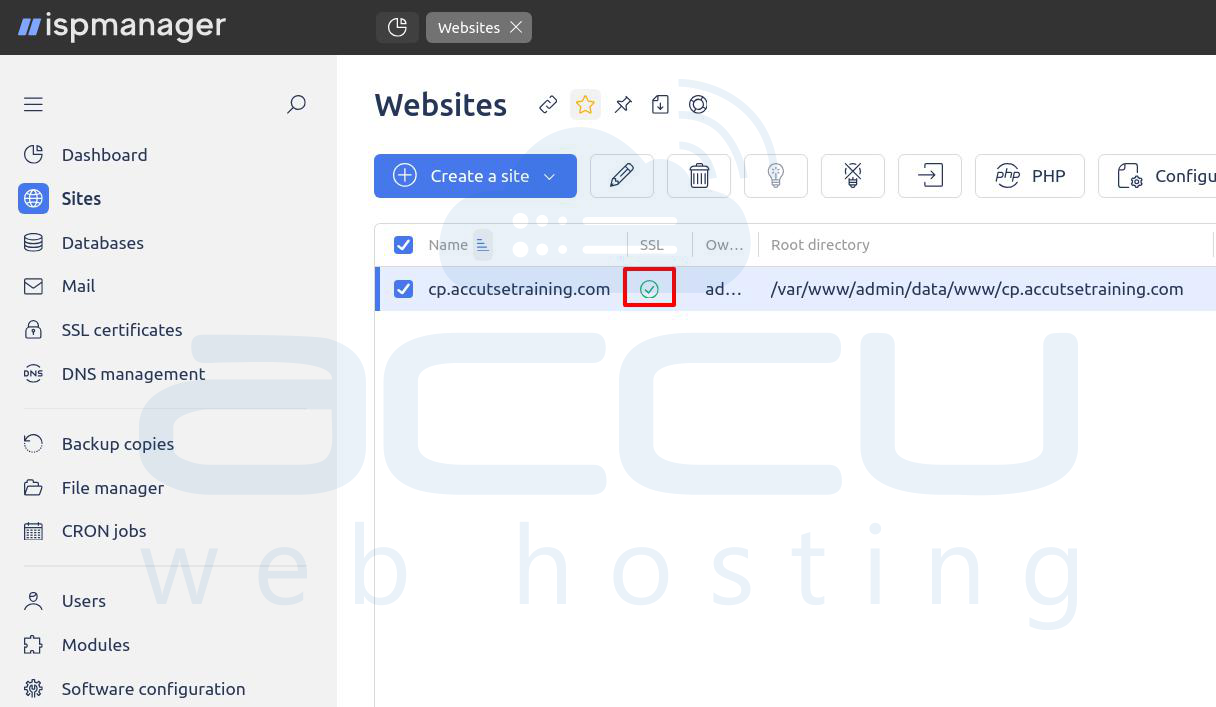
Step 5: on the websites page you will see the ssl status.
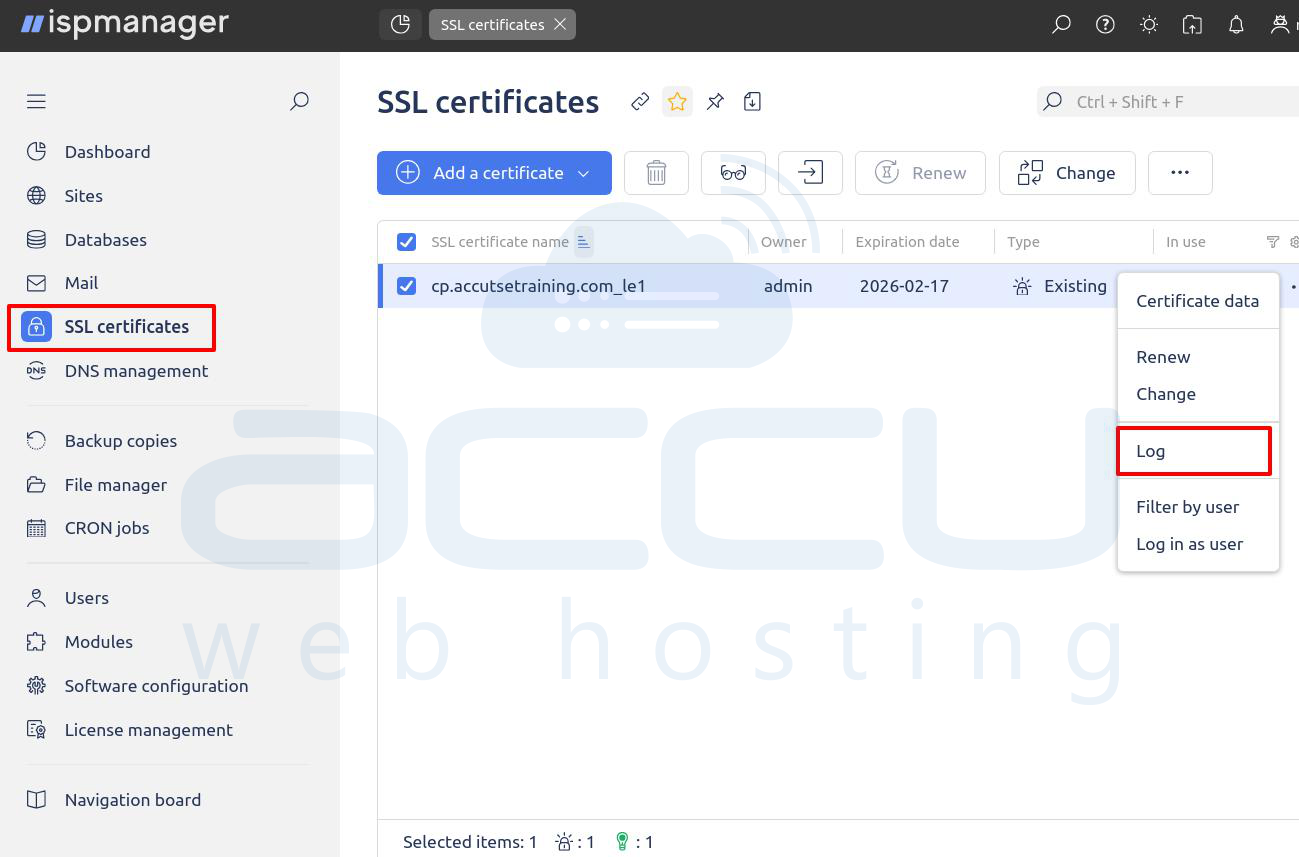
Step 6: If there is any issue, you can check SSL logs from the ISPmanager control panel. Navigate to SSL certificates in the left menu, select the certificate and click Log from the actions menu.
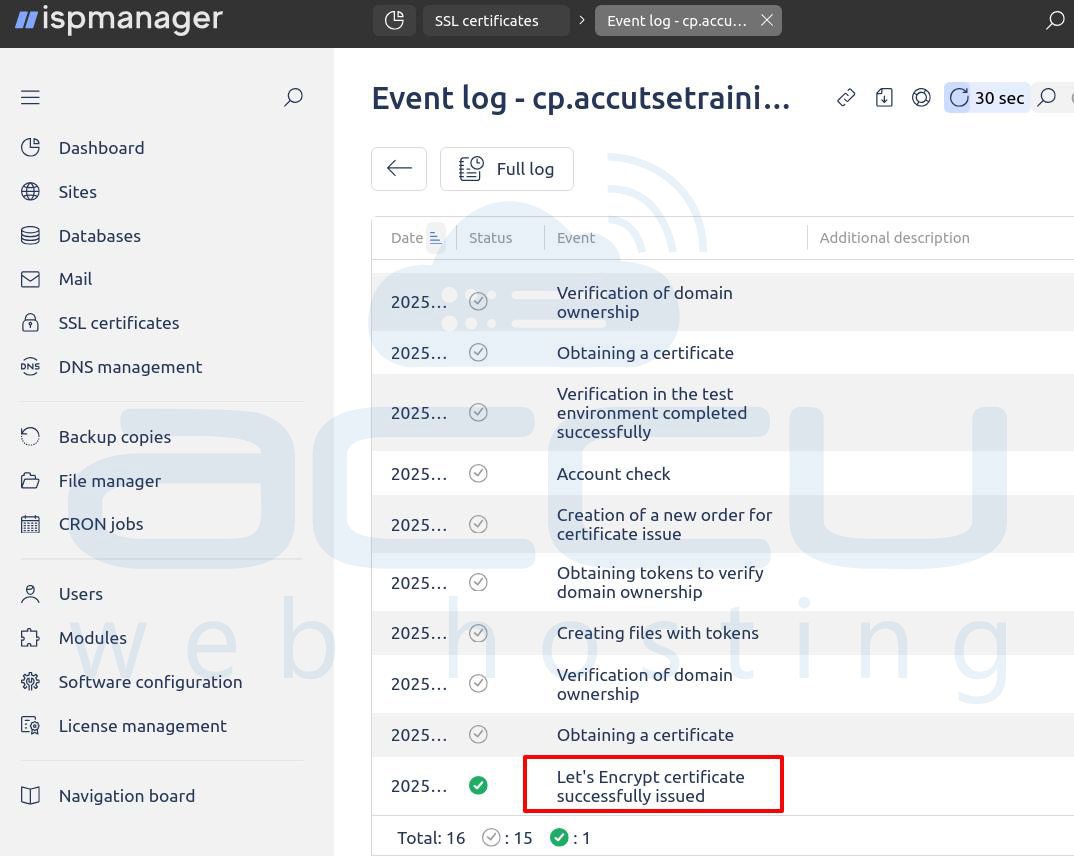
Step 7: The Event log shows the error and status of Let's Encrypt certificate.
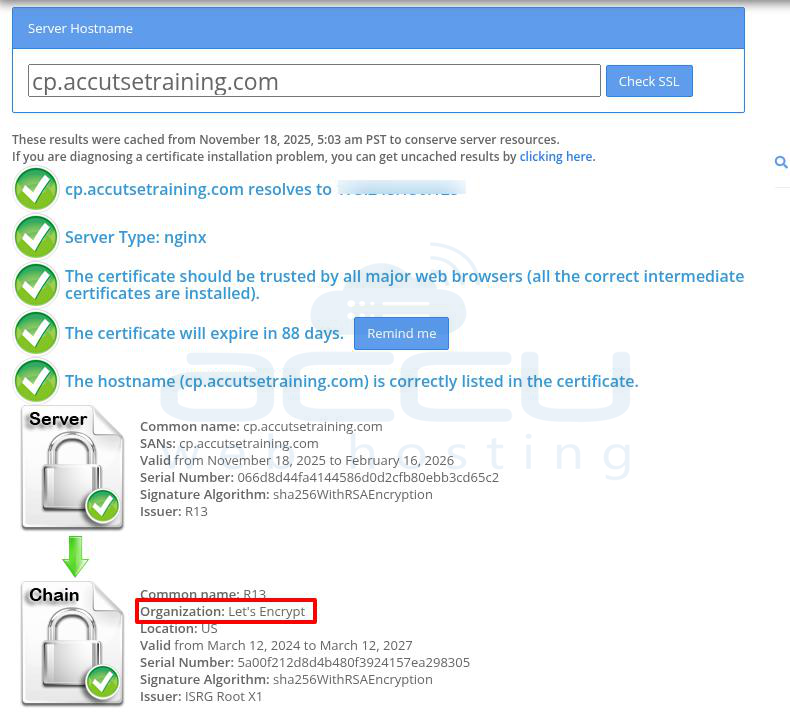
Step 8: You can also check SSL status from online tool like sslshopper.com. Visit sslshopper.com and enter your domain name, you will see the SSL status.
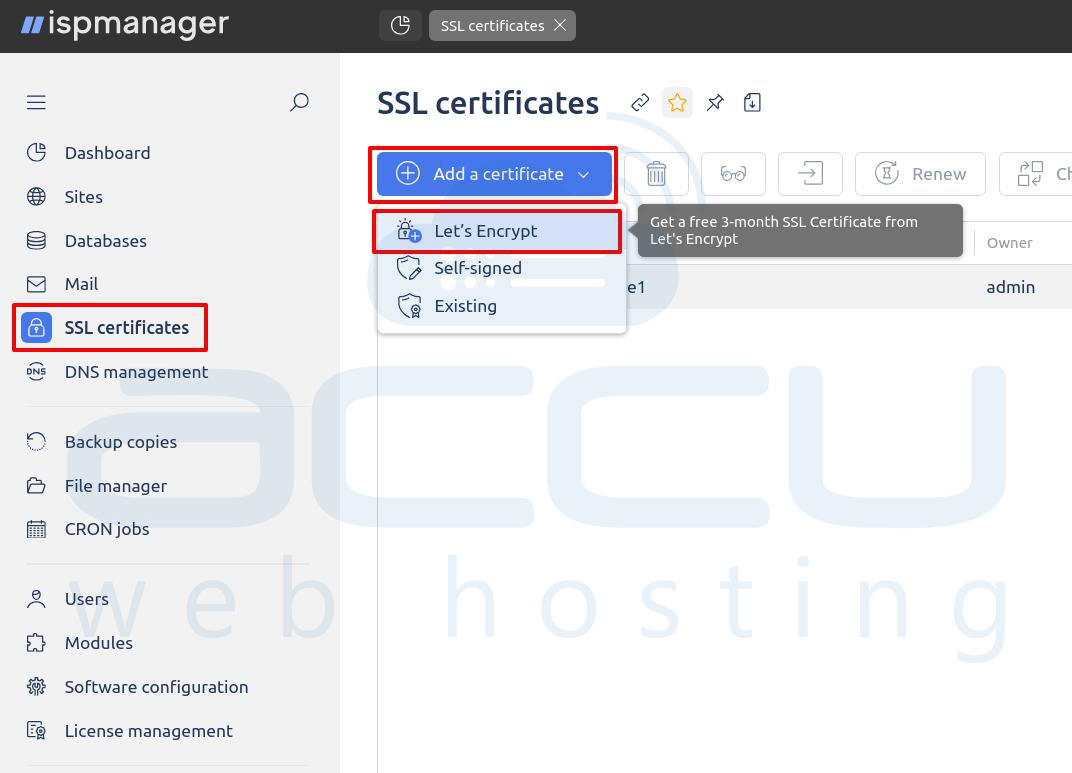
Initiate the Let's Encrypt Certificate Creation from SSL certificates section
Step 1: On the SSL certificates page, click the Add certificate button, which opens a dropdown menu. Select the Let's Encrypt option from the dropdown menu to start the automatic certificate request process.
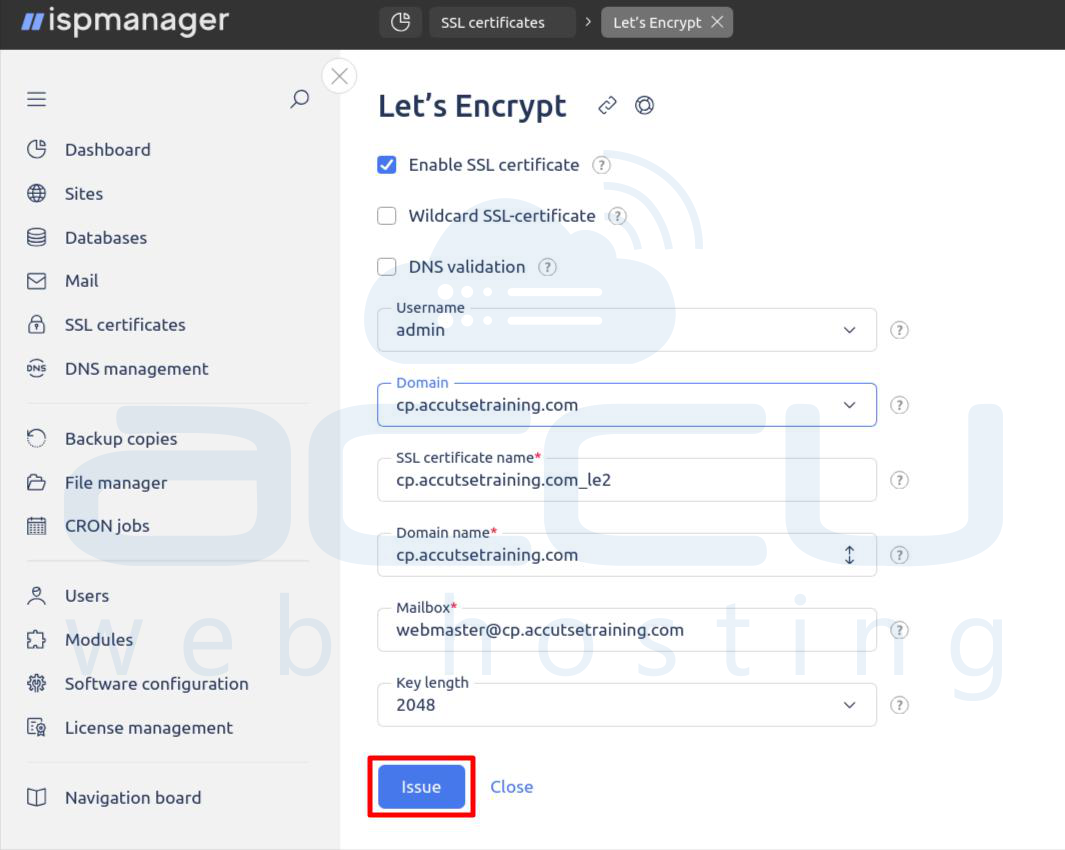
Step 2: In the New Let's Encrypt SSL certificate form that appears, configure the following fields:
- Enable SSL certificate (Checkbox): Check this box to automatically activate the SSL certificate for the corresponding website after it's issued.
- Wildcard SSL certificate (Checkbox): Leave this unchecked unless you specifically need a certificate for the domain and all its subdomains (like *.domain.com). Wildcard certificates usually require DNS validation, which is more complex.
- DNS validation (Checkbox): Leave this unchecked for the default, easier HTTP validation. Only check this if HTTP validation fails or if you are requesting a Wildcard certificate.
- Username: Select the User account that owns the domain for which you are issuing the certificate.
- SSL certificate name: A descriptive name for the certificate (e.g., mydomain.com_le). You can typically leave the default value.
- Domain: Select the Primary domain for which the certificate will be issued.
- Domain name (Alternative names): Enter the main domain name and any alternative names (e.g., yourdomain.com and www.yourdomain.com) that you want to be secured by this certificate. Enter each on a new line or separate them with a space/comma.
- Mailbox (E-mail): Enter a valid email address. This is required by Let's Encrypt for urgent notices (like renewal issues).
- Key length: Select the desired key length, usually 2048 bits is the standard and recommended option.
Step 3: Review all the entered information. Click the Issue button at the bottom of the form. The system will now attempt to issue and install the certificate. It might take a few moments for the status to update.
Configure HTTPS Redirect (Recommended)
After installing the SSL certificate, it's highly recommended to redirect all unencrypted HTTP traffic to the secure HTTPS connection:
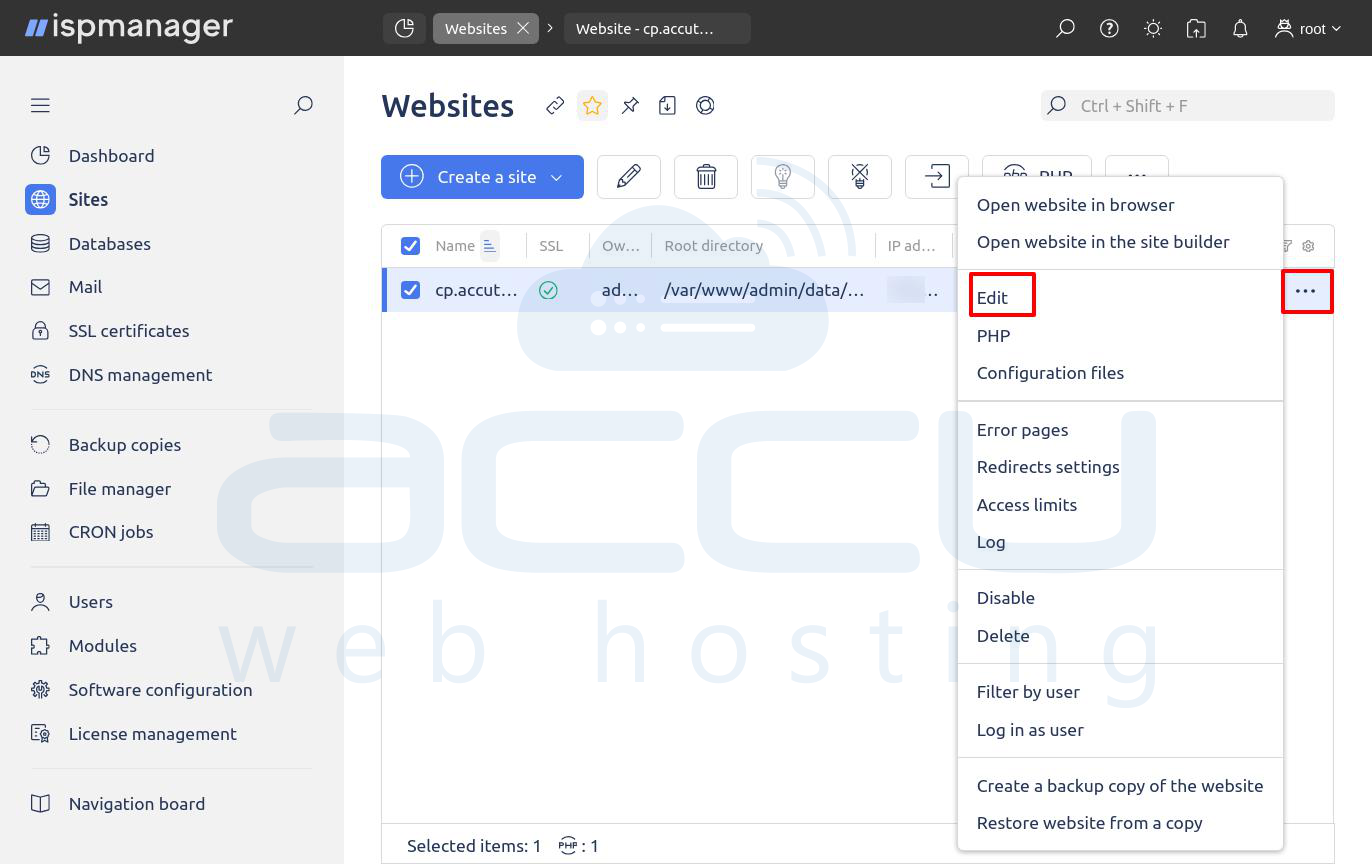
Step 1: Navigate to the websites section. Select the domain you just secured and click the Edit button.
Step 2: In the editing form, find and check the box labeled Redirect HTTP requests to HTTPS.
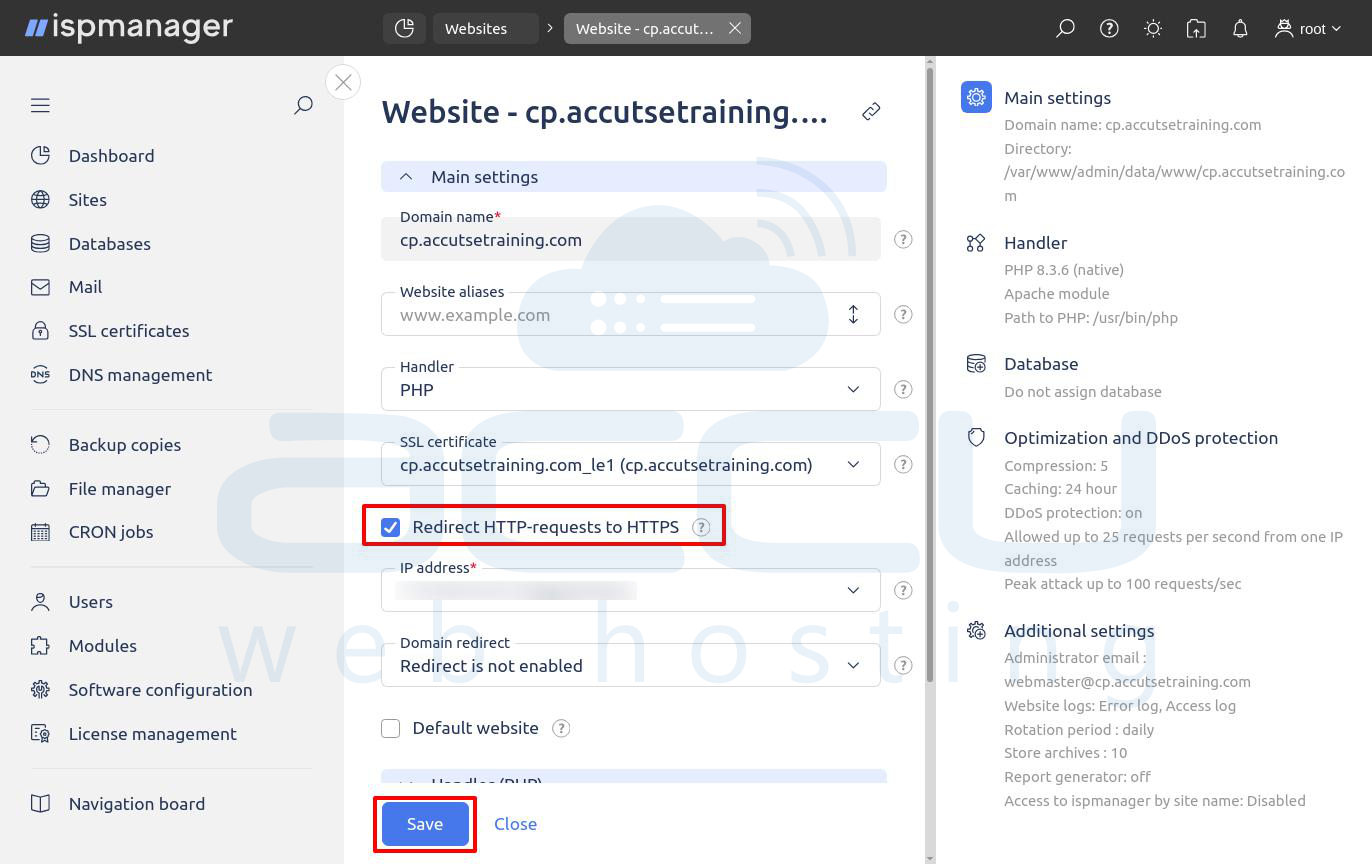
Step 3: Click Save to save the changes.
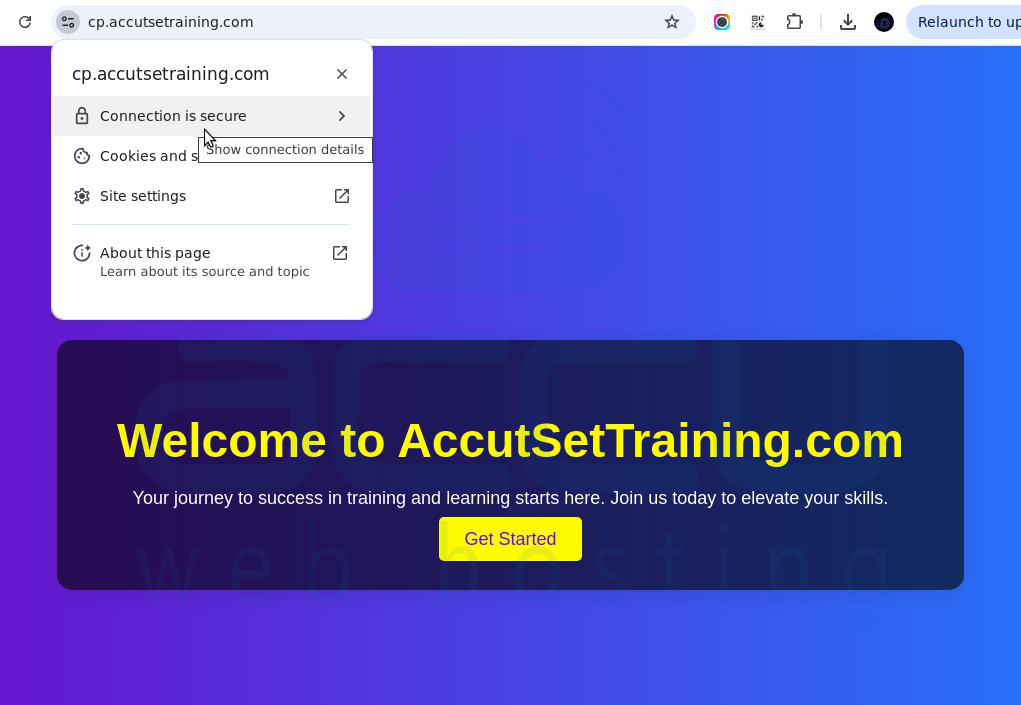
Your website is now secured with the Let's Encrypt SSL certificate, and all visitors will be automatically redirected to the secure HTTPS version. The certificate will also be automatically renewed by ISPManager before it expires (Let's Encrypt certificates are valid for 90 days).
Conclusion
Securing your website with an SSL certificate is a crucial step in ensuring the safety of your visitors’ data and improving the credibility of your online presence. By following the steps outlined in this guide, you can easily install a Let's Encrypt SSL certificate using ISPManager.