ISPmanager is a powerful and user-friendly hosting control panel that simplifies tasks such as managing domains, web servers, email accounts, and databases. In this article, we will walk you through the entire process of installing and Configuring ISPManager Hosting Control Panel to access via FQDN.
Configuring ISPmanager Hosting Control Panel
Step 1: Connect your server via SSH. Use a terminal or SSH client to connect to your server. You must log in with superuser permissions (as the `root` user) to execute the installation commands.
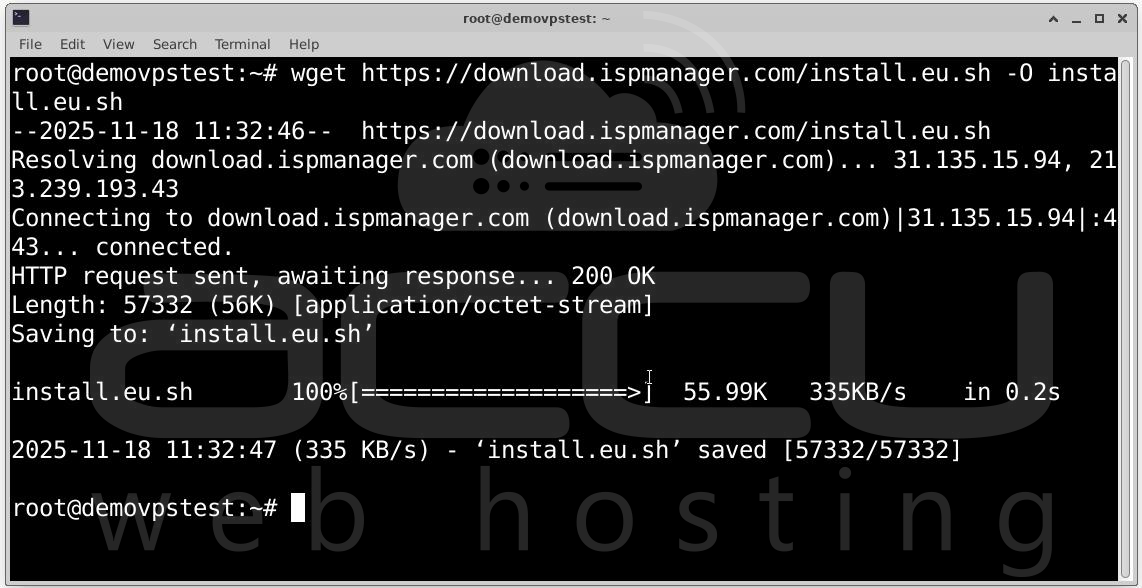
Step 2: Once connected, execute the following command to download the ISPmanager installer script directly to your server:
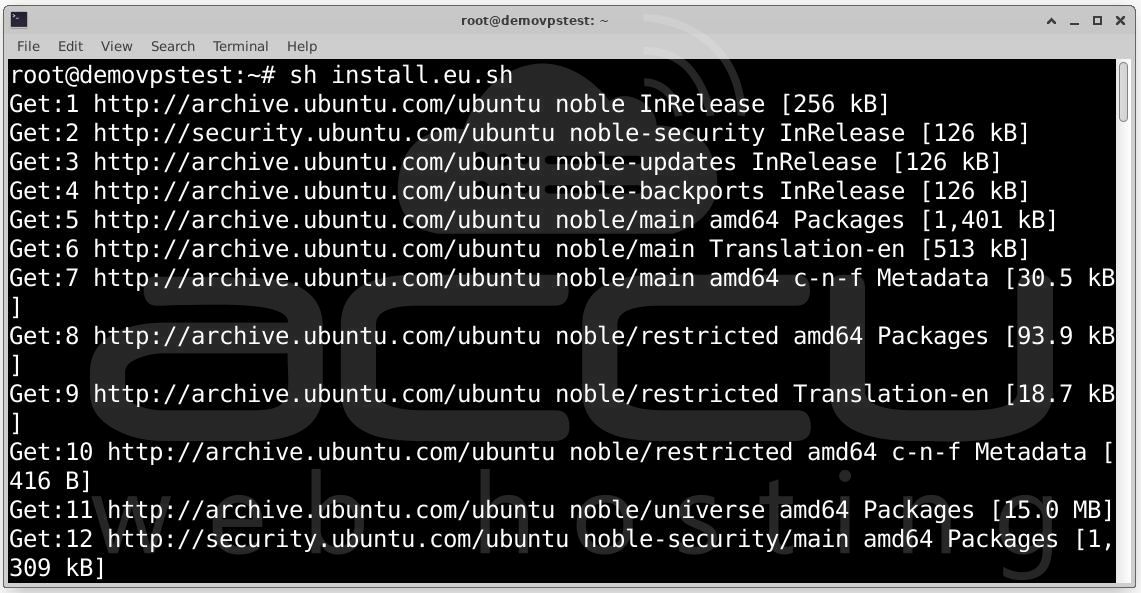
Step 3: Initiate the installation process by executing the downloaded script:
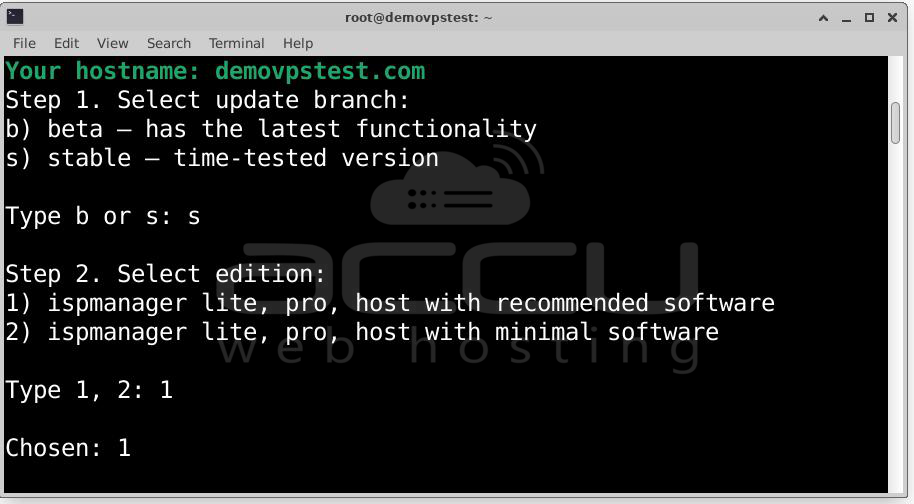
Step 4: The script will now prompt you to make initial decisions about the panel's stability and feature set.
Select Update Branch: You will be asked to choose between b) beta (the branch with the latest, but potentially unstable, updates) or s) stable (the branch that has successfully passed beta testing). For a production environment, type s for the stable branch.
Select ISPmanager Edition: Next, choose the software package. Option 1) ispmanager lite, pro, host with recommended software includes essential components like a web server, mail server, and database server. Option 2) ispmanager lite, pro, host with minimal software installs only the control panel. Type 1 to select the recommended full package.
Software Configuration (Recommended Package Only): If you selected the recommended software package (option 1), you must configure the web server and the database that the panel itself will use.
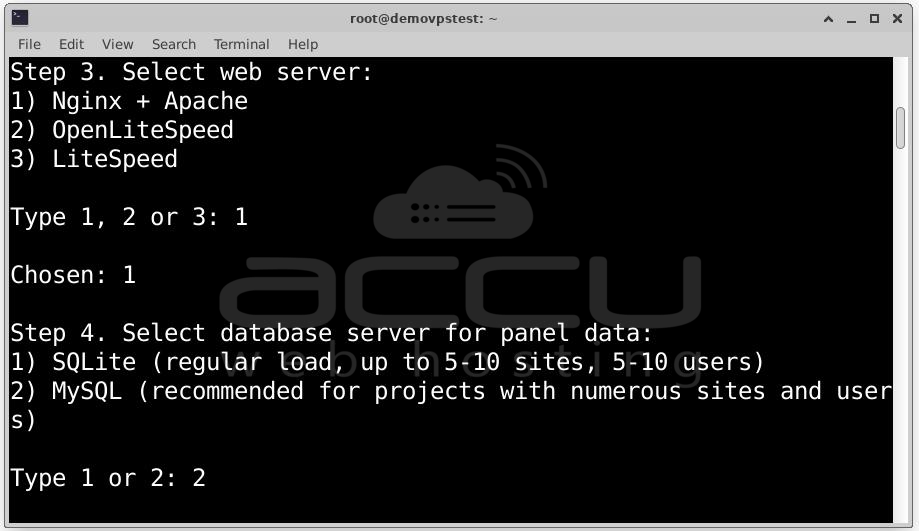
Web Server Selection: Select the web server by typing 1, 2, or 3:
1) Nginx + Apache (MPMITK)
2) OpenLiteSpeed:
3) LiteSpeed:
Panel Database Selection: Choose the database type for the control panel's internal operations by typing 1 or 2:
1) SQLite: A filebased database recommended for small projects (up to 5–10 sites and users).
2) MySQL: A powerful serverbased database recommended for larger projects (more than 5–10 sites and users), offering better scalability and performance.
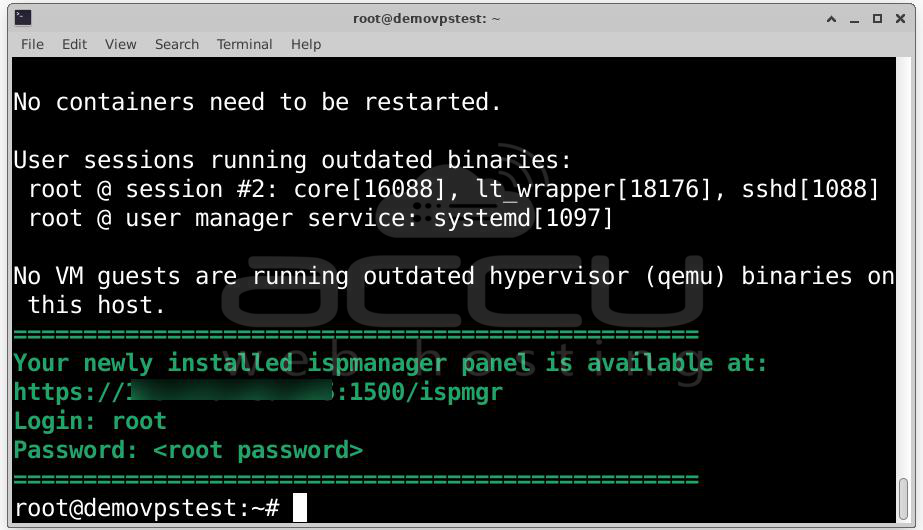
Step 5: After making your selections, the script will proceed with the automated installation. The installation will download and configure all selected components. Wait for the process to finish entirely.
Once the installation is complete, the ISPmanager control panel will be available in your web browser. You can access it using the following URL: https://IP address:1500/ispmgr
Login: root
Password: root password
Login into ISPmanager and Activate the license
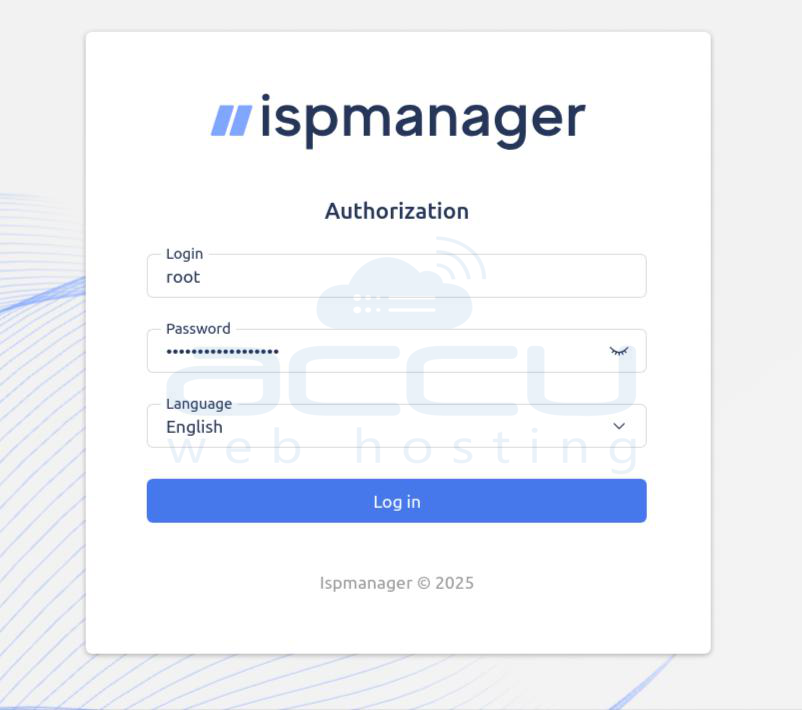
Step 1: Log in to your newly installed or trial version of ISPmanager (usually via https://<server IP address>:1500).
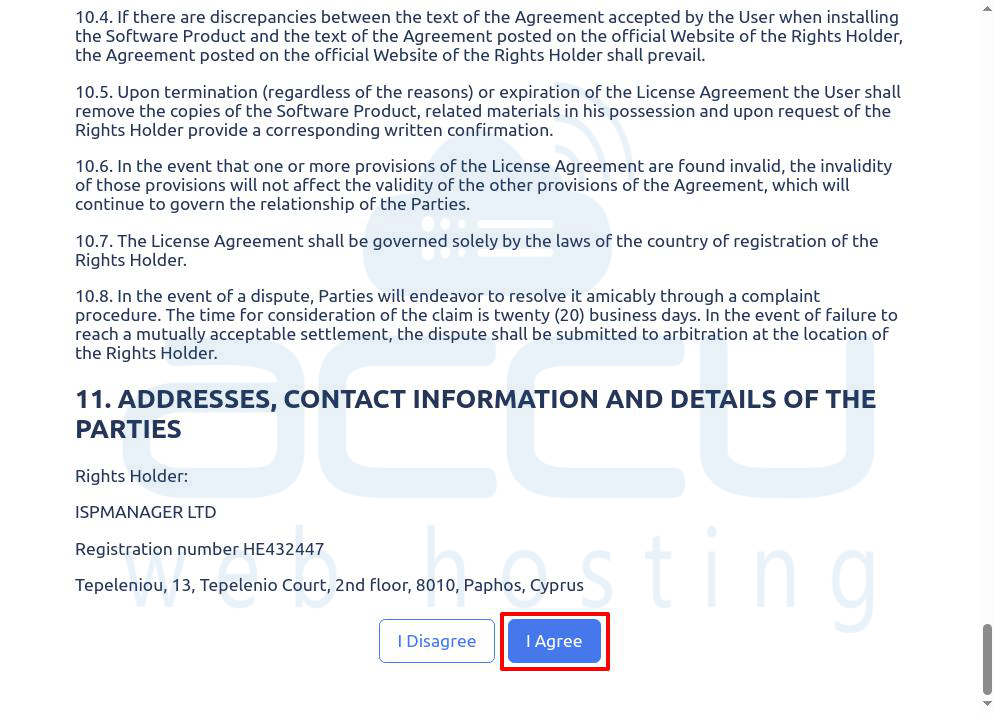
Step 2: Upon first access, or by navigating to the "License management" section, you may be presented with the **Terms and Conditions**. Review and Accept them to proceed.
Step 3: You will be redirected to the ISPmanager License management page. On the License management page, click on the Buy License button.
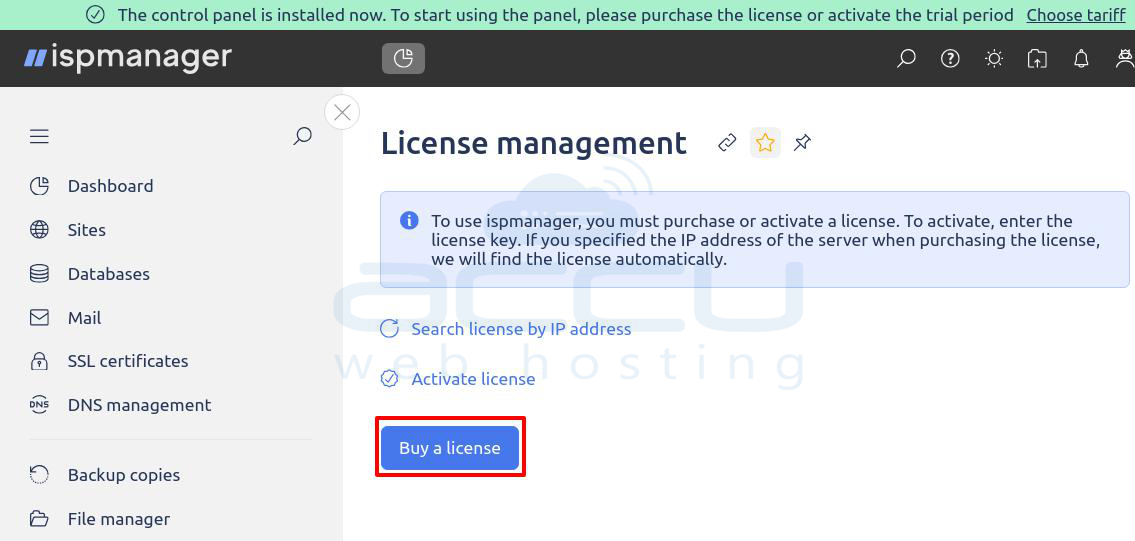
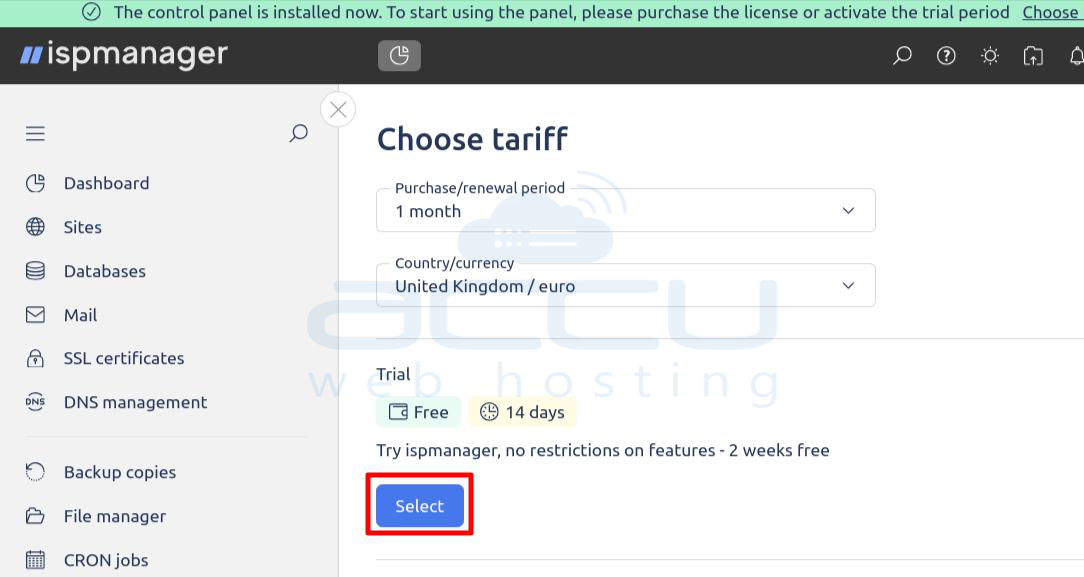
Step 4: Choose your desired license plan (e.g., Free, Lite, Pro, Host) based on your needs and select the desired payment period (e.g., 1 month, 1 year).
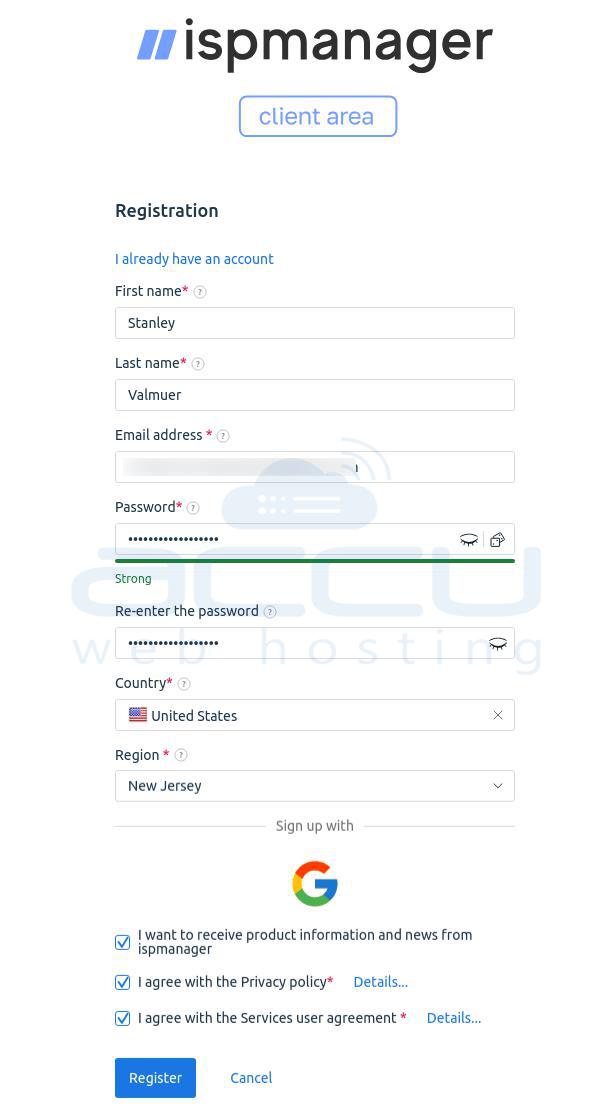
Step 5: If you are a new user, you will need to Create your ISPmanager account by providing your email, password, and other required information. If you are an existing user, simply log in.
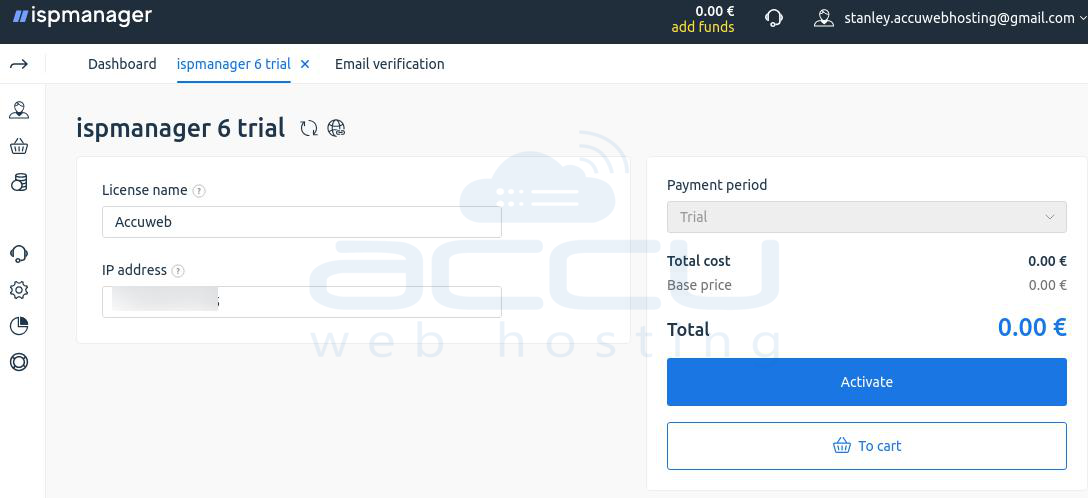
Step 6: Enter the public IP address of the server where the control panel is installed. This is crucial for the automatic activation process. Provide any other required details, such as a license name or server location.
Step 7: Review your order summary (plan, price, period), select your preferred payment method and Complete the payment to finalize the purchase.
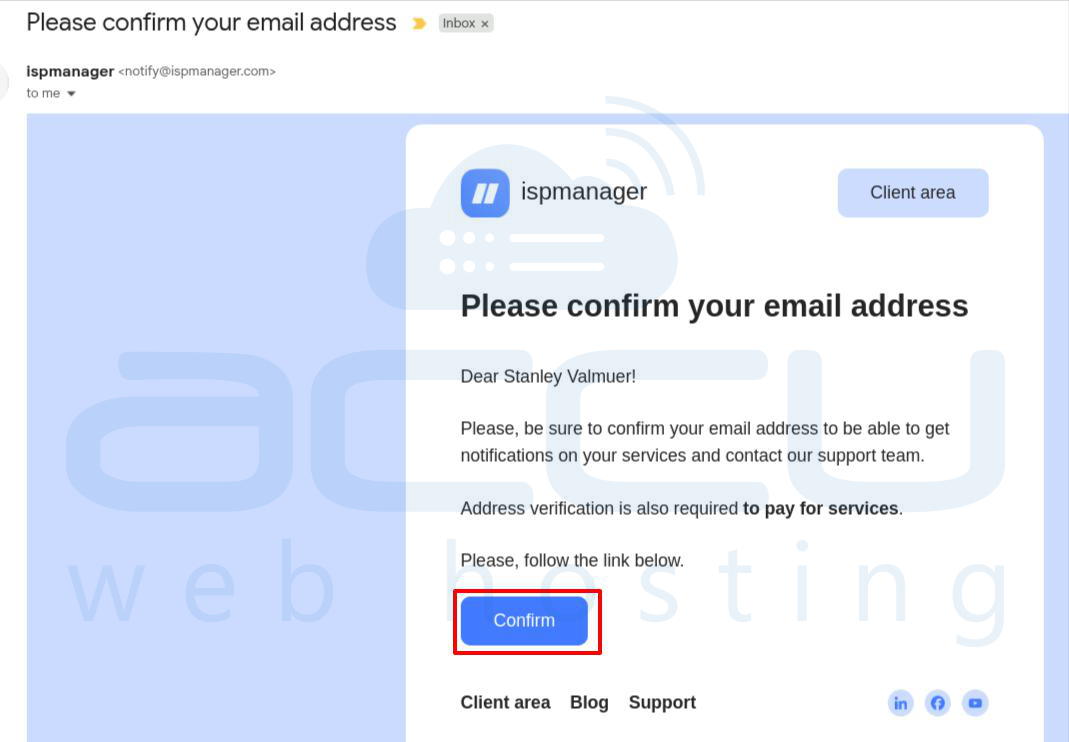
Step 8: Check the email address used for account creation. You will receive an email from ISPmanager. Click on the confirmation button/link in the email to Verify your email address
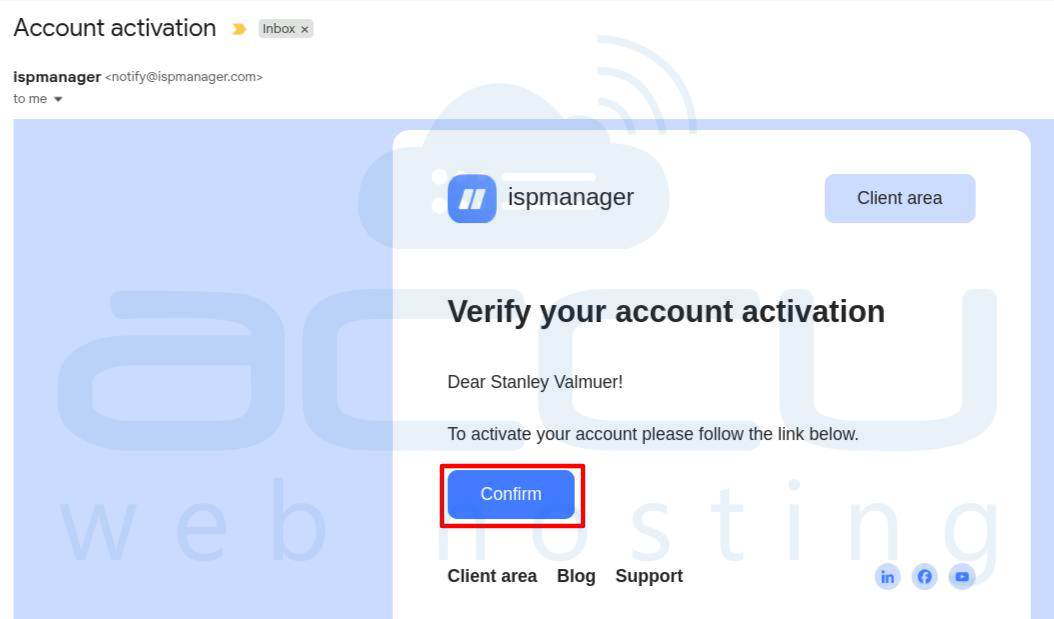
Step 9: You will receive an email from ISPmanager to complete your account activation. Click on the confirmation button/link in the email to activate account.
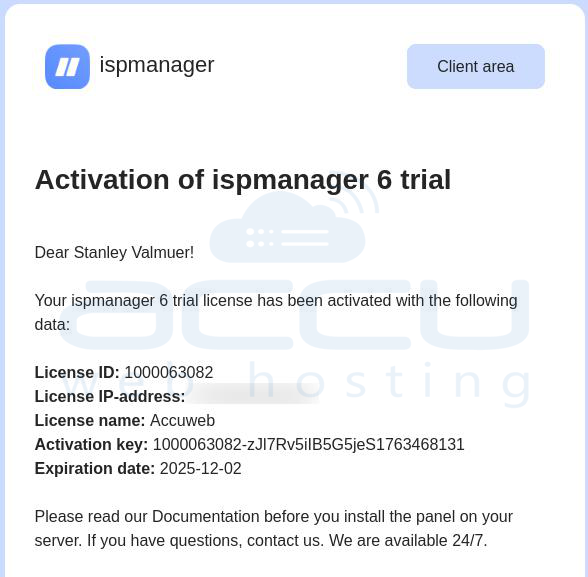
Step 10: After successful payment, the license details, including a unique Activation Key, will be available in your Client Area under the order section.
Steps to Activate the License
Option 1: Automatic Activation (Recommended): If you correctly specified the public IP address during the purchase, the license system will automatically link the key to your server.
Option 2: Manual Activation via Web Interface: Use this method if the automatic activation fails or if your license status remains "inactive."
Log in to your ISPmanager control panel, navigate to the License management section and click on the Activate license button.
Paste the Activation Key that you obtained from your Client Area into the required field and click the Activate button.

Once activated, your panel should immediately display the license as Active with the correct expiration date, confirming your commercial license is in use.
Steps to Configure a Control Panel Domain
For security and convenience, it is best practice to access the panel via a domain name secured with an SSL certificate, rather than just an IP address.
Step 1: Log in to your ISPmanager control panel.
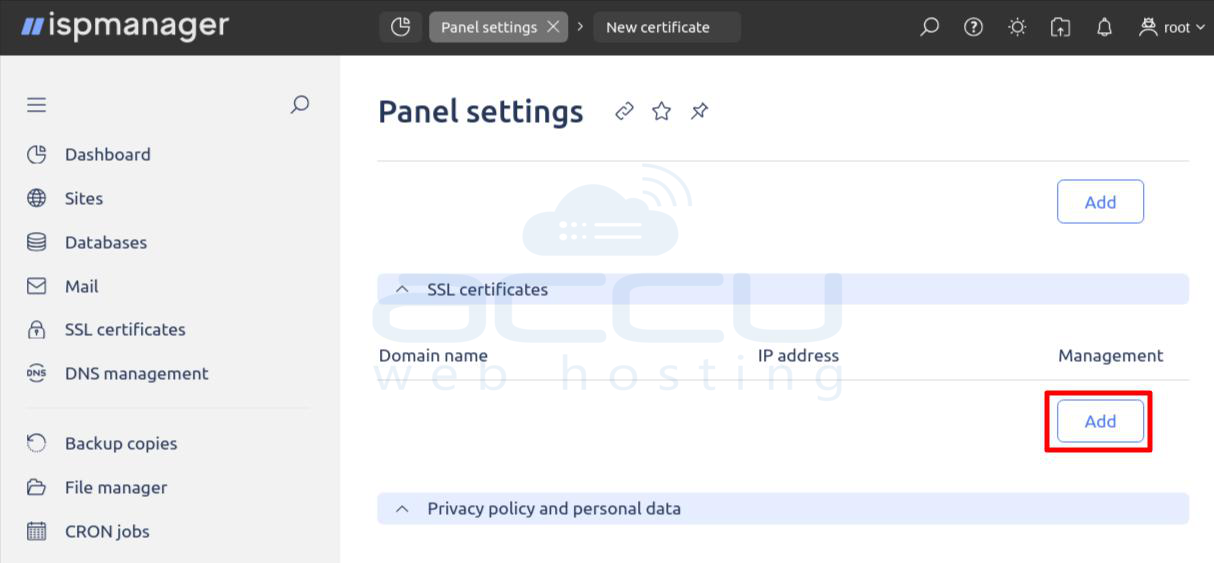
Step 2: Go to the main Navigation board (menu) and click on Panel settings.

Step 3: Locate the Panel address section and click Add.
Step 4: Select the type of SSL certificate you want to use (e.g., Let's Encrypt for automatic free SSL), enter the domain name you want to use for accessing the panel (e.g., cp.yourdomain.com), select the IP address associated with your server from the dropdown list.
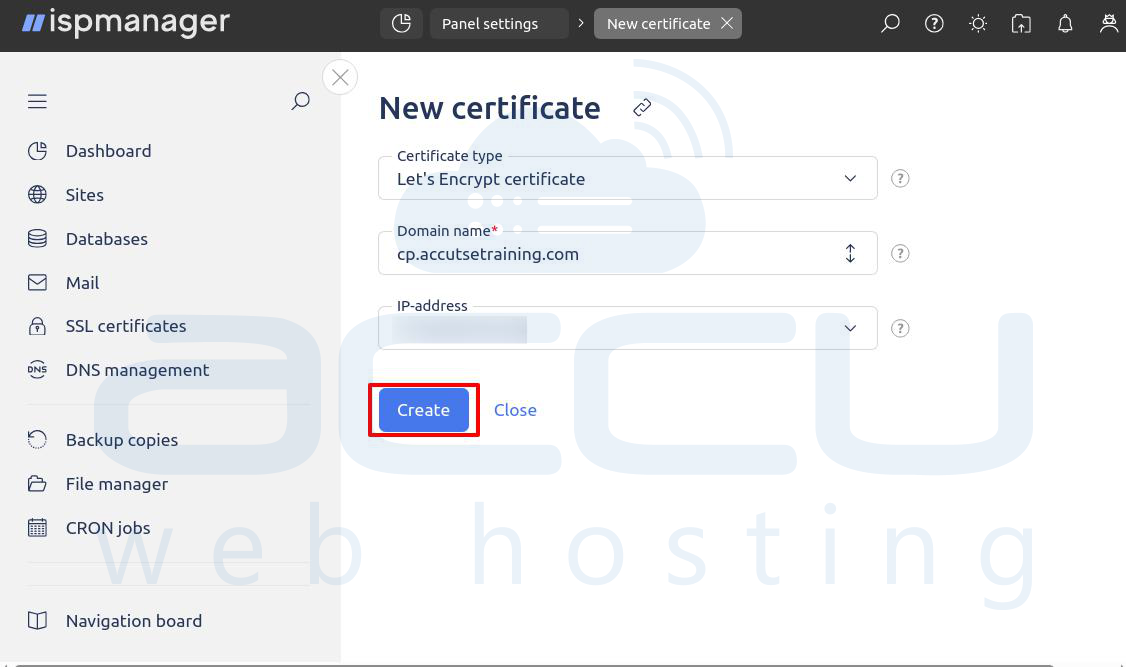
Ensure the domain you are entering is already pointing to the selected IP address in your domain registrar's DNS settings.
Step 5: Click Create. ISPmanager will automatically install the necessary SSL certificate on the control panel domain name.
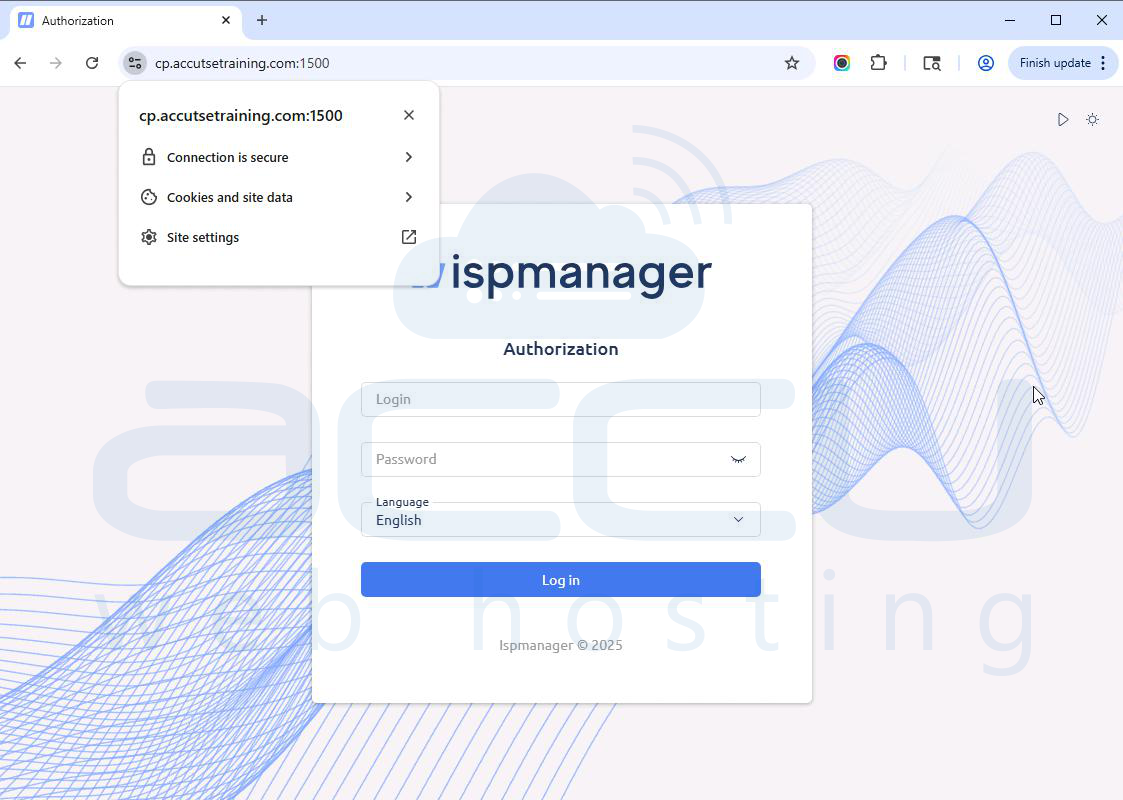
You can now access your ISPmanager control panel securely using your domain name (e.g., https://cp.yourdomain.com:1500).
Conclusion
In conclusion, installing and configuring ISPmanager on your server is a highly effective way to manage your hosting environment. By following the outlined steps, you have set up the control panel to ensure that it is secure and fully functional with an activated license.
