Control Web Panel (CWP), known as CentOS Web Panel, is a free web hosting control panel designed to simplify the management of Linux servers (CentOS, AlmaLinux, or Rocky Linux). It provides a web-based graphical interface that lets system administrators and hosting providers manage server services.
You can manage Web server, Database management, Mail server configuration, Firewall and security tools, DNS and domain management, User account and hosting package management from the Control Web Panel. In this guide, we will assist you on Install and Configure Control Web Panel on a Linux Server.
Requirements
Before you begin installation, ensure your server fulfills the following conditions:
- Operating System: A fresh install of one of the supported, CentOS 7, AlmaLinux 8/9, or Rocky Linux 8/9 (64-bit).
- RAM: Minimum 2 GB or more
- Root (Administrator) Access: You must be able to log in as root.
- Static Public IP: Your server must have a static external IP address.
Steps to Install and Configure Control Web Panel on a Linux Server
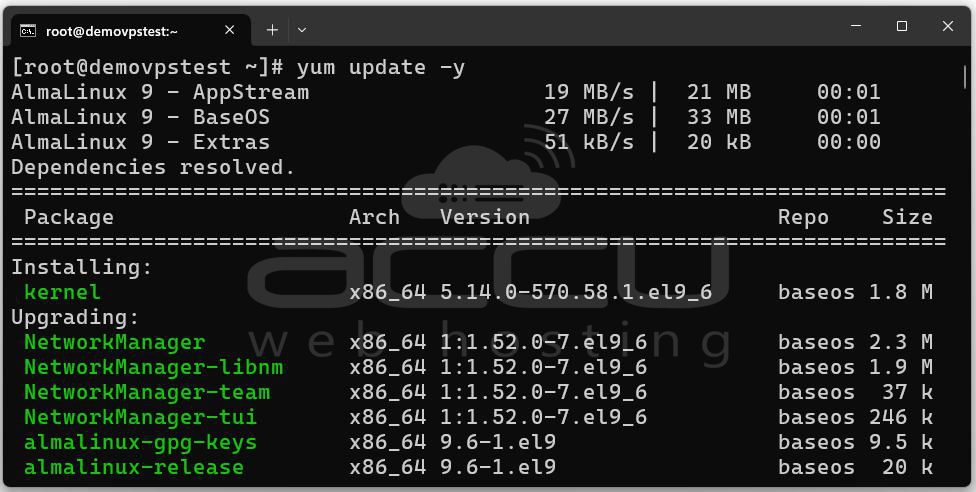
Step 1: The first step is to bring your server up to date. This ensures you have the latest OS patches and package updates.
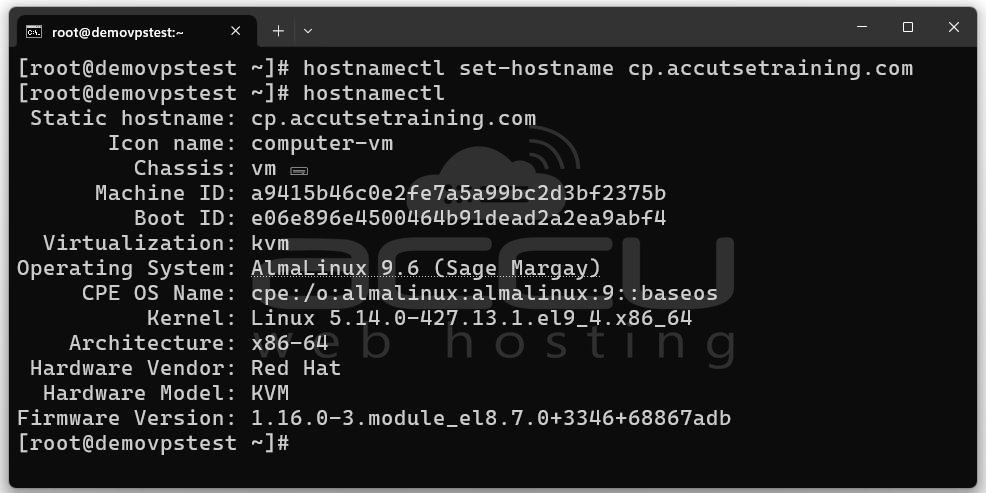
Step 2: It’s important to assign a fully qualified domain name (FQDN) as the hostname. For example: server.example.com.
hostnamectl set-hostname server.example.com
You can verify with: hostnamectl
Step 3: While CWP can sometimes work with SELinux in permissive mode, the recommended approach is to disable it entirely for best compatibility:
sed -i 's/^SELINUX=.*/SELINUX=disabled/' /etc/selinux/config
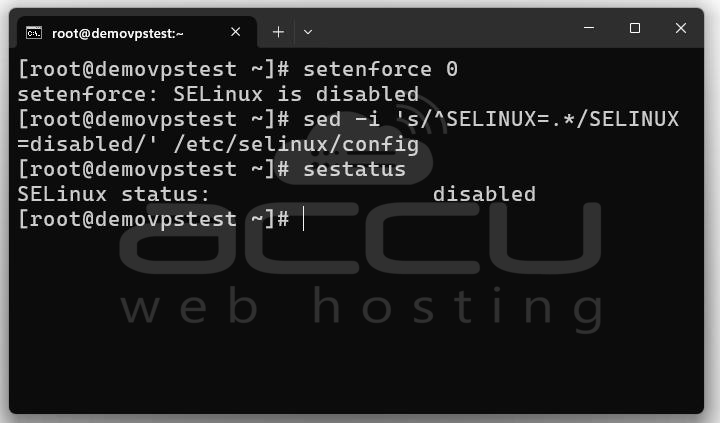
After changes to hostname & SELinux, it’s a good idea to reboot:
reboot
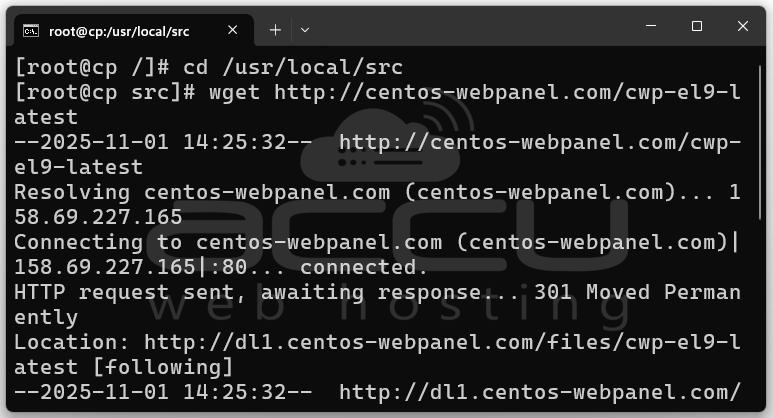
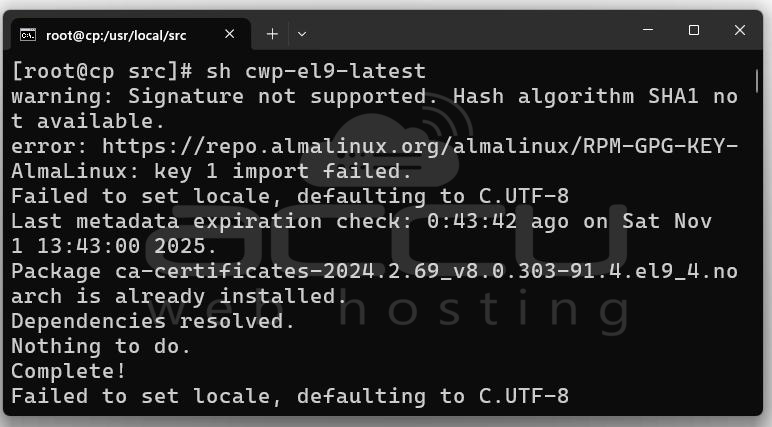
Step 4: logged in as root and Install Control Web Panel.
wget http://centos-webpanel.com/cwp-el9-latest
When done, the installer will output the login URL(s), port(s) and default credentials (usually root + your root password).
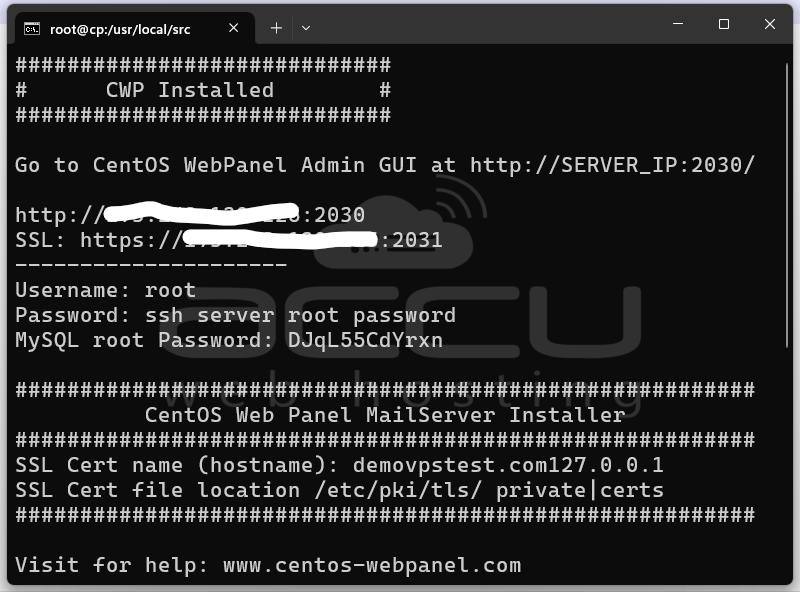
Step 5: Once installation is complete, you can access the admin and user interfaces by pointing your browser to the server’s IP or hostname with the appropriate port(s). Typical URLs:
- Admin Panel: https://your-server-ip:2031
- User Panel: https://your-server-ip:2083
The login is usually: Username: root & Password: Your server root password
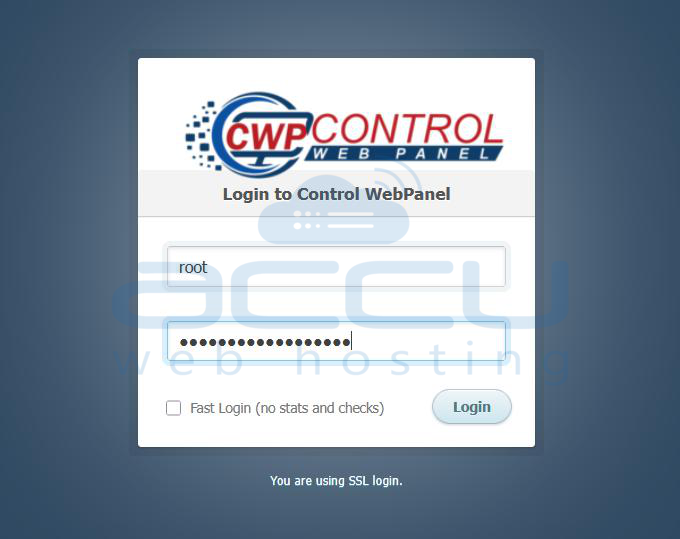
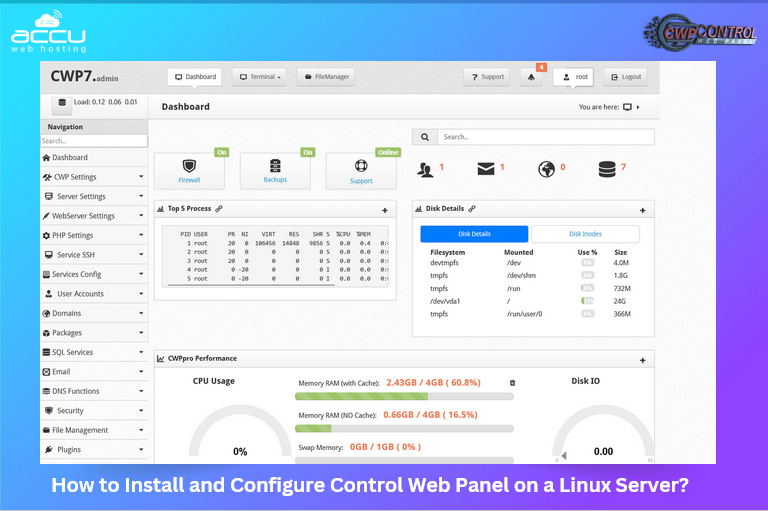
After login you will be redirected to the dashboard of CWP, where you’ll see an overview of the services (web, database, email, DNS, etc.).
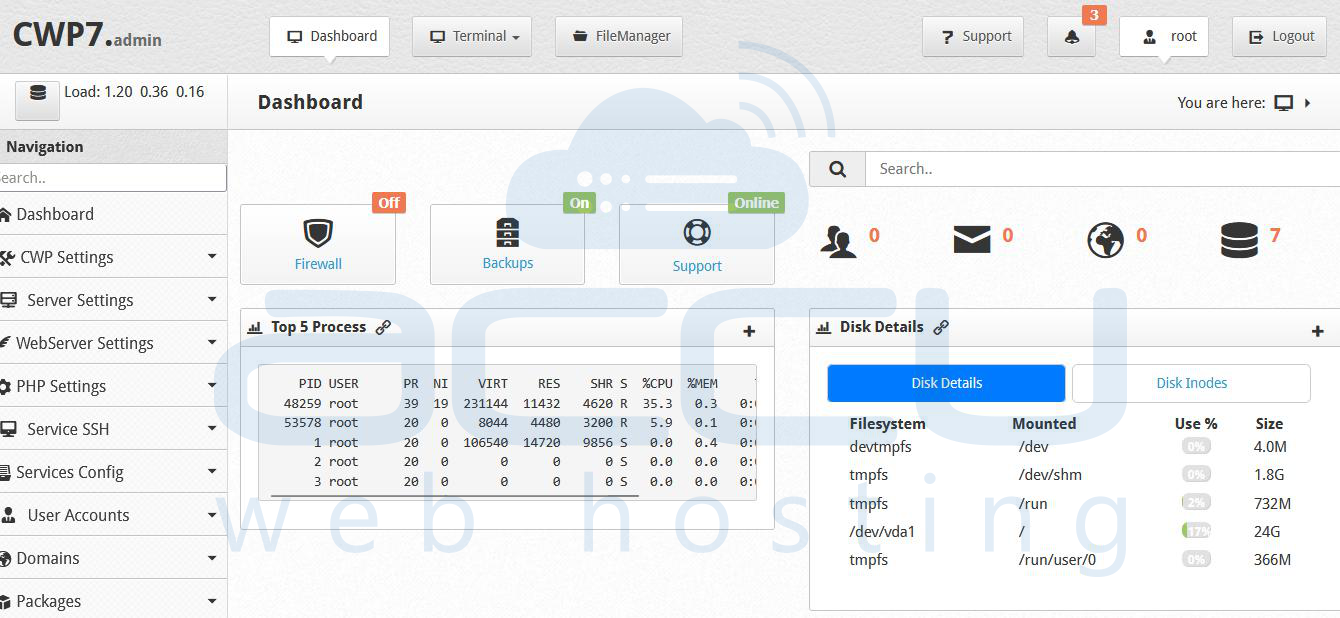
Basic Configuration After Login
Once you’re logged into the CWP admin panel, you’ll want to perform several configuration steps to make your hosting environment functional and secure. Below, each key item is described in detail.
1. Enable Firewall
Go to Server Settings → Firewall Manager and enable the firewall.
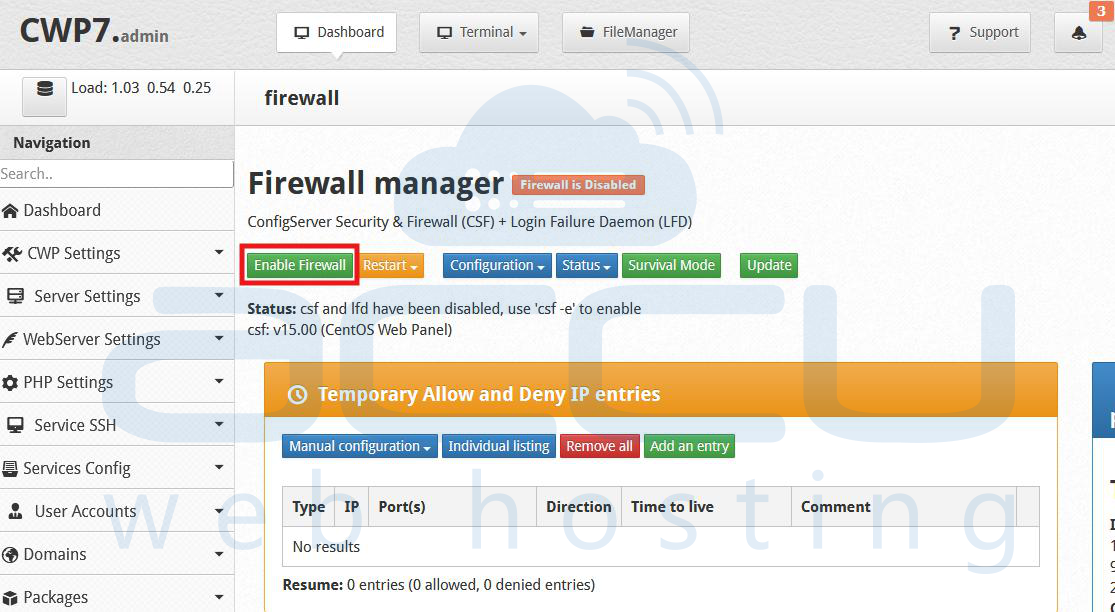
Ensure ports required for the panel (2031, 2083), web (80, 443) and email (25, 465, 587, 110, 143, 993, 995) are open if you plan to use email hosting.
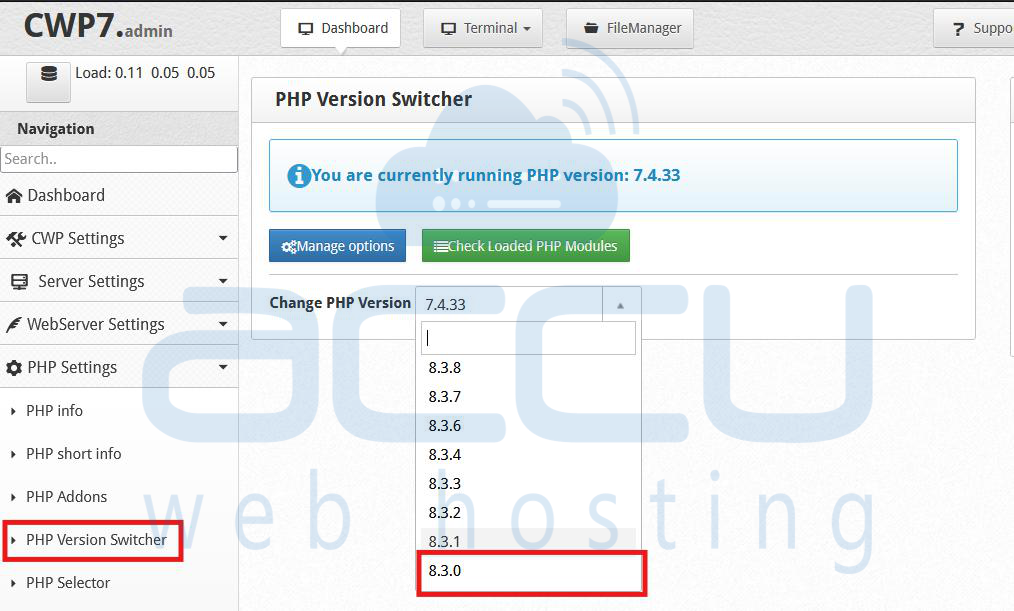
2. Set Latest PHP Version
In the panel, navigate to PHP Version Switcher and select the latest stable PHP version supported (for example PHP 8.x).
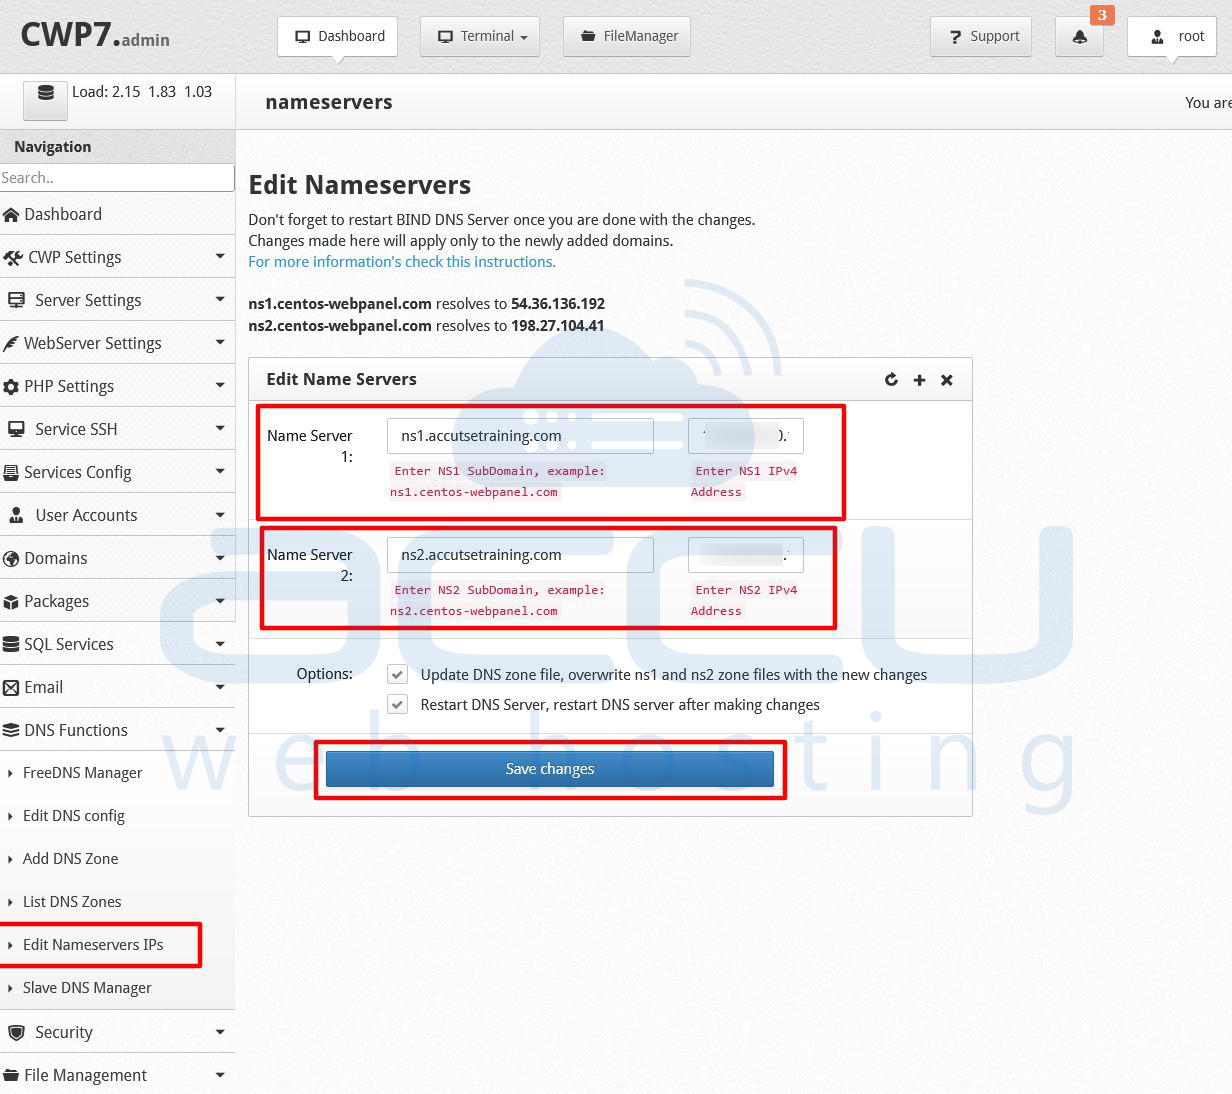
3. Configure Nameservers
If you plan to host domains and provide DNS through your server, go to Edit Nameserver IPs (under DNS settings) and set two or more nameservers. For example:
- Name Server 1: ns1.yourdomain.com → points to your server IP
- Name Server 2: ns2.yourdomain.com → same or another IP
Save changes. Then, at your domain registrar, update the domain’s nameserver records to point to these values. This ensures DNS queries will reach your server.
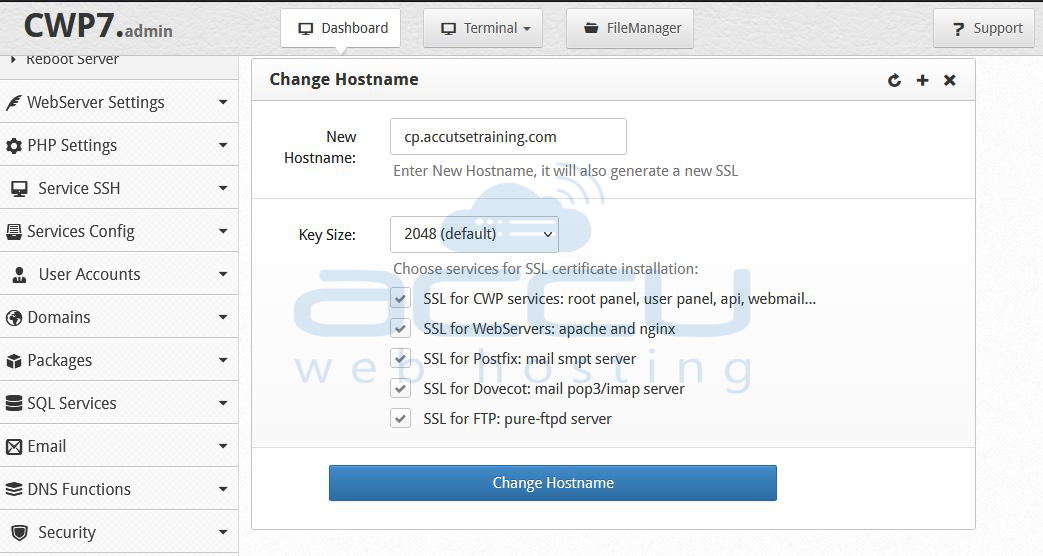
4. Change Hostname (from the Panel)
Even though you set the hostname via SSH earlier, you should also update it in the panel for consistency:
Navigate to Server Settings → Change Hostname. Enter your new hostname and Click “Change Hostname”.
5. Set Web Server Configuration
Go to Web Server Settings → Setup Default Web Servers. Choose the web server : Apache, Nginx (Nginx as reverse proxy) or if you prefer simplicity. After selection, click Save & Rebuild Configuration.
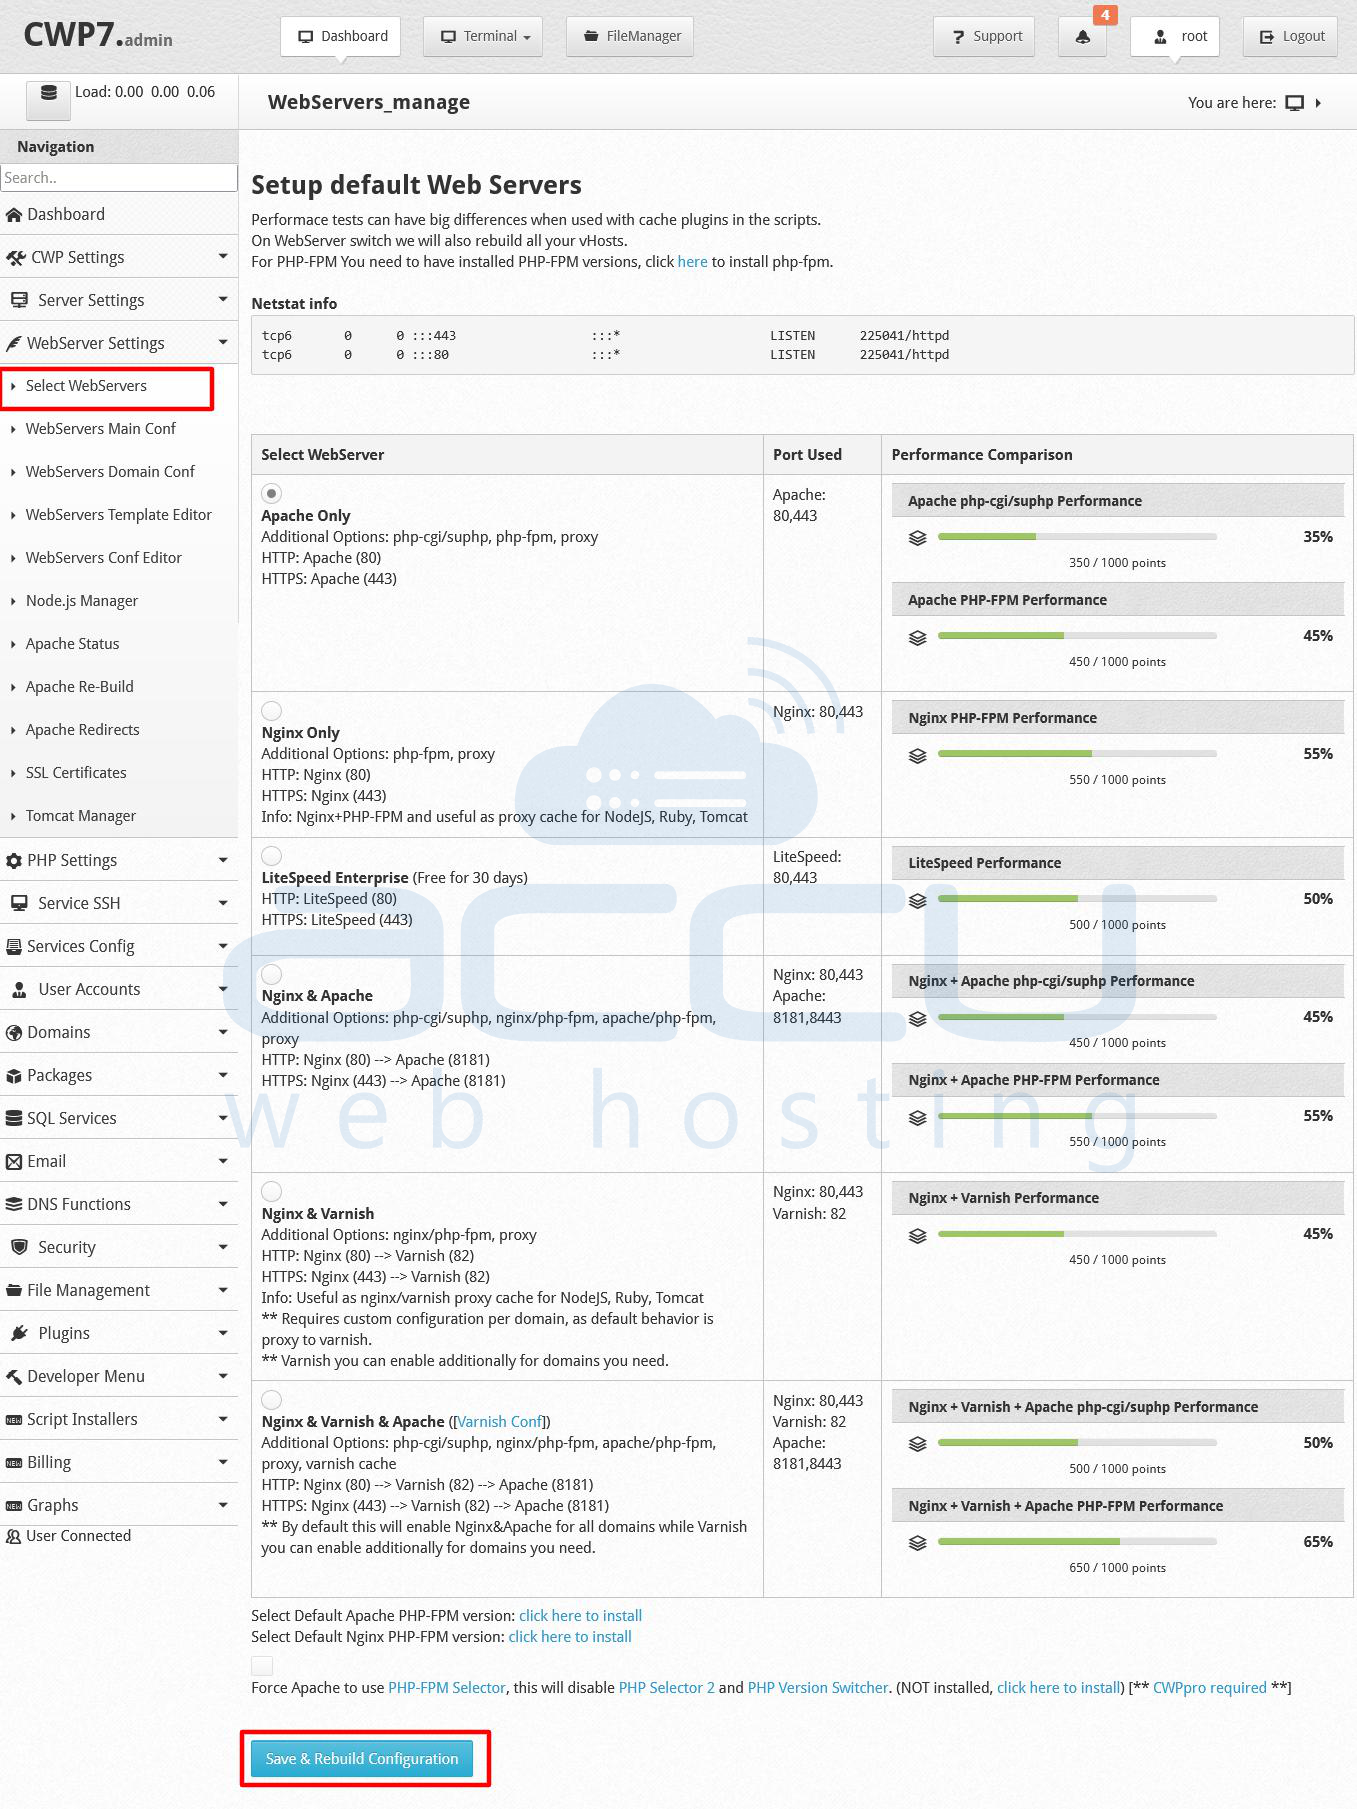
Wait for the system to rebuild web server configs. This sets up your web hosting stack (Apache/Nginx) for serving websites.
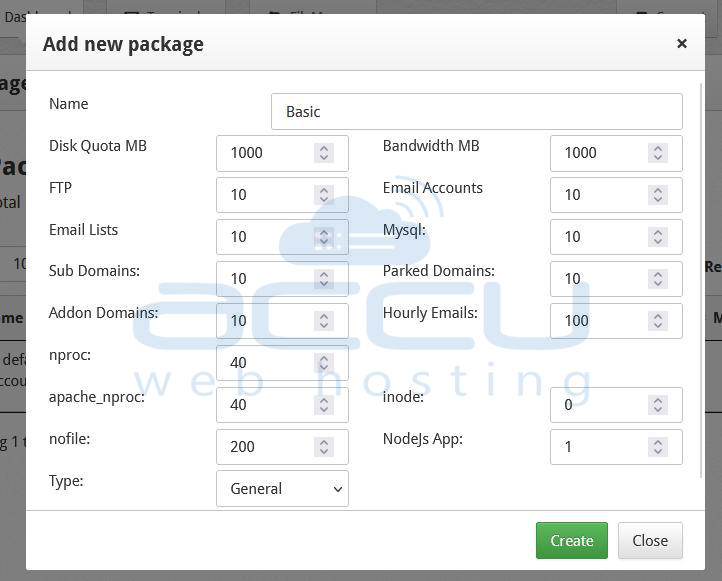
6. Create Hosting Packages
Hosting packages define limits and settings the user accounts will have. Navigate to Packages → Add New Package.
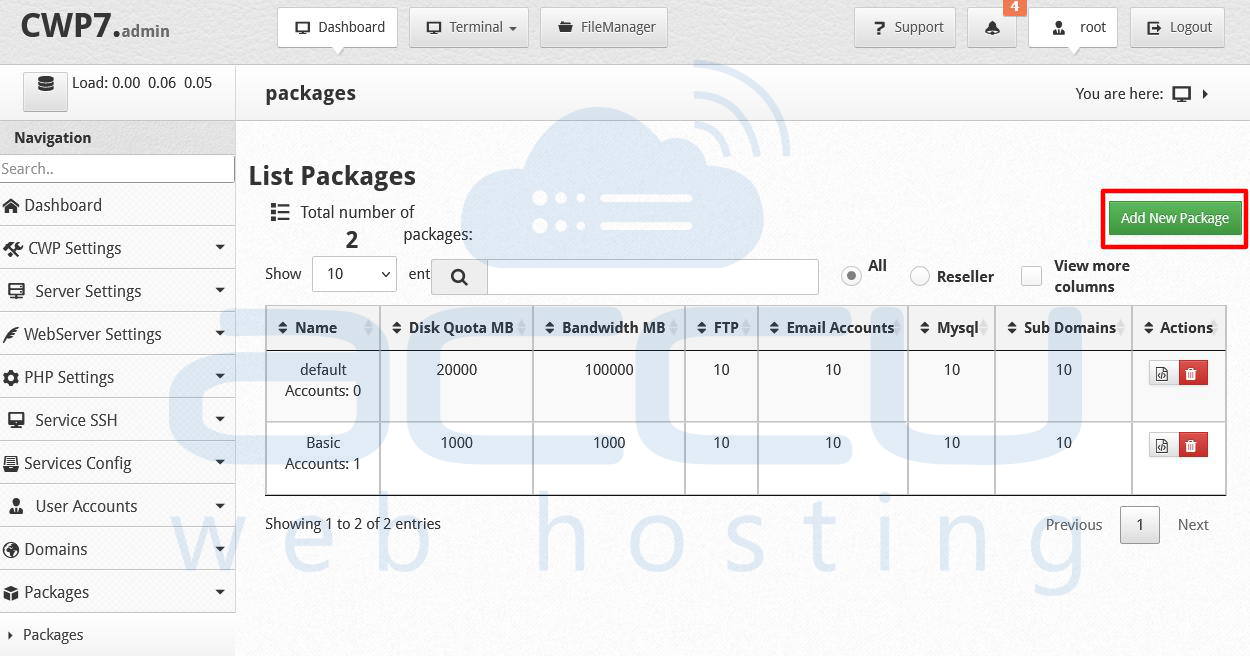
In the popup window: assign details like disk space quota, bandwidth, number of domains, mail accounts, FTP accounts, database usage, etc.
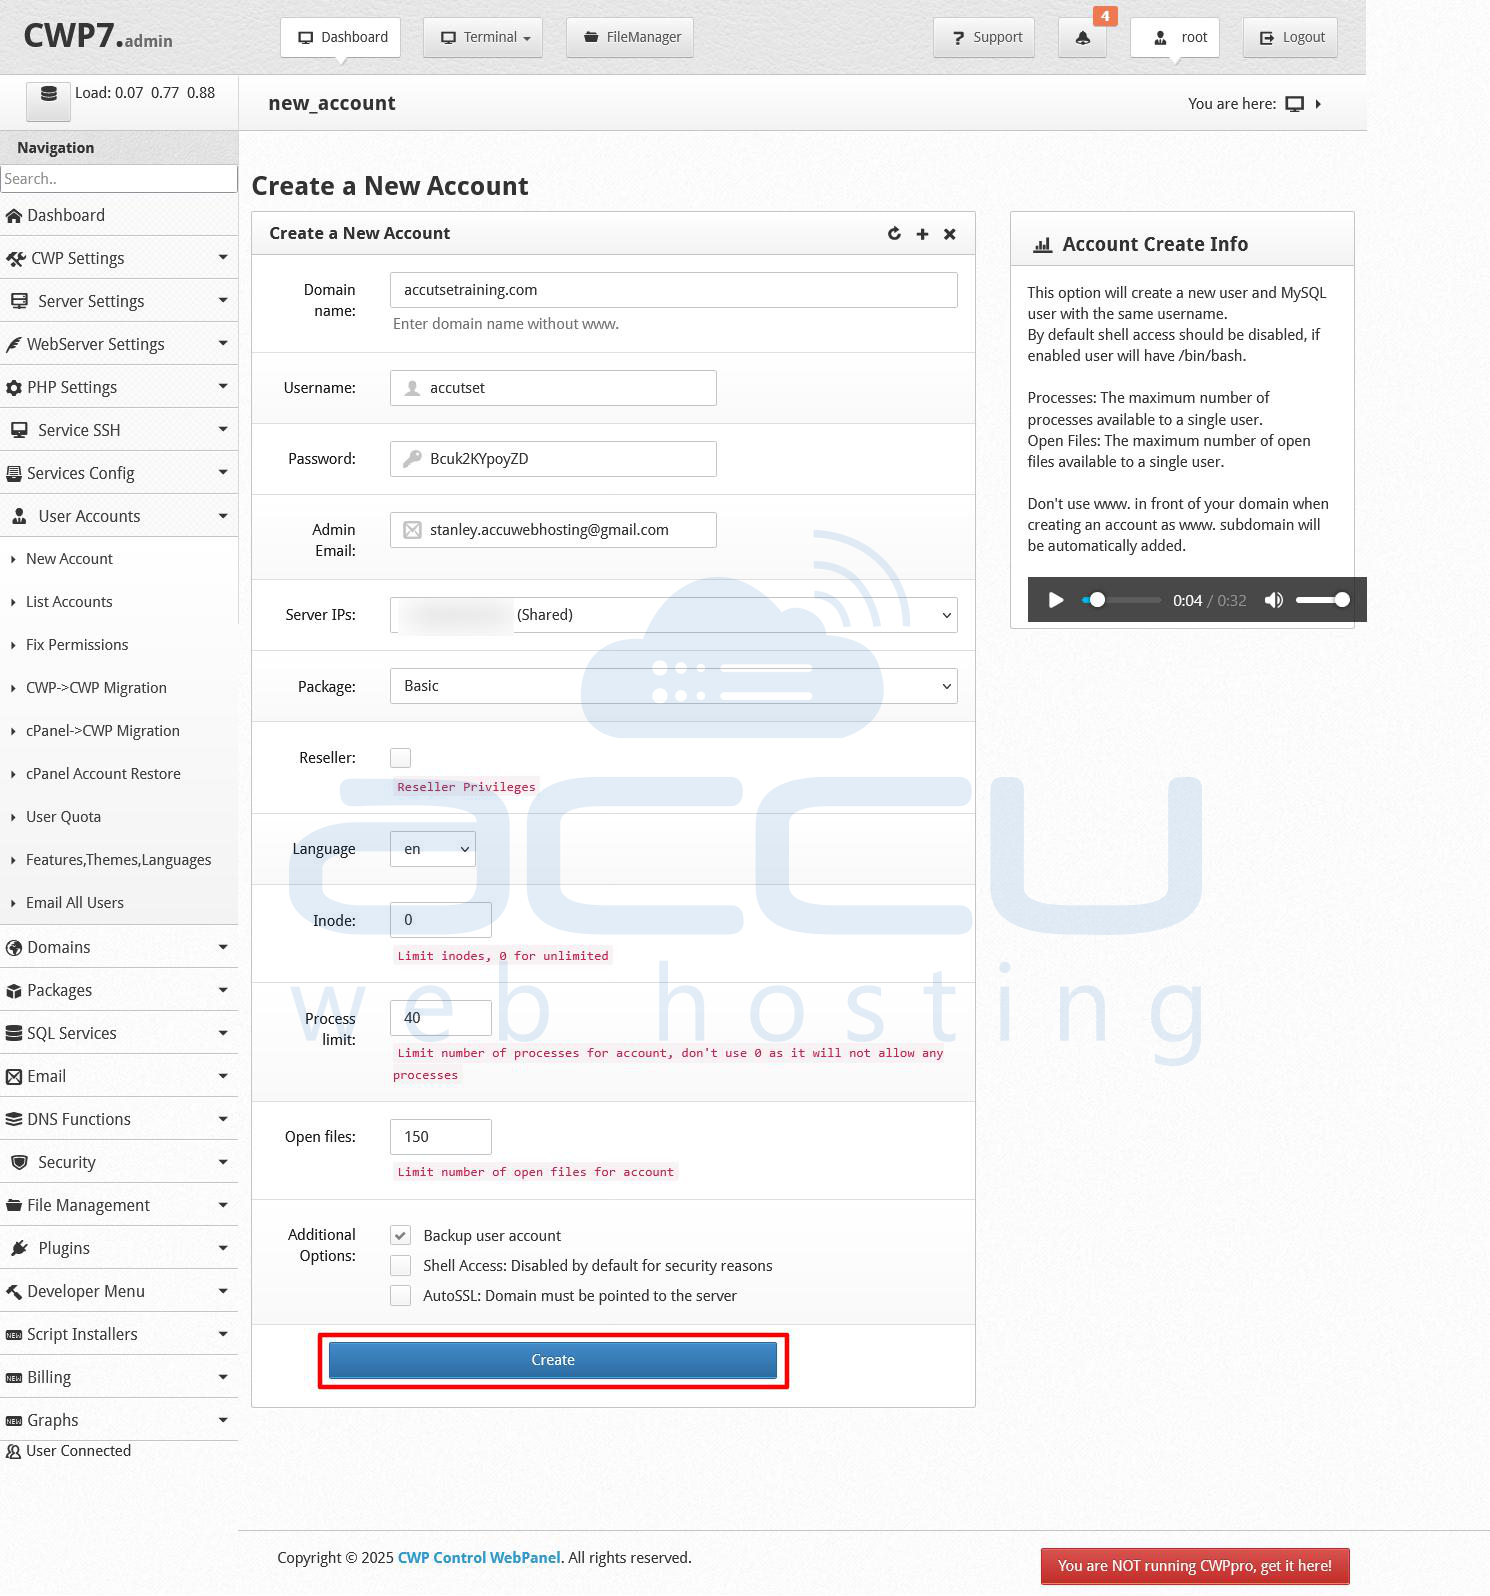
7. Add Hosting User Account
Now you can create a website hosting account: Go to User Accounts → New Account. Fill in details: username, domain name, package (choose the one you created), email address, password, FTP credentials, etc.
8. Add a Domain to the Account
If not added during account creation: Go to Domains → Add Domain. Enter the domain, choose an account, enter path, set any optional settings (document root, SSL,).
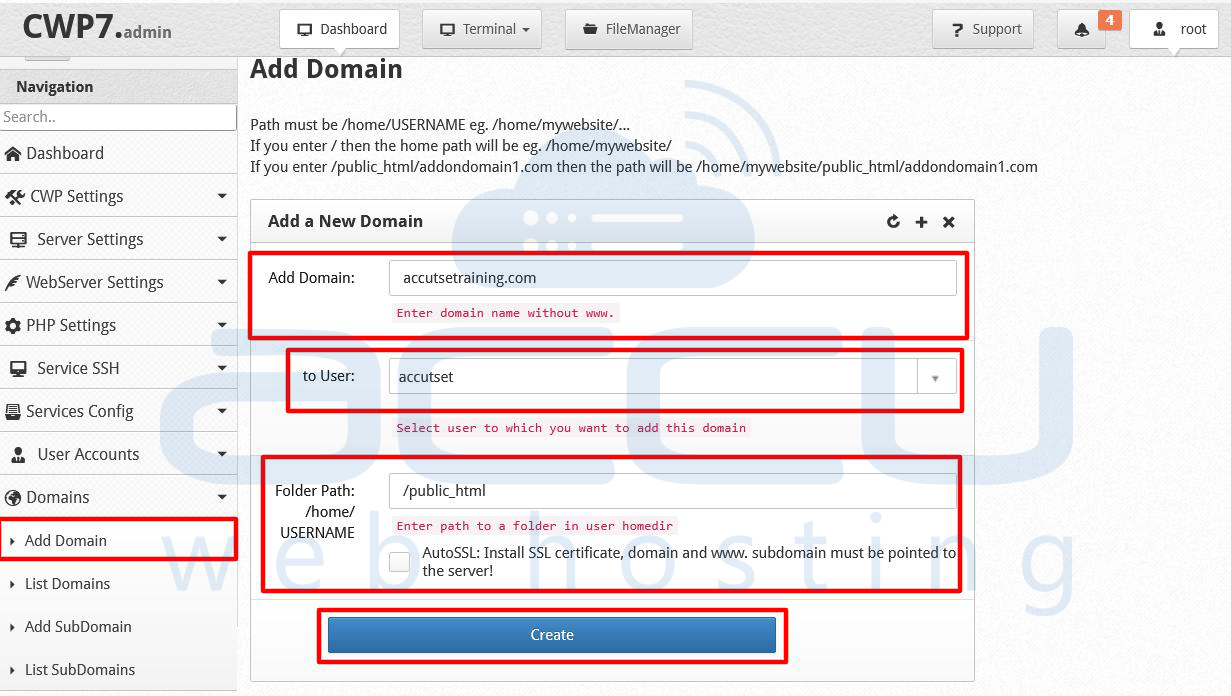
Confirm. Your domain is now configured to be served by the hosting environment.
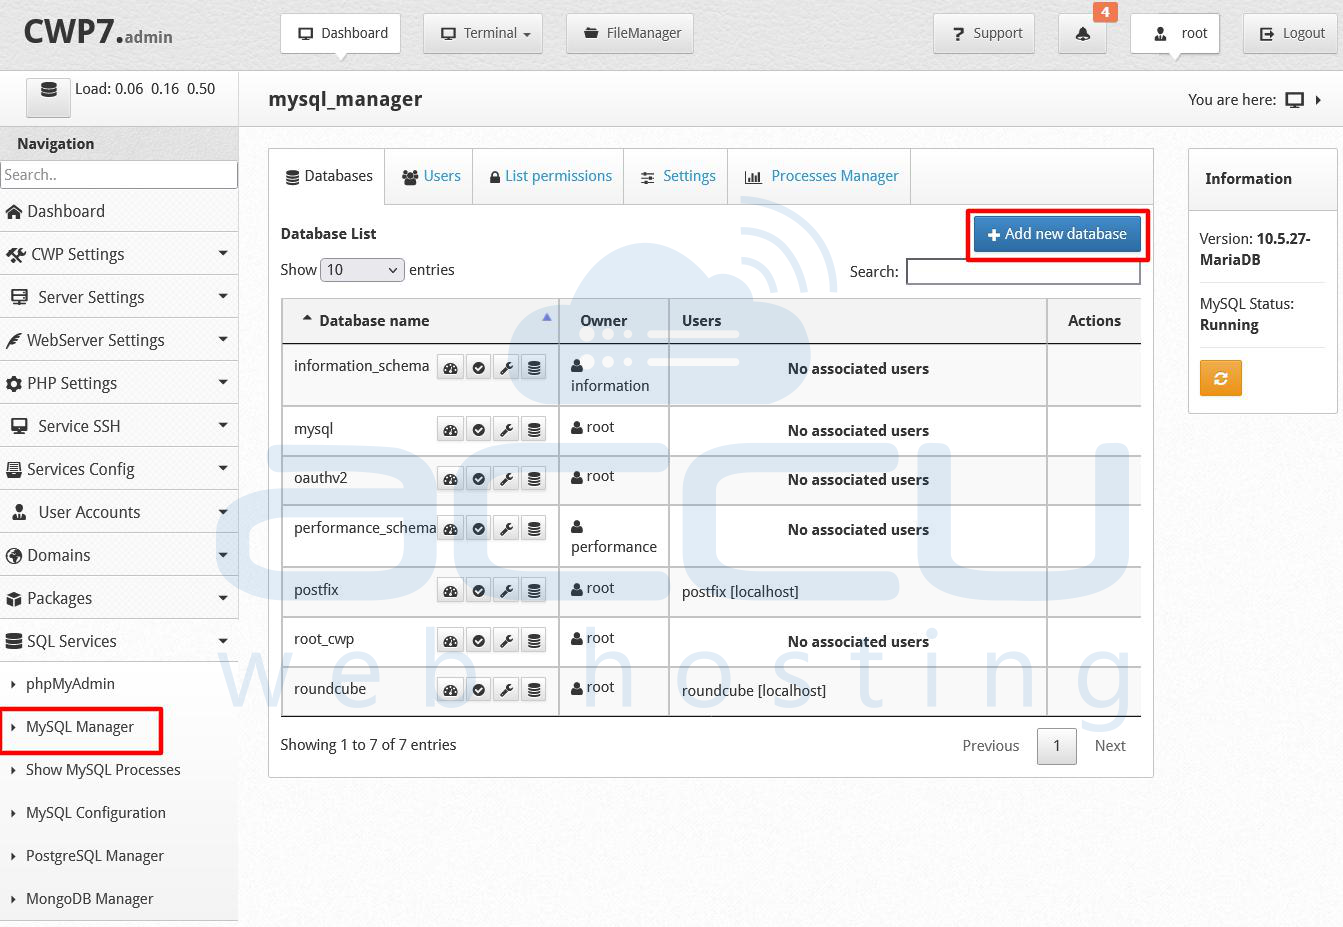
9. Add a Database
For website applications you’ll need a database. Navigate to SQL Services → mysql_manager and Click to Add Database.
10. Access phpMyAdmin
To manage your databases via a web interface: Go to SQL Services → phpMyAdmin.
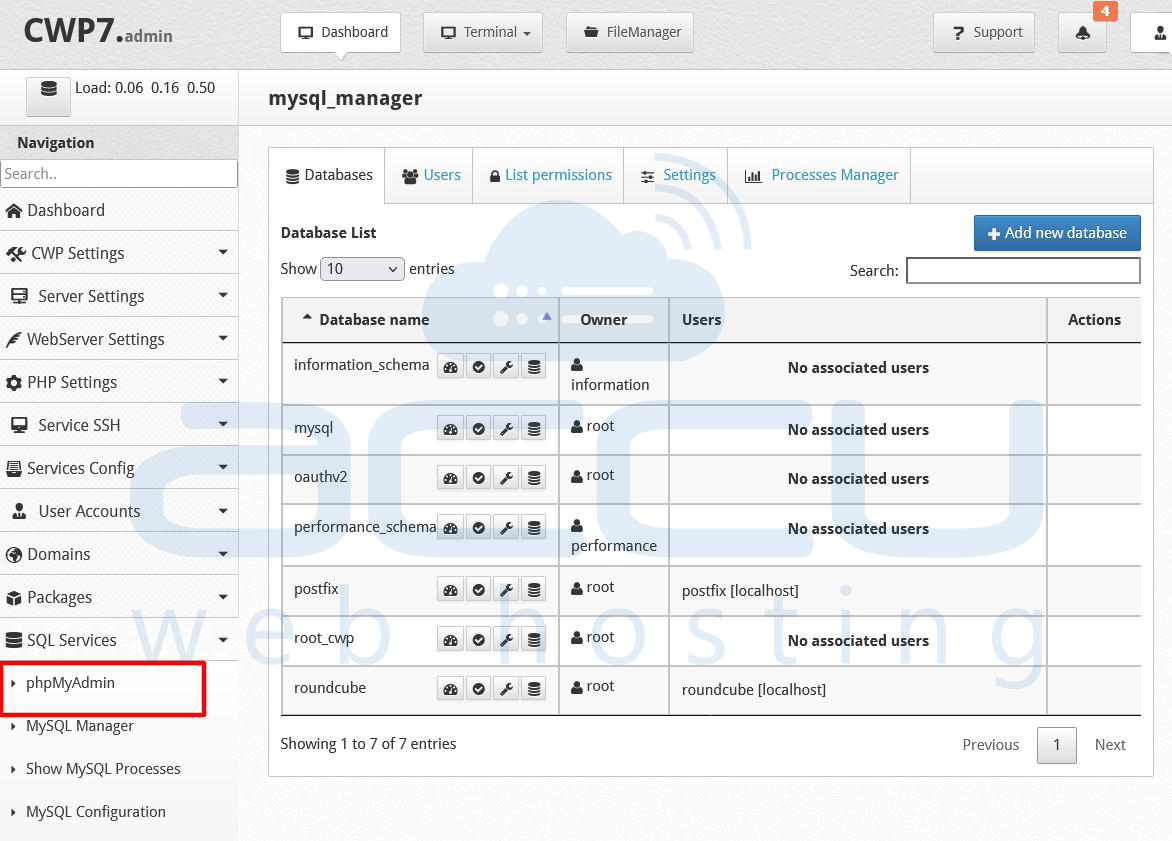
From here you can import/export databases, run SQL queries, manage tables, etc. phpMyAdmin simplifies database administration for non-CLI users.
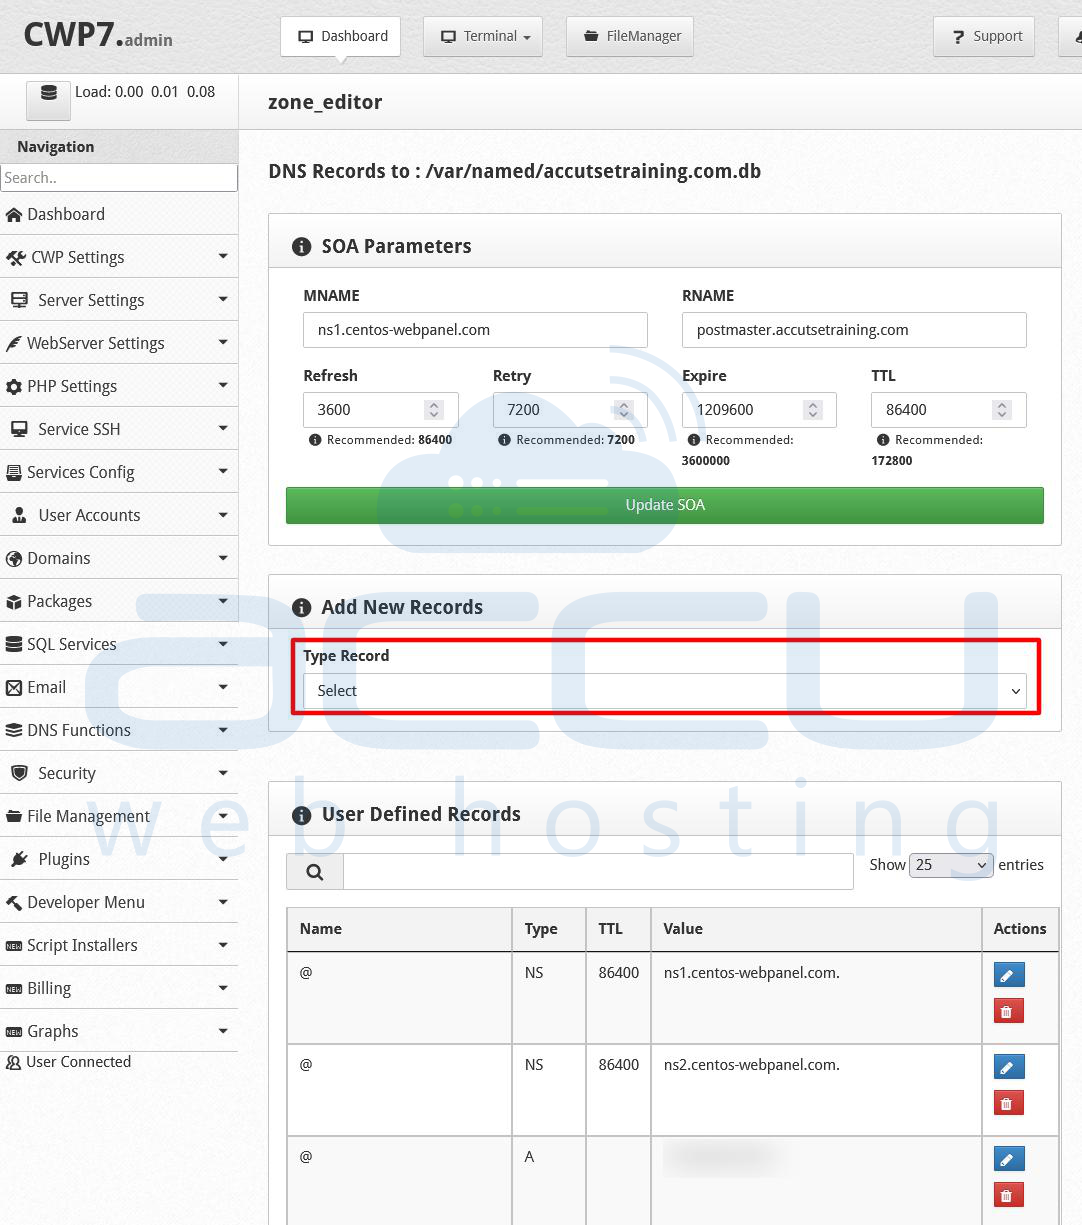
11. Add or Modify DNS Records
If your server is acting as the DNS provider: Go to DNS Function → List DNS Zone. Select the domain, click Edit Records.
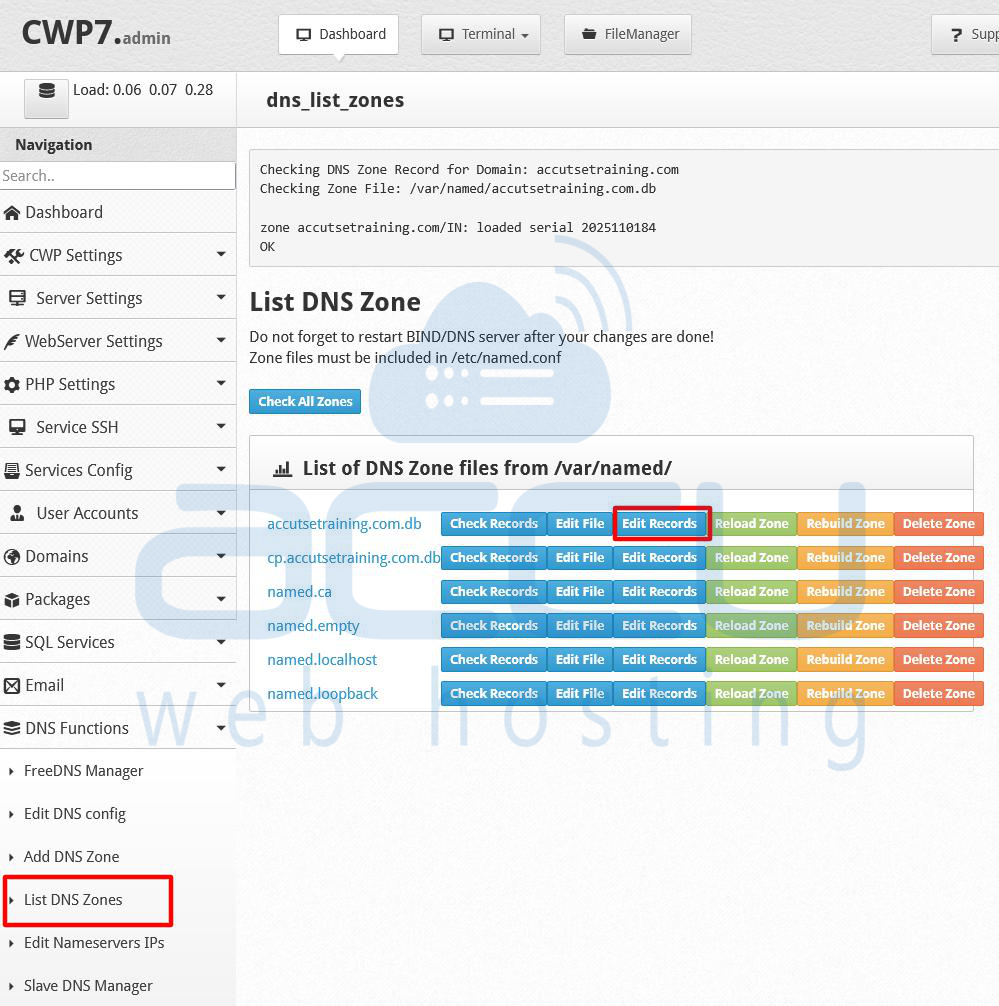
You’ll see A-records, MX-records, CNAMEs, etc. Add or update records (for example: @ A 123.123.123.123, mail A 123.123.123.123, mx1 MX 10 mail.yourdomain.com).
12. Add Email Account
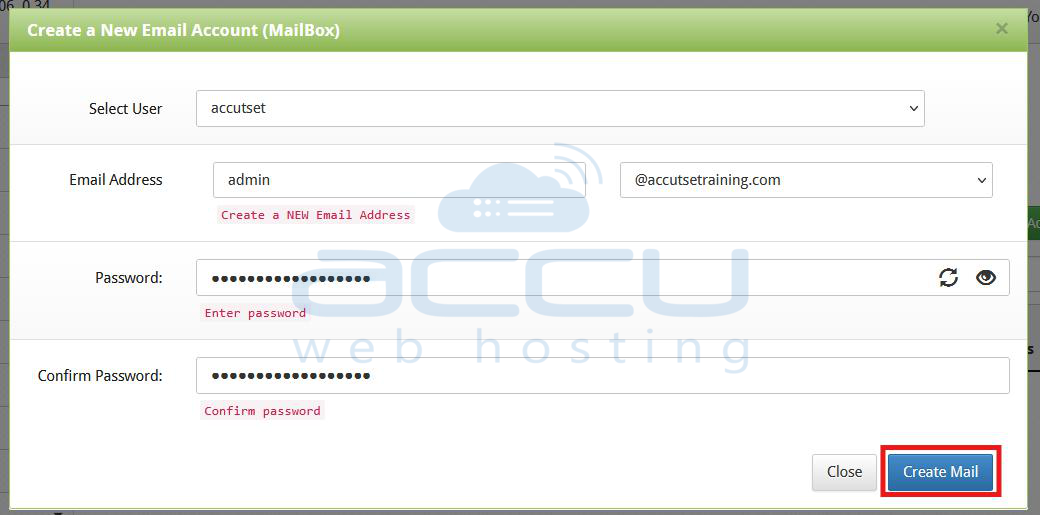
For the domain’s email service: Navigate to Email → Email Accounts. Click Add New Domain Mail.
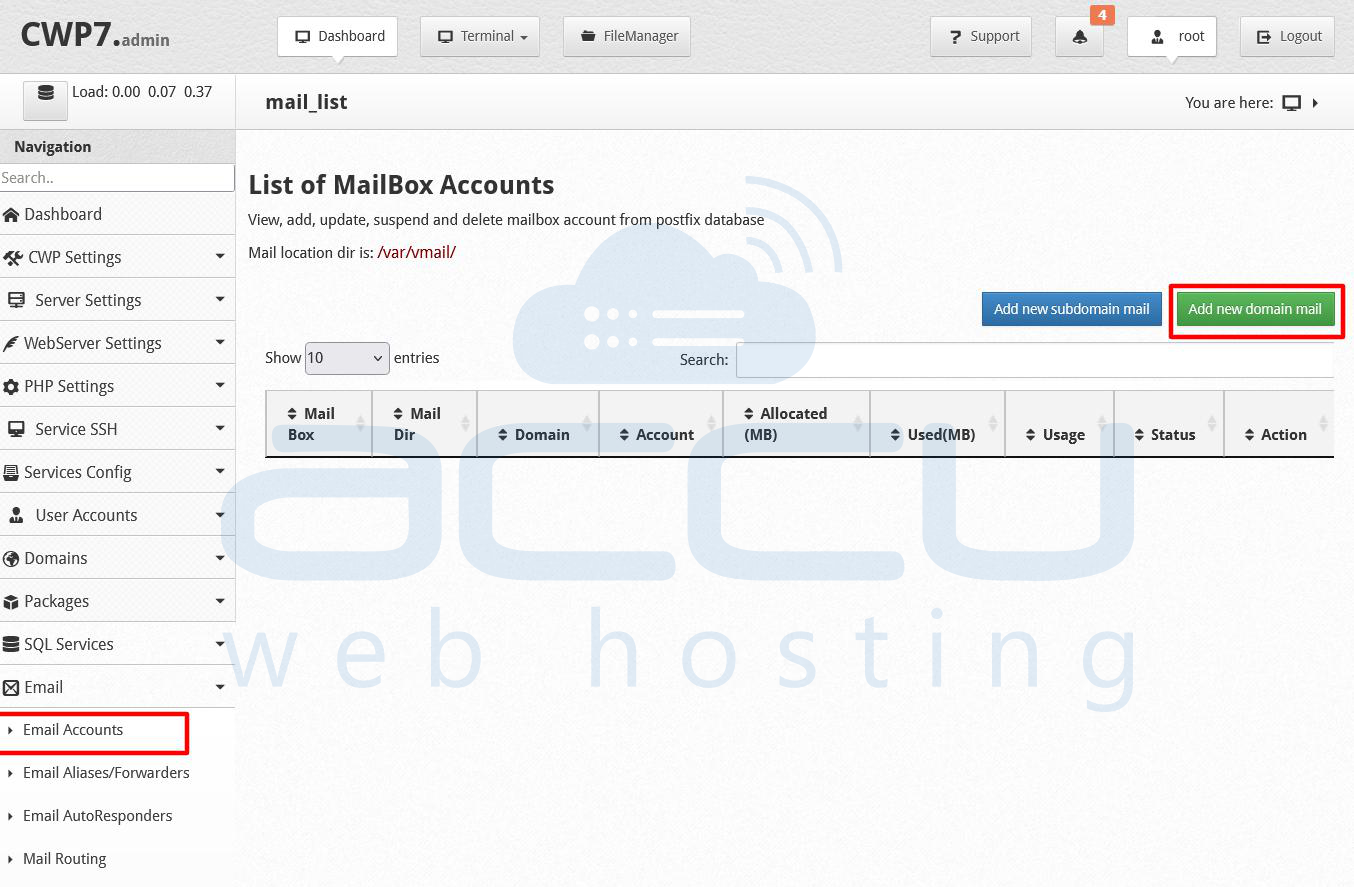
Enter the email address (e.g., [email protected]), password and click on Create the account.
By following the steps above you will have a fully-functional hosting environment managed via the Control Web Panel, ready to host web sites, manage email accounts, databases and DNS records.
Conclusion
Installing and configuring Control Web Panel (CWP) on a Linux server provides a powerful, free, and user-friendly solution for managing web hosting environments. From initial server preparation to post-installation configuration, CWP allows administrators to efficiently manage web servers, databases, email services, DNS, and user accounts through a web interface. By following the steps outlined in this guide, you can establish a fully functional hosting platform.
