Installation and Configuration of SolidCP on Windows Server
SolidCP is a free and open-source hosting control panel designed to manage Windows-based hosting environments. It provides centralized control for web hosting services such as IIS websites, FTP, DNS, databases, and more. This guide explains how to install and configure SolidCP step by step on a Windows Server operating system.
1.Install Required Roles and Features for SolidCP on Windows Server 2025
Before installing SolidCP, it’s essential to prepare your Windows Server by enabling all the necessary roles and features, such as IIS, .NET Framework, and FTP.
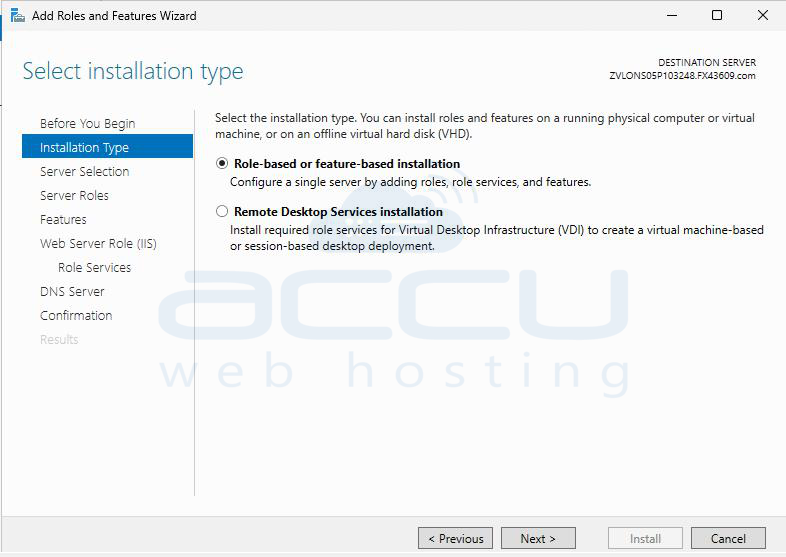
Step 1: Log in to your Windows Server 2025 as an administrator. Launch Server Manager from the Start menu.
In the wizard, select Role-based or feature-based installation, then choose your local server.
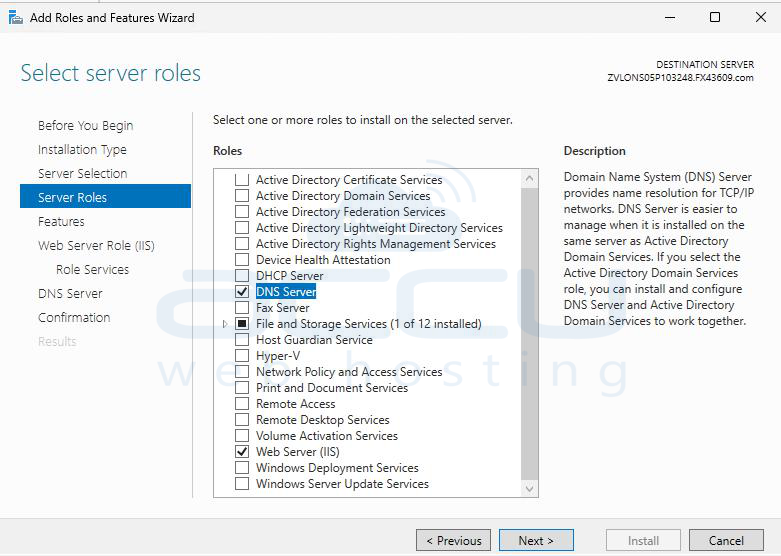
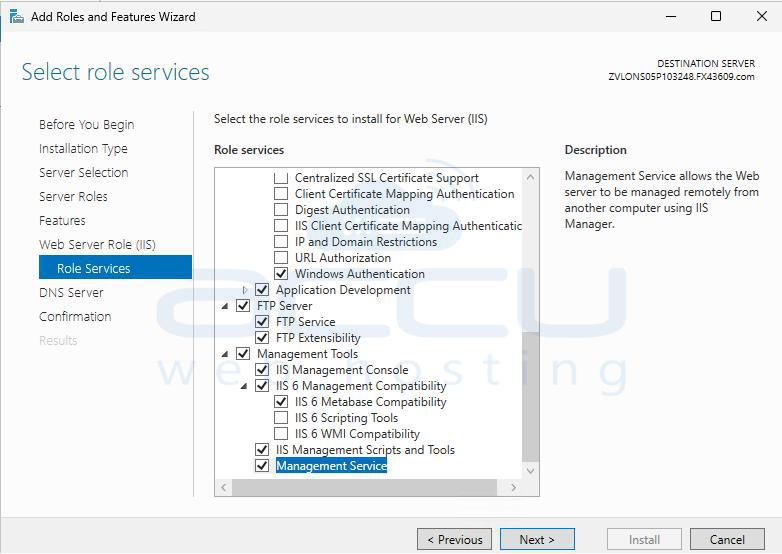
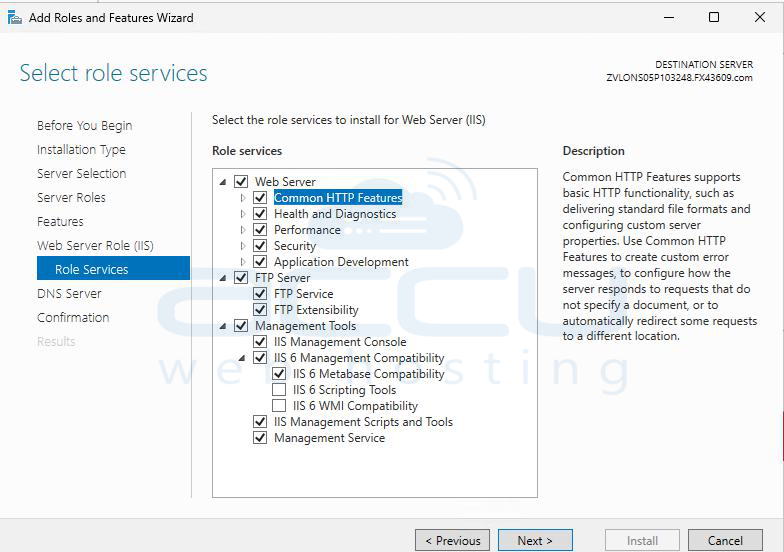
Step 2: Under Server Roles, select Web Server (IIS) and DNS. Expand the role and enable the following subcomponents:
Common HTTP Features: Default Document, Static Content, HTTP Errors, HTTP Redirection
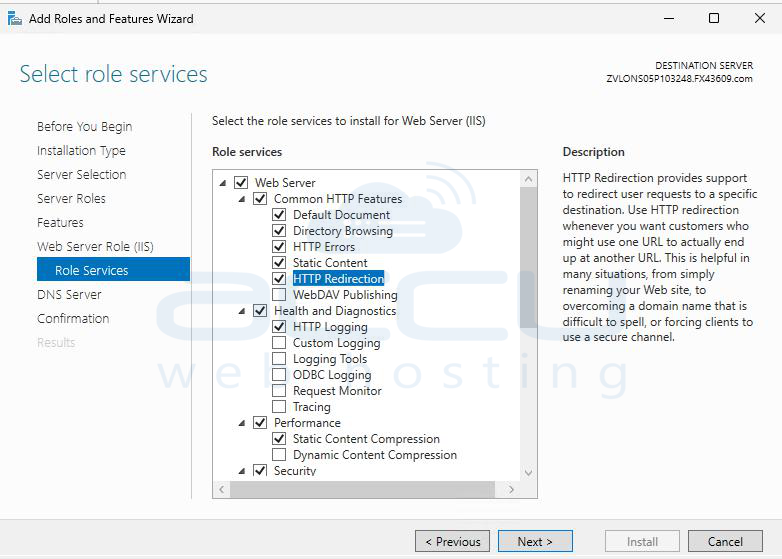
Security: Request Filtering, Windows Authentication (recommended), Basic Authentication (optional), Performance, Static Content Compression.
Management Tools: IIS Management Console, IIS Management Scripts and Tools, (Optional) IIS 6 Management Compatibility for legacy services.
These components ensure SolidCP can host and manage web applications properly.
Step 3: Under Features, check the following:
.NET Framework 3.5 Features (includes 2.0 and 3.0)
.NET Framework 4.8 Features: ASP.NET 4.8, WCF Services (HTTP Activation)

SolidCP depends on these frameworks for web application functionality and service communication.
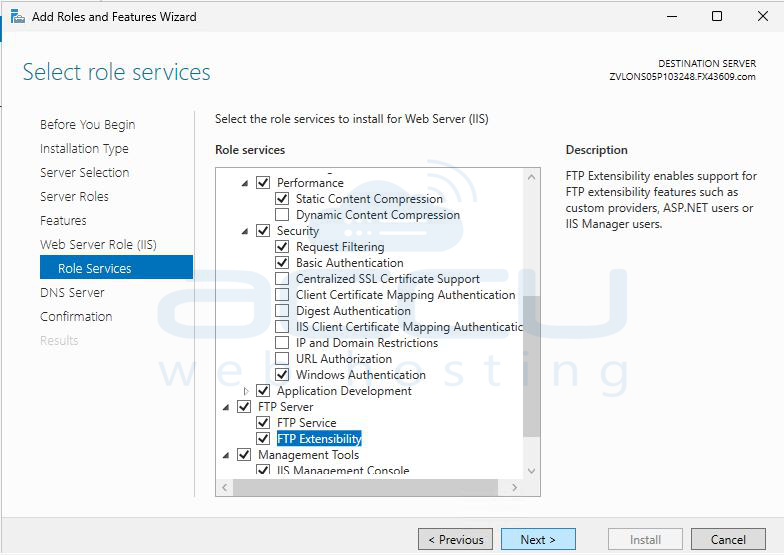
Step 4: If you plan to manage or host FTP sites using SolidCP, enable the FTP role.
Under Server Roles → Web Server (IIS), expand FTP Server and select: FTP Service, FTP Extensibility
This allows SolidCP to create and manage FTP accounts through its control panel.
Step 5: For better performance and remote management, enable these additional features:
IIS Management Service
Windows Process Activation Service (WAS): Process Model, NET Environment and Configuration APIs.
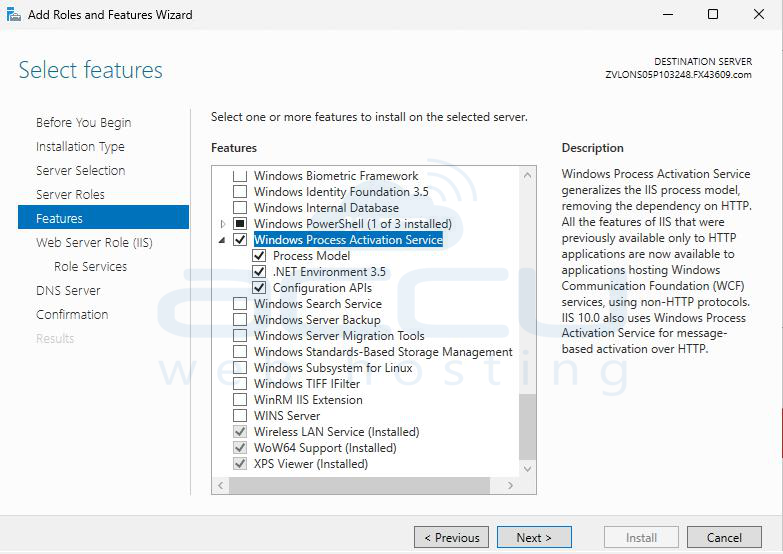
These features improve reliability and compatibility with modern web hosting environments.
Step 6: Click Next to proceed through the installation wizard. On the Confirmation screen, check Restart the destination server automatically if required.
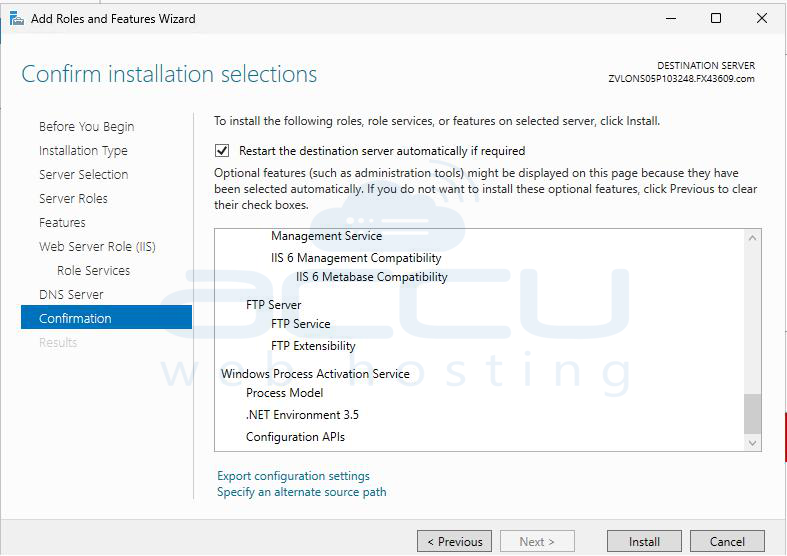
Click Install and wait for the process to finish. Once complete, reboot the server.
2: Installation of SQL Server Express Edition
SQL Server Express 2022 is a free edition of Microsoft SQL Server designed for lightweight applications and hosting panels such as SolidCP. Below are detailed steps for installation and initial configuration.
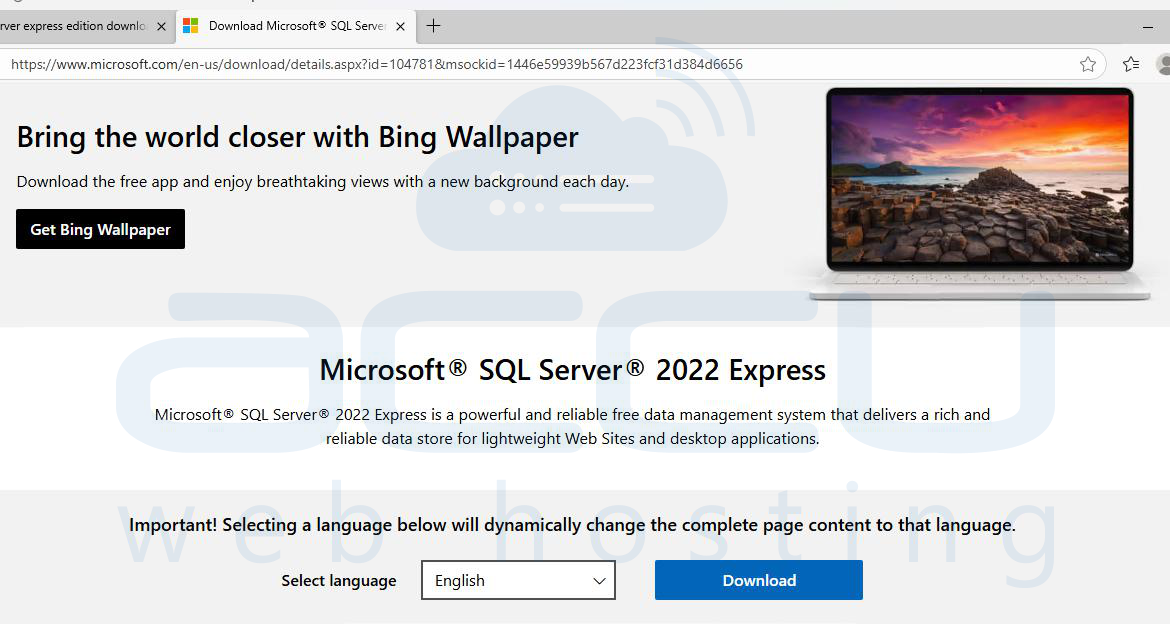
Step 1: Go to the official Microsoft download page: https://www.microsoft.com/en-us/sql-server/sql-server-downloads
Under SQL Server 2022 Express, click Download Now.
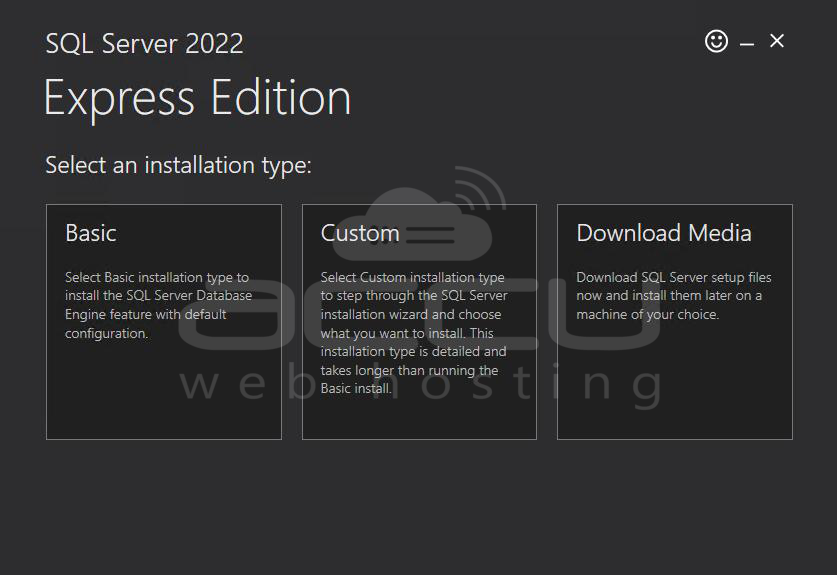
Step 2: Locate the downloaded file and run it as Administrator. You’ll see three installation options: Basic, Custom and Download Media. Choose “Custom” to have control over features and configuration.
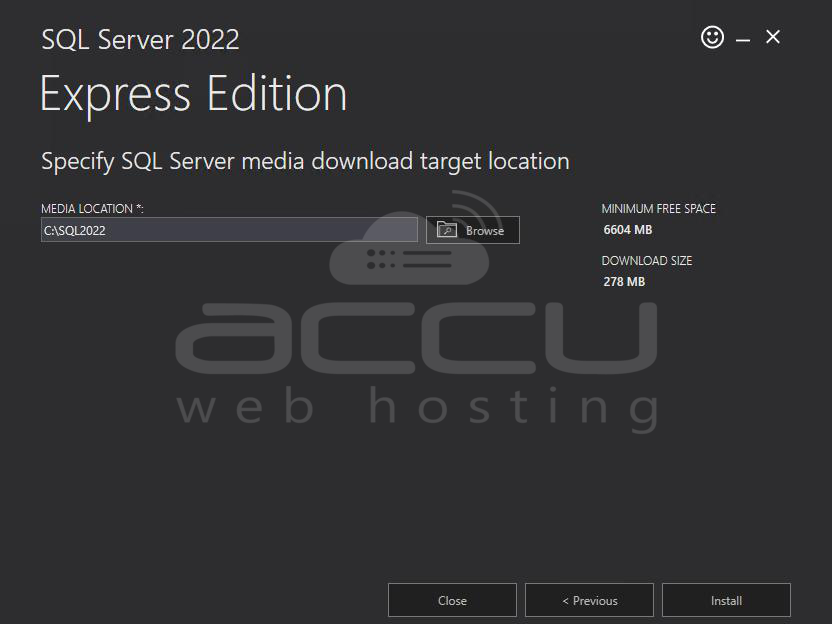
The installer will download necessary setup files. Once complete, click Install to launch the SQL Server Installation Center.
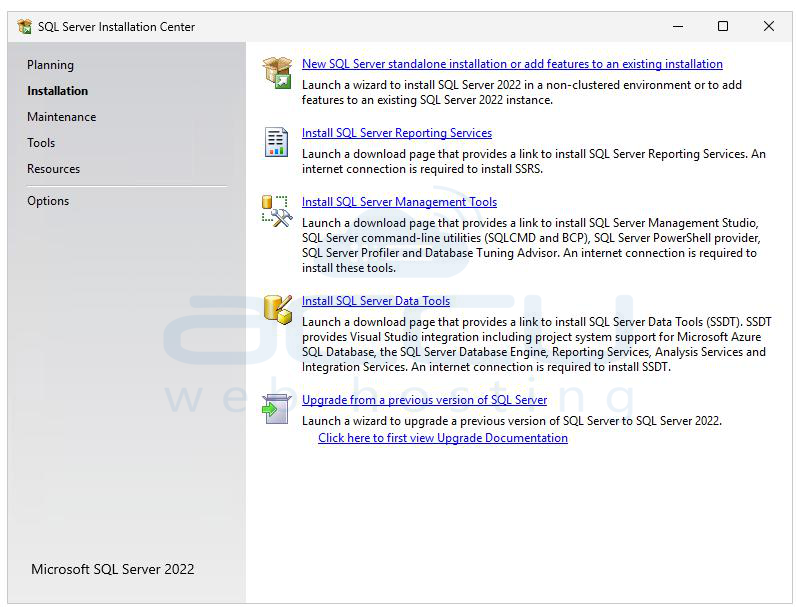
Step 3: In the Installation Center, click New SQL Server stand-alone installation or add features to an existing installation.
The setup will check for prerequisites; click Next when all checks pass.
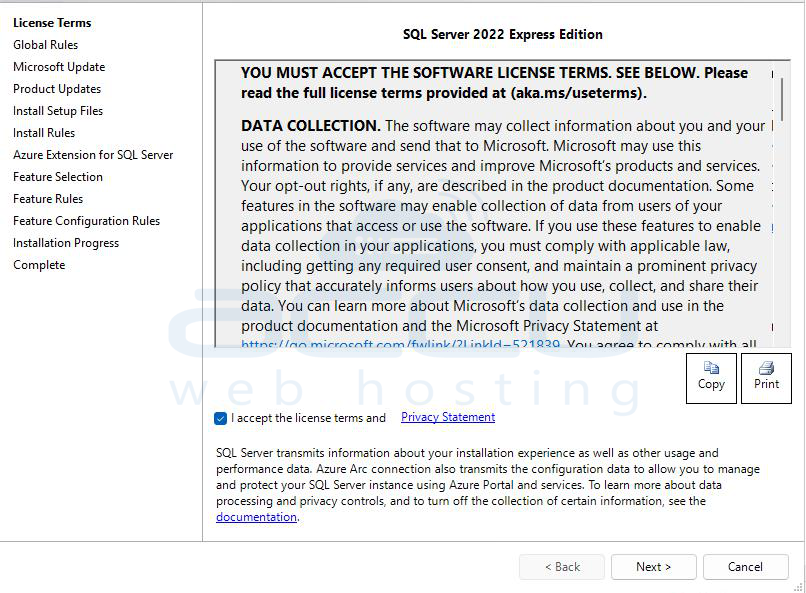
Step 4: SQL Server Express is free, so it will automatically use the “Express Edition” key. Accept the license terms and click Next.
Microsoft Update: You may choose to enable updates; it’s recommended for security.
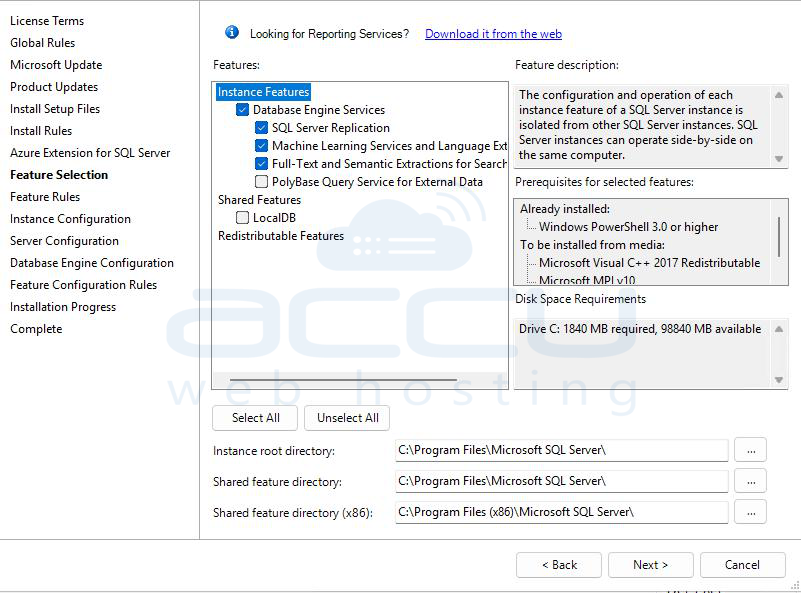
Feature Selection: Select the Database Engine Services, SQL Server Replication (optional) and Full-Text and Semantic Extractions (optional, for advanced search). Click Next.
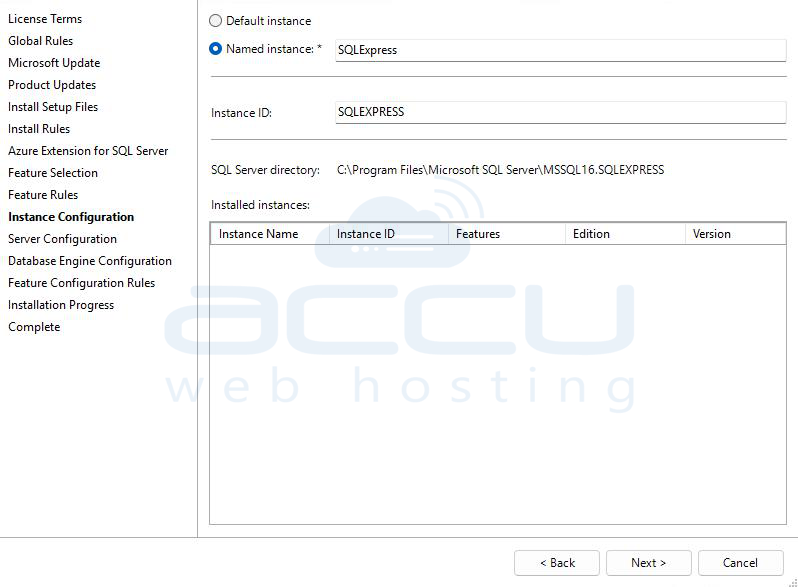
Step 5: In Instance Configuration, choose Default instance (named MSSQLSERVER) for simplicity. Or select a Named instance (e.g., SQLEXPRESS) if you plan to host multiple SQL versions. Click Next.
Step 6: In Server Configuration, leave default service accounts (e.g., NT Service\MSSQL$SQLEXPRESS).
Set the Startup Type for SQL Server Database Engine → Automatic and SQL Browser → Automatic (if remote access is needed). Click Next.
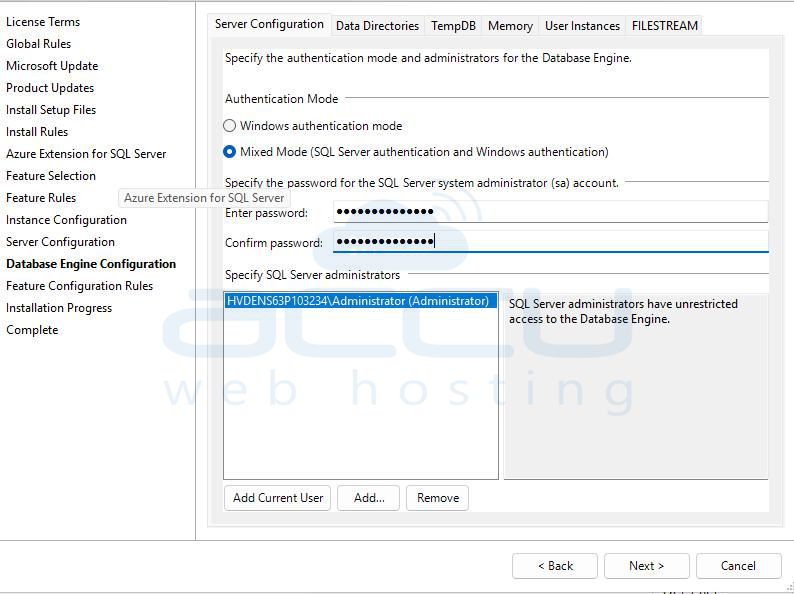
Step 7: In Database Engine Configuration, under Authentication Mode, select:
Mixed Mode (SQL Server and Windows Authentication)
Enter a strong password for the sa (system administrator) account.
Click Add Current User to grant your Windows account admin rights to SQL.
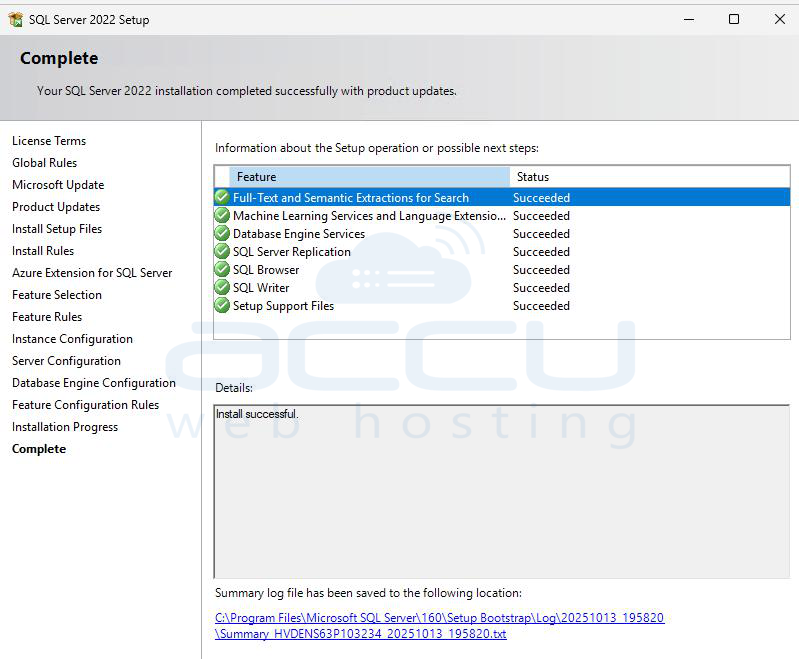
Click Next, then Install. The installation will take several minutes.
3: Install SQL Server Management Studio (SSMS)
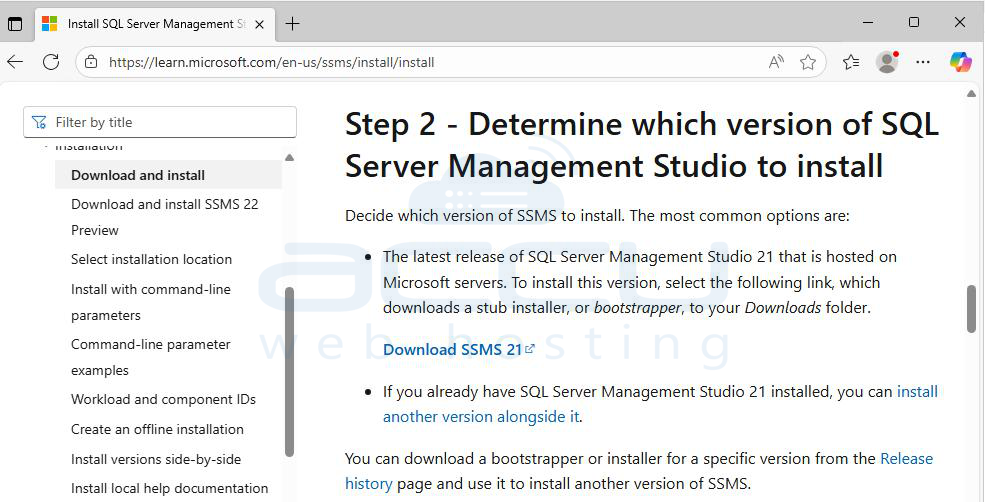
Download SSMS from Microsoft’s official page: https://learn.microsoft.com/en-us/ssms/install/install
Run the installer (SSMS-Setup-ENU.exe) as Administrator and click Install to begin the setup.
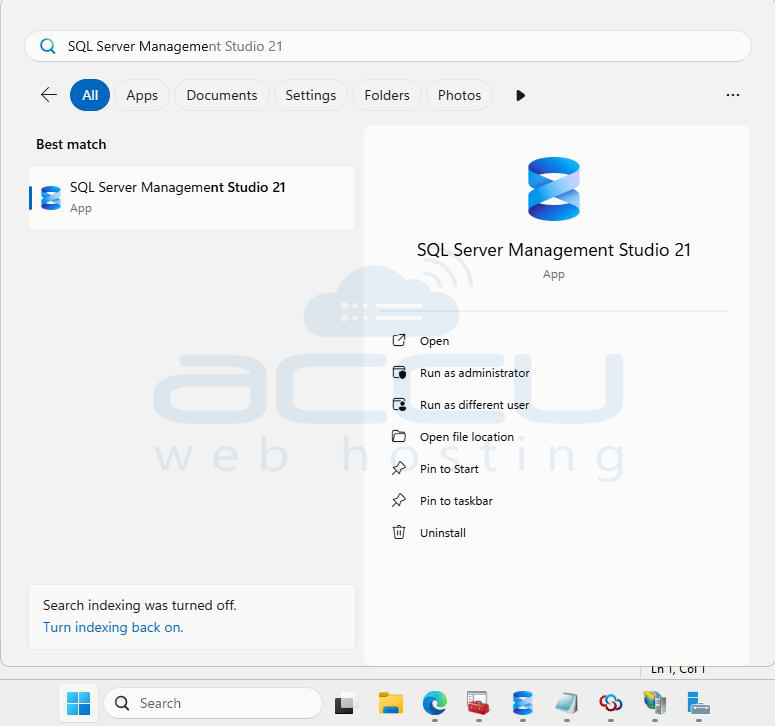
After installation, launch SQL Server Management Studio from the Start menu.
Enable TCP/IP Protocol: Open SQL Server Configuration Manager and Go to SQL Server Network Configuration → Protocols for [YourInstanceName].
Right-click TCP/IP, then select Enable. Right-click TCP/IP → Properties → go to the IP Addresses tab.
In the IPAll section, make sure TCP Port is set to 1433 (default) and TCP Dynamic Ports is blank.
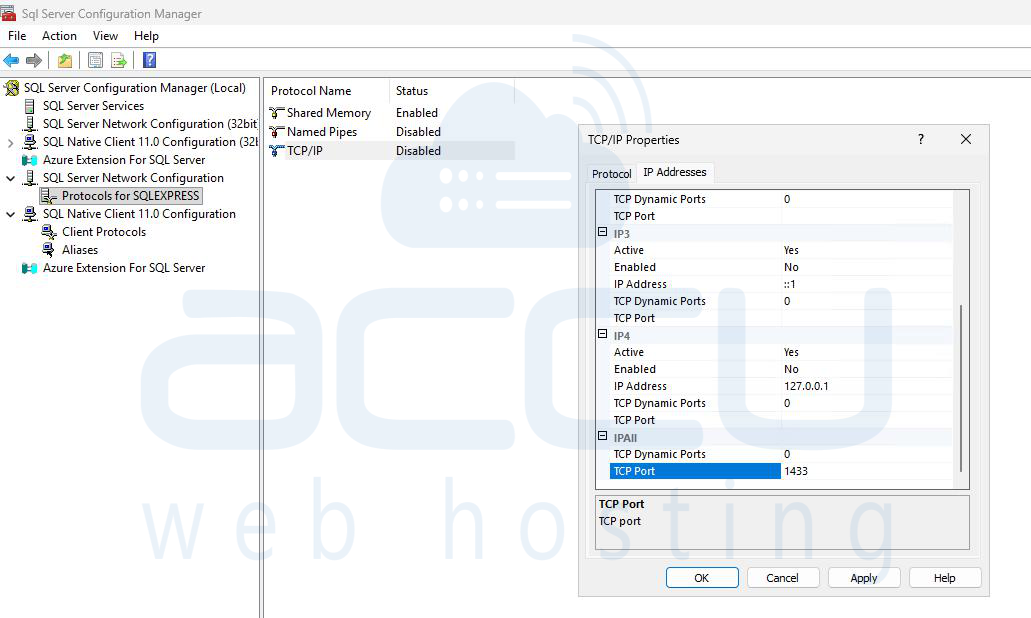
Click OK and restart the SQL Server service.
Allow Required Ports in Windows Firewall: To ensure proper communication between SolidCP and its associated services, specific network ports must be allowed through the Windows Firewall.
Open your server firewall and allow the following ports: 21, 25, 80, 110, 143, 443, 465, 587, 808, 8756, 1433, 1533, 2178, 2978, 3306, 8080, 8172, 9001, 9002, 9003, 9006, 9007, 10050
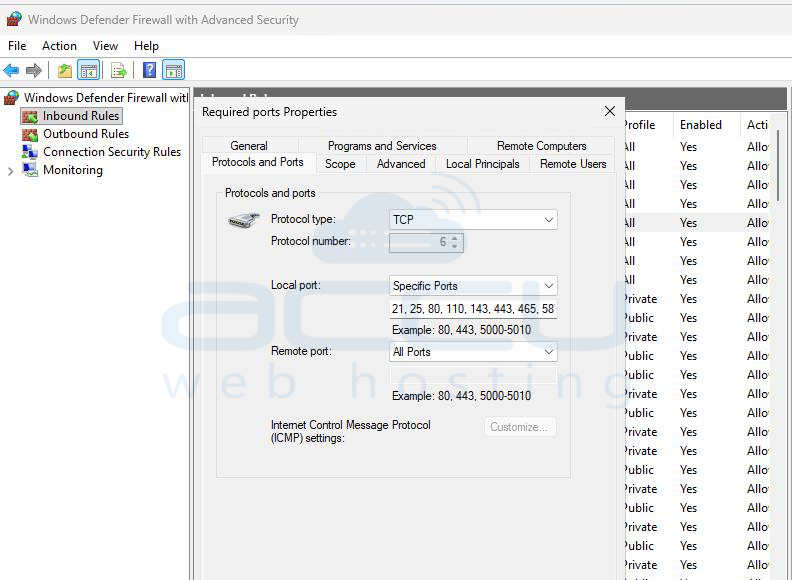
Only open the ports that are required for your specific services or applications. Avoid exposing unnecessary ports to reduce potential security risks.
Check SQL Server Authentication: In SQL Server Management Studio (SSMS), connect locally.
Right-click the server → Properties → Security and Ensure SQL Server and Windows Authentication mode is selected.
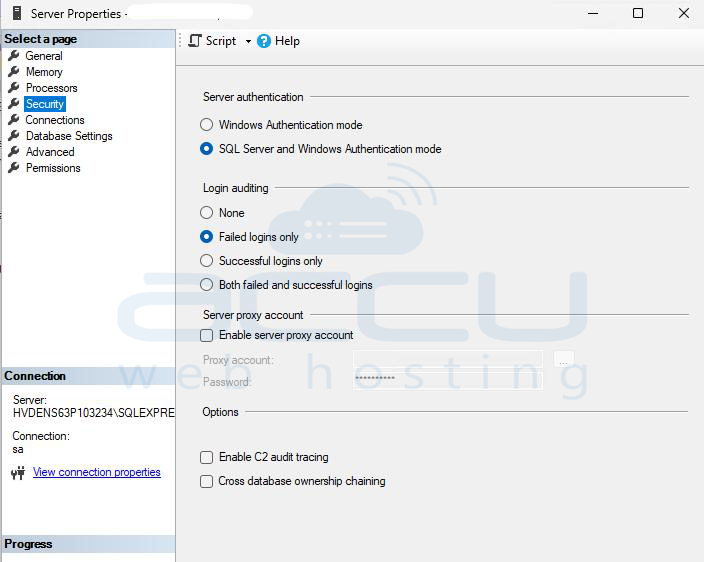
Restart SQL Server if you changed this setting.
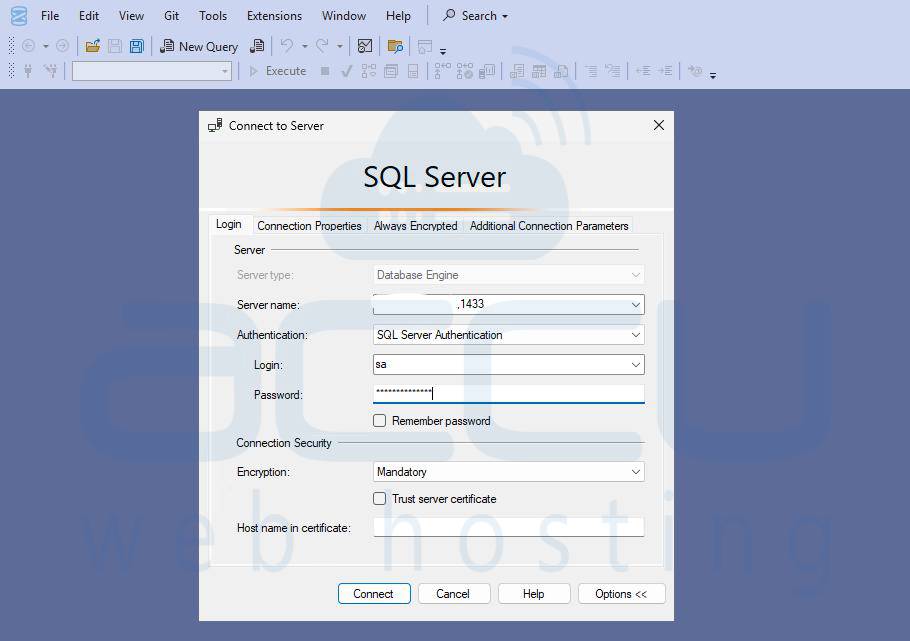
Test Remote Connection: From a client computer, open SQL Server Management Studio (SSMS).
Connect using:
Server name: <ServerIPAddress>,1433
Authentication: SQL Server Authentication
Enter valid credentials and test the connection.
4: Install and configure SolidCP
Step 1: Download SolidCP Installer from official SolidCP website: https://solidcp.com/downloads/
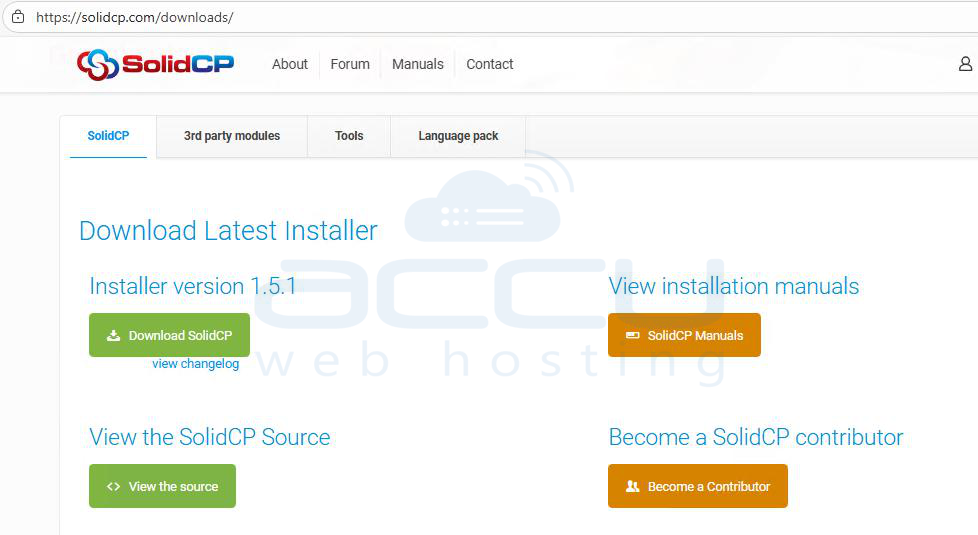
Download the latest SolidCP Installer (SolidCPInstaller.msi).
Step 2: Right-click the downloaded SolidCPInstaller.msi file and choose Run as Administrator. The SolidCP Setup Wizard will appear.
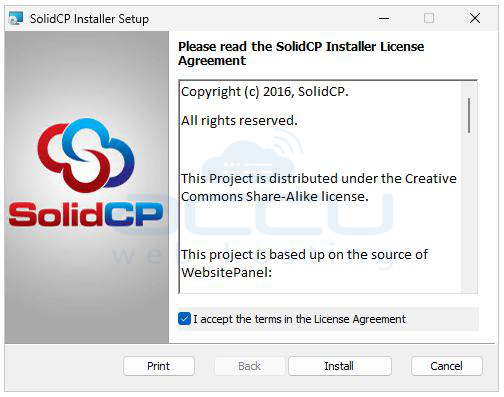
Step 3: Check the box beside “I accept the terms in the License Agreement”. Click Install to continue.
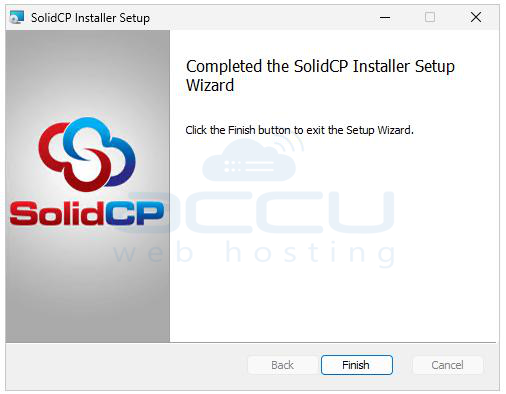
Step 4: Wait while the installer copies necessary files and prepares the installation environment. When the installation completes, click Finish.
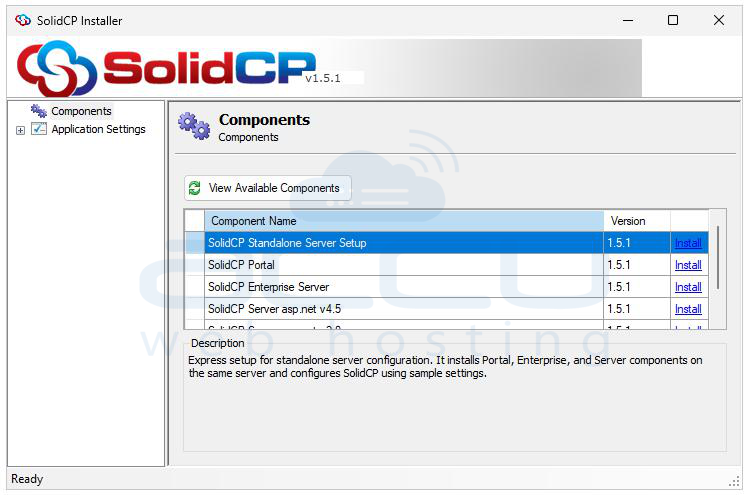
Step 5: Open the SolidCP Installer from the Start Menu or Desktop. Click View Available Components.
Step 6: Locate SolidCP Standalone Server Setup and click Install beside it.
Step 7: The SolidCP Download Manager will appear and automatically download all required setup files for the Standalone version. Once the files are downloaded, click Next to continue.
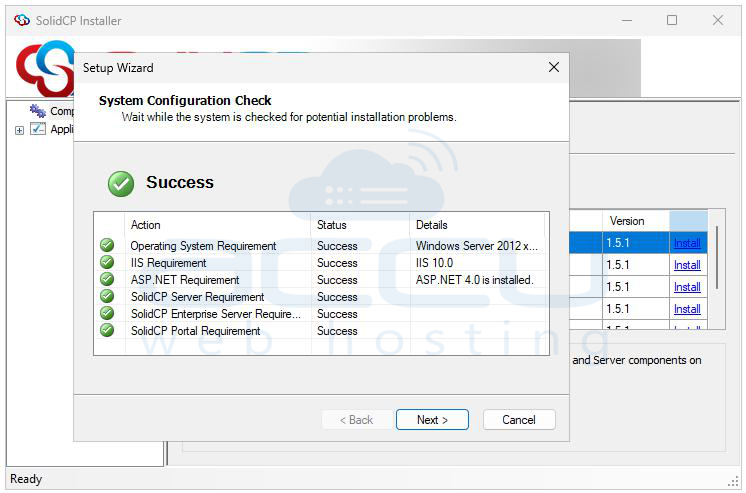
Step 8: The setup will automatically perform a System Configuration Check to ensure all prerequisites (IIS, .NET, SQL, etc.) are available.Once all checks pass, click Next to proceed.
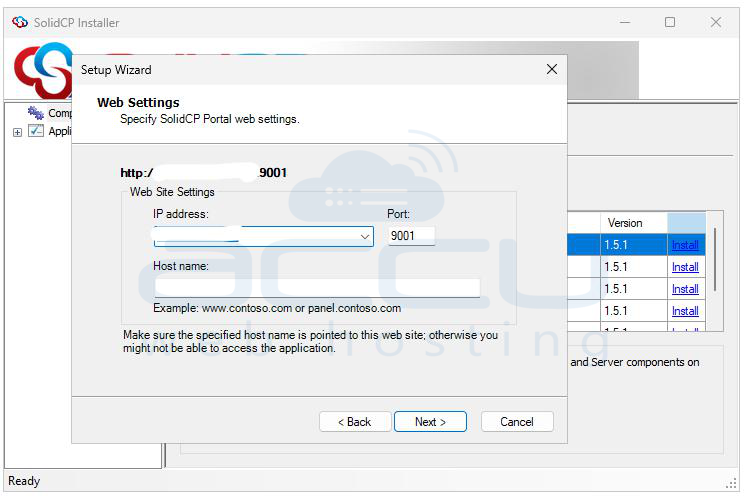
Step 9: In the Network Configuration window, Enter your Server IP Address and specify a Host Name. Click Next to continue.
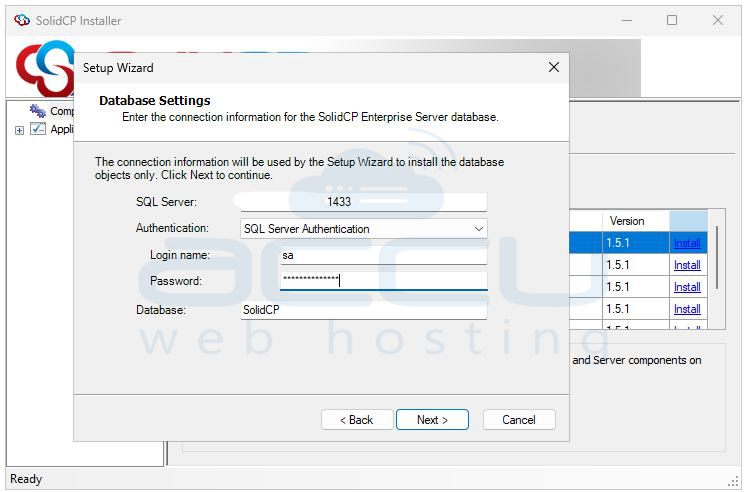
Step 10: In the Database Configuration screen, type localhost or your SQL Server instance name beside SQL Server, Choose the Authentication Type: SQL Server Authentication and provide your SQL Username (e.g., sa) and Password. Click Next to continue.
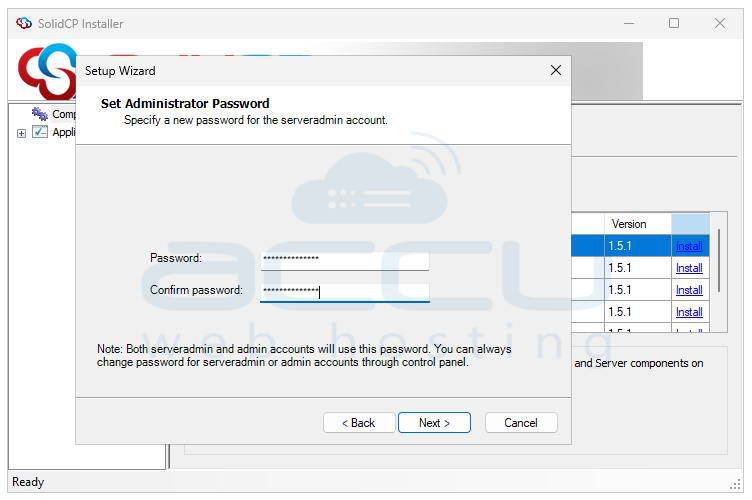
Step 11: Enter a strong Administrative Password for the ServerAdmin account. This account will be used to log in to the SolidCP portal. Click Next to continue.
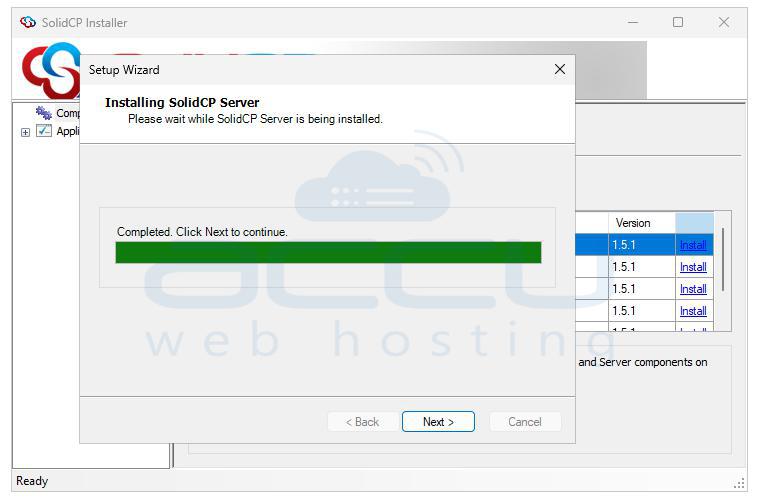
Step 12: Wait while the installer creates databases, configures services, and deploys the SolidCP web applications to IIS.
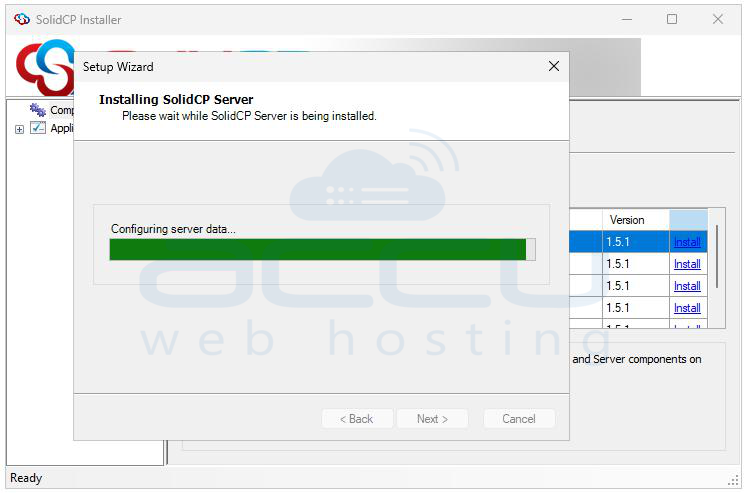
Once the process is complete, click Next, then Finish to finalize the installation.
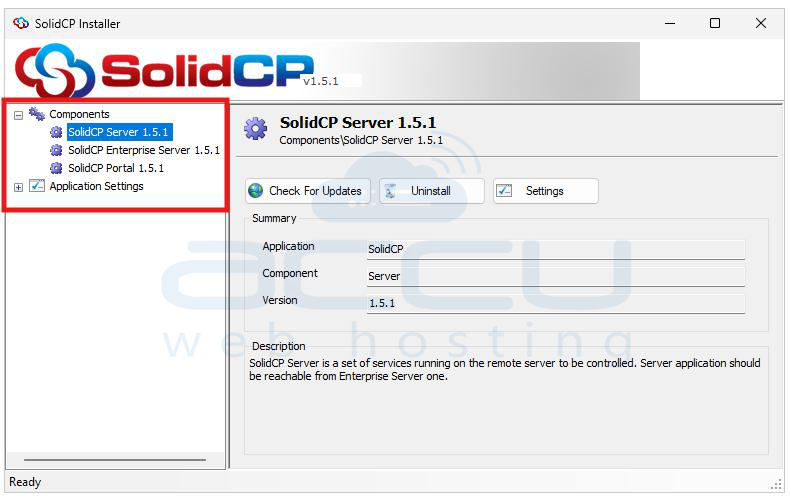
You will see installed components in SolidCP window.
Step 13: To ensure SolidCP runs continuously and efficiently, adjust Settings for Each SolidCP Application Pool by Right clicking each SolidCP Application Pool → click Advanced Settings…
Modify the following parameters:
Start Mode: AlwaysRunning
Idle Time-out (minutes): 0
Regular Time Interval (minutes): 0
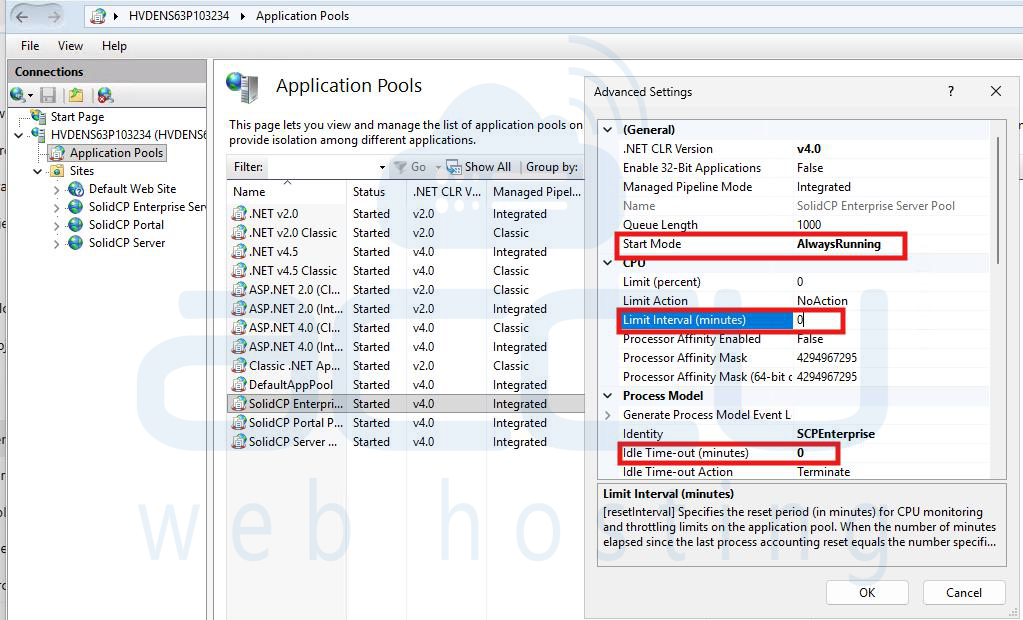
Click OK to save changes. Repeat this configuration for each SolidCP Application Pool.
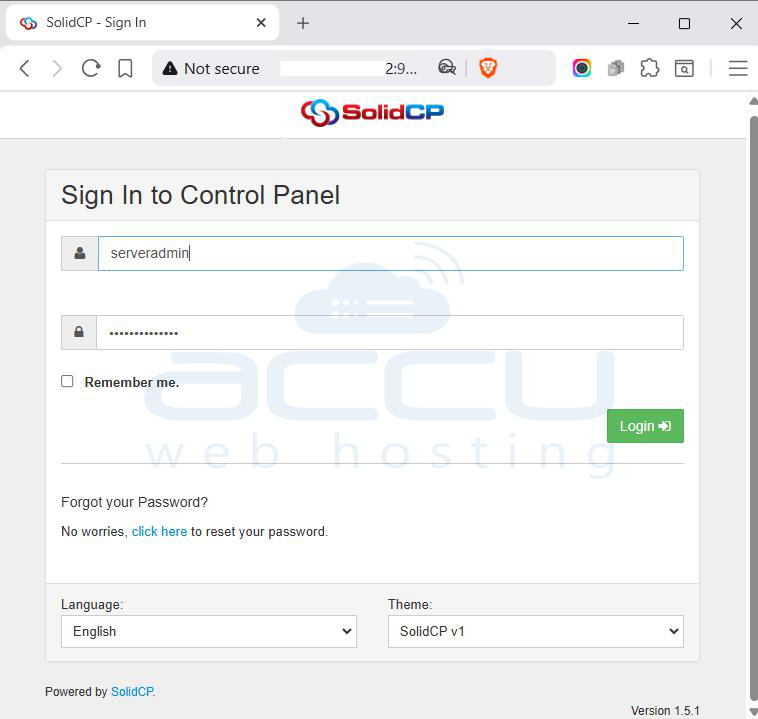
Step 14: After installation is complete open a web browser on your system or a remote machine.
In the address bar, type your Server IP or hostname followed by the assigned port number. http://<ServerIP>:9001
Example: http://10.0.0.1:9001
The SolidCP login page will appear. Log in using the following credentials Username: ServerAdmin and Password: (the one set during installation)
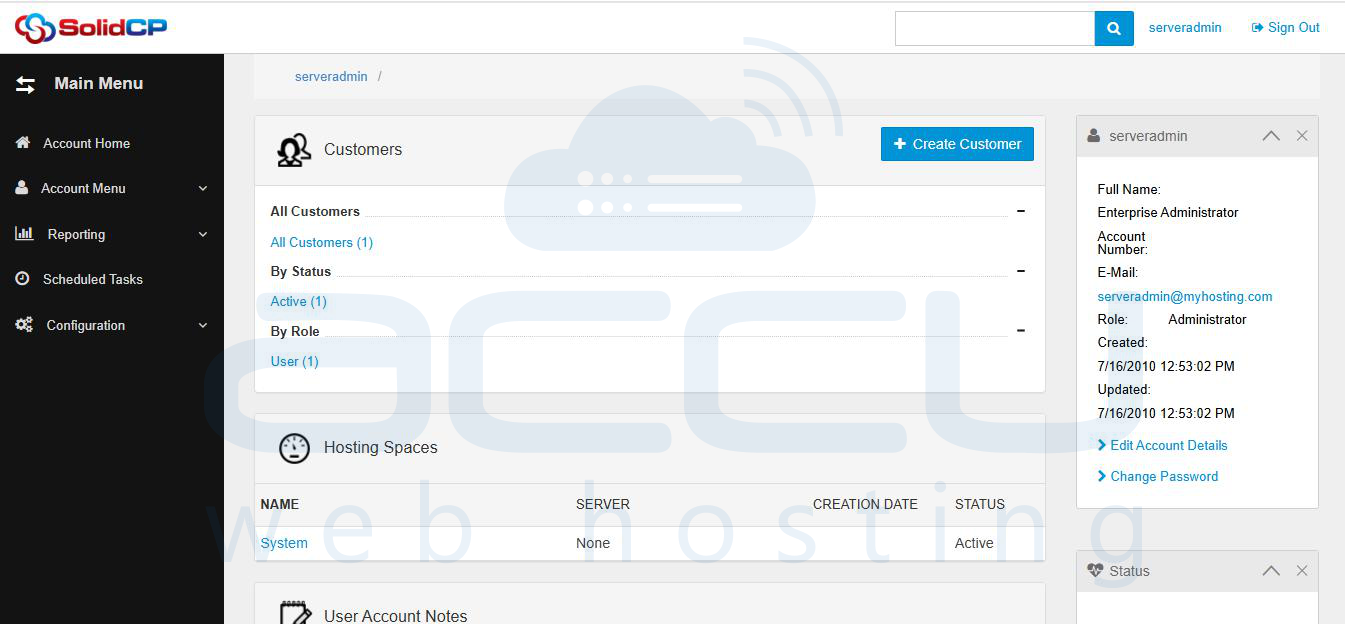
Once you logged in, you will see the SolidCP dashboard.
Once the initial setup is complete, you can review the server service configurations and add additional components such as MySQL databases, Mail Server, DNS, FTP and other supported services as needed.
Conclusion
By following these detailed steps, you can successfully install and configure SolidCP on a Windows Server environment. Once installed, SolidCP provides a centralized interface to manage hosting services such as IIS websites, databases, and FTP accounts efficiently.
This setup is ideal for both standalone and shared hosting servers, offering scalability, automation, and simplified management of Windows-based hosting environments.
