Mattermost is an open-source messaging platform that allows you to run your own Slack-like environment, but with full control over your data. In this guide, we’ll go through a complete installation of Mattermost on Ubuntu, configure it for production with PostgreSQL, set up a custom domain, and enable HTTPS using Let’s Encrypt.
Prerequisites
Before installing, make sure you have:
- An Ubuntu 20.04/22.04 LTS server.
- A domain name (e.g., chat.yourcompany.com).
- DNS A record pointing to your server’s public IP.
- A sudo-enabled user account.
Steps to install MatterMost on Ubuntu OS
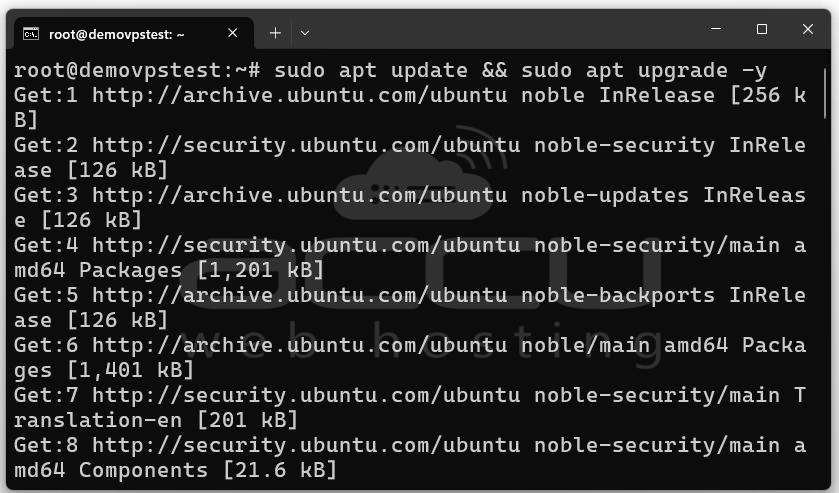
Step 1: Before installing Mattermost, it’s important to make sure your server is fully updated. This ensures you have the latest security patches and system improvements. Run the following command:
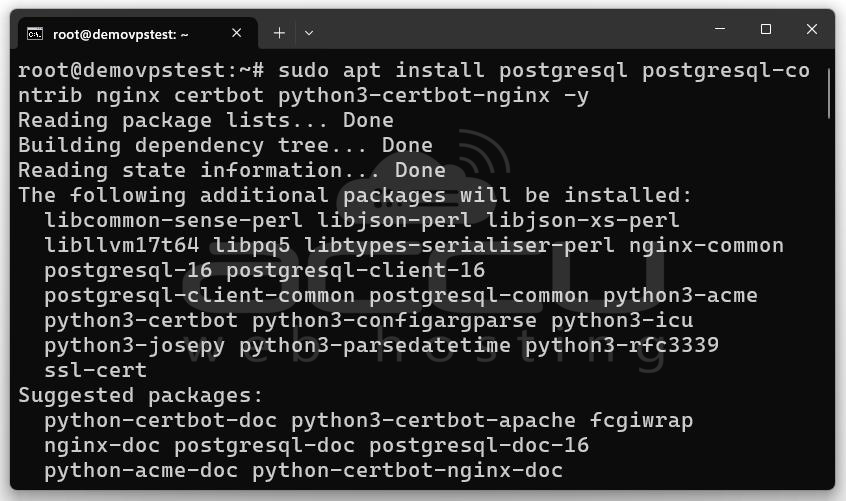
Step 2: Mattermost requires a database, a web server, and tools to manage SSL certificates. Install PostgreSQL, Nginx, and Certbot using:
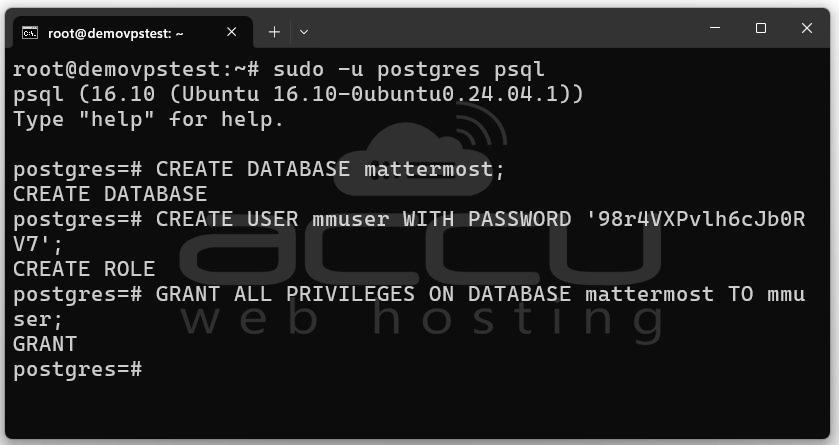
Step 3: Mattermost needs its own database to store messages, users, and other application data. Follow these steps to set it up:
Access the PostgreSQL Shell: sudo -u postgres psql
Create the Database and User:
Create the Mattermost database: CREATE DATABASE mattermost;
Create a dedicated user for Mattermost with a strong password:
CREATE USER mmuser WITH PASSWORD 'yourStrongPassword';
Grant all privileges on the database to the user: GRANT ALL PRIVILEGES ON DATABASE mattermost TO mmuser;
Configure Schema Permissions:
To ensure proper access, grant privileges on the public schema:
\c mattermost
GRANT ALL ON SCHEMA public TO mmuser;
ALTER DEFAULT PRIVILEGES IN SCHEMA public GRANT ALL ON TABLES TO mmuser;
ALTER DEFAULT PRIVILEGES IN SCHEMA public GRANT ALL ON SEQUENCES TO mmuser;
Exit the PostgreSQL shell: \q
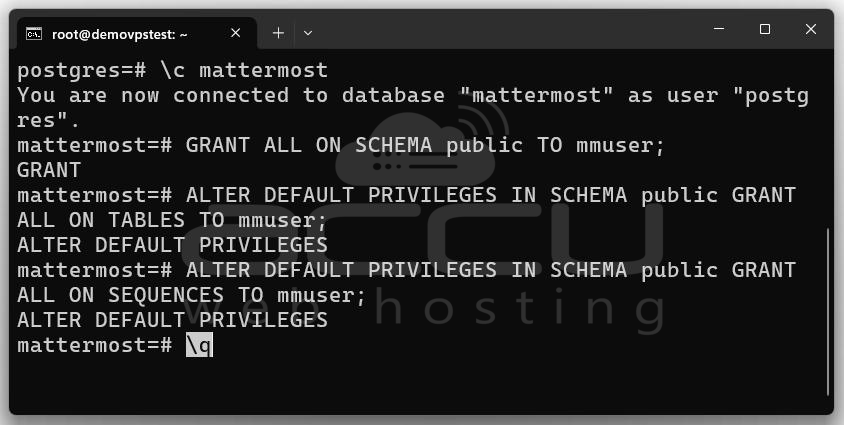
This isolates Mattermost’s data in a secure environment and avoids potential conflicts with other applications.
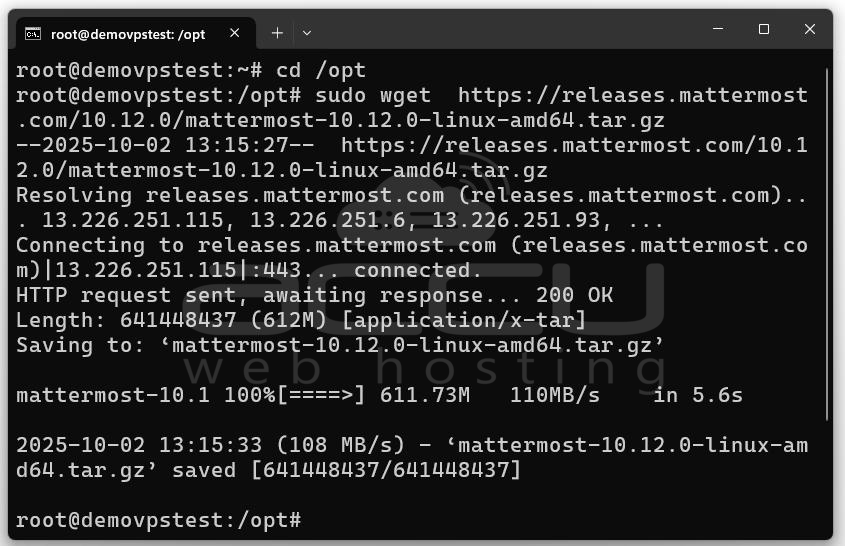
Step 4: Download and Install Mattermost
Navigate to /opt and download the latest Mattermost server package from the official website:
sudo wget https://releases.mattermost.com/10.12.0/mattermost-10.12.0-linux-amd64.tar.gz
Extract and Set Up Mattermost

sudo mkdir /opt/mattermost/plugins
sudo mkdir /opt/mattermost/client/plugins
For security, run Mattermost under its own system user:
sudo chown -R mattermost:mattermost /opt/mattermost
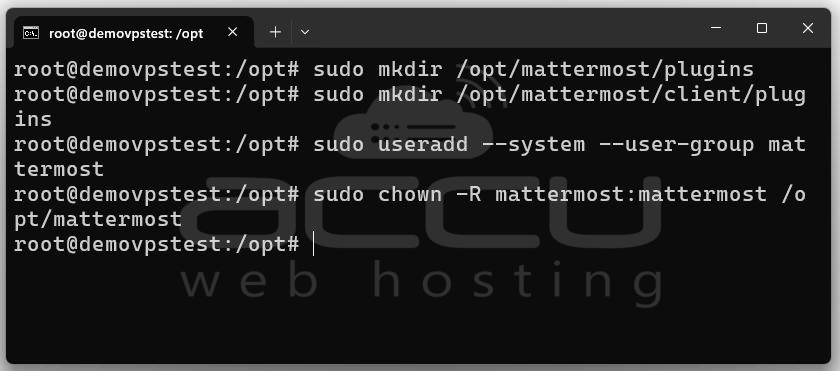
This ensures Mattermost operates independently from other services on the server.
Step 5: Configure Mattermost to use PostgreSQL. Mattermost’s configuration is stored in config.json:
sudo nano /opt/mattermost/config/config.json
Locate the SqlSettings section and update it as follows:
"SqlSettings": {
"DriverName": "postgres",
"DataSource": "postgres://mmuser:yourStrongPassword@localhost:5432/mattermost?sslmode=disable&connect_timeout=10",
...
},
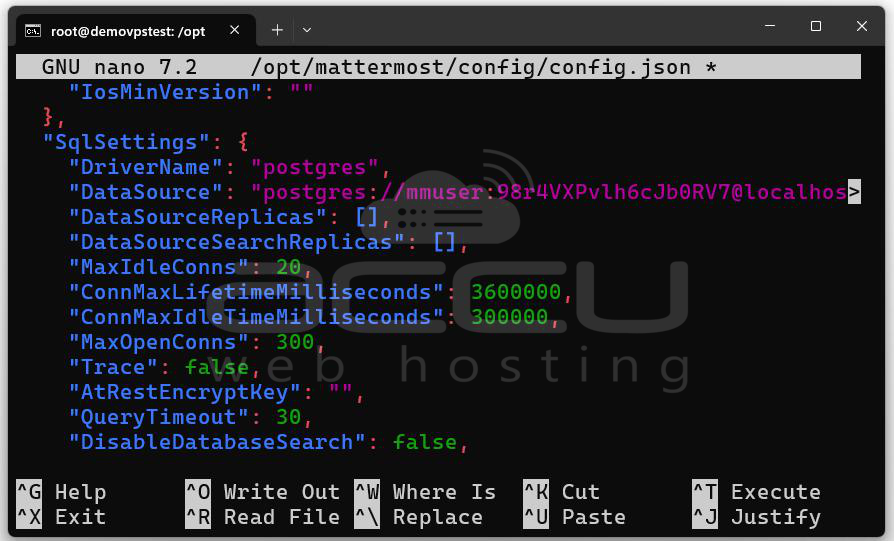
Save the file and exit (CTRL+O, CTRL+X).
Step 6: To run Mattermost as a background service that starts automatically on boot, create a systemd service:
sudo nano /etc/systemd/system/mattermost.service
Add the following content:
[Unit]
Description=Mattermost
After=network.target
Requires=postgresql.service
[Service]
Type=simple
User=mattermost
Group=mattermost
ExecStart=/opt/mattermost/bin/mattermost
WorkingDirectory=/opt/mattermost
Restart=always
RestartSec=10
[Install]
WantedBy=multi-user.target
Reload systemd and start the service:
sudo systemctl daemon-reload
sudo systemctl start mattermost
sudo systemctl enable mattermost
Verify that Mattermost is running: sudo systemctl status mattermost

Step 7: If UFW is active, allow HTTP and HTTPS traffic:
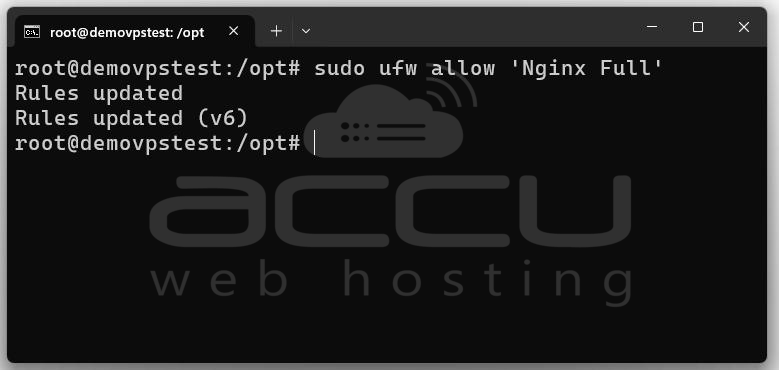
This opens ports 80 and 443, required for web access.
Step 8: Mattermost runs on port 8065 by default. Nginx will route traffic from your domain to this port.
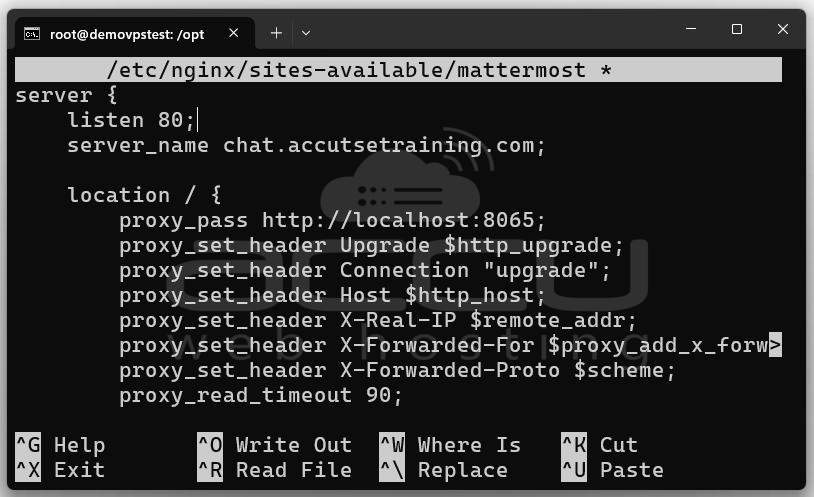
Create a New Server Block: sudo nano /etc/nginx/sites-available/mattermost
Paste the configuration below, replacing mattermost.example.com with your domain:
server {
listen 80;
server_name mattermost.example.com;
location / {
proxy_pass http://localhost:8065;
proxy_set_header Upgrade $http_upgrade;
proxy_set_header Connection "upgrade";
proxy_set_header Host $http_host;
proxy_set_header X-Real-IP $remote_addr;
proxy_set_header X-Forwarded-For $proxy_add_x_forwarded_for;
proxy_set_header X-Forwarded-Proto $scheme;
proxy_read_timeout 90;
}
}
Enable the Configuration: sudo ln -s /etc/nginx/sites-available/mattermost /etc/nginx/sites-enabled/
sudo systemctl reload nginx
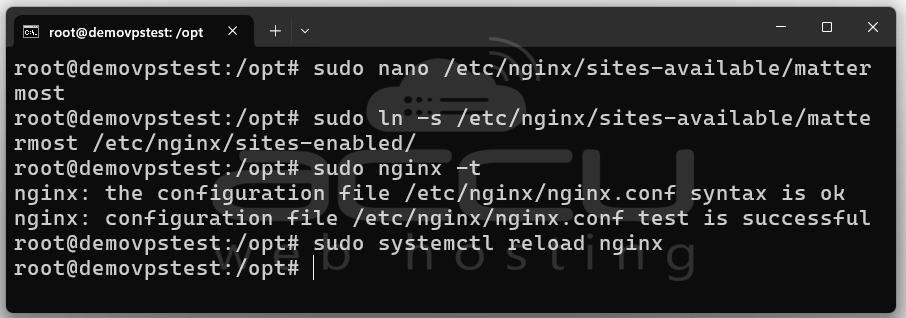
Your domain should now point to the Mattermost service.
Step 9: To enable HTTPS, use Certbot:
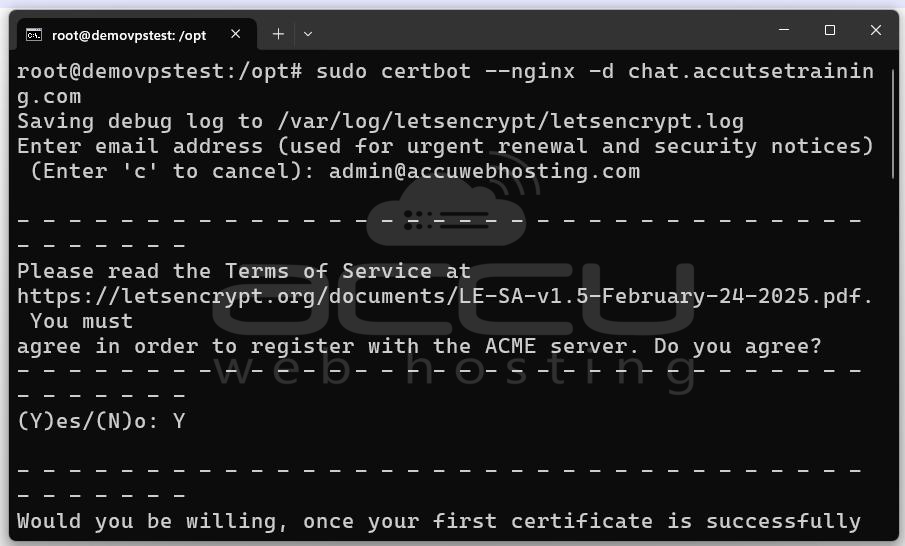
Visit your site: https://chat.example.com
You should now see Mattermost running securely over HTTPS.
Steps to Set Up a Mattermost Workspace
Step 1: Visit your site: https://chat.example.com
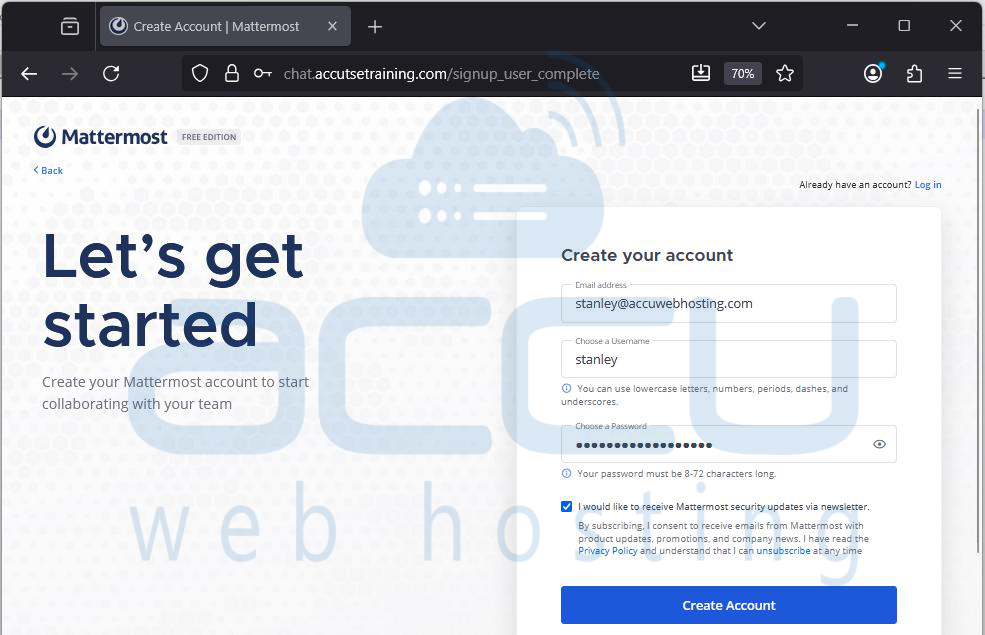
Step 2: Create Your Mattermost Account by entering your email address, username, and strong password. Click the "Create Account" button to complete your registration.
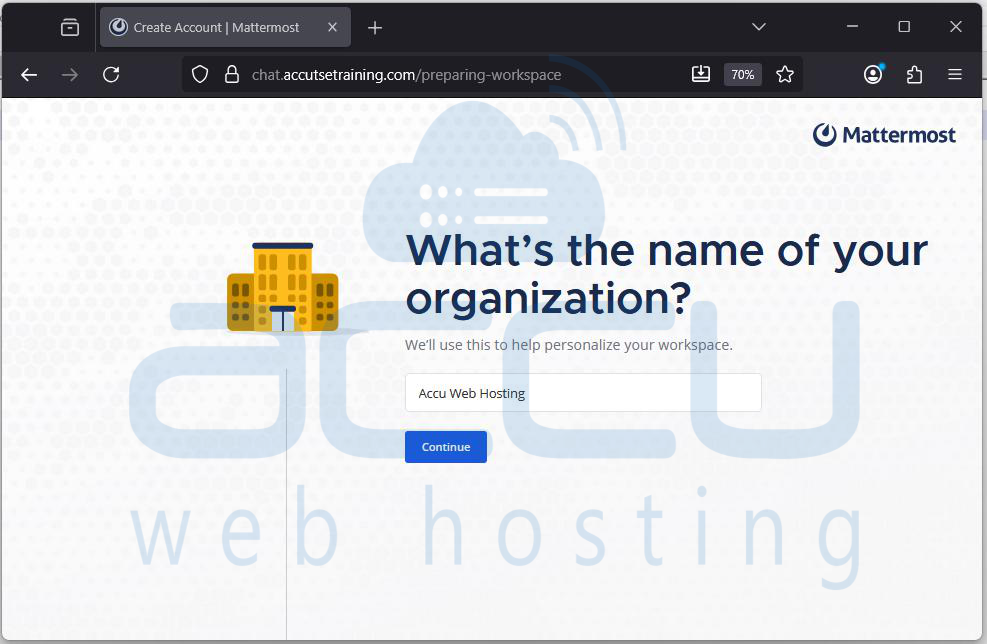
Step 3: You’ll be prompted to enter your organization’s name.
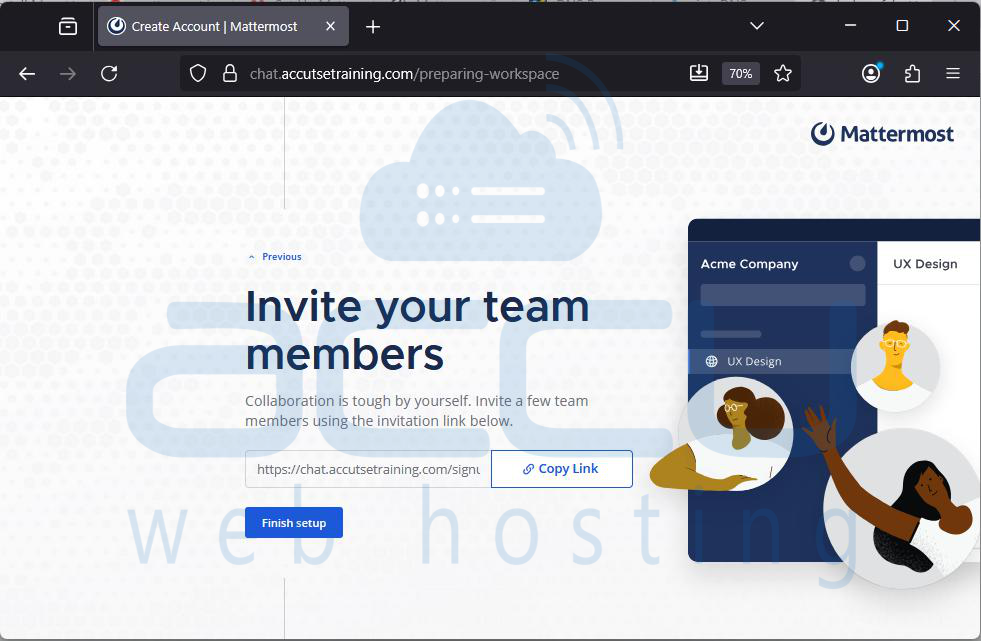
Step 4: You’ll be provided with an invitation link. Click Copy Link to copy the invite URL and share it with your team members. Click Finish setup when done.
Step 5: After setup, you’ll land in the Town Square channel. This is a default public channel for all team members. You can Post messages, Add channels, Send direct messages and Invite more members.
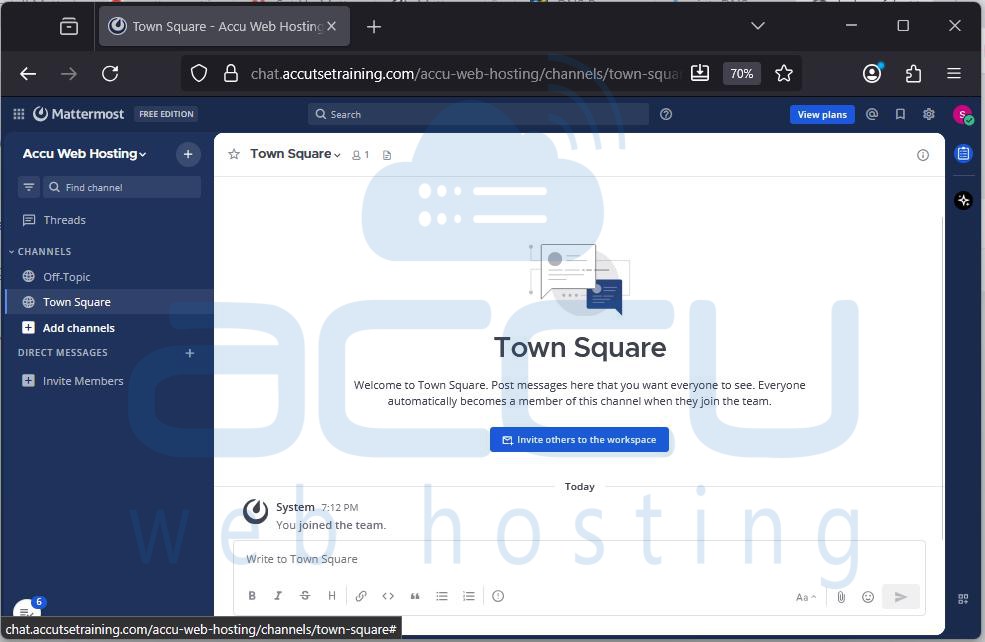
You’ve now successfully created a Mattermost account and set up your team’s workspace.
Conclusion
Congratulations! You now have a production-ready Mattermost server running on Ubuntu 24.04. Mattermost is more than just a Slack alternative, it’s a flexible platform that you fully control, making it ideal for organizations that value security, customization, and data ownership.
