Password management is essential for both personal and professional environments. If you want full control over your credentials, Vaultwarden is an excellent choice. It’s resource-friendly, runs well on small servers, and integrates seamlessly with Bitwarden clients. In this guide, we’ll walk through the complete installation process on Ubuntu, set up Nginx as a reverse proxy, and secure your instance with Let’s Encrypt HTTPS certificates.
Prerequisites:
Before starting, you’ll need:
- Ubuntu Server with root or sudo access.
- A domain name pointing to your server’s IP (A record). Example: vaultwarden.example.com.
- Firewall access with ports 80 and 443 open.
Steps to install VaultWarden on Ubuntu
Step 1: Always begin with updates to ensure security patches are applied. Update your system by running the following command.
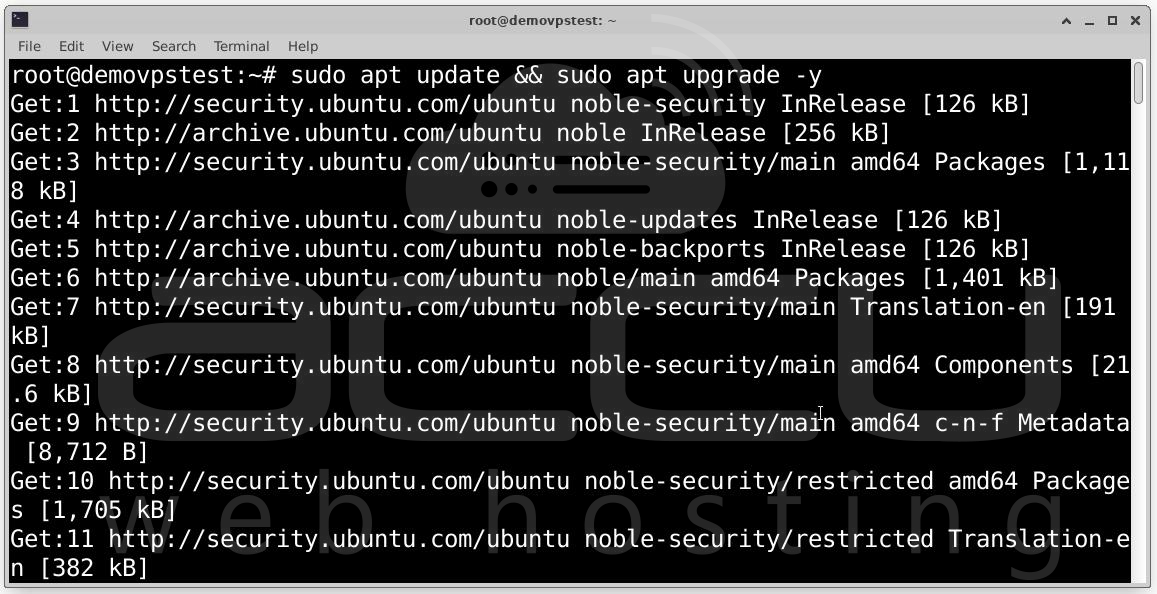
apt update refreshes the package index and apt upgrade -y installs available updates without asking for confirmation.
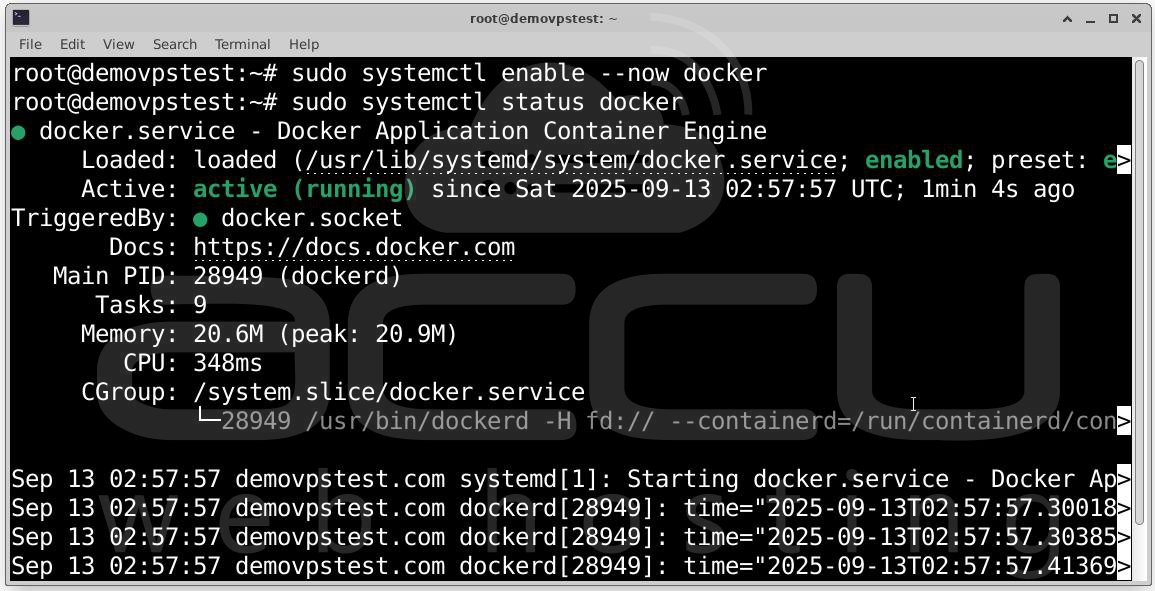
Step 2: Vaultwarden is distributed as a Docker container. This makes deployment easy and keeps it isolated from the main system. Install Docker & Docker Compose by running the following command.
Install Docker and Compose:

Enable Docker to start at boot:
sudo systemctl enable --now docker
Check Status of Docker service:
Step 3: Organize Vaultwarden files under a dedicated folder. Create a vaultwarden directory by running the following command.
mkdir -p ~/vaultwarden
cd ~/vaultwarden
Here, we’ll keep Docker files and Vaultwarden data.
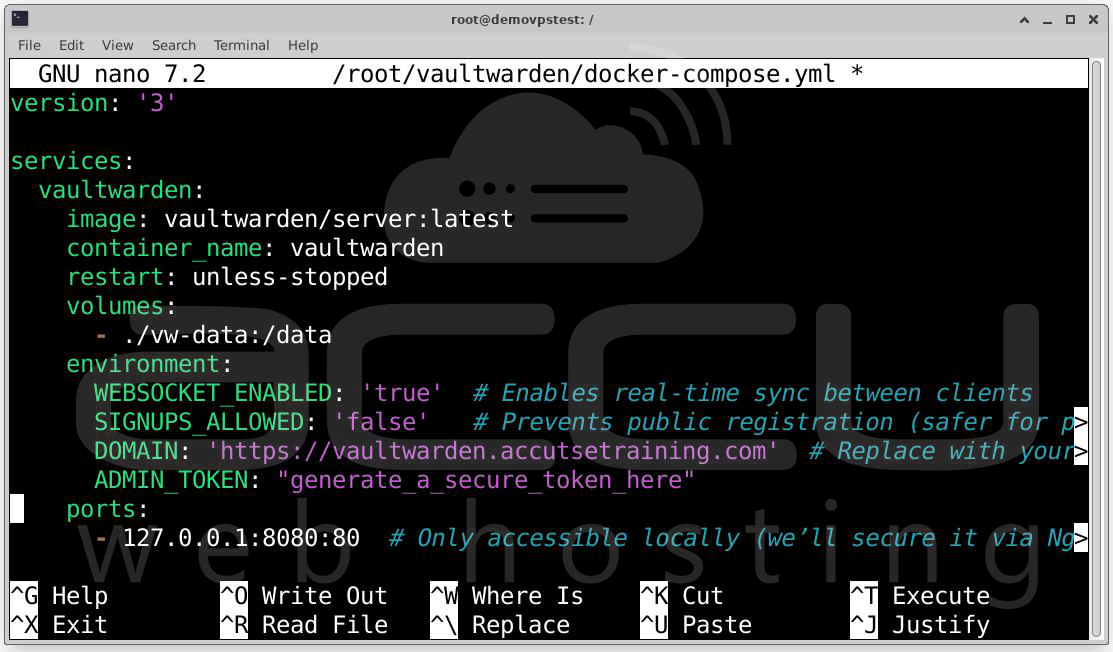
Step 4: Configure Docker Compose for Vaultwarden by creating the docker-compose.yml file:
nano ~/vaultwarden/docker-compose.yml
Paste the following:
version: '3'
services:
vaultwarden:
image: vaultwarden/server:latest
container_name: vaultwarden
restart: unless-stopped
volumes:
- ./vw-data:/data
environment:
WEBSOCKET_ENABLED: 'true' # Enables real-time sync
SIGNUPS_ALLOWED: 'false' # Set to 'true' if you want to allow user registration
DOMAIN: 'https://vault.yourdomain.com' # Replace with your domain
ports:
- 127.0.0.1:8080:80 # Internal binding; secured via Nginx
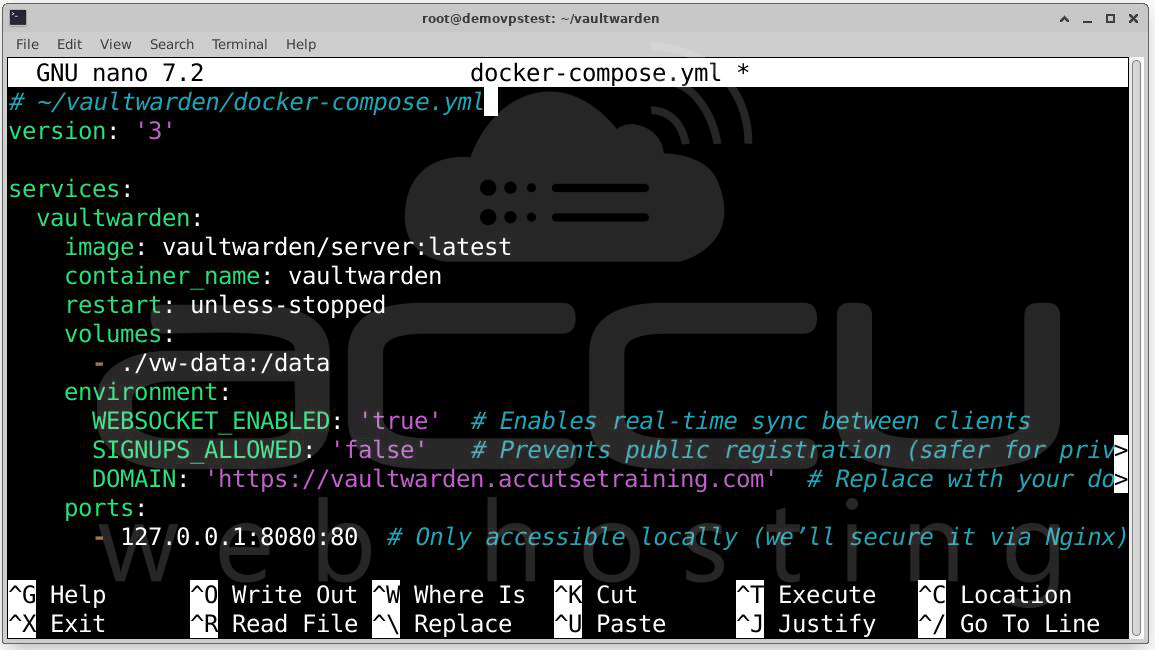
Save and exit (CTRL+O, ENTER, CTRL+X).
Now start Vaultwarden:
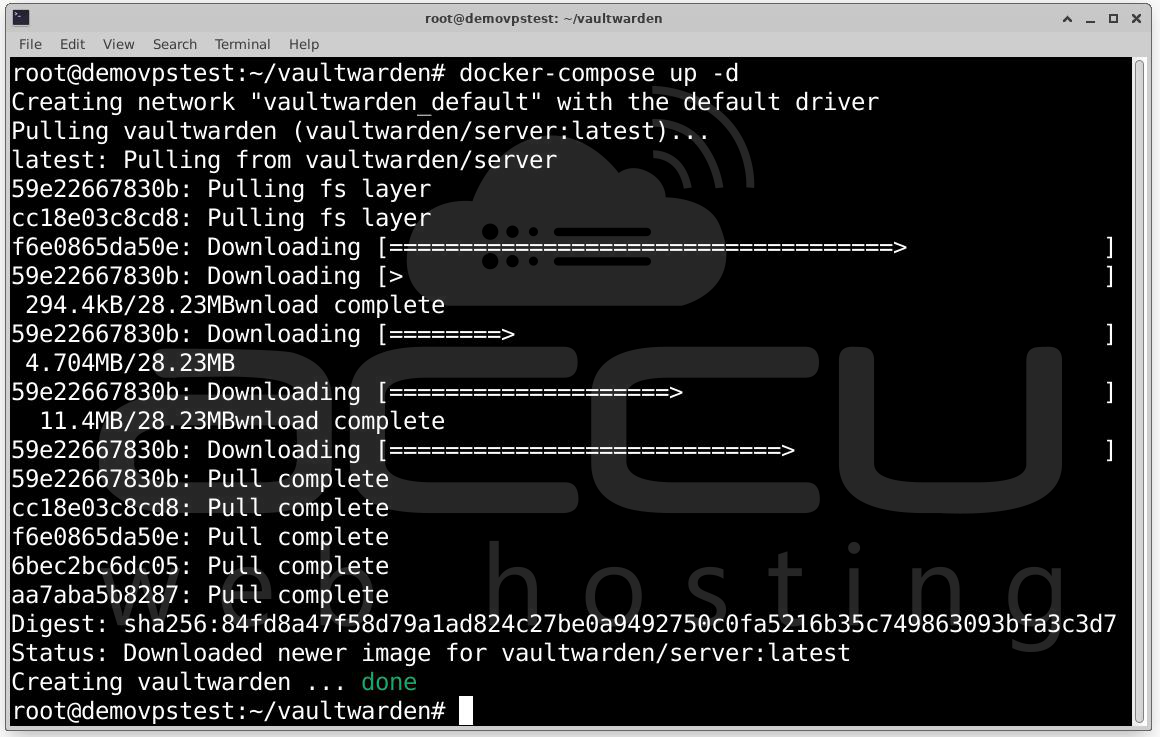
This will download the latest Vaultwarden image, run it in the background and store persistent data in ~/vaultwarden/vw-data.
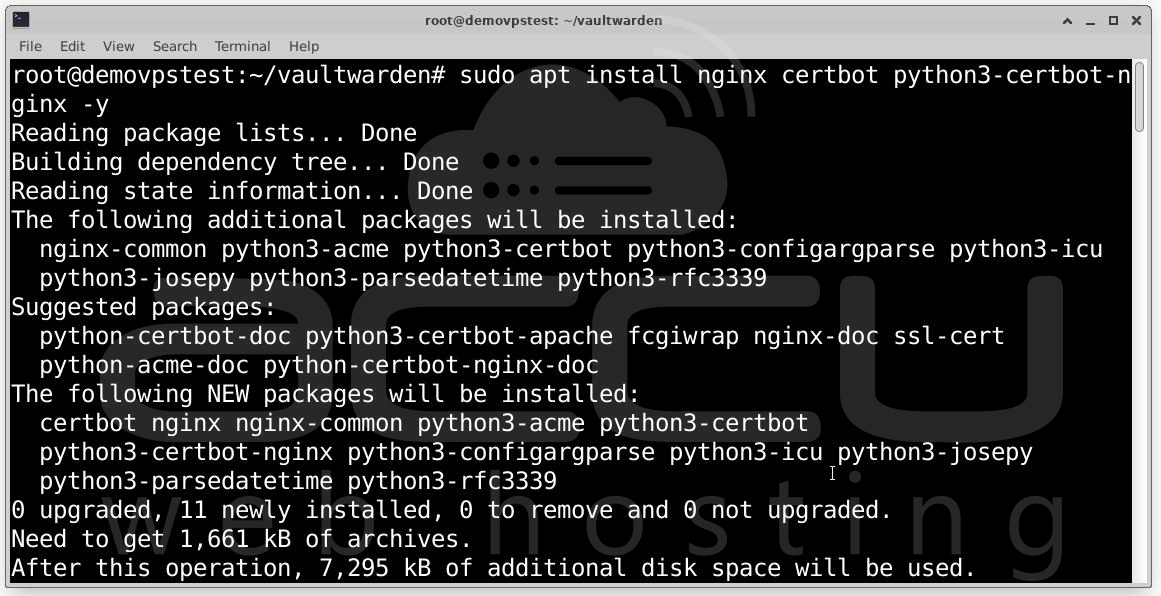
Step 5: Nginx will act as a reverse proxy, forwarding traffic from your domain to the Vaultwarden container. Install and Configure Nginx by running the following command.
Install Nginx and Certbot:
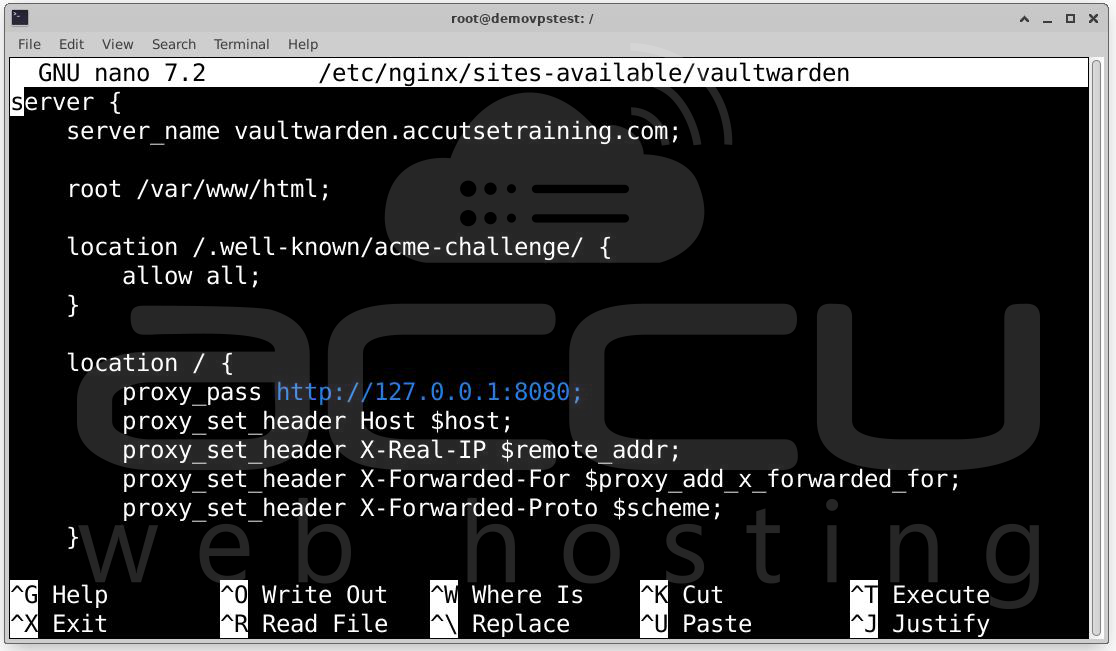
Create Nginx Site Config: sudo nano /etc/nginx/sites-available/vaultwarden
Paste this configuration:
server {
listen 80;
server_name vault.yourdomain.com;
root /var/www/html;
location /.well-known/acme-challenge/ {
allow all;
}
location / {
proxy_pass http://127.0.0.1:8080;
proxy_set_header Host $host;
proxy_set_header X-Real-IP $remote_addr;
proxy_set_header X-Forwarded-For $proxy_add_x_forwarded_for;
proxy_set_header X-Forwarded-Proto $scheme;
}
}
Enable the site:
sudo ln -s /etc/nginx/sites-available/vaultwarden /etc/nginx/sites-enabled/
sudo nginx -t
sudo systemctl reload nginx
sudo systemctl status nginx
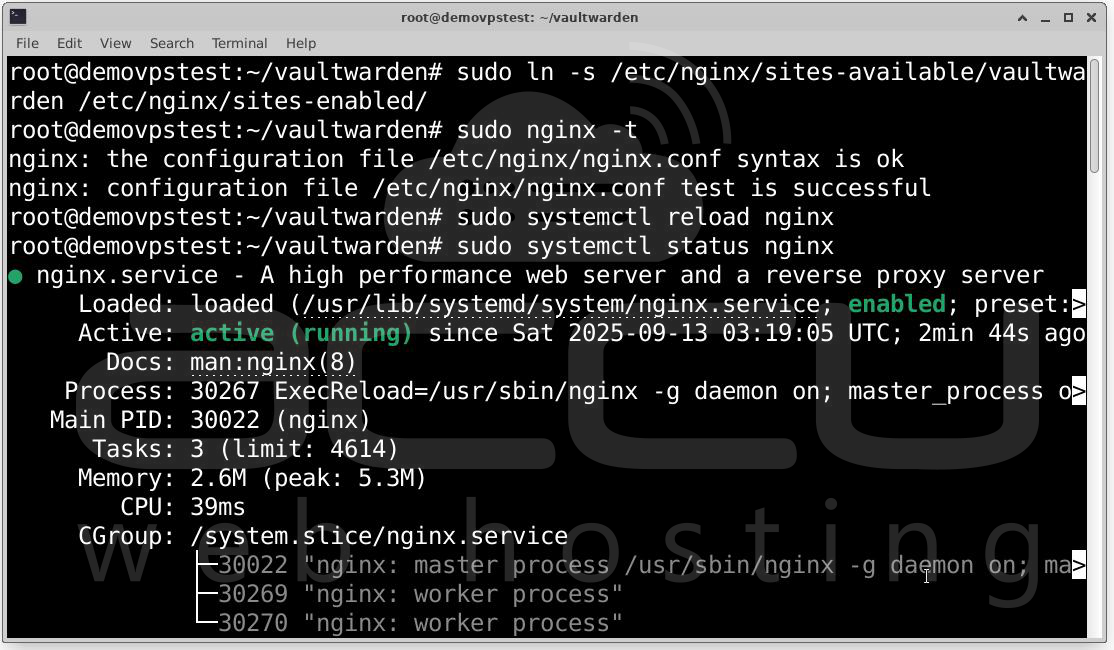
At this stage, your domain should correctly forward HTTP requests to Vaultwarden.
Step 6: Now we’ll install a TLS/SSL certificate. Run the following command to install SSL.
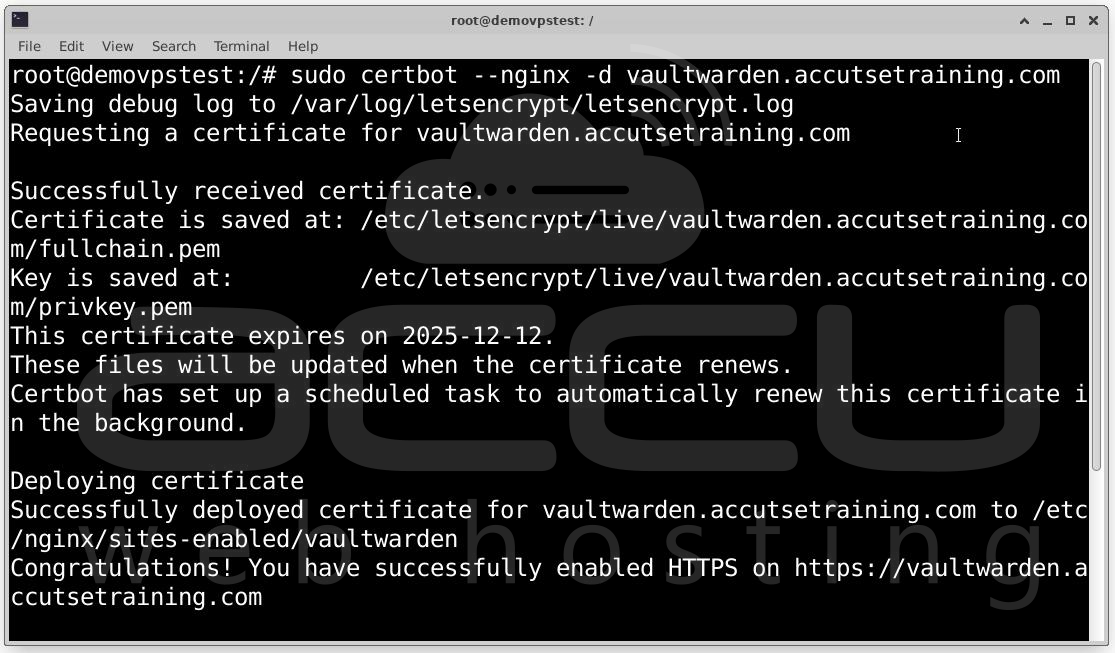
Certbot will automatically Validate domain ownership, Obtain and install a certificate, Configure Nginx for HTTPS and Redirect HTTP → HTTPS.
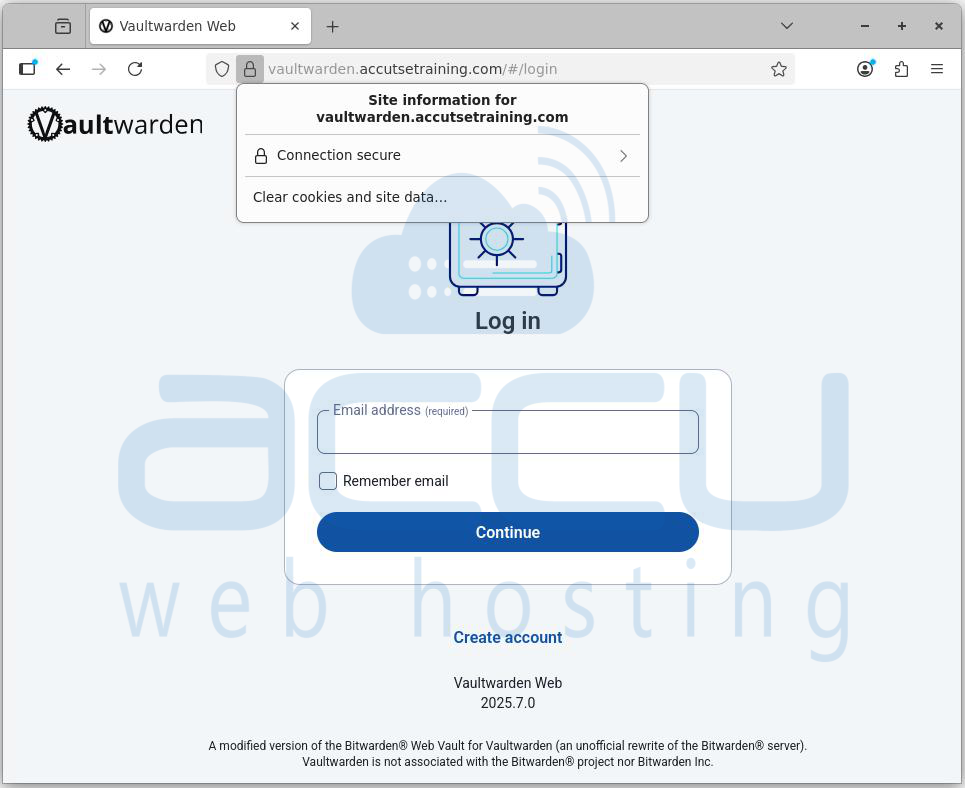
Step 7: Open your browser and verify setup
https://vault.yourdomain.com
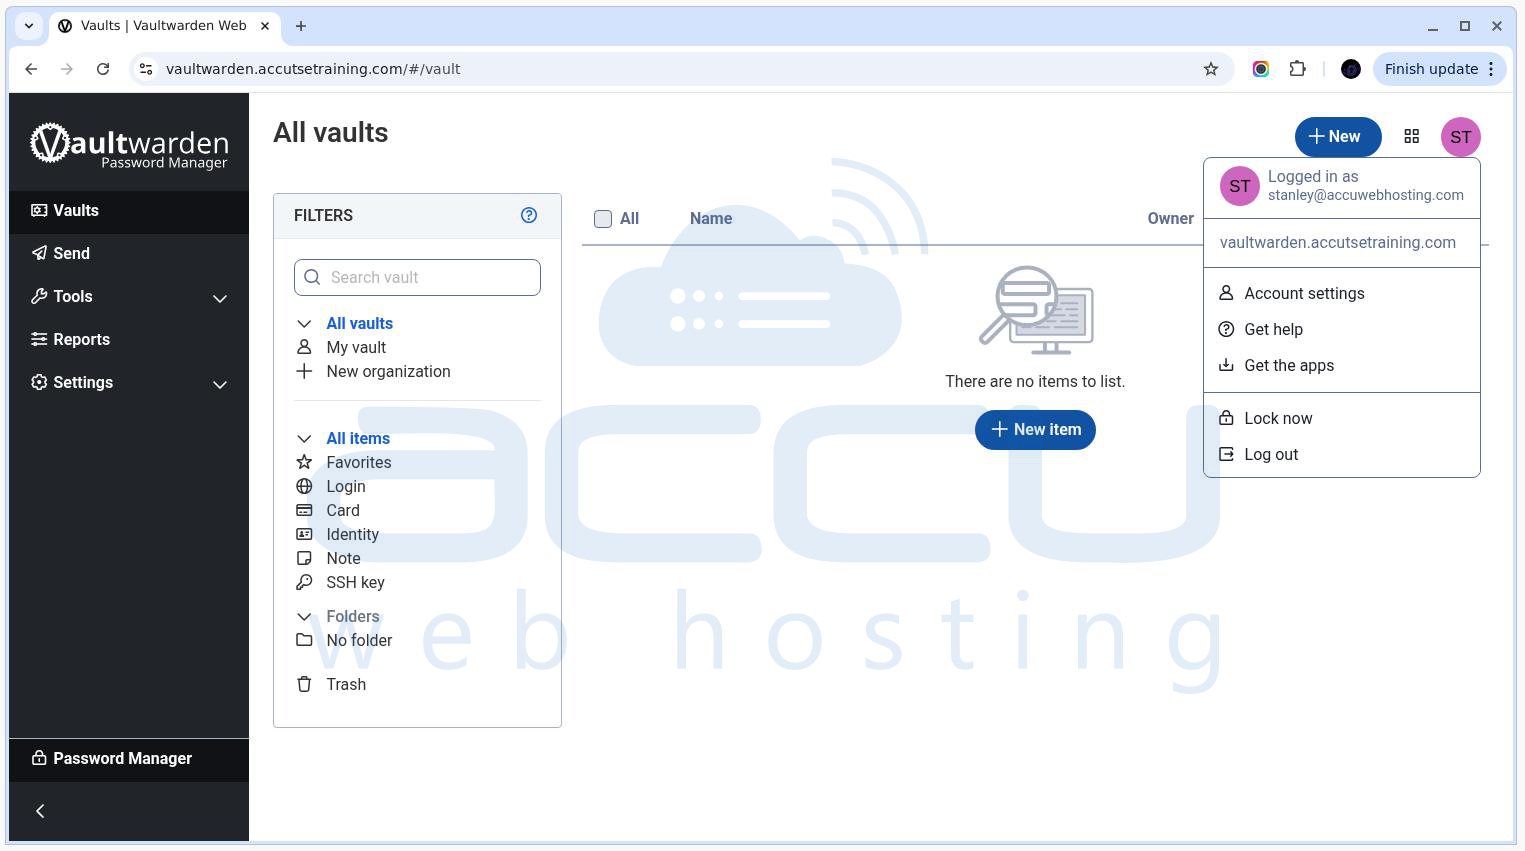
You should see the Vaultwarden login page with a secure HTTPS lock icon.
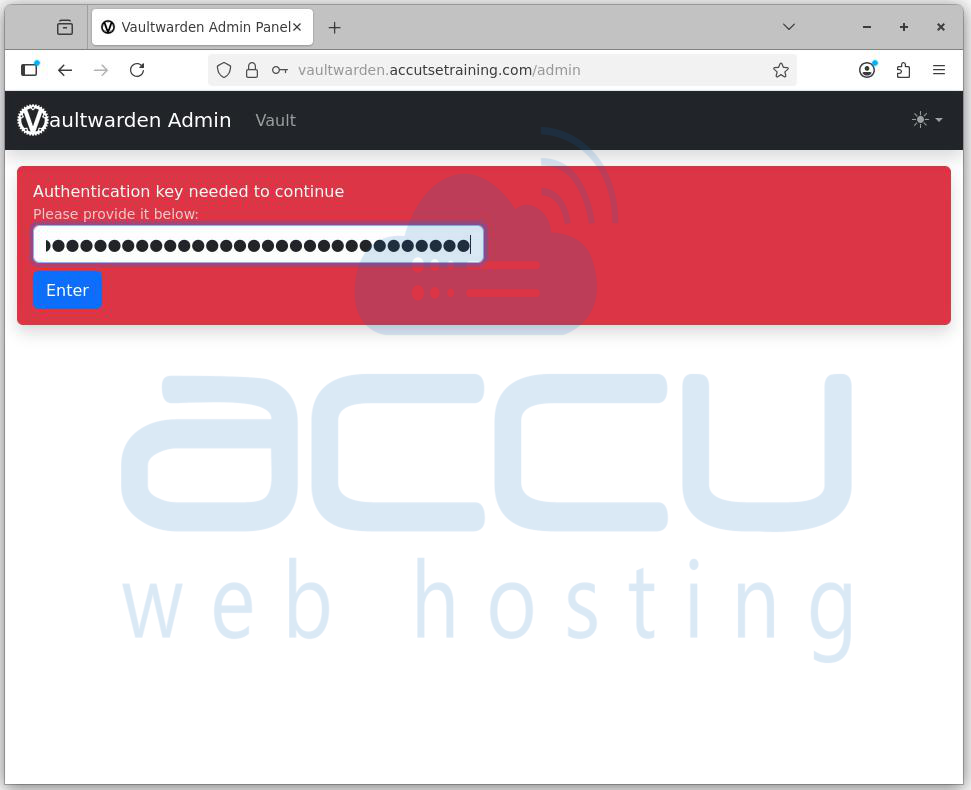
Step 7: Vaultwarden has an admin panel for managing users and configuration. To enable it, you must define an admin token.
Edit Docker Compose File: nano ~/vaultwarden/docker-compose.yml
Add under environment::
environment:
ADMIN_TOKEN: "generate_a_secure_token_here"
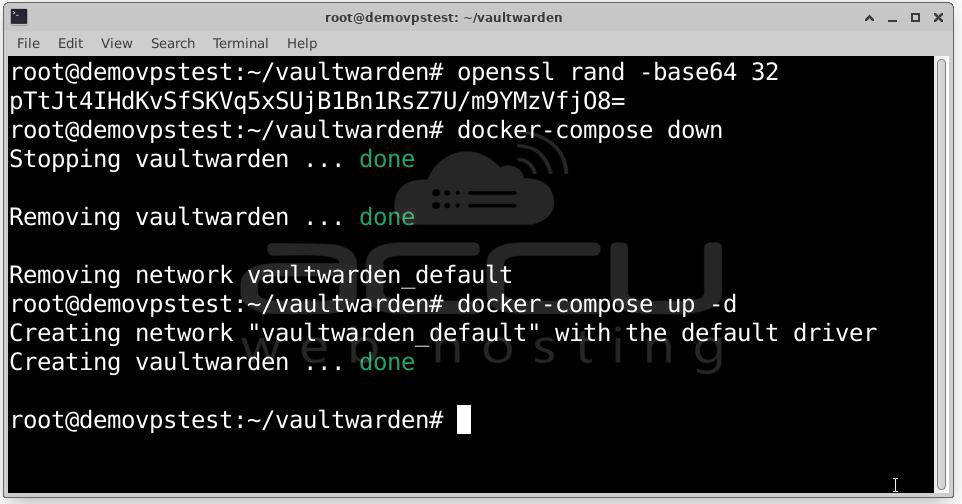
Generate a Secure Token: openssl rand -base64 32
Copy the generated string and paste it as the ADMIN_TOKEN.
Restart Vaultwarden: docker-compose down
Access Admin Panel: https://vault.yourdomain.com/admin
Enter the token to log in.
Step 8: Configure SMTP Email Settings (One-Time Setup) in Vaultwarden. This step enables Vaultwarden to send invite emails. Go to https://domain.com/admin, click the Settings tab and Scroll to SMTP Email Settings, and configure.

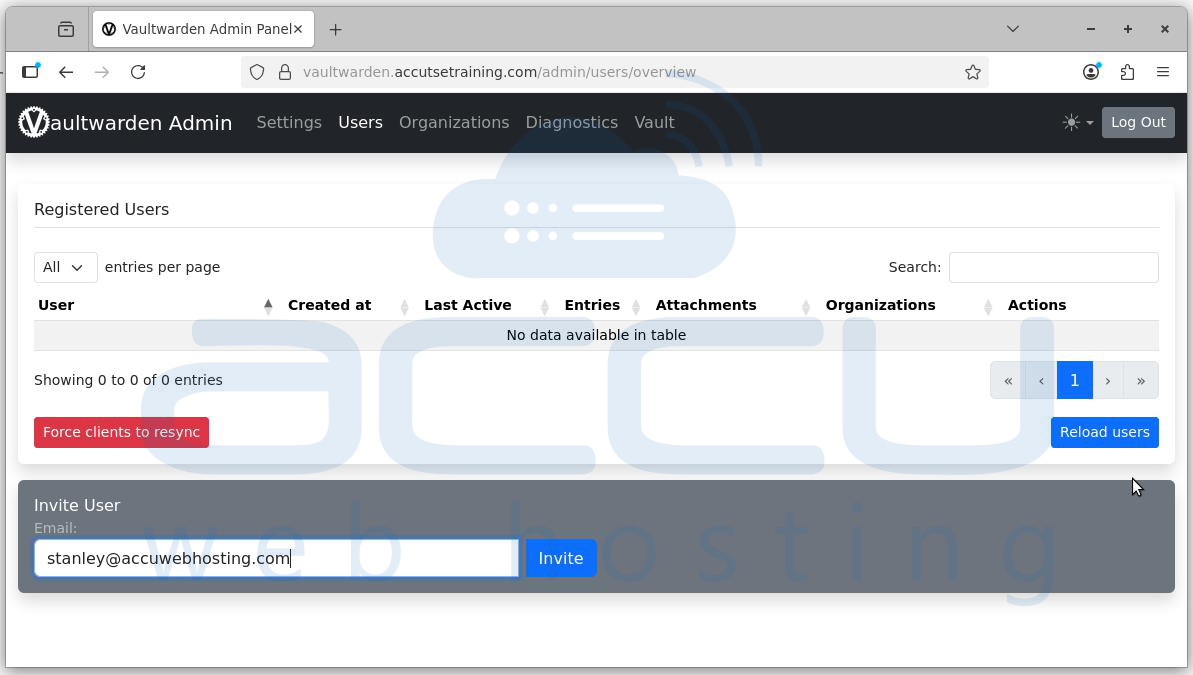
Step 9: Navigate to the Users tab from the top bar. You will see an "Invite User" field. Enter the user’s email address and click Invite. An invitation email will be sent to the user.
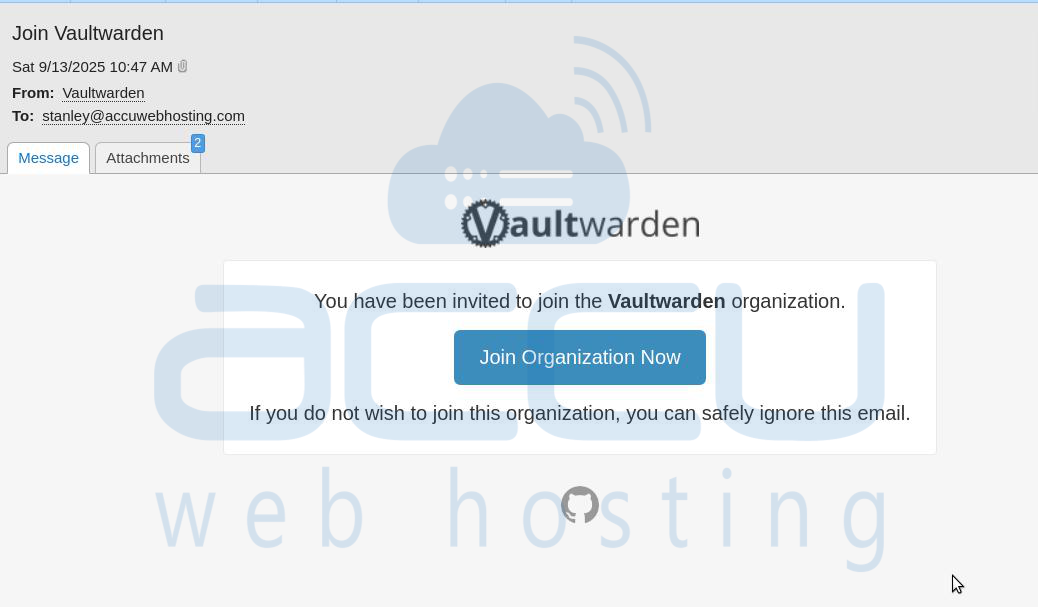
Step 10: The user receives an email titled "Join Vaultwarden". Click on the link: Join Organization Now.
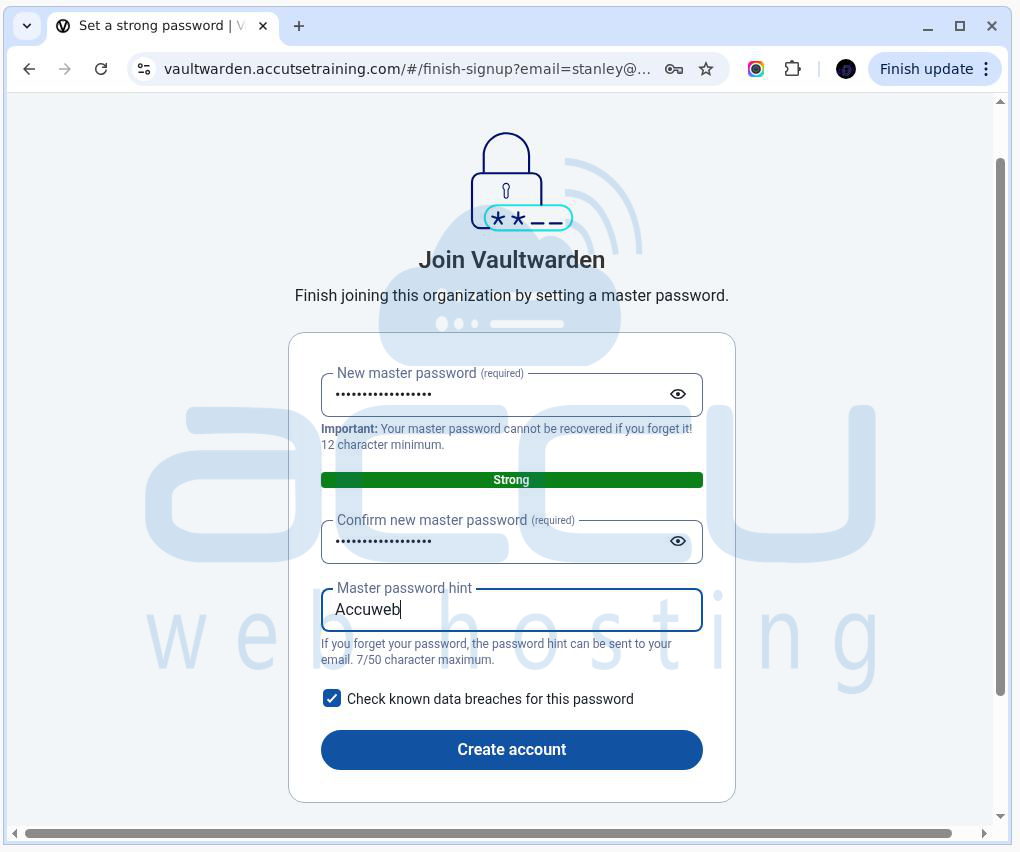
Step 11: The user will be directed to the account creation page. Set master password, Confirm password and Optionally add a password hint. Click Create Account.
Step 12: The now part of the Vaultwarden instance. They can login and manage their password vault.
Conclusion
You now have a production-ready Vaultwarden server running on Ubuntu with Nginx, HTTPS, and basic security hardening. With this setup, you can securely manage credentials across devices while keeping full control of your data.
