Introduction
Over time, even a high-performance Windows Server VPS can slow down due to memory leaks, unclosed processes, or pending updates. A scheduled reboot helps maintain stability, ensure updates are applied, and minimize downtime.
Using Task Scheduler, you can set your Windows Server to reboot automatically at specific times—perfect for remote servers that run continuously.
This guide covers step-by-step instructions for Windows Server 2016, 2019, and 2022.
Why Schedule Automatic Reboots on Windows Server?
1. Improved Stability & Performance
Frees up system memory, clears temporary files, and resets processes.
2. Smooth Update Installations
Many security patches and feature updates require a restart to complete.
3. Hands-Off Automation
Ensures reboots happen at predictable times without manual intervention, reducing the risk of unexpected downtime.
Prerequisites
Before setting up a scheduled reboot:
- Administrator Access to the VPS (local or via Remote Desktop).
- Windows Server 2016, 2019, or 2022 is installed.
- Choose off-peak hours for the reboot (e.g., late night) to avoid service disruption.
Step-by-Step: Schedule an Automatic Reboot
Step 1 – Open Task Scheduler
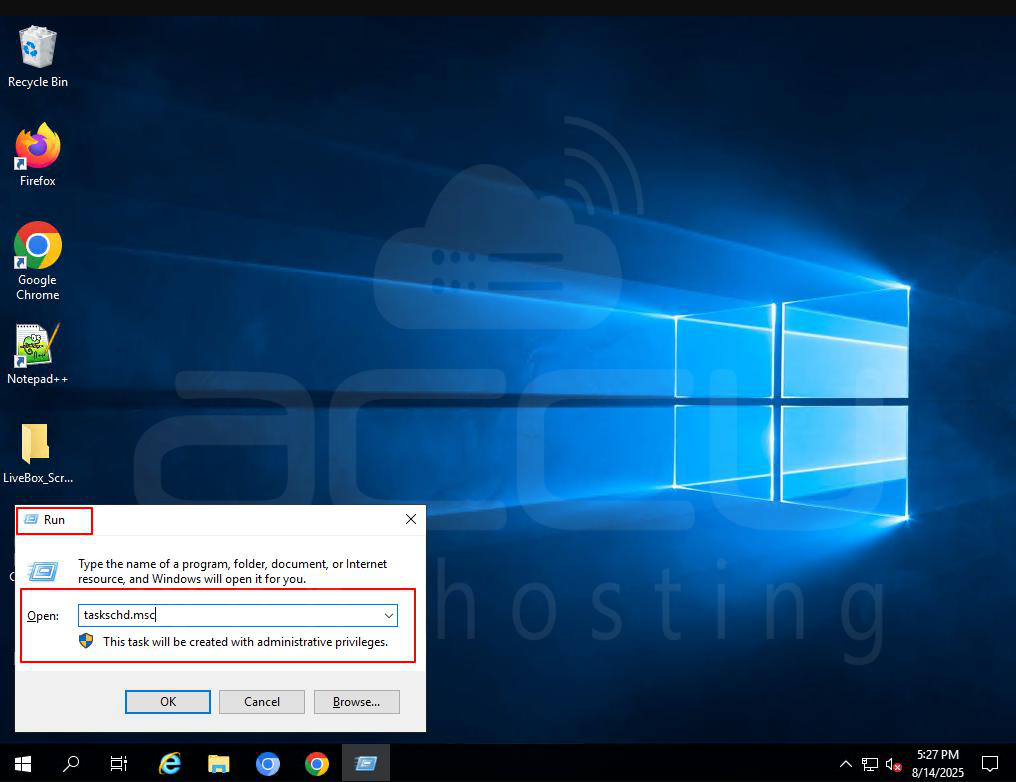
1. Log in to your VPS via Remote Desktop.
Press Windows + R, type:
taskschd.msc
2. And press Enter.
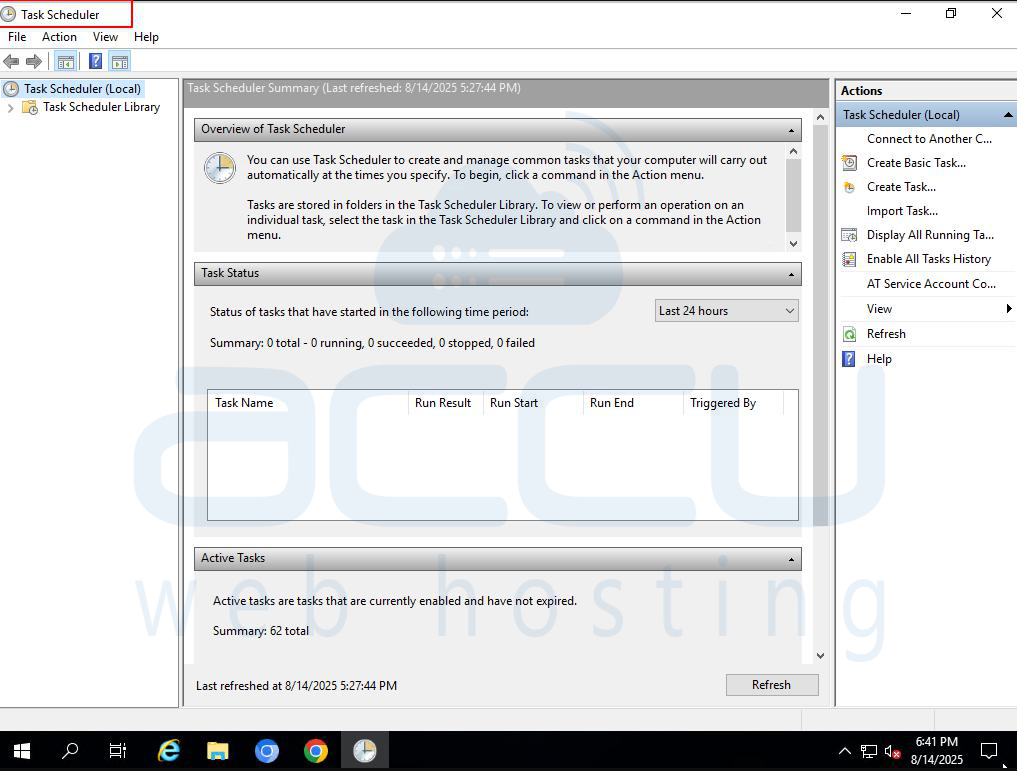
3. Task Scheduler will open.
Step 2 – Create a New Task
1. In the right-hand Actions panel, click Create Basic Task.
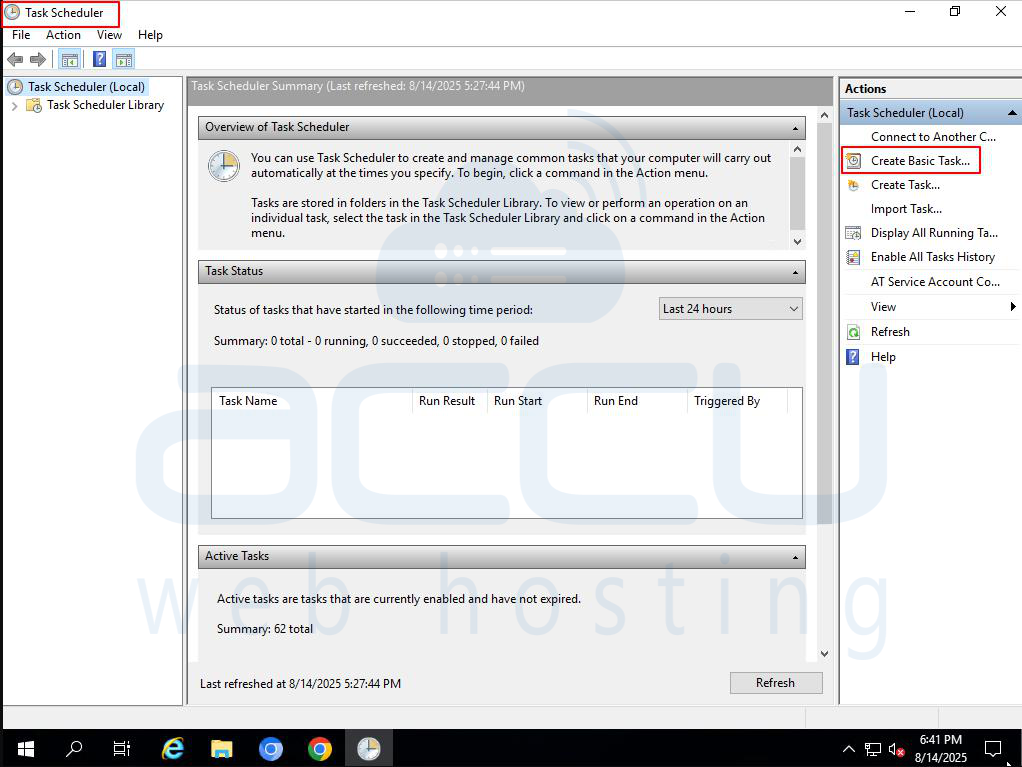
2. Name it (e.g., Scheduled Server Reboot).
3. Optionally add a description, then click Next.

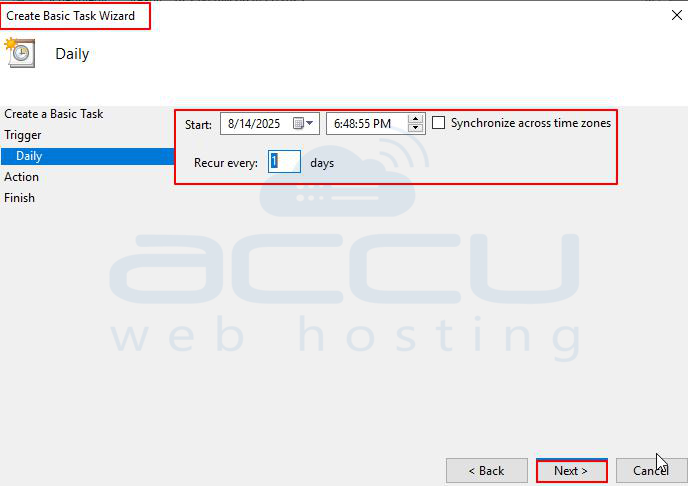
Step 3 – Set the Trigger
1. Choose when you want the reboot to occur:
- Daily – Best for busy servers.
- Weekly – Good for light workloads.
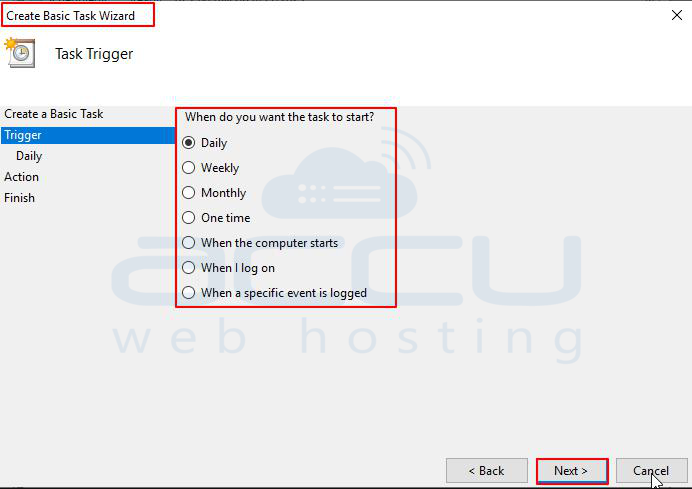
2. Set the start date and time (off-peak hours recommended).
3. Click Next.
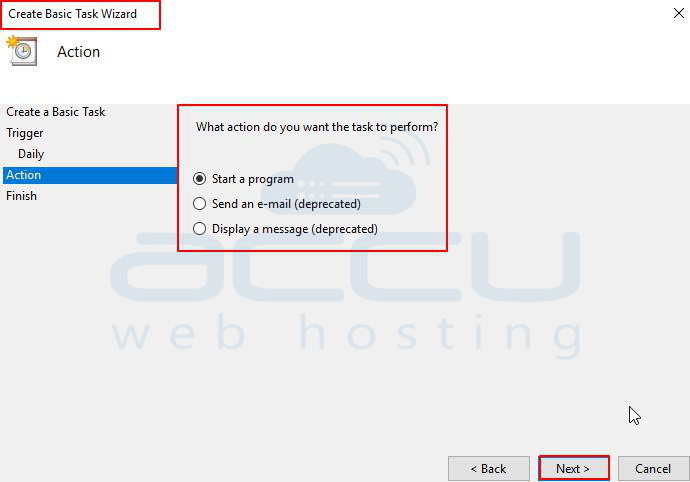
Step 4 – Set the Action
1. Select Start a program and click Next.
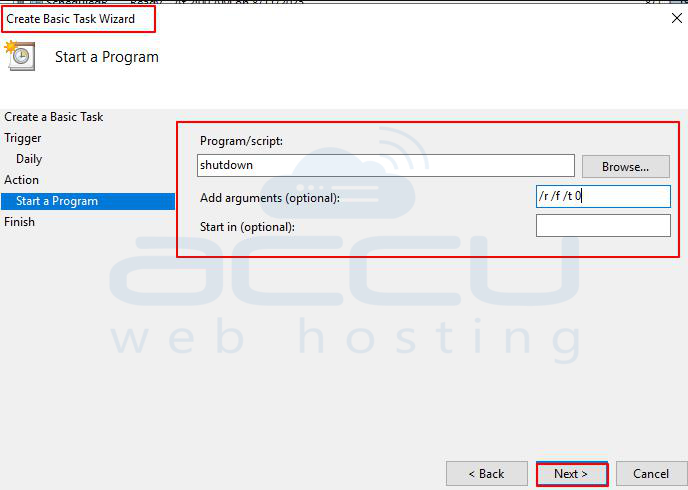
In Program/script, type:
shutdown
2. In Add arguments, enter:
/r /f /t 0
3. Explanation:
- /r = restart
- /f = force close apps
- /t 0 = no delay
4. Click Next.
Step 5 – Review & Save
1. Review your settings.
2. Click Finish.
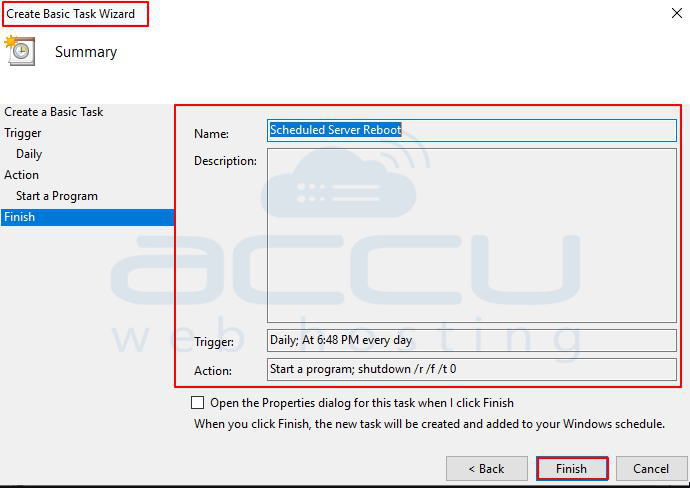
3. When prompted, enter your administrator credentials so the task can run even if you’re not logged in.
Advanced Option: Scheduling Reboots on Multiple Systems via Group Policy
For network administrators managing multiple machines, you can use Group Policy on a Windows Server to push a reboot schedule to all targeted computers.
Steps in Brief:
1. Open Group Policy Management Console (gpmc.msc).
2. Create and name a new GPO (e.g., Scheduled Reboots Policy).
3. Edit it → Computer Configuration > Preferences > Control Panel Settings > Scheduled Tasks.
4. Create a new scheduled task with the reboot command shutdown /r /f /t 0.
5. Link the GPO to the desired Organizational Unit (OU).
6. Apply with gpupdate /force on client machines.
Security & Maintenance Best Practices
- Restrict Access – Only trusted admins should manage scheduled tasks or Group Policies.
- Enable Logging – Review Task Scheduler logs regularly to detect unauthorized changes.
- Use MFA for Admin Accounts – Especially for remote access.
- Delay Forced Restarts if Possible – Use /f carefully; forced reboots can cause unsaved data loss.
- Apply System Updates Regularly – Reboots work best when paired with a consistent update strategy.
Conclusion
Automating reboots with Task Scheduler is a set-it-and-forget-it solution to keep your Windows VPS performing at its best. Whether you manage a single server or a whole fleet of machines, the process is straightforward—and when done right, it minimizes downtime while maximizing system reliability.
