Introduction
Microsoft SQL Server is a powerful relational database management system (RDBMS) widely used in enterprise environments. By default, SQL Server is configured for local access to ensure security. However, there are many scenarios — like web application hosting, reporting services, or remote administration — where remote access to SQL Server is necessary.
Allowing remote access requires combining SQL Server configuration and network-level changes to ensure security and functionality.
Practical Steps to Enable Remote Connections
1. Enable Mixed‐Mode Authentication & Allow Remote Connections
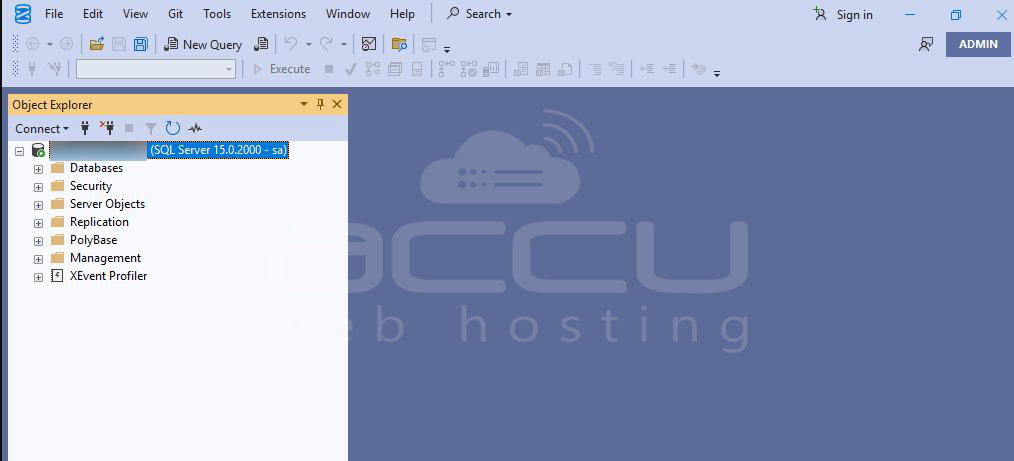
1. Open SSMS and connect to your SQL Server instance.
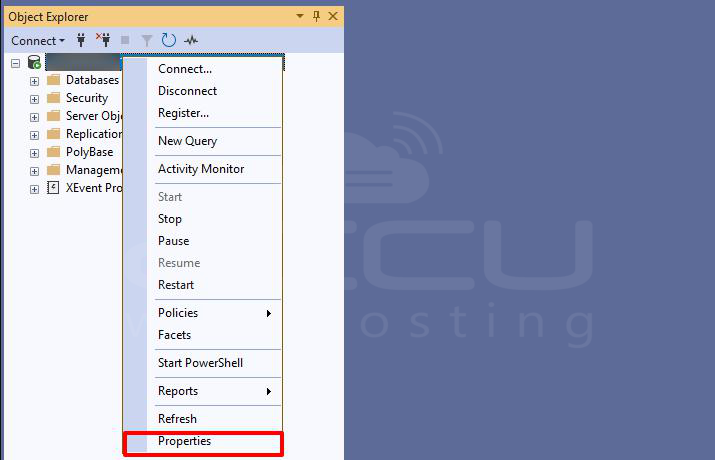
2. Right-click the server ➔ Properties ➔ go to the Security page.
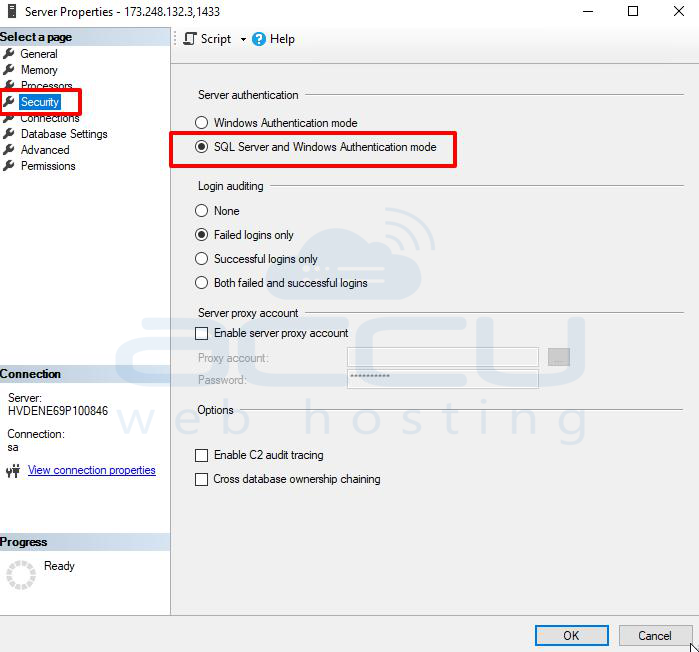
3. Change Server authentication to SQL Server and Windows Authentication (Mixed-Mode).
4. While still in Properties, go to the Connections page, check Allow remote connections to this server, and then click OK.

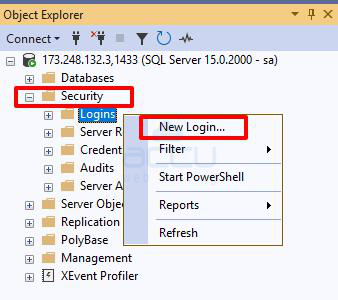
2. Create a SQL Login for Remote Users
1. In SSMS, expand Security ➔ right-click Logins ➔ New Login…
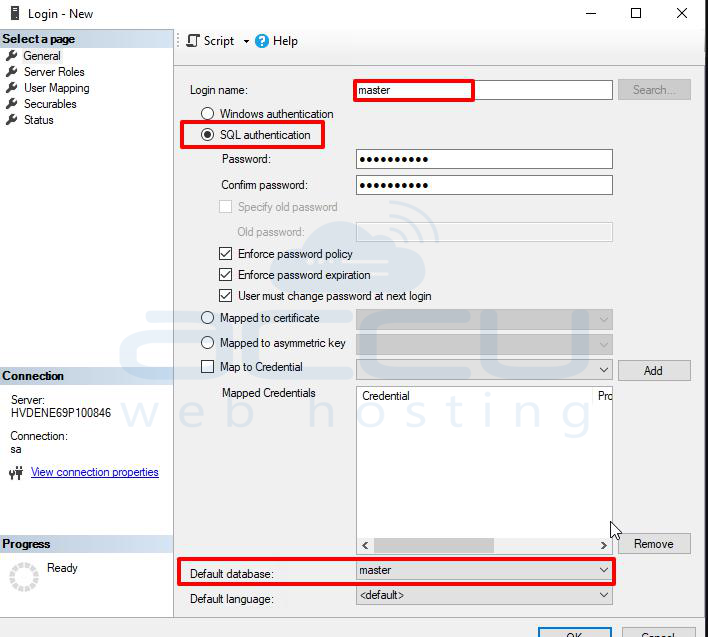
2. Enter a username (e.g., master), select SQL Server Authentication, and set a password. Optionally uncheck Enforce password policy.
3. Set the Default database to your Calibration Control DB (e.g., master).
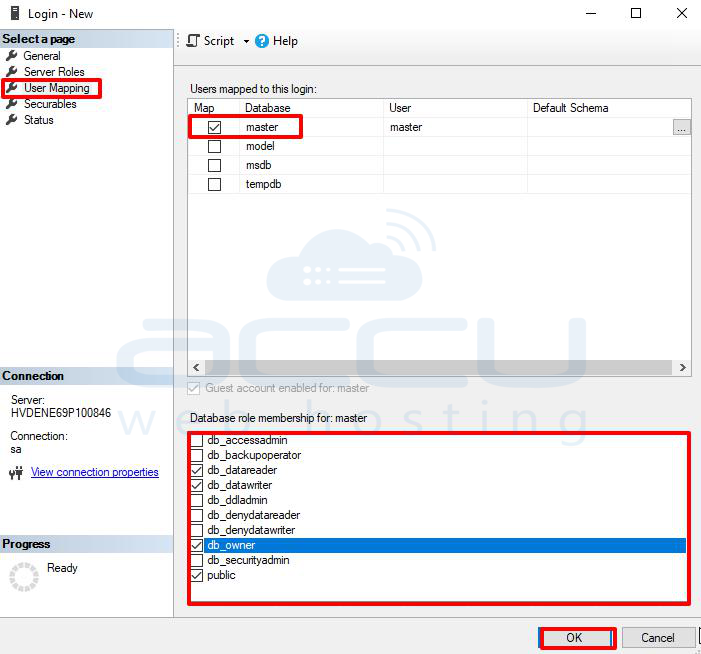
4. Open User Mapping, select the master database, and assign the roles: db_datareader, db_datawriter, and db_owner (or as needed).
5. Click OK to create the login.
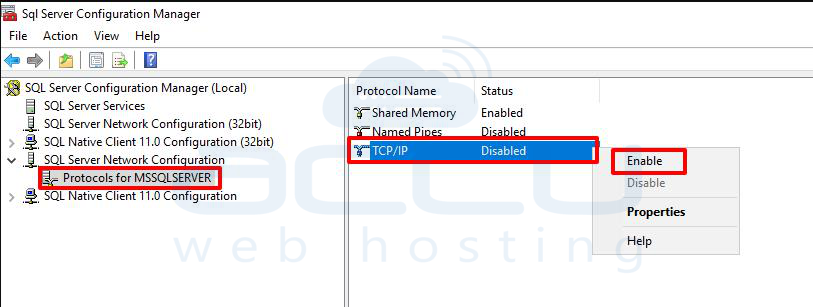
3. Enable TCP/IP Network Protocol
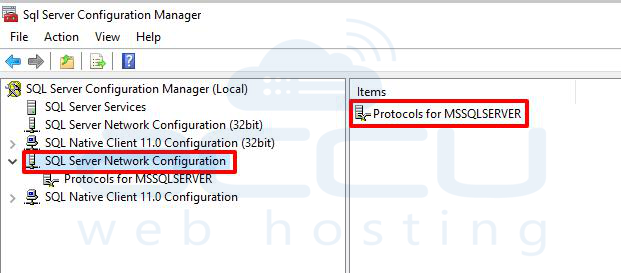
1. Open SQL Server Configuration Manager.
2. Navigate to SQL Server Network Configuration ➔ Protocols for [Your Instance]
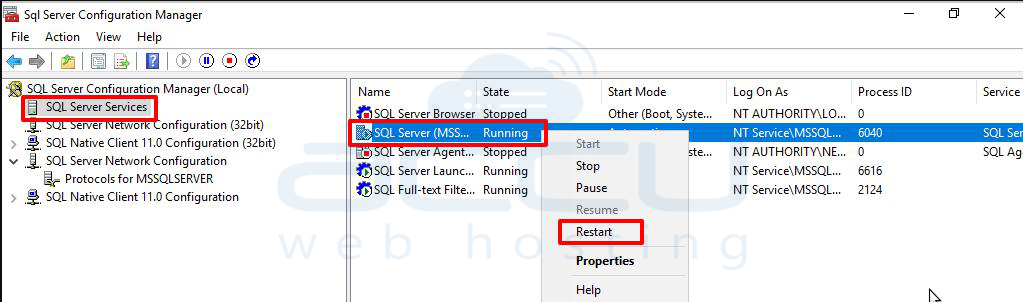
3. Right-click TCP/IP ➔ Enable, then confirm the need to restart the service.
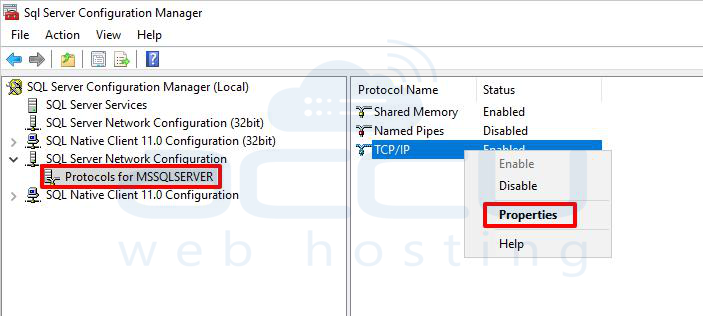
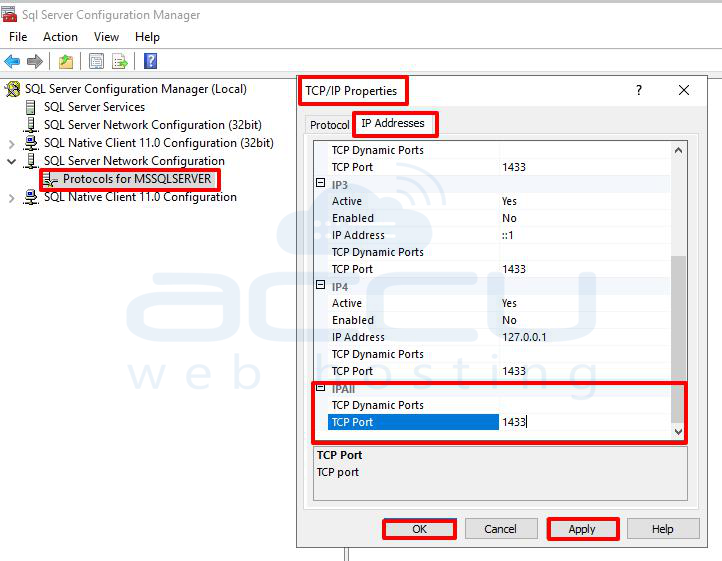
4. Right-click TCP/IP again ➔ Properties ➔ go to IP Addresses tab ➔ scroll to the IPAll section.
5. Clear TCP Dynamic Ports (leave blank), and set TCP Port to 1433.
6. Click OK, and then restart the SQL Server service via the SQL Server Services node.

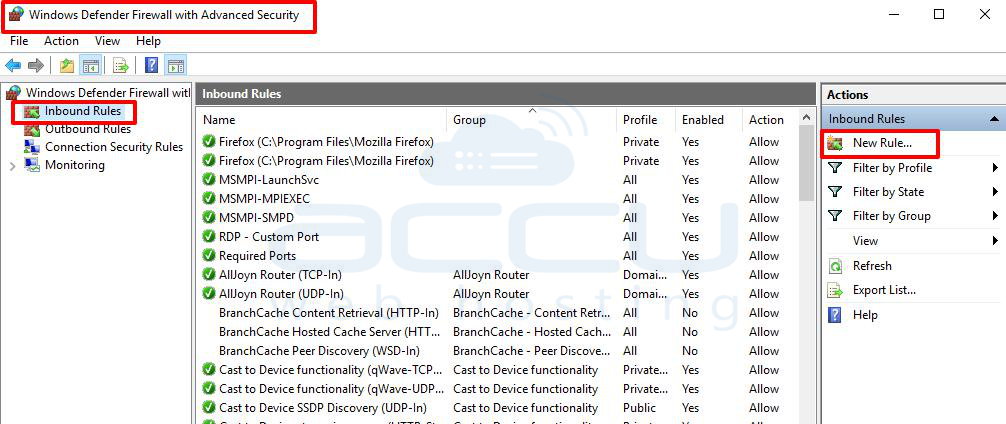
4. Configure Windows Firewall to Allow SQL Traffic
1. Open Windows Defender Firewall with Advanced Security.
2. Select Inbound Rules ➔ New Rule…
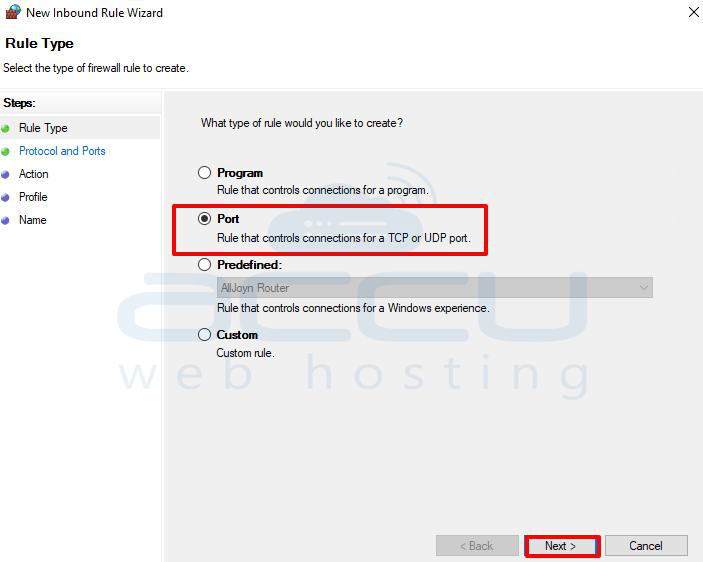
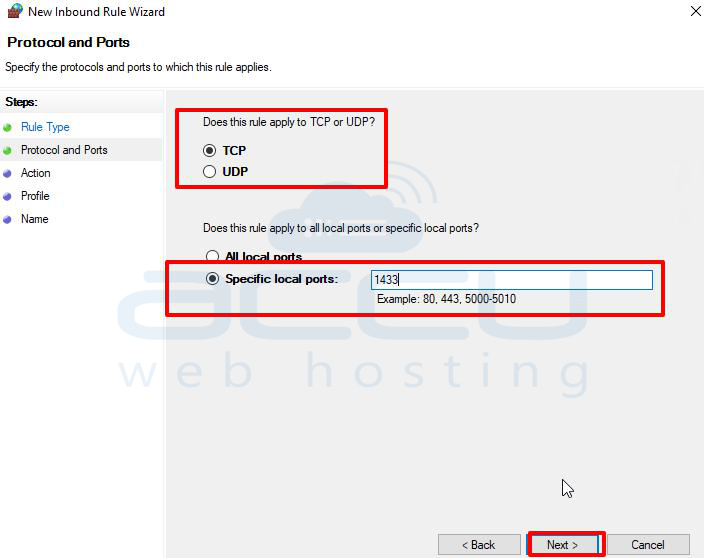
3. Choose Port ➔ Next ➔ select TCP, and enter port 1433.
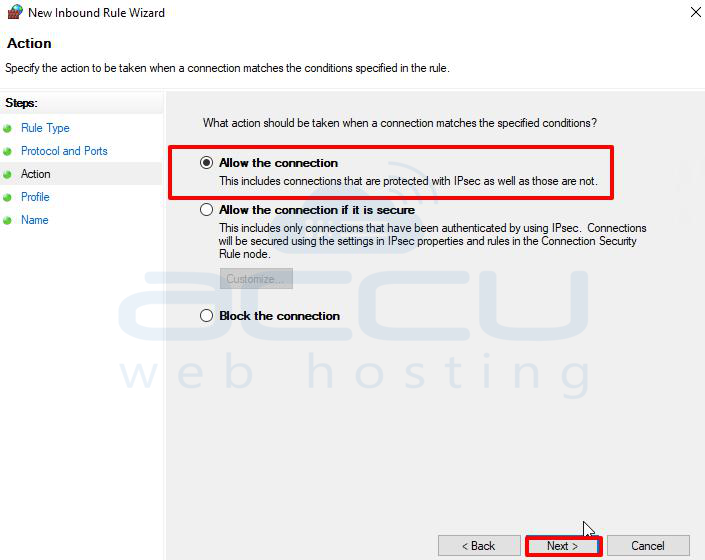
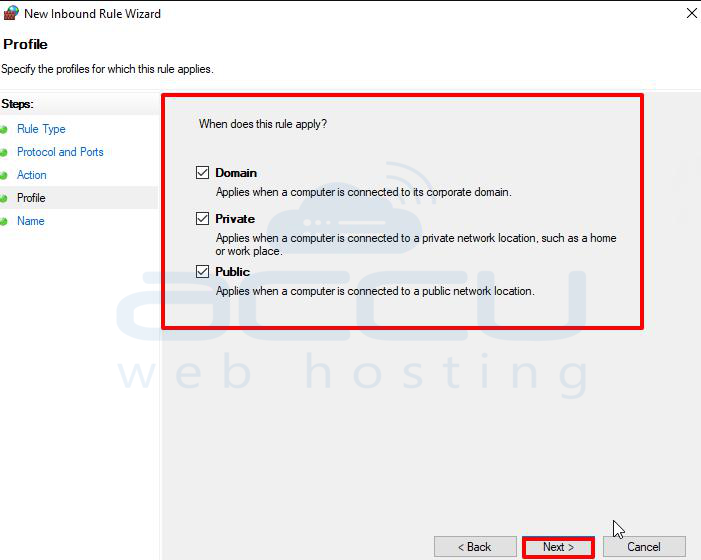
4. Choose Allow the connection, and apply it to the profiles you need (Domain, Private, Public).
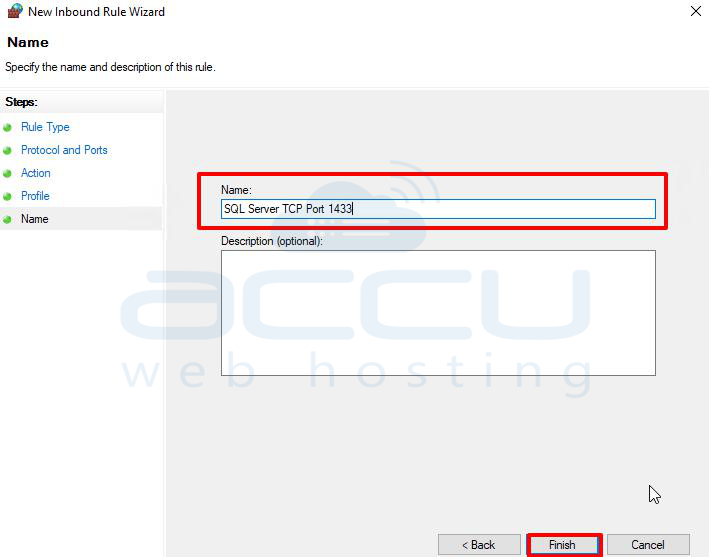
5. Name the rule (e.g., SQL Server TCP Port 1433) and finish.
5. Restart Services & Verify
- Restart both SQL Server and SQL Server Browser (if you're connecting to a named instance).
- Optionally verify using netstat -an | find "1433" to confirm the server is listening.
- From a client PC, test the connection using SSMS or a telnet/PowerShell test command.
Connecting Remotely
In the remote SSMS connection dialog:
- Server name: ServerIP,1433 (or Hostname\InstanceName,1433 for named instances).
- Choose SQL Server Authentication, enter your login credentials, and connect.
Troubleshooting Tips
- Ensure the SQL Server Browser service is running for named instances.
- Verify the firewall on both server and client machines allows traffic through port 1433.
- If using domain accounts, confirm the server is in the same domain or a trust exists between domains.
Conclusion
Allowing remote access to Microsoft SQL Server involves enabling the right protocols, opening the correct firewall ports, and ensuring user authentication is configured securely. While it's technically straightforward, it's crucial to balance accessibility with security — especially if the server is exposed over the internet.
Be sure to:
- Use strong passwords
- Restrict access using firewall rules or IP whitelisting
- Monitor remote access for unusual activity
By following the above steps, you can confidently allow remote access to your SQL Server while maintaining control and security.
