At reboot, Linux may mount critical partitions (especially /) as read-only (ro) to protect data integrity. In this mode, you can still read files, but write, delete, and create operations are blocked. The OS triggers this when it detects something is seriously wrong. This guide will walk you through simple fixes and deeper repair steps to get everything working again.
Common Causes in VPS Environments
Even on VPSs, where hardware is abstracted, you can encounter read-only remounts due to:
-
File-system corruption: often from dirty shutdowns or bugs.
-
Disk errors: underlying physical block device failures—still possible via host hardware faults.
-
Disk full conditions: when no free space is available, filesystem may remount read-only as a safeguard.
-
Improper shutdown or kernel panic: system crashes or panic events trigger forced remounts.
-
fstab misconfiguration: incorrect UUID or missing rw options can cause permanent ro mounts.
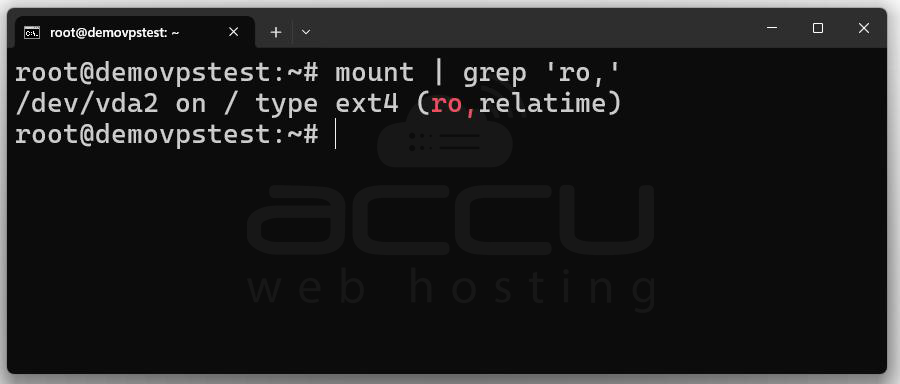
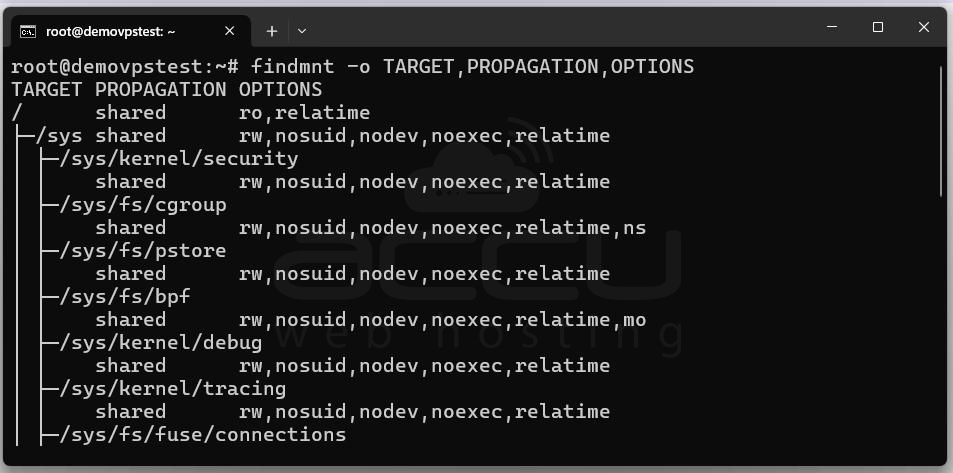
Step 1: How to Detect Read-Only Mode
Command 1: mount | grep 'ro,'
Command 2: findmnt -o TARGET,PROPAGATION,OPTIONS
Command 3: df -h
In the output, if you see ro (read-only) in the OPTIONS column or if write operations fail (e.g. touch file.txt gives a "Read-only file system" error), your system is in read-only mode.
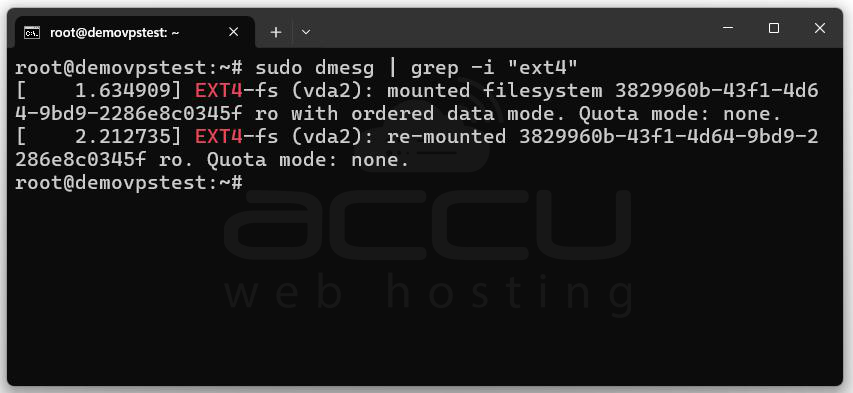
Step 2: Check System Logs for Clues
Find out why the file system was remounted as read-only.
Command 1: sudo dmesg | grep -i "read-only"

Command 2: sudo dmesg | grep -i "ext4"
Command 3: sudo tail -n 100 /var/log/syslog
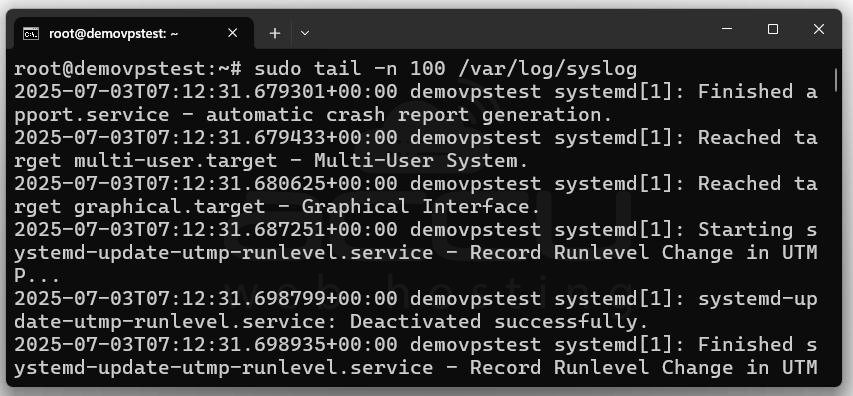
Look for Messages Like:
EXT4-fs error: Remounting filesystem read-only, I/O error, Buffer write error, Attempt to remount the File System as Read-Write.
Step 3: Try to restore normal function if it’s a temporary error.

Replace / with your mount point if it's not the root file system.
Run the following command to check if It Worked:
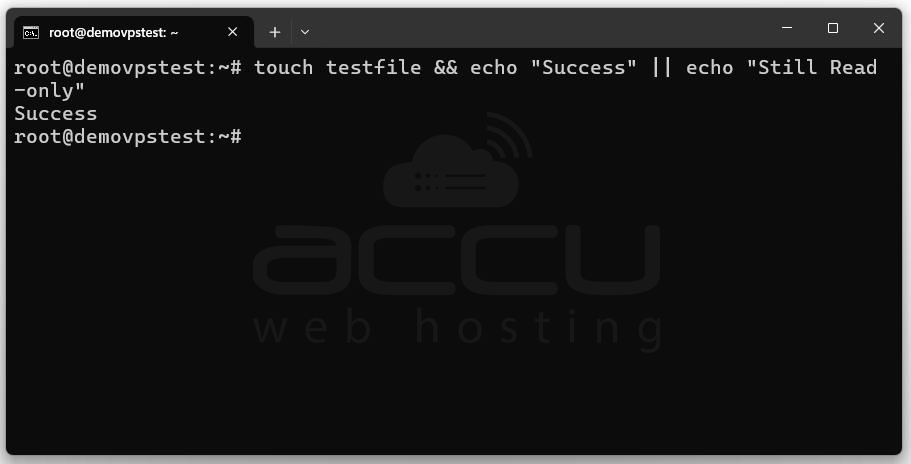
If this works, it might have just been a temporary mount error. However, you should still investigate further to prevent recurrence.
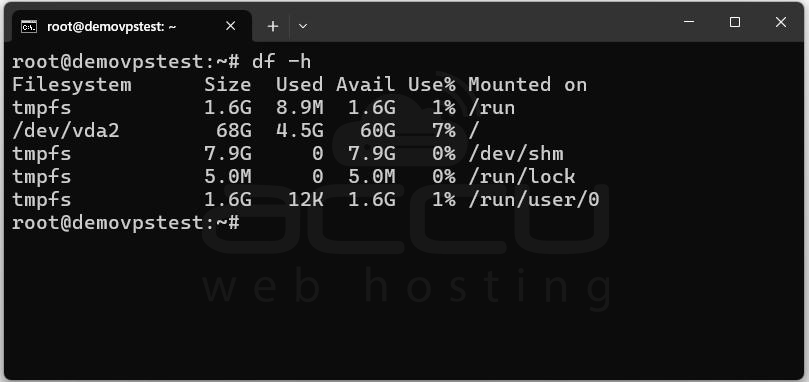
Step 4: Check Disk Space
Make sure your disk didn’t run out of space.
Command: df -h
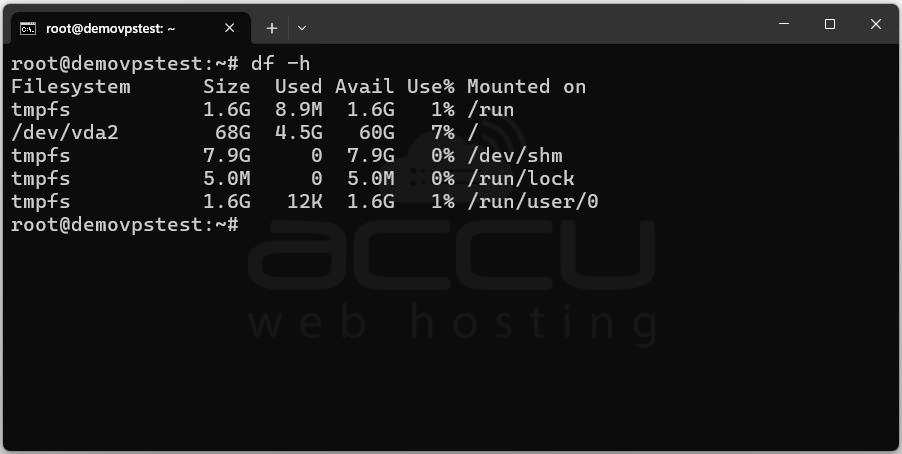
Any mount point showing 100% usage /, /var, or /home being full
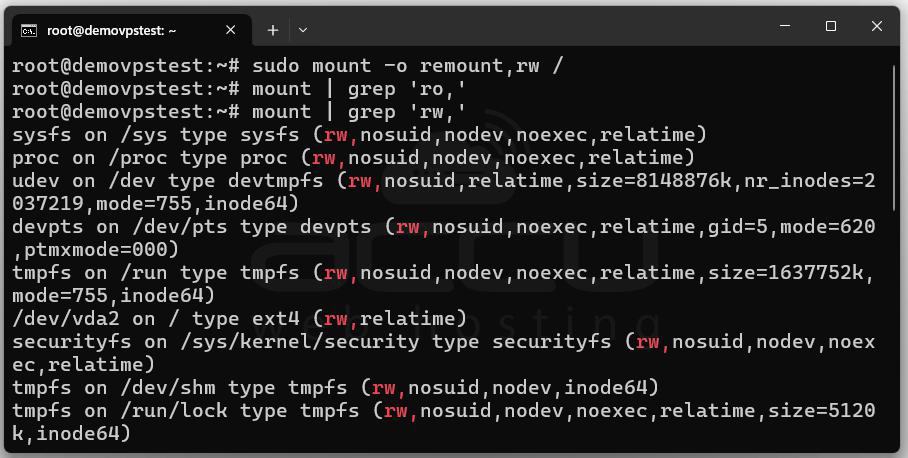
If Full, clear logs or cache:
sudo du -sh /var/log/*
sudo rm -rf /var/log/*.gz /var/log/*.1
Then try to remount: sudo mount -o remount,rw /
A full disk can cause file system errors and force Linux to remount in read-only mode to prevent overwriting or corruption.
Step 5: Run fsck to Repair the File System
Fix underlying file system corruption.
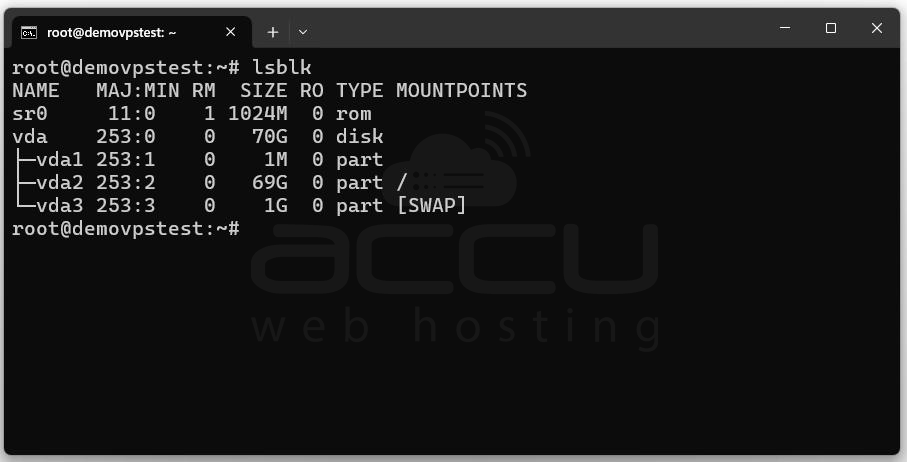
Step 1: Identify the disk: lsblk
Step 2: Unmount the file system (if possible): sudo umount /dev/vda2
If it's the root partition (/), you'll need to boot into rescue mode, single-user mode, or use your VPS provider's recovery environment.
Step 3: Run fsck: sudo fsck -y /dev/vda2
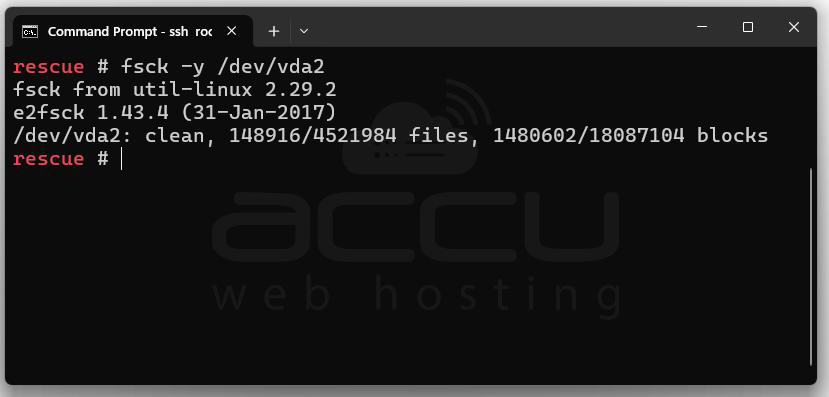
Replace /dev/vda2 with your actual device name.
Step 4: Reboot: sudo reboot
fsck checks and fixes disk errors, file system inconsistencies, and corrupt journals. Always back up before using fsck on important disks.
Step 5: Review and Correct /etc/fstab File
Ensure correct mount configurations on boot.
Command: sudo nano /etc/fstab
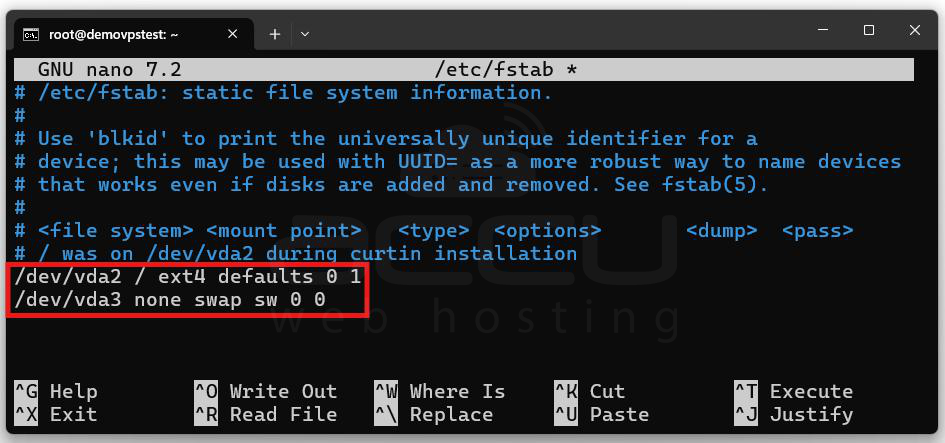
Check For: Correct UUIDs or device names
-
Use of defaults or rw in the options field, save the file and reboot the server to apply changes.
A bad /etc/fstab entry can cause the OS to fail to mount the drive properly, defaulting to read-only to avoid errors.
Conclusion
When a Linux system mounts critical partitions as read-only, it is typically a protective response to prevent data loss or further corruption. This guide has outlined a systematic approach to diagnosing and resolving read-only file system issues, including detecting the mode, analyzing logs, remounting the filesystem, checking disk space, running fsck, and verifying /etc/fstab configurations.
