MySQL uses a designated folder called the data directory to store all database files, tables, and configuration information. On most Linux systems, this directory is located at /var/lib/mysql by default. Database administrators often need to move this directory to a different location for various operational reasons.
This guide covers the complete process, including detailed steps, to help you transfer your MySQL data while keeping everything secure and functional.
Why Relocate the MySQL Data Directory?
Here are the main reasons database administrators relocate MySQL data directories:
- When your current partition runs low on space, moving the data to a larger disk or partition becomes necessary.
- Placing the data directory on faster storage devices (such as SSDs) improves database response times and overall performance.
- Organizations often require database files to be stored in specific, secure locations that meet their security standards and policies.
- Having the data directory on a separate partition makes backup and recovery processes more streamlined and organized.
- Server migrations and infrastructure updates often require data relocation to maintain system consistency.
Prerequisites:
Before starting the relocation process, ensure you have:
- Root or sudo access to the server
- A complete backup of your MySQL databases
- Sufficient disk space at the new location
- MySQL service is running and accessible
- Basic knowledge of Linux file system permissions
Step 1: Preparing and Moving the MySQL Data Directory
The first step involves safely stopping the MySQL service and creating a copy of the existing data directory.
1.1 Stop the MySQL Service
sudo systemctl stop mysql
// No Direct Output
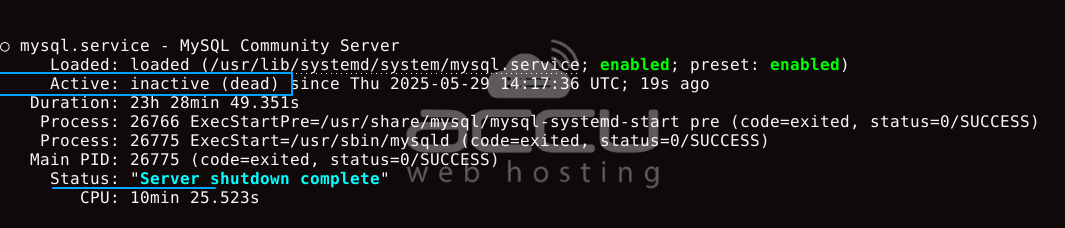
Stopping MySQL ensures that no active connections are writing to the database files during the move. This prevents data corruption and ensures file consistency.
1.2 Verify MySQL has stopped
1.3 Create the New Directory Location
sudo mkdir -p /new/path/to/mysql
Replace /new/path/to/mysql with your desired location. Common choices include /opt/mysql/data, /home/mysql/data, or a mounted external drive.
sudo mkdir -p /opt/mysql/data
// No Direct Output
1.4 Copy the Data Directory
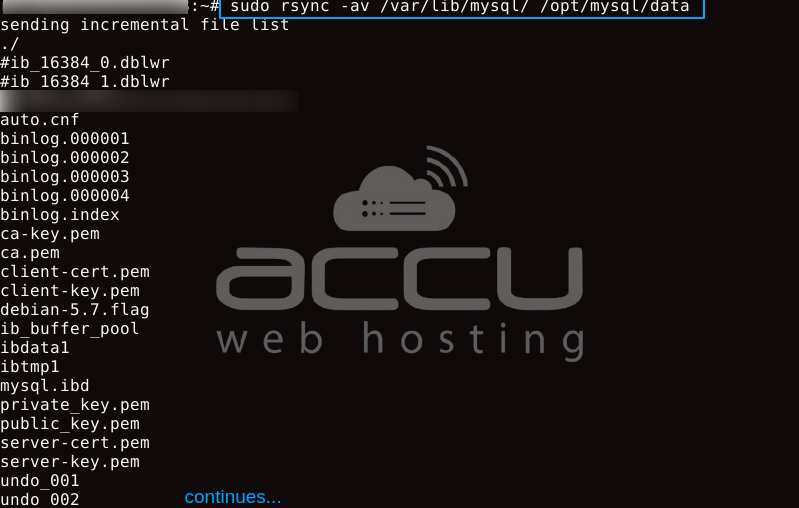
We are using rsync instead of cp because rsync preserves file permissions, timestamps, and handles large files more efficiently. It also provides progress feedback and better error handling.
1.5 Set Proper Ownership and Permissions
sudo chown -R mysql:mysql /opt/mysql/data
// No Direct Output
sudo find /opt/mysql/data/ -type d -exec chmod 755 {} \;
// No Direct Output
sudo find /opt/mysql/data/ -type f -exec chmod 644 {} \;
// No Direct Output
Step 2: Updating MySQL Configuration
Now you need to tell MySQL where to find its data files by updating the configuration.
2.1 Locate the MySQL Configuration File

Here's what each file is:
|
File Path |
Description |
|
/etc/mysql/my.cnf |
Main MySQL configuration file (can include others). |
|
/etc/mysql/mysql.conf.d/mysqld.cnf |
Configuration specific to the MySQL server daemon (mysqld). This is typically where most MySQL settings are located. |
|
/etc/alternatives/my.cnf |
A symbolic link (symlink) managed by the alternatives system, often pointing to /etc/mysql/my.cnf or another config. |
2.2 Edit the Configuration File
sudo nano /etc/mysql/mysql.conf.d/mysqld.cnf
Find the [mysqld] section and update or add the following line:
[mysqld]
datadir = /opt/mysql/data/
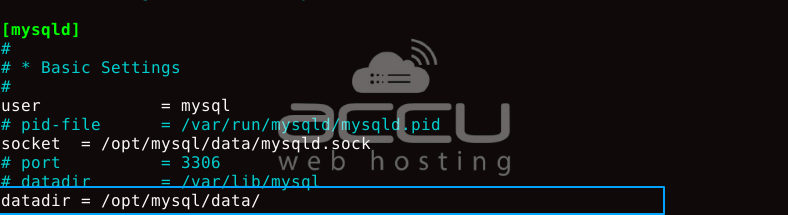
Why this works: The datadir parameter instructs MySQL to locate database files, logs, and other data-related files.
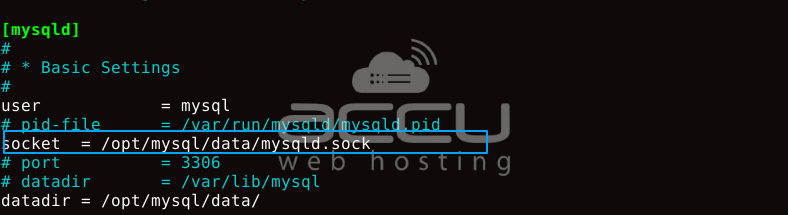
2.3 Update Socket Configuration (if needed)
If your configuration file has a socket path under the old directory, update it:
Step 3: Configuring AppArmor (Ubuntu/Debian Systems)
AppArmor is a security system that restricts application capabilities, such as MySQL, even for a root user.
Think of it as a firewall for file access; it restricts what files, directories, or system resources an application (like MySQL) can access for any user, including root.
You need to update its configuration to allow MySQL to access the new location.
3.1 Check if AppArmor is Active

If you see MySQL profiles listed (as in the output), you need to update the AppArmor configuration.
3.2 Edit the MySQL AppArmor Profile
sudo nano /etc/apparmor.d/usr.sbin.mysqld
Add the following lines to allow access to your new directory:
/opt/mysql/data/ r,
/opt/mysql/data/** rwk,
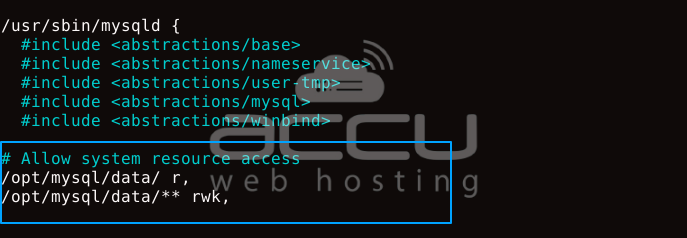
These rules grant MySQL read access to the new directory and read, write, and lock access to all files within it.
Without updating AppArmor, MySQL will be denied access to the new location, causing startup failures.
Step 4: Testing and Finalizing the Migration
Now it's time to restart MySQL and verify everything works correctly.
4.1 Start the MySQL Service
sudo systemctl start mysql
4.2 Verify MySQL Started Successfully
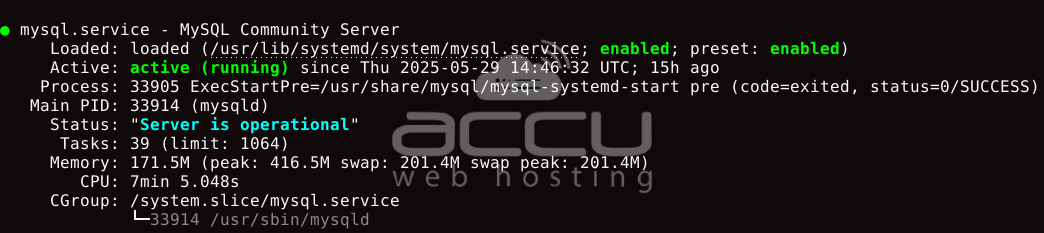
Expected Output: The service should show as "active (running)" with no error messages.
4.3 Connect to mysql
sudo mysql
Once connected, run a simple query to ensure databases are accessible:
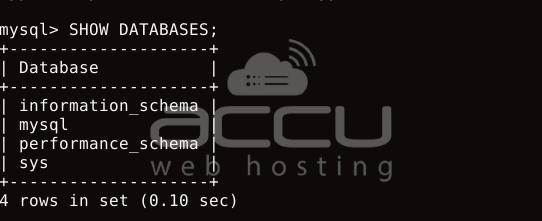
This indicates that the directory has been updated, and you can now access the databases.
This operation requires close attention to file permissions, ownership, and security policies, such as AppArmor. Proper configuration of each component ensures a smooth transition and maintains your database system's correct operation.
Relocating your MySQL data directory offers numerous benefits for improved performance, enhanced storage management, and increased security. This skill proves valuable for database administrators who need to adapt their systems to changing infrastructure requirements while maintaining data security and system stability.
