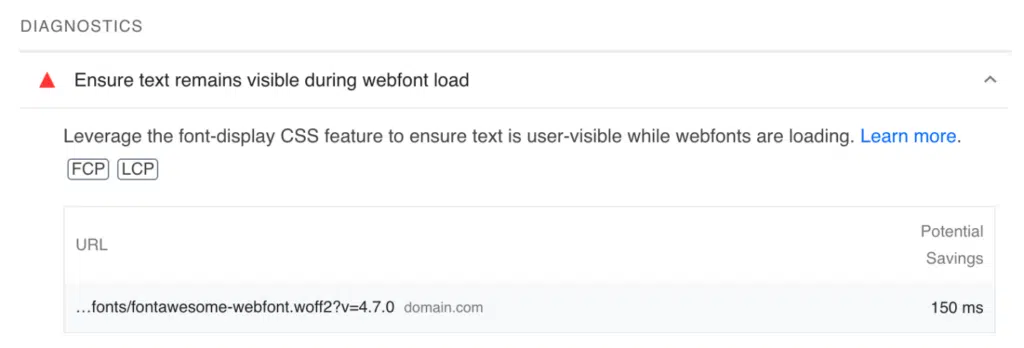
When you check your domain in PageSpeed Insights, you may sometimes see the error "Ensure Text Remains Visible During Webfont Load" if you use web fonts. This can make your page slower to load since it remains unfinished for visitors until the fonts are fully loaded.
(The web font loads each time a user visits.)
This guide will walk you through the steps to fix this error to improve the site's loading speed, enhance the user experience, and achieve better performance scores.
How Web Fonts Can Slow Down Your Site?
Web fonts can slow down your site because they require additional HTTP requests to fetch font files from external servers. When a browser encounters a web font (Ex. Google fonts), it must download and process it before rendering the text. This is likely to slow down, particularly if the font files are large or if they are being loaded from a slow server.
Some browsers hide text while loading custom fonts, causing blank spaces until the fonts are fully loaded. This is called FOIT, or "Flash of Invisible Text."
It impacts performance indicators like First Contentful Paint (FCP), Largest Contentful Paint (LCP), Cumulative Layout Shift (CLS), and overall Core Web Vitals.
How to Fix Ensure Text Remains Visible During Webfont Load error?
Method 1: Using Code
Option 1: Google Fonts
If you’re using Google Fonts, you can enable font-display: swap by adding &display=swap to your stylesheet link (Add code in <head> tag inside your HTML).
<link href="https://fonts.googleapis.com/css?family=Open+Sans&display=swap" rel="stylesheet">
<!-- Using the @import method -->
<style>
@import url('https://fonts.googleapis.com/css?family=Open+Sans&display=swap');
</style>
OR
You can directly add the enqueue function to your theme’s functions.php file.
1. Log into your WordPress dashboard.
2. Navigate to the Appearance/Tools > Theme File Editor.
3. Open the functions.php file.
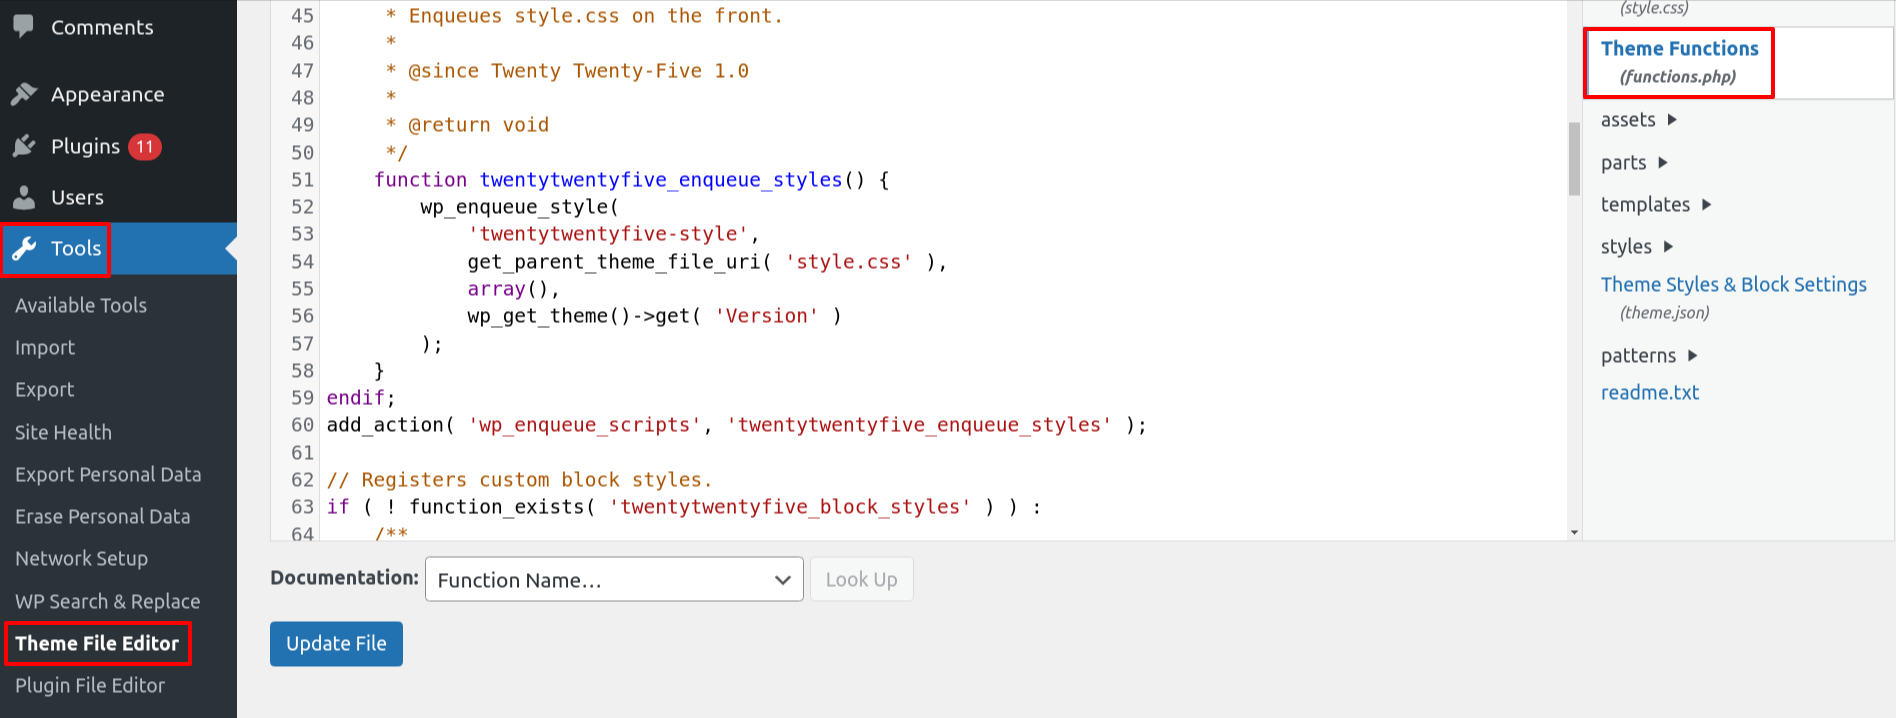
4. Search the Google fonts enqueue function and update it.
function load_google_fonts()
{
wp_enqueue_style('google-fonts', 'https://fonts.googleapis.com/css?family=Open+Sans&display=swap', false);
}
add_action('wp_enqueue_scripts', 'load_google_fonts');
5. Click on Update File.
Option 2: Local Fonts
If you have local fonts, you can set font-display: swap in your @font-face rule in your CSS file. (For example, font-face.css, style.css, or any custom CSS file).
@font-face {
font-family: 'Pacifico';
font-style: normal;
font-weight: 400;
src: local('Pacifico Regular'), local('Pacifico-Regular'),
url(https://fonts.gstatic.com/s/pacifico/v12/FwZY7-Qmy14u9lezJ-6H6MmBp0u-.woff2)
format('woff2');
font-display: swap;
}
Option 3: Font Awesome
Font Awesome doesn’t have built-in fallback options. So, if you use font-display: swap, icons might not appear while the font is still loading, which can cause display issues.
Use font-display: block, which ensures that icons stay hidden until the font is fully loaded, preventing missing icons.
Add below code inside your font or custom CSS file.
@font-face {
font-family: 'Font Awesome 5 Free';
font-style: normal;
font-weight: 900;
font-display: block;
src: url('https://use.fontawesome.com/releases/v5.15.4/webfonts/fa-solid-900.woff2') format('woff2'),
url('https://use.fontawesome.com/releases/v5.15.4/webfonts/fa-solid-900.woff') format('woff');
}
For even better performance, you can preload your Font Awesome font files by adding this line to your theme’s <head> section.
<link rel="preload"
href="https://use.fontawesome.com/releases/v5.15.4/webfonts/fa-solid-900.woff2"
as="font" type="font/woff2" crossorigin="anonymous">
Method 2: Using Plugin
1. Log into your WordPress dashboard.
2. Navigate to Plugins > Add New Plugin.
3. Search for the “Swap Google Fonts Display” plugin.
4. Click on Install Now and activate it.
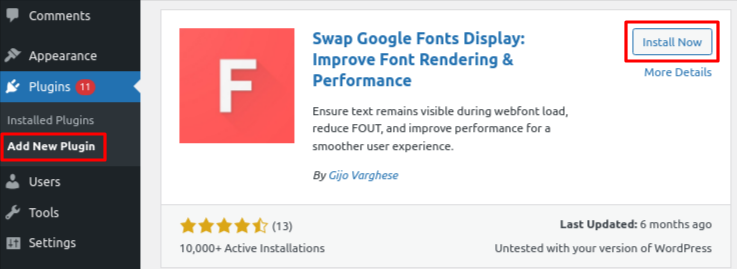
You don't need to change any settings after installation. The plugin automatically adjusts the loading of Google Fonts by adding the font-display: swap property.
Method 3: Using Elementor
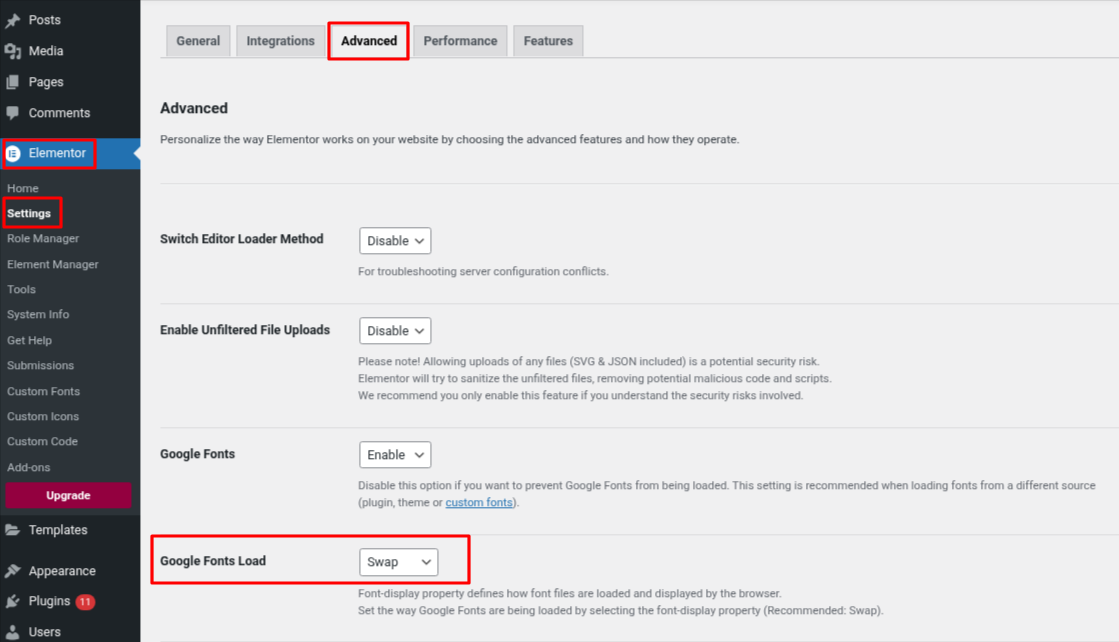
If you're using Elementor to build your website, it also provides an option to set font display methods.
1. Log into your WordPress dashboard.
2. Navigate to Elementor > Settings.
3. Click on the Advanced tab and search for “Google Fonts Load”.
4. From the drop-down menu, choose Swap.
Font-display: swap vs fallback vs optional
The font-display property in CSS defines how a font is displayed while it’s being downloaded.

1. Block
The text will be invisible (not appear) until the font is fully loaded, and it will appear all at once when the font has been downloaded.
This can cause a delay in text visibility but avoids rendering with a fallback font.
2. Swap
The browser will initially display the text with a fallback font until the web font is fully loaded, then it will swap to the web font.
This helps ensure the text is visible quickly, improving the user experience.
3. Fallback
The text will use a fallback font for a short period (100ms), and if the web font hasn't loaded by then, it will continue using it indefinitely.
This ensures the text is visible quickly but could result in a mismatch if the web font doesn't load.
4. Optional
The font will only be used if available in a reasonable time (usually 100ms). If the font doesn’t load quickly, it will use a fallback font.
This is a more aggressive version of fallback, aiming to improve performance by reducing wait times.
By implementing the above methods, you can easily fix ”Ensure Text Remains Visible During Webfont Load” and provide a better user experience. A faster-loading website leads to higher user satisfaction, improved engagement, increased conversions, and reduced bounce rates. Prioritizing web performance not only enhances accessibility but also positively impacts SEO and overall business success.
Before installing any WordPress plugin, it's recommended to check user reviews and ensure compatibility with your WordPress version before installing.
