What is ACF?
Advanced Custom Fields (ACF) is a powerful WordPress plugin that lets you easily add custom fields to your website. These fields aren’t just basic—they give you the flexibility to design your site exactly how you want. Whether you’re building a personal blog or a big corporate website, ACF makes it simple to create detailed, unique layouts that fit your needs perfectly.
WordPress Includes Built-In Custom Fields Functionality
The same concepts will apply to posts, but you must implement them in the template files that handle page creation instead of posts.
1. Log into your WordPress CMS dashboard.
2. Add a New post.
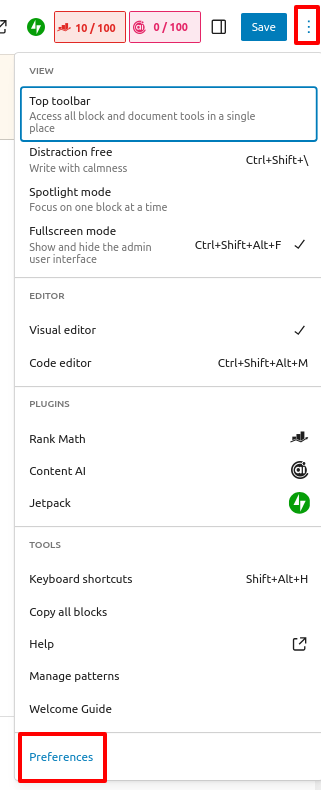
3. Click the three dots in the upper right corner of the post editor, then select Preferences from the menu.
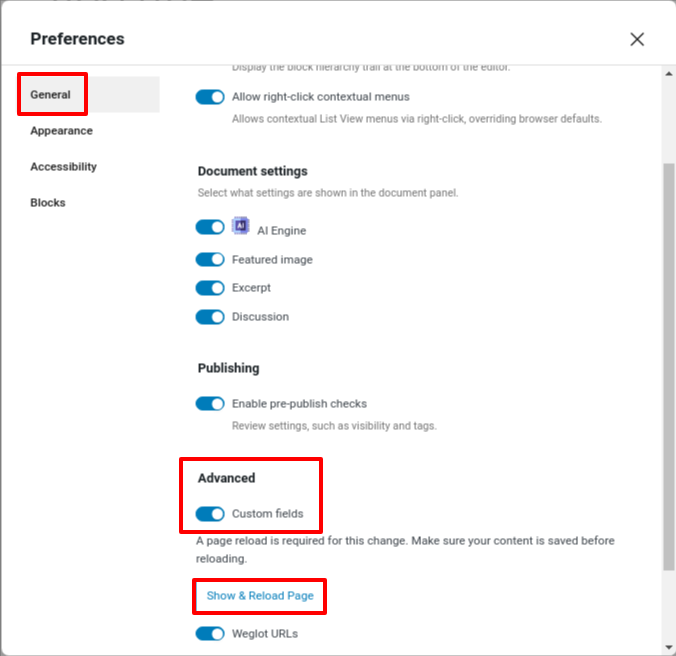
4. Next, go to General and toggle on the Custom fields option.
5. Then, click Show & Reload Page to continue.
6. Add a key – for this example, we'll use "Type of Millets." This field will allow you to add specific activity details to the post.
7. Enter a value – let's say Finger Millet for this post. This value will only apply to the current post. For other posts, you can input different values.
8. Save the post to apply the changes.

How Do you Add Advanced Custom Fields to Your WordPress Site?
Create a New Field Group
1. Log into your WordPress CMS dashboard.
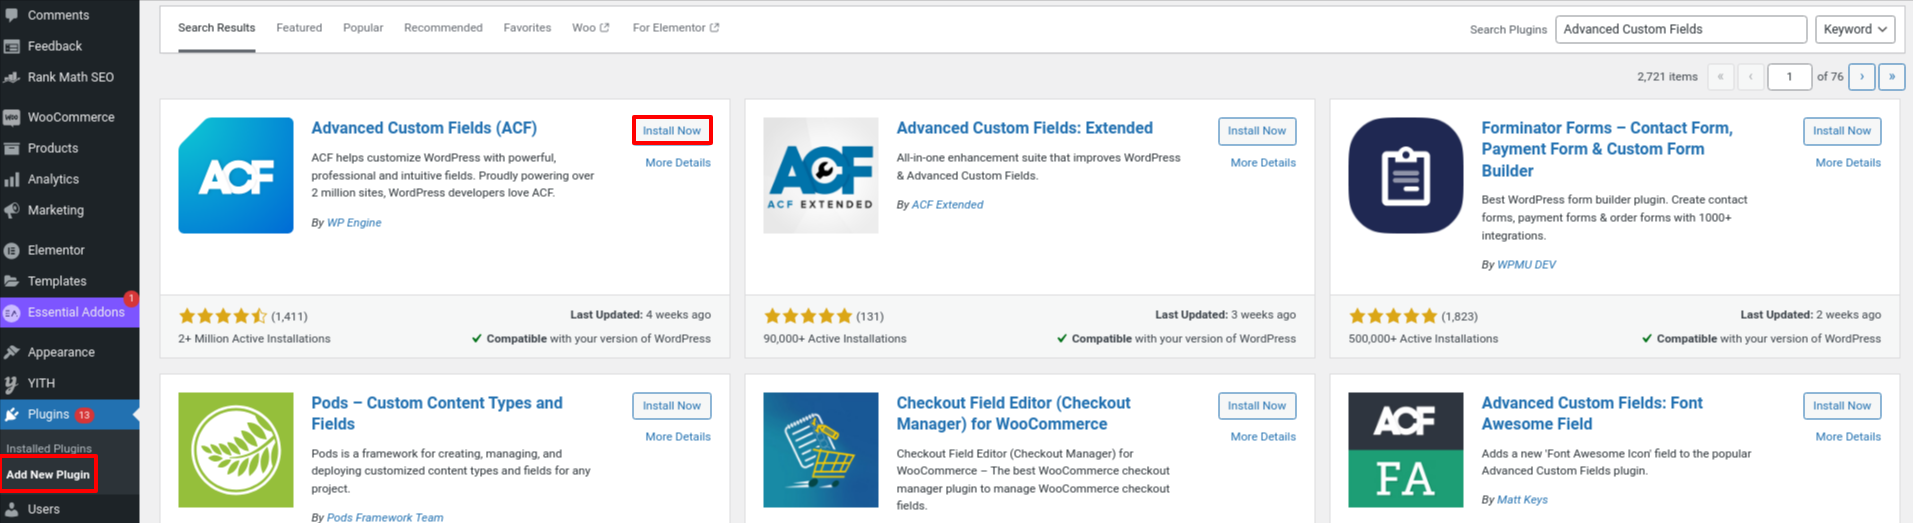
2. Navigate to Plugins > Add New Plugin.
3. Search for the "Advanced Custom Fields (ACF)" plugin, then click on Install Now and activate the plugin.
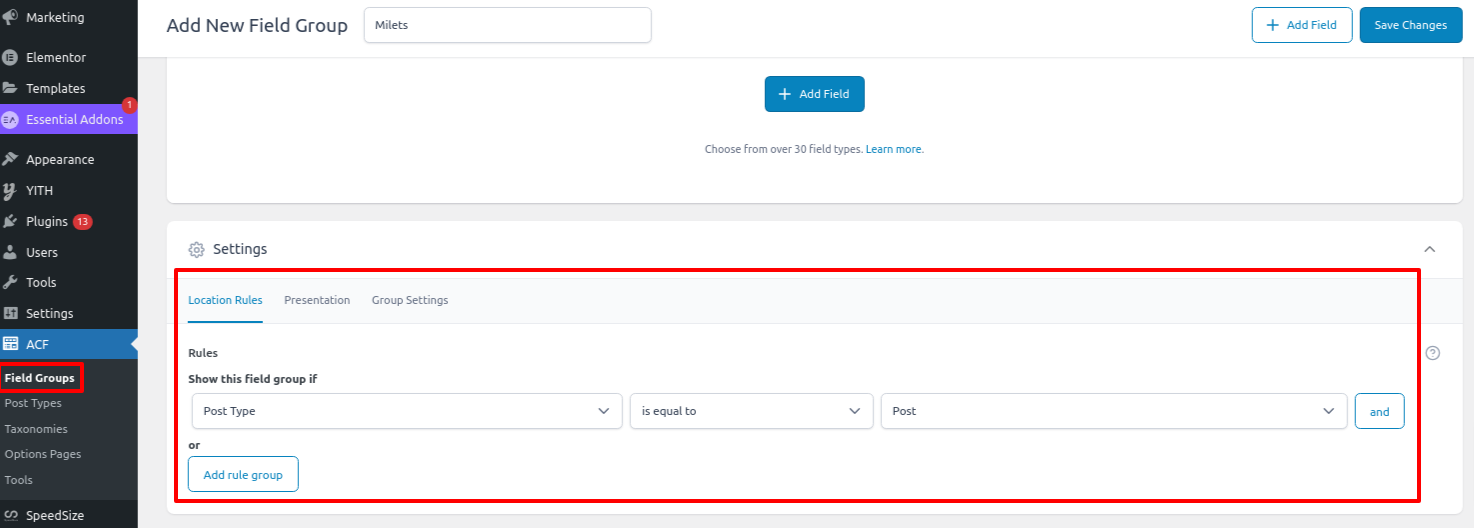
4. Next, go to ACF > Field Groups > Add New.
5. Add a title for your field group that highlights its purpose.
6. Scroll down to the Settings > Location Rules tab to specify where this field group will be used, such as on specific post types, pages, custom post types, or user profiles.
Create Custom Field
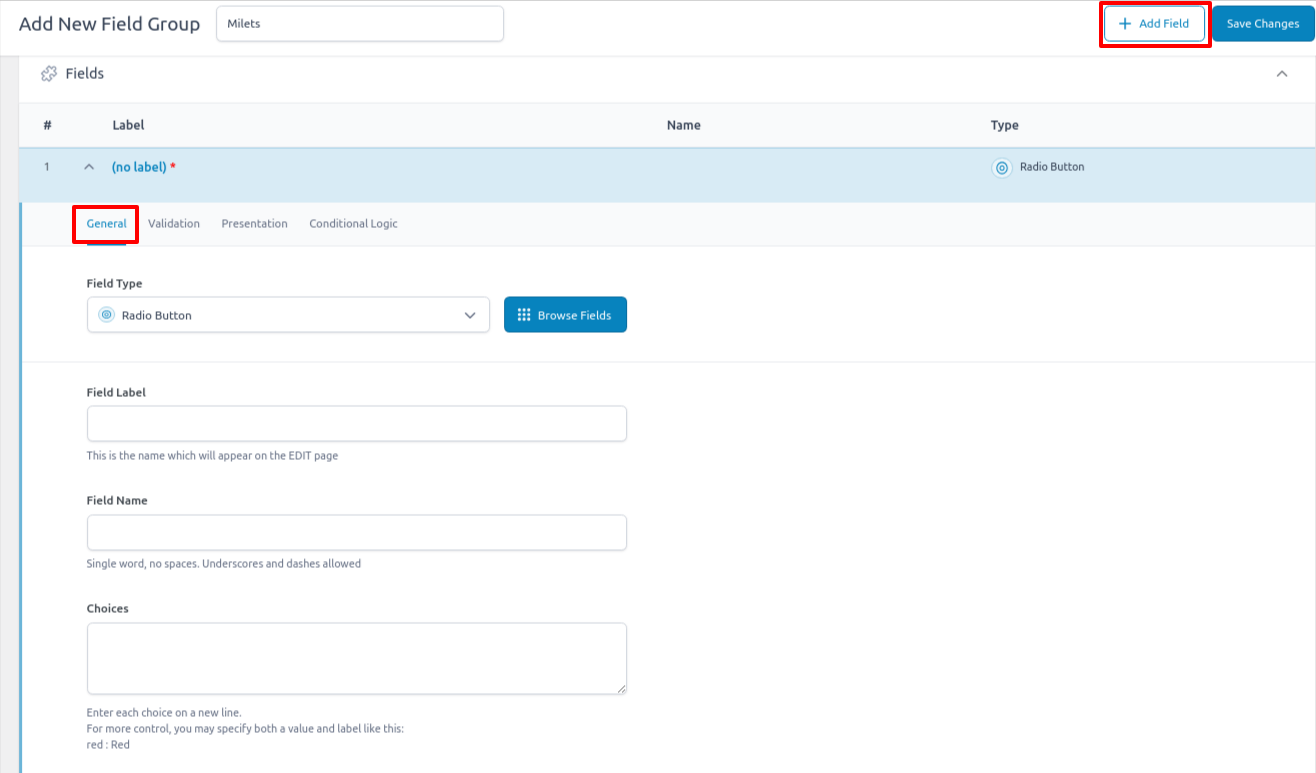
7. Click the + Add Field button to create your first custom field.
When adding a field, ACF gives you lots of options:
- Field Type: Choose the type of data you want to collect. For example, select "Number" for numerical data or "Email" for email addresses.
- Field Label: This is the name that will appear in the editor. It also generates the Field Name, which you’ll use in your code. The default field name works fine, but you can customize it if needed.
For this first field, select Radio Button as the field type.
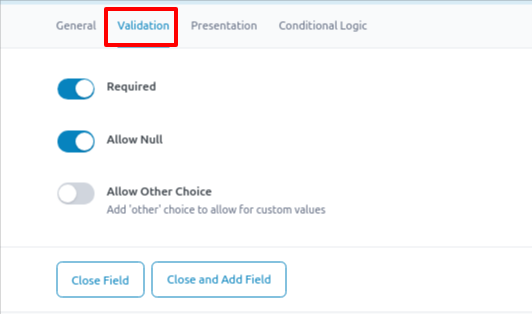
8. In the Validation tab, you can customize other settings, such as making a field required or setting a default value. Adjust these options to suit your needs.
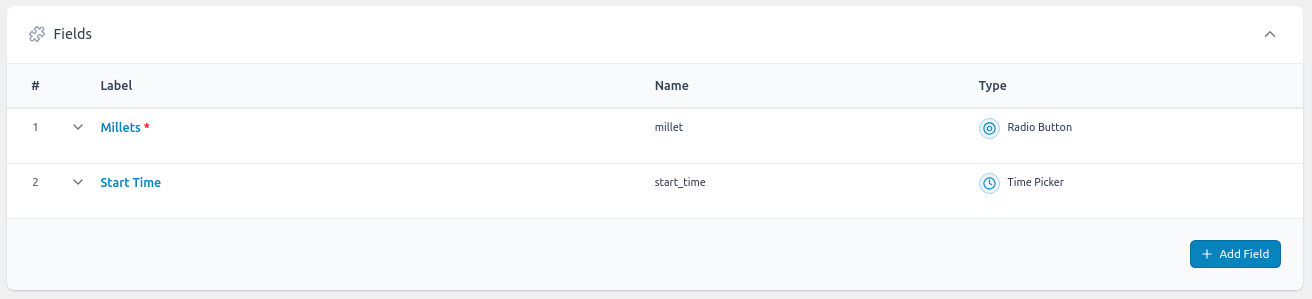
Simply repeat these steps for any additional custom fields you want to create. Once finished, your setup should look something like this:
Finalize Settings and Publish
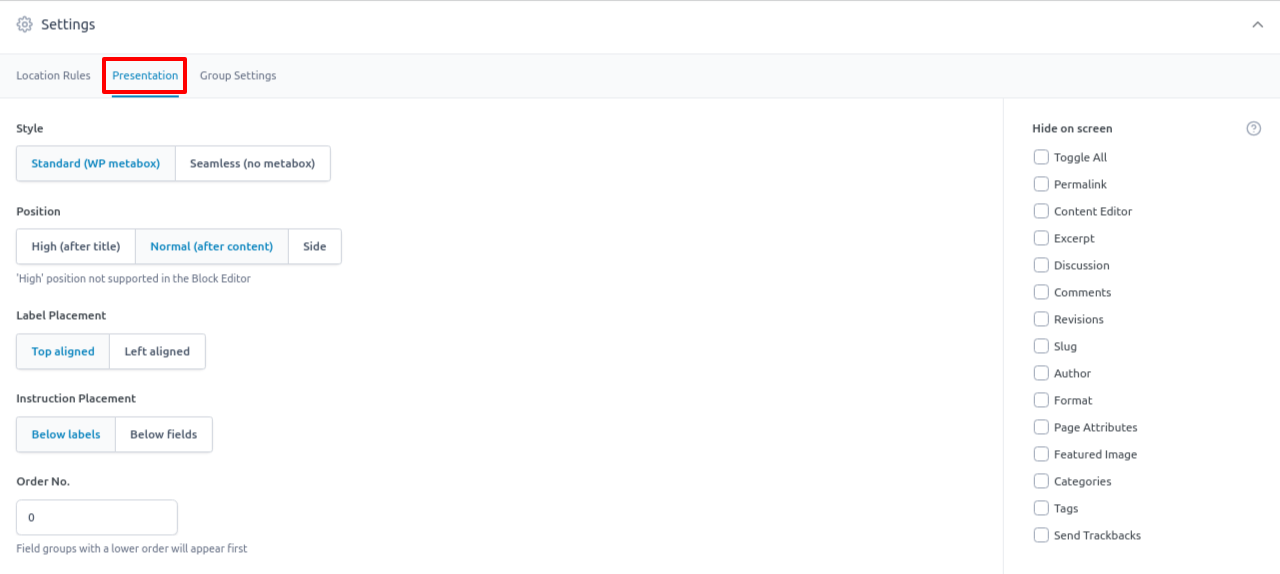
9. Scroll down to Settings > Presentation to customize how your fields appear in the WordPress editor.
The default settings work well in most cases, but you can adjust them as needed. For instance, you might display your custom fields above the standard WordPress editor to facilitate access.
10. Once you're happy with the configuration, click Save Changes to make your field group live.
After publishing your field group, your custom fields will automatically appear when you create a new post.
By default, they’ll be grouped below the editor, whether you’re using the classic TinyMCE editor or the new block editor.
The data you enter into these fields will be saved in your WordPress database, making it easy to retrieve and use.

How to Show Advanced Custom Fields on Your Website
There are three ways to display Advanced Custom Fields data on the front end. The method you choose depends on your technical skills and needs. Here are your options:
1. Edit Your Theme’s Template Files
- This option requires a bit of technical knowledge but offers the most control.
- It’s ideal if you’re comfortable editing your theme’s files and want to customize exactly where and how the custom fields appear.
2. Use a Shortcode
- Simple and easy to use if you only need to add custom fields in specific places.
- However, it involves more manual work, as you’ll need to add shortcodes for each post where you want custom field data to appear.
3. Use Elementor Pro
- The easiest option for those who prefer not to touch code.
- With Elementor Pro, you can display custom fields without using PHP, but keep in mind that it’s a premium product and requires you to use Elementor Pro for your templates.
