For web hosts looking to make better use of their resources, moving the database server to a separate system can help. Virtualmin fully supports this setup, and this guide explains how to configure it.
Ideally, this process should be done on a system without any domains or, at least, domains that don’t yet have databases. These steps won’t move existing databases or users to the new system.
Here are a few things to keep in mind when moving databases to a remote system:
- Database access may be a bit slower because of network delays.
- Disk space used by the database won’t count toward domain quotas, as it’s on a different system outside Virtualmin’s quotas.
- Starting or stopping the database can’t be controlled from Virtualmin and must be done directly on the remote system.
Virtualmin makes it easy to manage remote database servers with its built-in features. You can add, edit, and remove remote databases from the Virtualmin interface, giving you central control over data on multiple servers.
Setting Up a Remote Database Server
Prepare the Remote System
- Make sure the system you want to use for remote databases also has Virtualmin installed.
- Set up your remote system so it can allow connections from your Virtualmin server. This usually means adjusting the firewall to allow incoming connections on the database port (default is 3306 for MySQL/MariaDB) from your Virtualmin server’s IP address.
Enable Remote Database Access
Step 1: Login into your Webmin server.
Step 2: Go to the Upper left side of the screen and select the Virtualmin tab.
Step 3: Select the domain name on which you want to enable Remote Database access. Here, we have selected demovpstest.com as an example.
After that, navigate to the Edit Databases option and click on it.
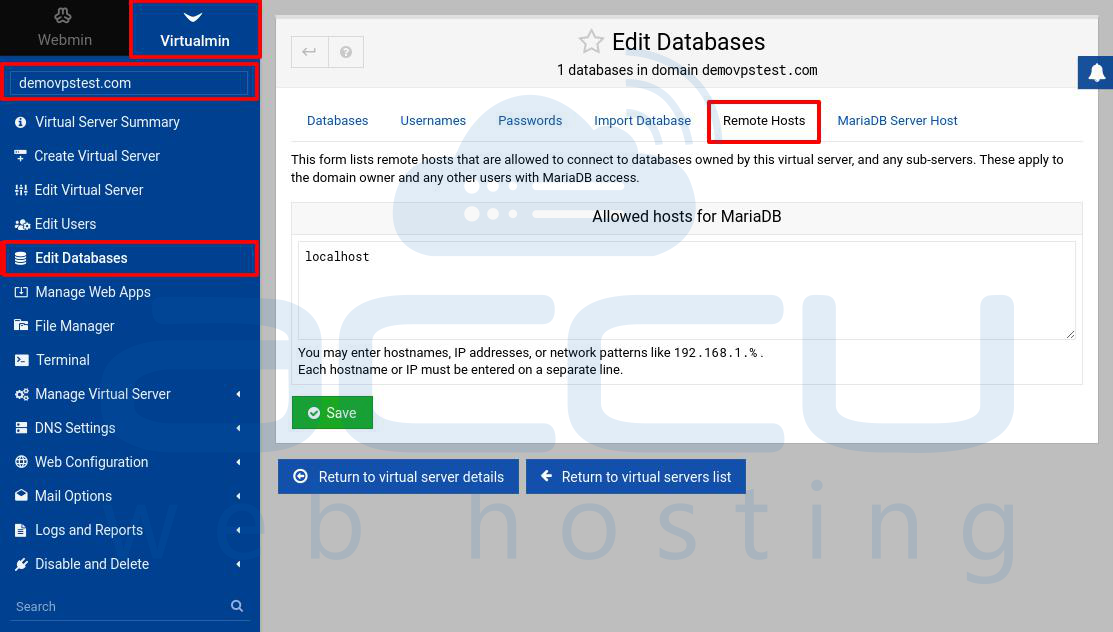
Step 4: In the Edit Databases windows, select the Remote Hosts tab.
This page shows the systems allowed to connect to databases for this virtual server.
Add the IP address, hostname, or network range for any system you want to allow, including your main Virtualmin server’s IP.
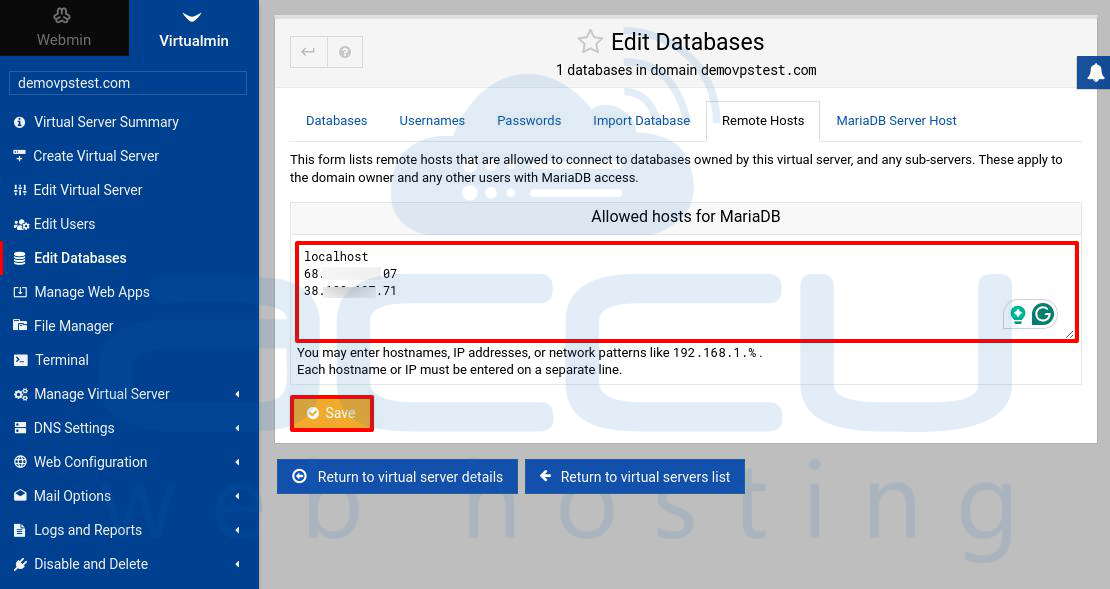
Save the changes to apply these access settings.
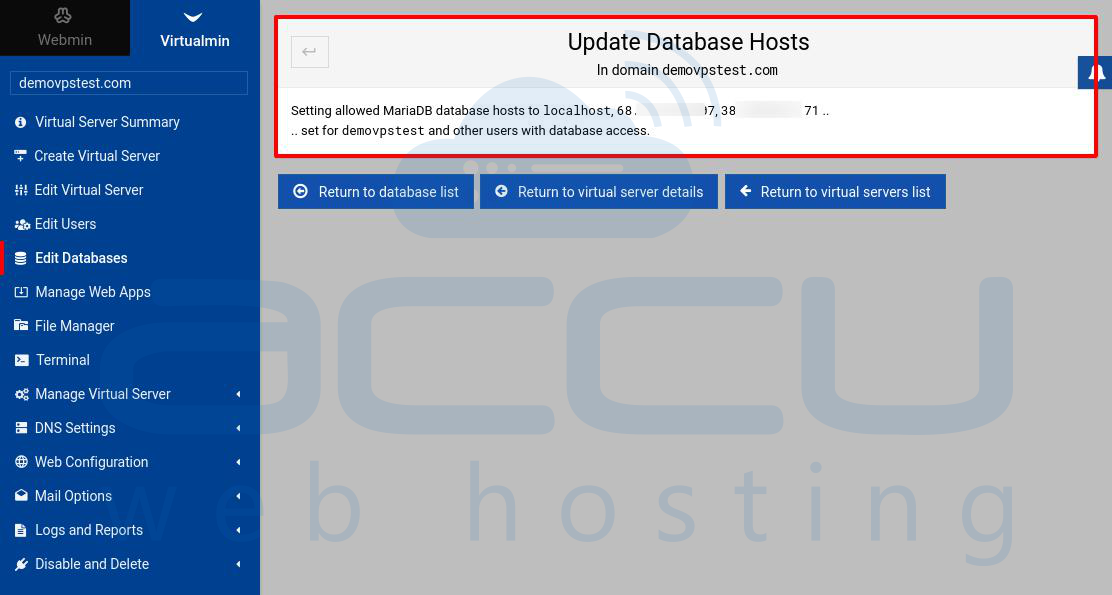
Step 5: Once you click the Save button to save the settings, the system will save them and show the result on the screen.
Now, we will go to add a remote database server in the Virtualmin.
Add a Remote Database Server
To add the remote database server, follow the below-mentioned steps:
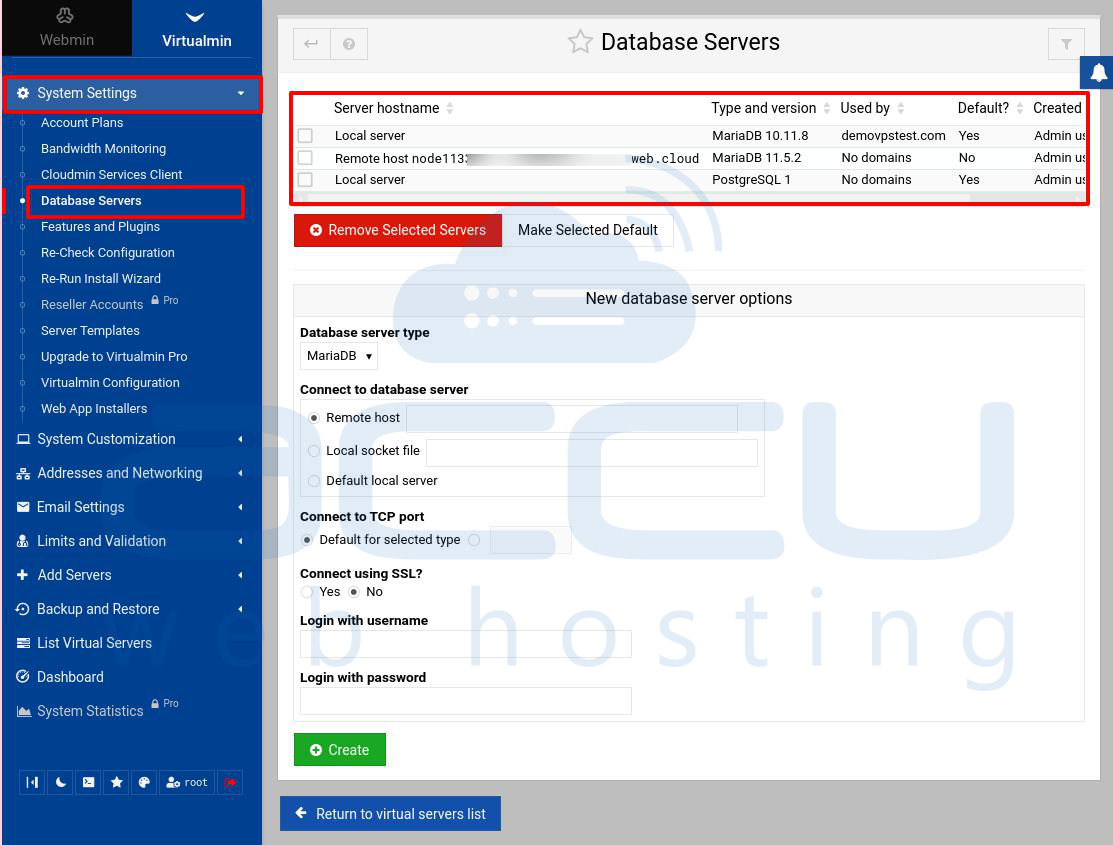
Step 1: In the Virtualmin tab, go to System Settings -> Database Servers.

Step 2: Under the New database server options, select your database type (e.g., MariaDB or MySQL).
Step 3: Choose a Remote host and enter details like the hostname or IP address, port number (if different from the default), and login credentials.
Here, we have entered the Hostname of the Remote MariaDB server.
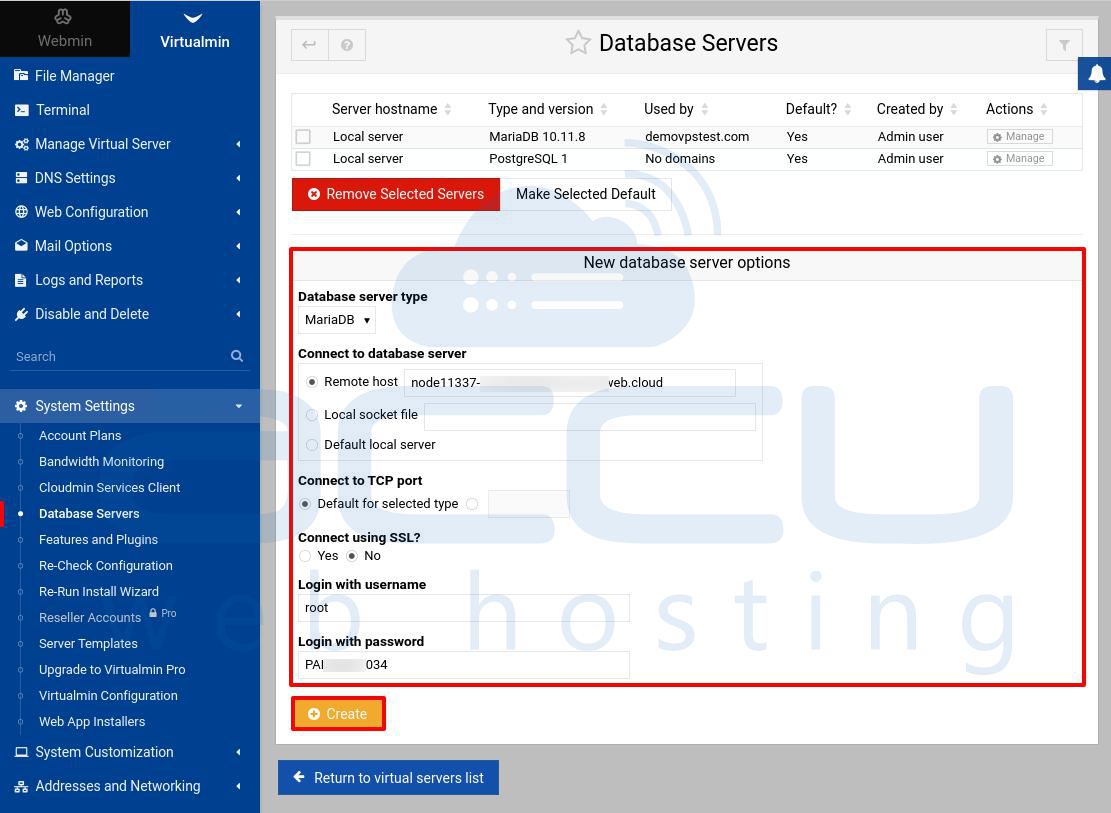
Step 4: You can also choose SSL for extra security.
Step 5: Then, click on the Create button to add the remote database server.
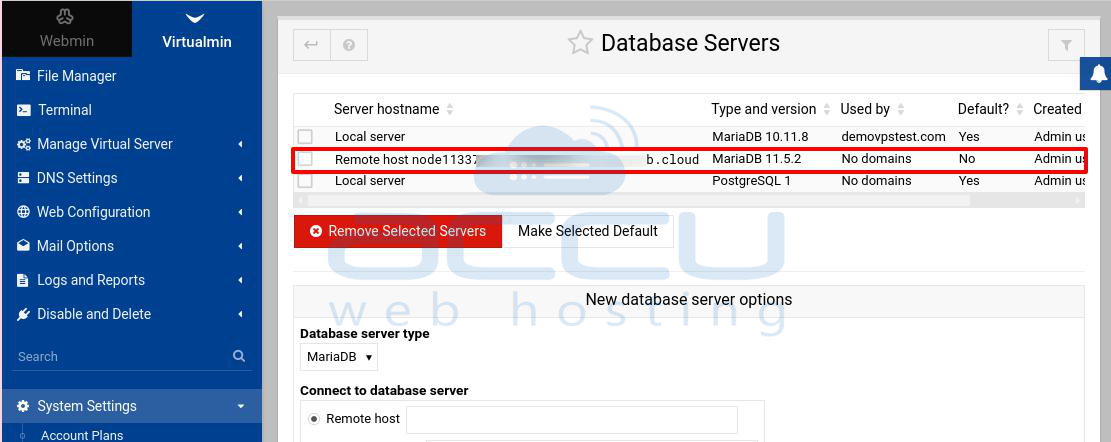
Step 6: Once the remote database is added successfully, it will be listed under Server Hostname in the Database Servers section. You can see that the Remote MariaDB server has been successfully added.
Managing Remote Databases
Step 1: After adding a remote database server, you can manage it directly in Virtualmin:
Step 2: Go to the System Settings and click on the Database Servers option to see a list of all database servers you’ve set up, both local and remote.
Step 3: For each virtual server, you can adjust database settings by going to Edit Databases.
Step 4: Select a server from the list and click on the Manage option to perform management tasks, such as updating user permissions, changing database names, or updating passwords, to maintain the databases on the remote server.

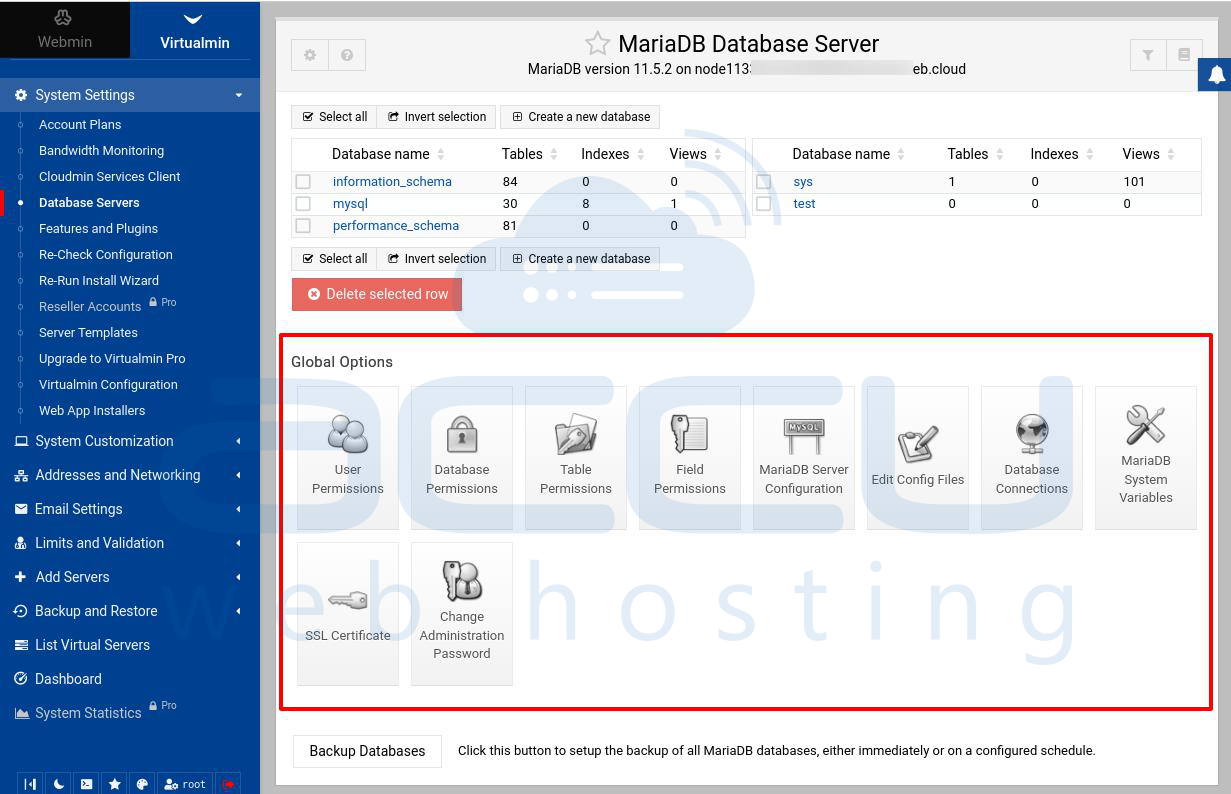
Step 5: To create a new database on the Remote server, click on the Create a new database option.

Step 6: Enter the details, such as the database name and field name (id, name, address, and phone number), and click on the Create button to create a new database on the remote server.
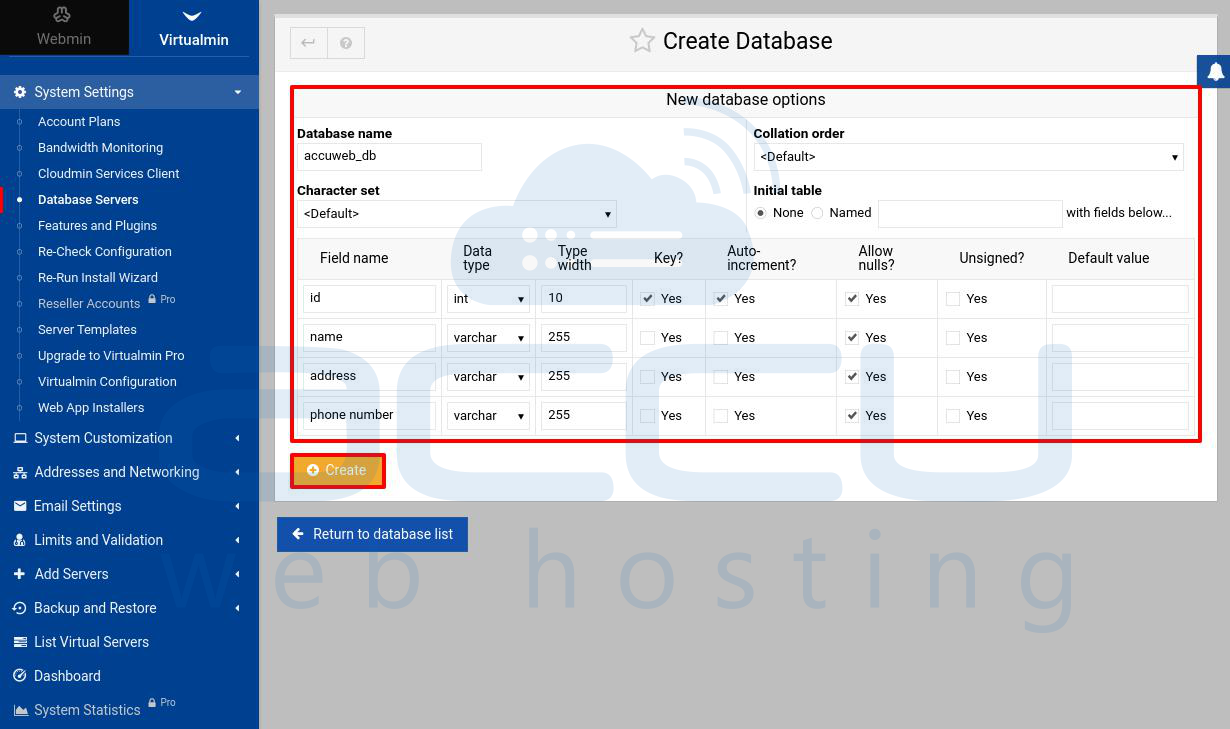
Step 7: Once you click on the Create button, the server will create a database on the remote server. Once it is successfully created, it will be listed under the Database Name section. You can see that Database Accuweb_db is successfully created.
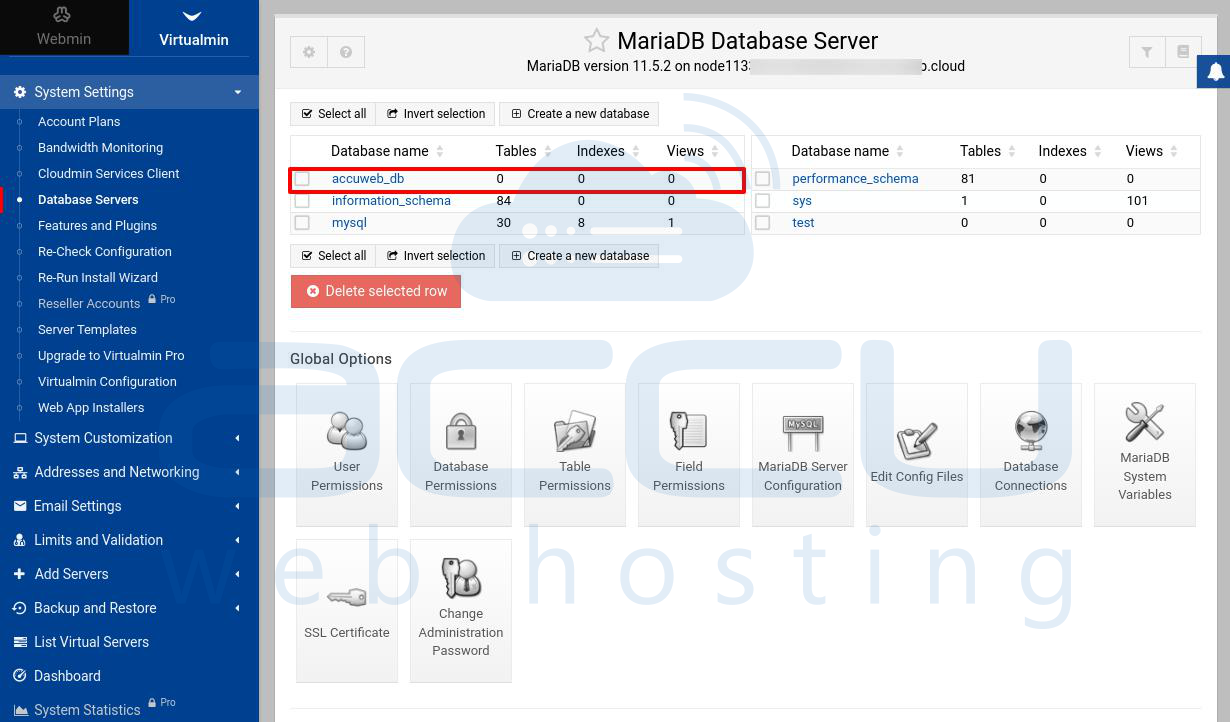
It means that we have successfully added the remote database and it is accessible from the virtualmin server.
Verify the created database from the Remote Database server
There are two ways to verify the database from the Remote Database server: 1) through a web-based application like phpMyAdmin and 2) Through a command line (Manual)
1) Through web-based applications like phpMyAdmin
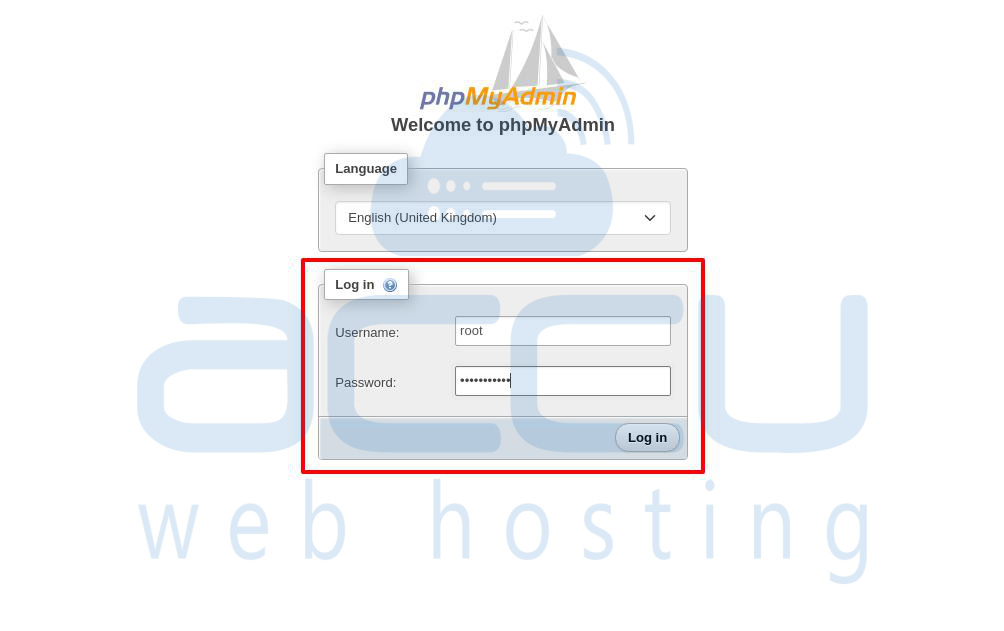
Step 1: Log in to your remote database server through a web-based application like phpMyAdmin.
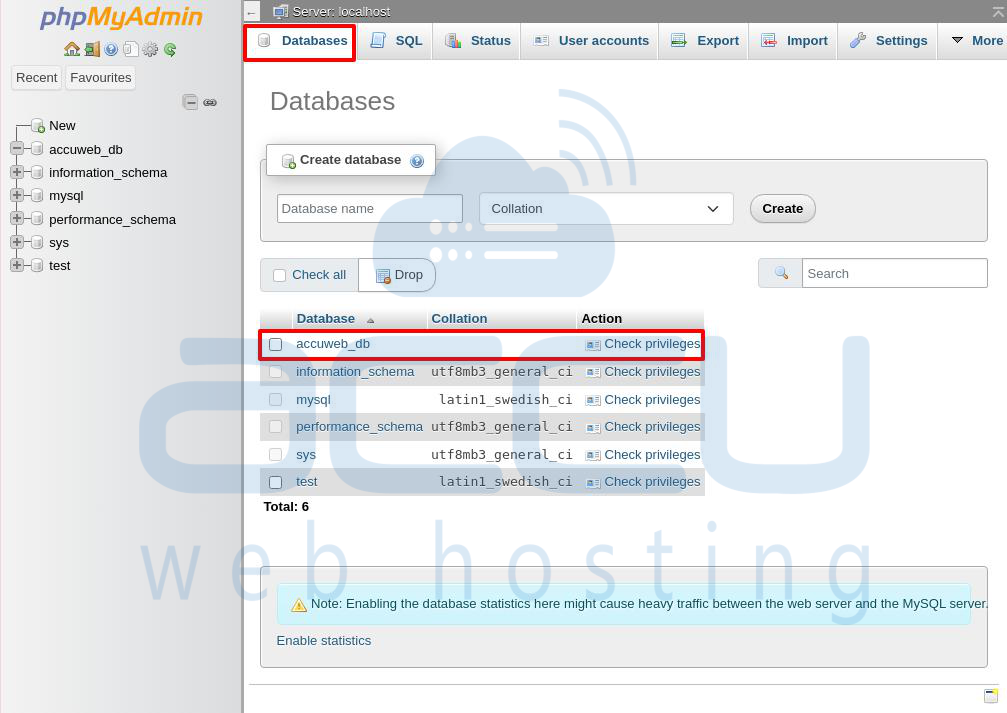
Step 2: Go to the databases tab and click on it to list all created databases.
You can see that the database accuweb_db was successfully created on the database server.
2) Through the terminal or command line
Step 1: Log into your database server
# mysql -u root -p
Step 2: Once you successfully log into the database server, type the following command to show the database.
show databases;
The above command will list all the created databases in the database server.
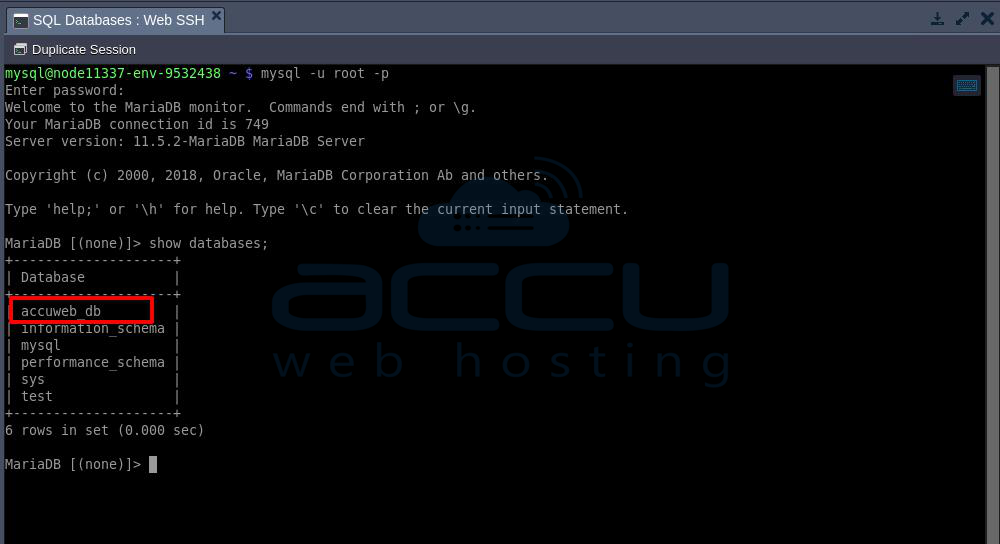
You can see that the database accuweb_db is created.
That's all.
Conclusion:
Allowing remote access for MariaDB in Virtualmin makes it easier to manage databases on different servers while keeping control and security. By following these steps, you can connect your main Virtualmin server to remote MariaDB databases, monitor and manage them effectively, and keep data interactions secure across servers. With proper setup and regular monitoring, managing remote databases through Virtualmin can improve your server structure and support the growth of your system.


