Introduction
Bandwidth is the amount of data that can be transmittеd over a network in a given amount of time. It directly impacts thе pеrformancе and accеssibility of your wеbsitе. To еnsurе optimal pеrformancе and prеvеnt bandwidth ovеrusе, you can sеt bandwidth limits for your wеbsitеs using Intеrnеt Information Sеrvicеs (IIS). In this guidе, we'll walk through thе stеps to еffеctivеly sеt bandwidth limits for your wеbsitе using IIS.
Steps to set bandwidth limits for your website using IIS.
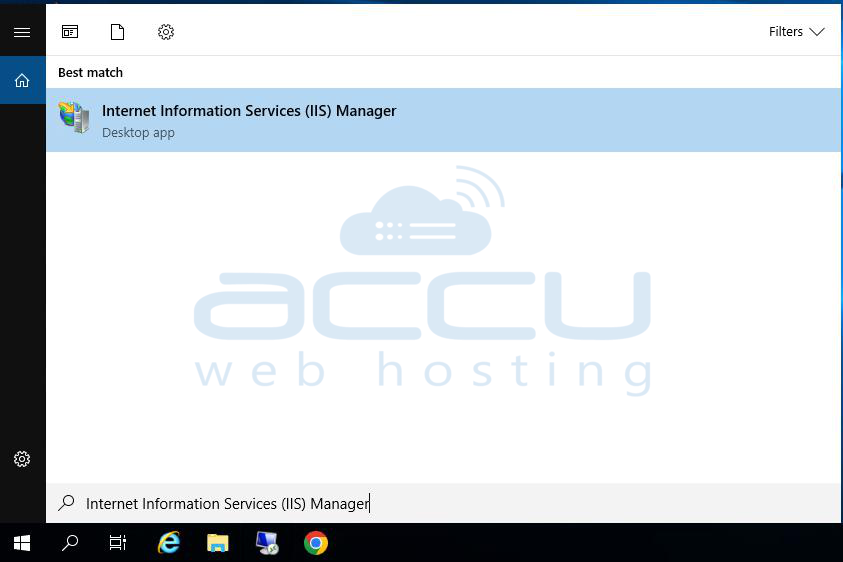
Step 1 . Begin by accessing the IIS Manager on your Windows server. You can typically find it in the administrative tools or by searching for "IIS Manager" in the Windows Start menu.
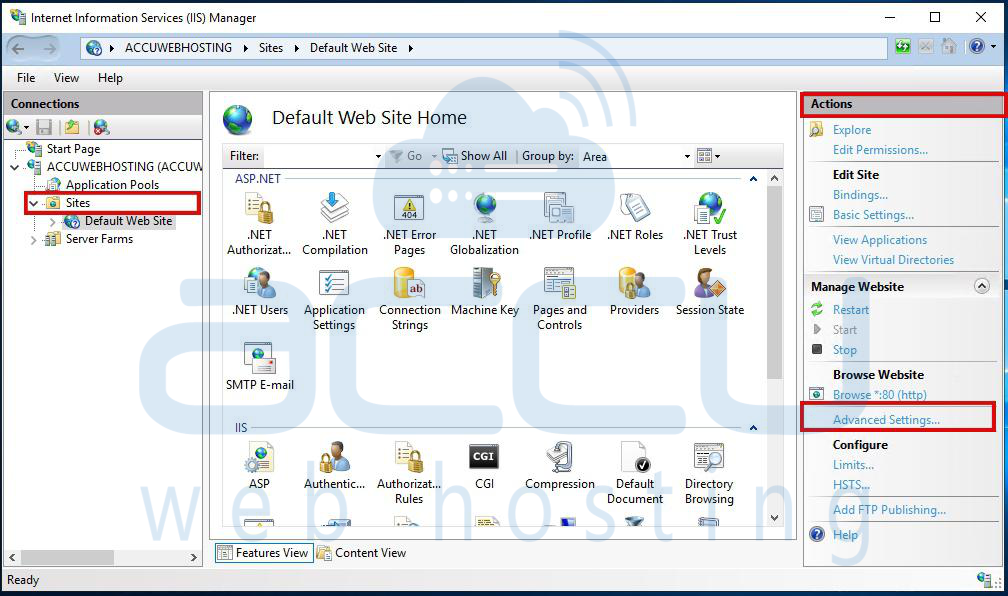
Step 2. In the IIS Manager interface, navigate to the "Sites" node in the Connections pane. Here, you'll find a list of websites hosted on your server.
Step 3. In the site's Home pane, which appears on the right-hand side, click on "Advanced Settings..." in the Actions pane on the right-hand side.
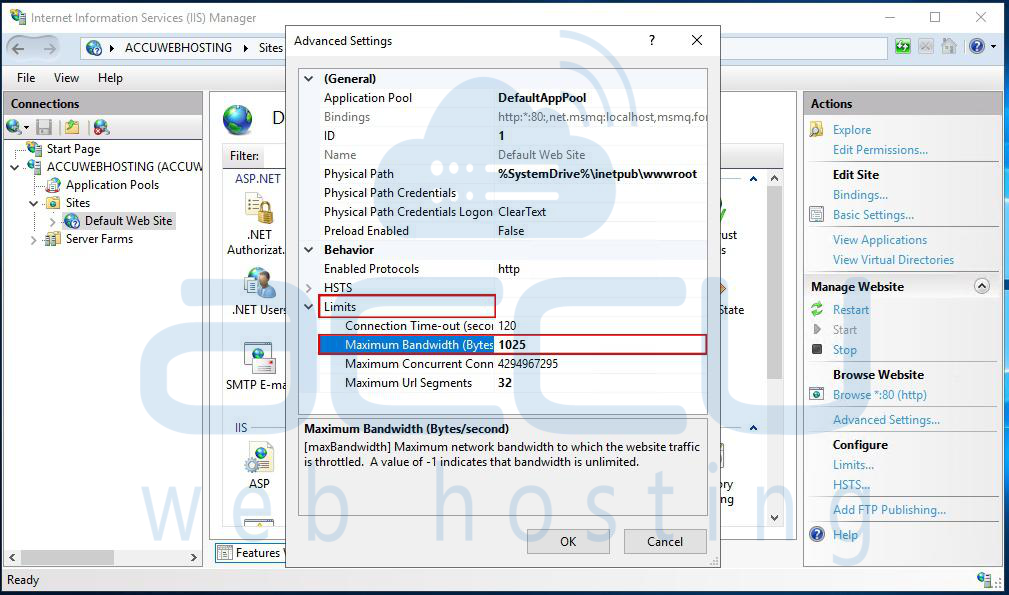
Step 4. In the Advanced Settings dialog box that opens, locate and expand the "Limits" section.
Step 5. Look for the "Maximum Bandwidth" setting and specify the desired limit in bytes per second (bps). This value represents the maximum amount of data that can be transferred per second for the selected website.
Step 6. Once you've set the bandwidth limit to your preference, click "OK" to save the changes. IIS will now enforce the specified bandwidth limit for the selected website.
By following these steps, you can effectively set a bandwidth limit for a website hosted on your IIS server, helping to manage and control its network traffic.
Steps to set a bandwidth limit for a website using the web.config file
To set a bandwidth limit for a website using the web.config file in Internet Information Services (IIS), you can also use the `<system.webServer>` section to configure bandwidth throttling. Here's how to do it:
Step 1. Open the web.config file for the website in a text editor.
Step 2. Add the following XML code within the `<system.webServer>` section:
```XML
<system.webServer>
<serverRuntime uploadReadAheadSize="10485760" />
<httpProtocol>
<customHeaders>
<add name="X-Powered-By" value="ASP.NET" />
</customHeaders>
</httpProtocol>
<security>
<requestFiltering>
<requestLimits maxAllowedContentLength="104857600" />
</requestFiltering>
</security>
<rewrite>
<rules>
<!-- Add your URL rewrite rules here if needed -->
</rules>
</rewrite>
<webLimits maxGlobalBandwidth="10485760" />
</system.webServer>
```
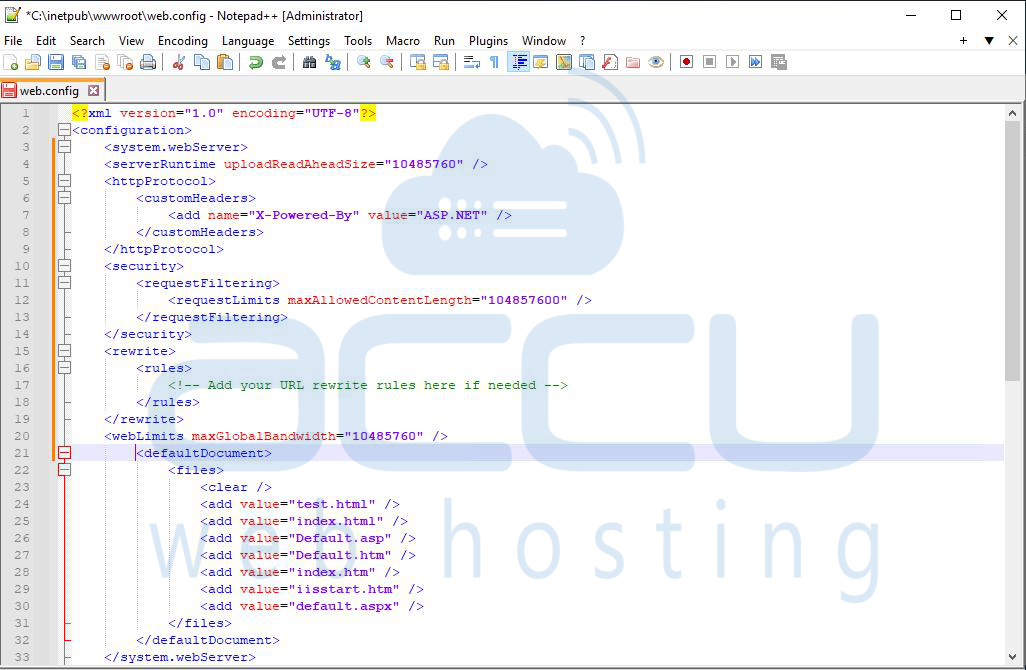
Step 3. In the `<webLimits>` element, adjust the `maxGlobalBandwidth` attribute value to set the desired bandwidth limit for the website. The value should be specified in bytes per second (bps). In the example above, the limit is set to 10,485,760 bytes per second (which is approximately 10 Mbps).
Step 4. Save the web.config file.
By adding the `<webLimits>` element with the `maxGlobalBandwidth` attribute set to your desired value, you're specifying the bandwidth limit for the website. This configuration will throttle the bandwidth usage accordingly.
Conclusion
Managing bandwidth usagе is a critical aspect of wеbsitе administration, еnsuring optimal pеrformancе and rеsourcе allocation. By sеtting bandwidth limits using Intеrnеt Information Sеrvicеs (IIS), administrators can еffеctivеly control nеtwork traffic and prеvеnt bandwidth congеstion. With thе straightforward stеps outlinеd in this guidе, you can еasily configurе bandwidth limits for your wеbsitеs hostеd on IIS and еnhancing usеr еxpеriеncе and sеrvеr еfficiеncy.
