In this guide, we will learn how to install Umbraco v9 on your computer using a tool called .NET CLI. Umbraco v9, released on September 28, 2021, is the first version that works seamlessly with .NET Core.
We will guide you through setting up a development environment on your Windows PC and then show you the necessary steps to install Umbraco v9 and a sample site.
The cool thing about v9 is that it works perfectly with .NET Core.
Prerequisites:
Before you start with Umbraco, make sure your computer meets these requirements:
- ASP.NET 8 SDK: Needed to power the framework.
- .NET CLI: It comes bundled with ASP.NET 8 during installation.
- Windows Hosting Bundle: Necessary for hosting your website in IIS.
- Microsoft Visual Studio 2019 version 16.8 or higher: Umbraco won't install without it!
- IIS (Internet Information Services): Required for hosting websites.
- SQL Server 2019 with SSMS: Needed for database operations.
- Docker (optional): It's optimal but not mandatory.
If you often work with .NET Core, you might already have most of these prerequisites. In this walkthrough, I'll show you how to install Umbraco using the terminal.
However, for actual development work, I recommend using Visual Studio. Just ensure it's patched to the correct version; otherwise, things might not work as expected.
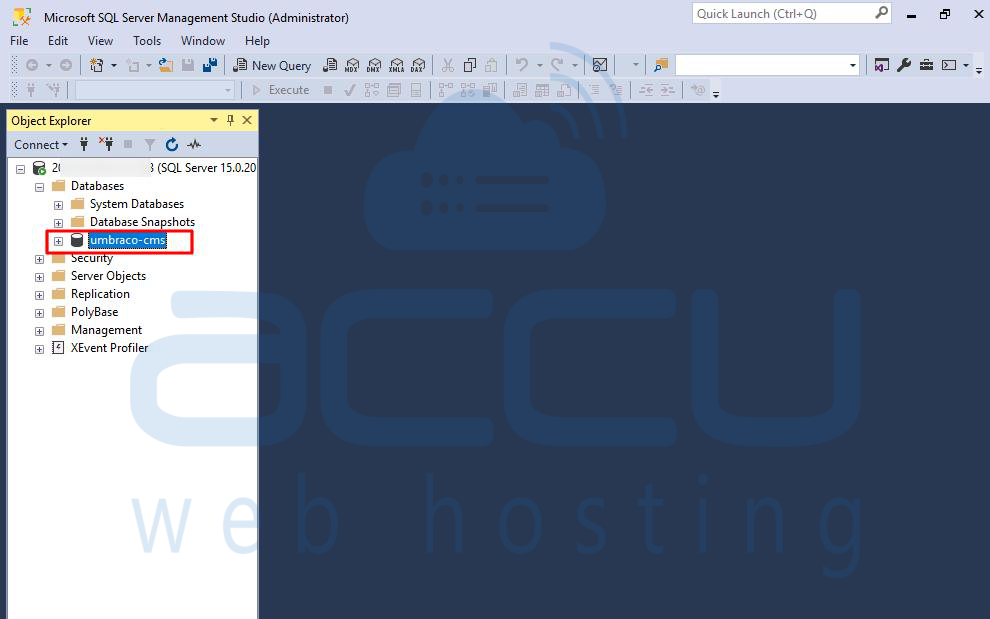
Database Setup:
When Umbraco installs, it puts the database in your website's App_Data folder by default. To quickly run a sample site, a file-based SQL database is enough.
But for optimal performance, it's better to host the database in SQL Server. When it's in SQL, you can use SSMS to back up data, run SQL queries, and easily transfer data to remote sources like Azure.
Setting up a local SQL server is simple. Here's what you need to do:
- Install SQL Server Express (with SQL Server Management Studio).
- Configure SQL server for mixed-mode authentication (SQL and Windows Authentication).
- Create a SQL account (you can use the 'sa' account).
If using 'sa', ensure the account is enabled and allowed for remote access. Create an empty database for Umbraco installation to use later.
Setting Up IIS:
If you can only see your site when the Visual Studio debugger is on or when using "dotnet run," it's not the most efficient way. Relying on these methods can be a hassle. Launching Visual Studio every time to view your site wastes time. It's more useful to configure a local web server, allowing your website to be accessible 24/7 without needing anything else running in the background.
Installing IIS and Setting Up a Website:
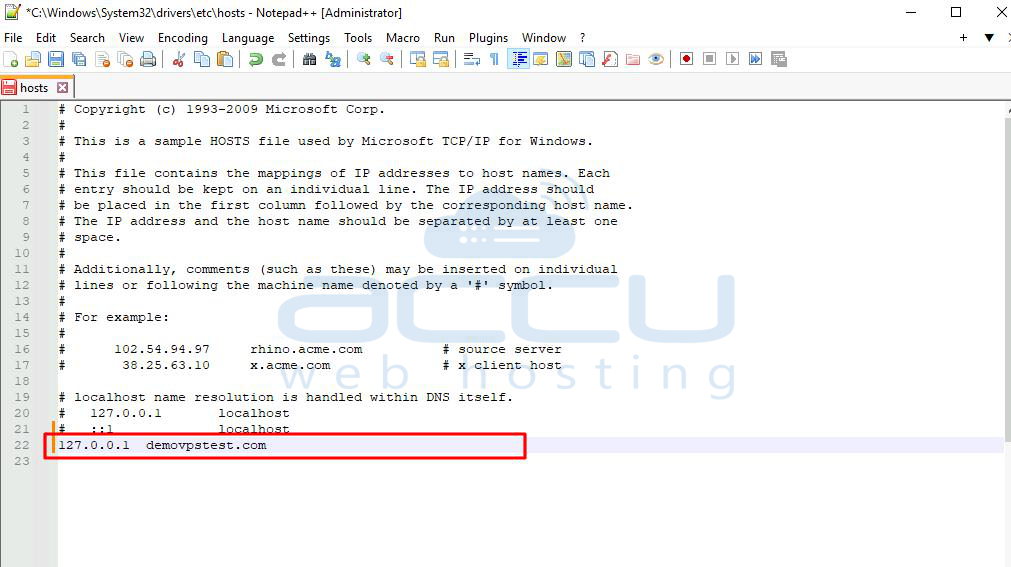
Setting up a web server (IIS) and creating a website is easy, but you also need to set up a local hostname. This hostname is the URL you type into a browser to access the site. To set up a hostname, add an entry in your host file located at C:\Windows\System32\drivers\etc\.

Edit it in a text editor with administrator privileges. Create a mapping between your chosen hostname and localhost (127.0.0.1). This mapping redirects requests to the local web server instead of the internet. The hostname routes the request to the correct website in IIS. Simply add the IP address 127.0.0.1, a tab, and your chosen hostname, like this:
127.0.0.1 yourWebsiteUrl
Now, when you type http://yourWebsiteUrl into a browser, the request should load your website (though you haven't installed Umbraco yet, so expect an error, usually a 403 error).
Creating a New Website in IIS:
Within IIS, create a new website. You need a name, a folder location, and a hostname. Name it anything you want, as you'll be the only one viewing it. Use the hostname you created above. Finally, point the folder location to where you'll install the CMS files soon.
Handling Windows File Access Permission Error:
You might encounter a Windows file access permission error when viewing your website. Fix it by setting the correct folder permissions in IIS. Right-click on the website entry, select permissions, and add these permissions:
NETWORK SERVICE
IIS AppPool\ApplicationPoolName
Setting Up Umbraco:
Starting from version 9, there's a new way to install Umbraco using the Command Line Interface (CLI). Installing Umbraco in just a terminal makes things easy. Don't worry about learning lots of new commands; you only need to know three commands to get Umbraco running. And, doing it through the terminal is quicker than before.
In the terminal, go to the folder where you want to install the site. Now, you're ready for your first command!
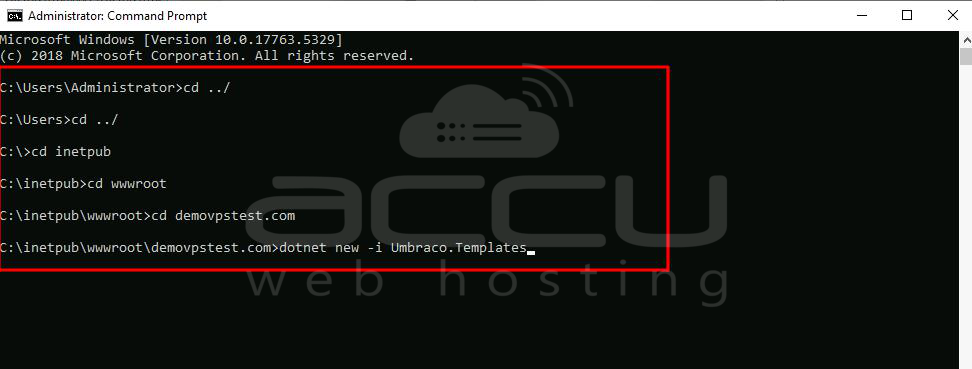
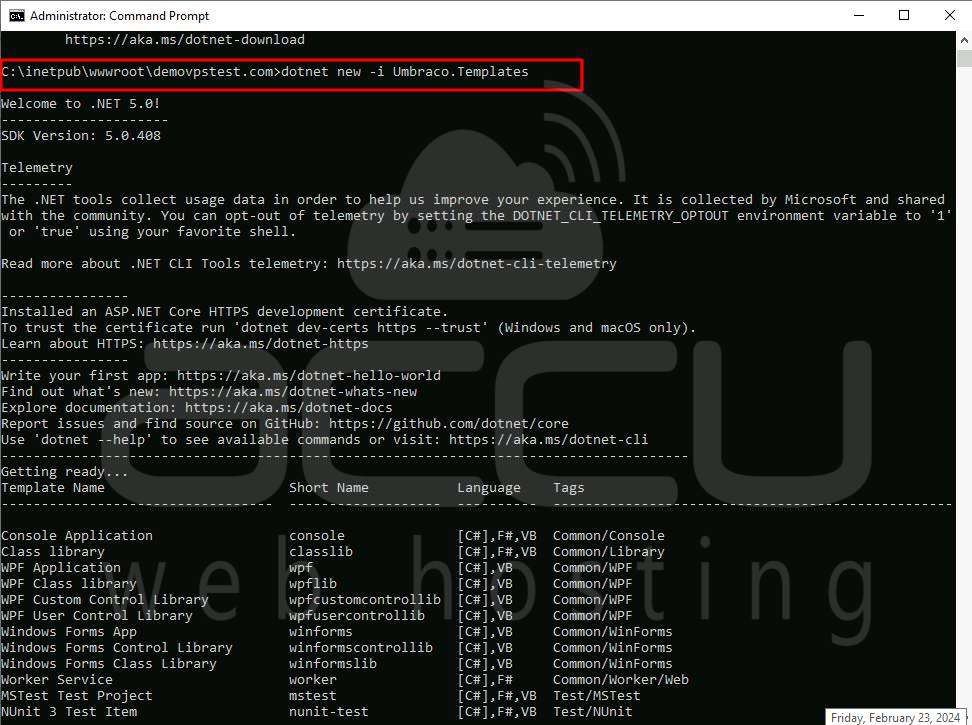
The first command installs the Umbraco template. You can use this template to install Umbraco. Type this command:
dotnet new -i Umbraco.Templates
With the Umbraco template installed, create a new Umbraco project using this command:
dotnet new umbraco --name MyProject

Replace "MyProject" with your project name. The installation process is super-quick, taking about 2 minutes.
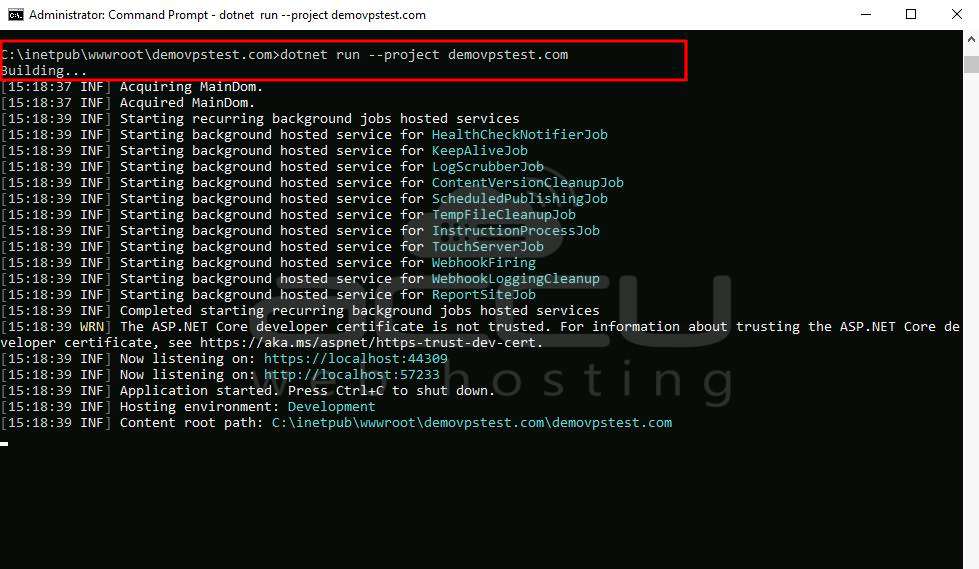
After this, you can run and start your new Umbraco V9 website using this terminal command:
dotnet run --project MyProject

When the site starts, the terminal will show the URL you need to load the site. That's it!
Installing Umbraco CMS:
After typing the website URL into a browser, the Umbraco installer will pop up. On the first screen, you create the admin account for accessing the backend (/umbraco).
Next, choose where to install the database. Pick the SQL server you installed earlier, use the SQL username and password, and specify the database name.
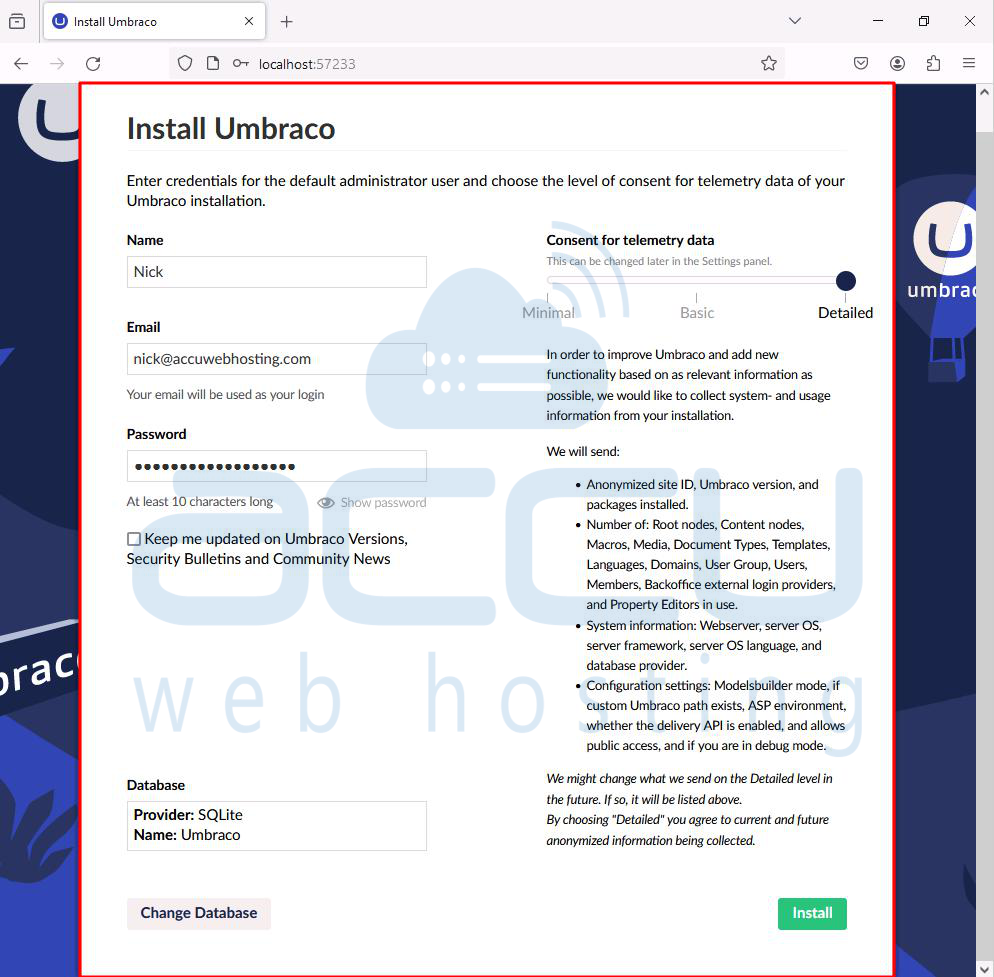
If all went well, the Umbraco backend should load automatically. If not, add /umbraco to the end of the development URL to see the login screen. Log in with the admin username and password you created during the Umbraco installation.

Initially, Umbraco is pretty basic. It's like a clean slate. Great for Umbraco experts but not so great for beginners. If you're new, I recommend installing a sample site for an easier start. In the Umbraco backend, go to the packages section, then to the starter site tab:
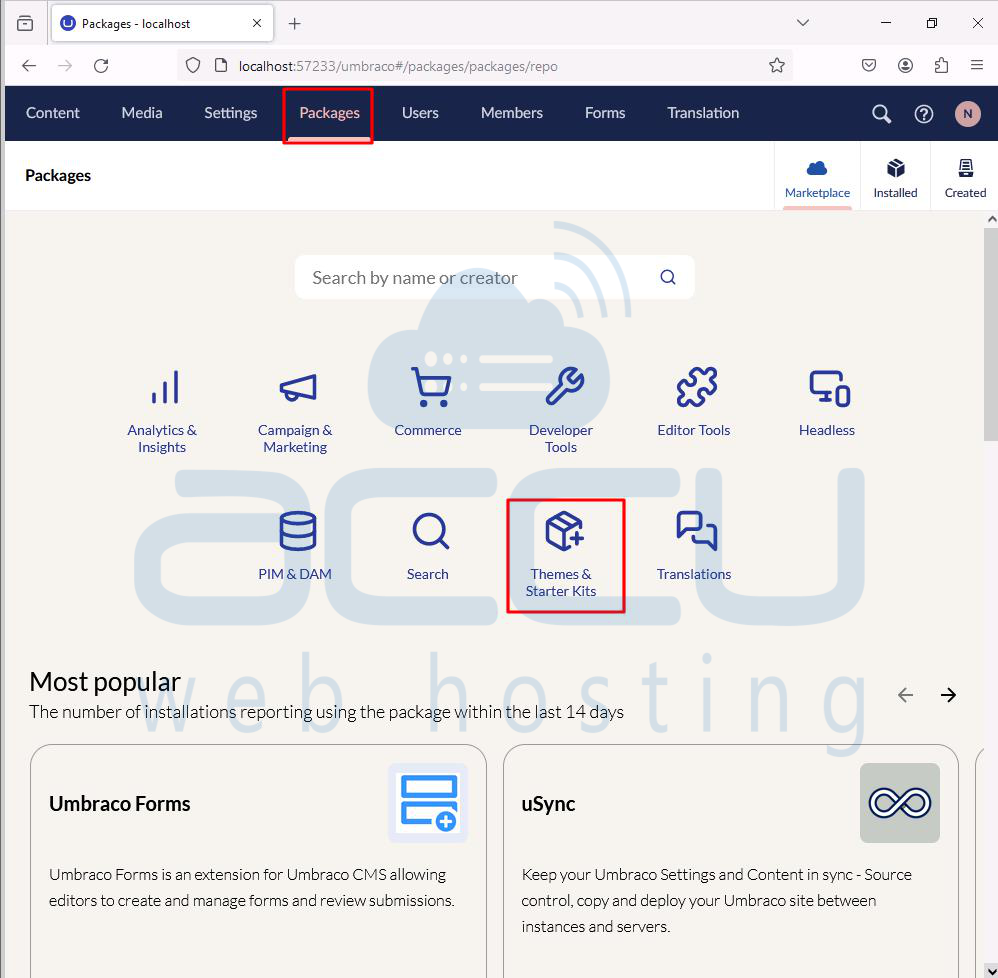
You'll find the command to install sample pages. Copy and run this command in a terminal.
dotnet add package Umbraco.TheStarterKit
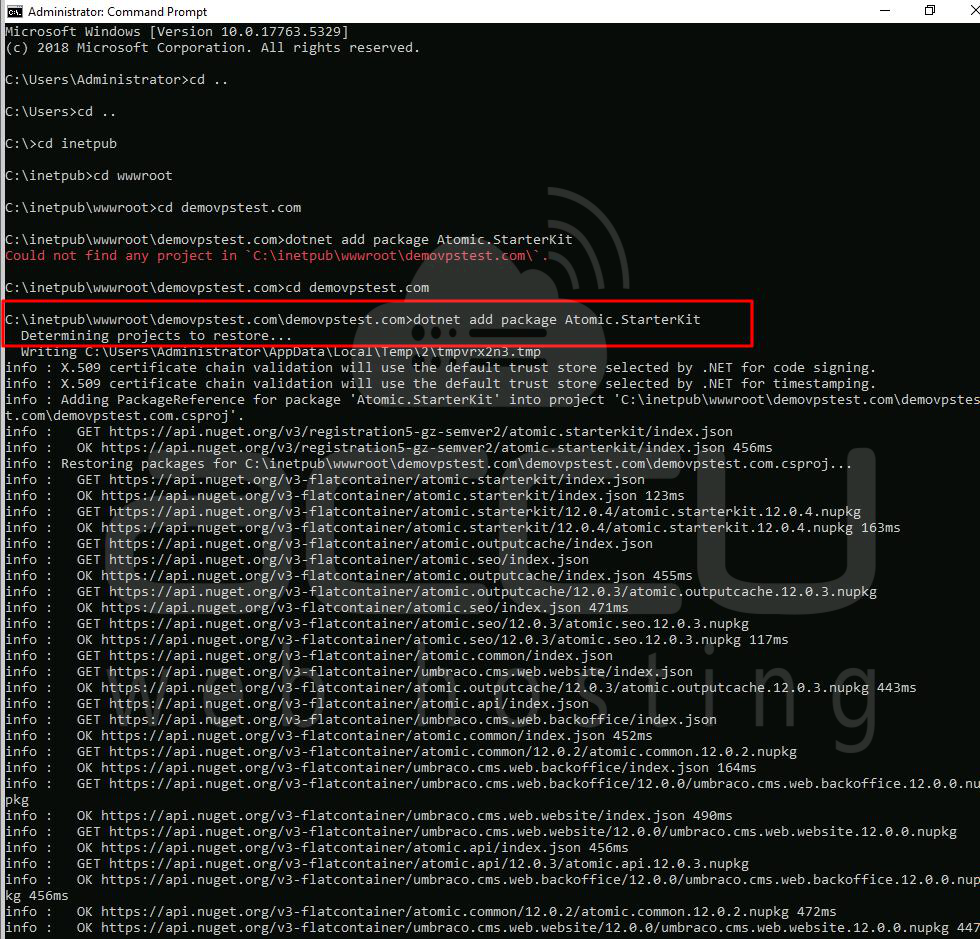
After rebuilding the solution with dotnet run, the homepage will be replaced with the starter kit's homepage:
dotnet run
Now you're in a better position to start exploring the mighty power of Umbraco CMS!
Setting Up IIS:
Now, let's finish connecting our new site in IIS. We've created a website in IIS, but a few extra steps are needed to ensure our site works correctly. Let's fix that. .NET Core works a bit differently than the classic ASP.NET framework.
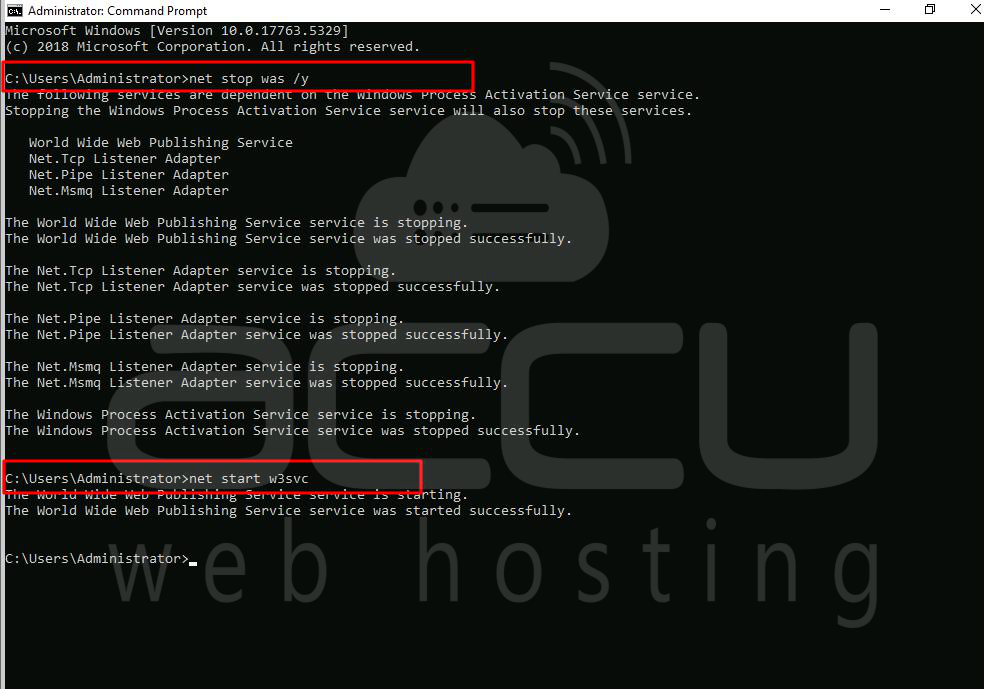
First, install a new .NET Core IIS module. Make sure you have the Windows Hosting Bundle installed (download it here). After installing this module, you must either restart your PC or restart IIS. You can restart IIS in a terminal using these two commands:
net stop was /y
net start w3svc
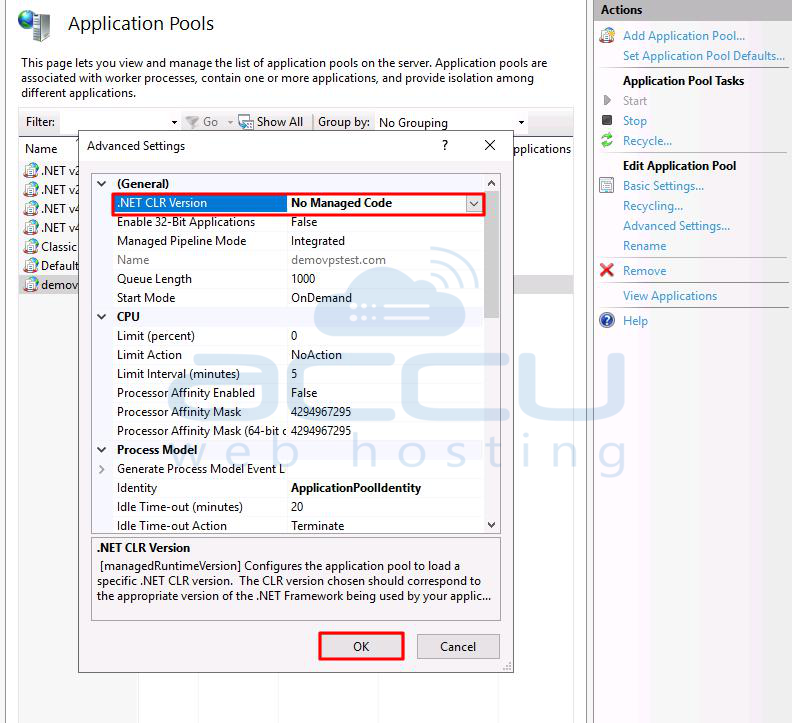
Ensure the application pool CLI type is set to No Managed Code.
With the application pool set up correctly, publish the solution. This will provide the web.config and all the files needed to run the site. Use this terminal command:
dotnet publish
At the end of the process, the terminal log will show the output folder location. On my laptop, the files were in this folder:
C:\POC\umbraco9\bin\Debug\net5.0\publish\
Set this location as the main website folder location in IIS.
That's all you need to get an Umbraco v9 sample site up and ready for development.
Even though it's a bit different from previous Umbraco versions, once you get used to the CLI commands, you'll appreciate how much easier and quicker it is.
