Many websites use SSL (Secure Socket Layer) for security. SSL encrypts the data sent between the website and your browser, making the site more secure.
It's important to have an SSL certificate because Google now ranks websites with HTTPS (HTTP + SSL) higher. Websites with only HTTP may be labeled as "unsafe" or "Not secure."
Method 1: How to install PAID SSL on Linux Ubuntu and Almalinux server without control panel
First we will show you how to create a CSR key and install an SSL Certificate on both Ubuntu and AlmaLinux servers.

A) How to generate a CSR key and install an SSL Certificate on Ubuntu Server without a control panel?
Generate a CSR key in Ubuntu Server
A CSR (Certificate Signing Request) is like a coded message you send to a Certificate Authority when you want an SSL Certificate. You usually create it on the server where the certificate will go and include details about your website and business, which get encoded into the certificate.
For an Ubuntu Apache server, you can use the secure shell (SSH) protocol to generate the CSR.
Step 1: Log into your server using the SSH command.
Step 2: Enter the following command to create the private key and CSR files:
# openssl req -new -newkey rsa:2048 -nodes -keyout yourdomain.key -out yourdomain.csr
Note: Replace "yourdomain" with your actual domain name, like demovpstest.com. Provide accurate details about your company to the Certificate Authority (CA). Use the examples below:
Country Name: Use the two-letter code for your country (e.g., "US" for the United States).
State or Province: Enter the full name of your state or province.
City or Locality: Provide the full name of your city.
Organization Name: For Business Validation and Extended Validation certificates, use your organization’s legal name (e.g., GPI Holding LLC). For Domain Validation certificates, use your full name.
Organizational Unit Name: Usually, it’s the department responsible for SSL management, like “IT” or “Web Administration”.
Common Name: Enter the fully qualified domain name (FQDN) you want to secure, like ssldragon.com.
Email Address: Provide a valid email address.
Challenge Password: Optional. You can create a password for extra security.
Optional Company Name: Add an optional name for your company.
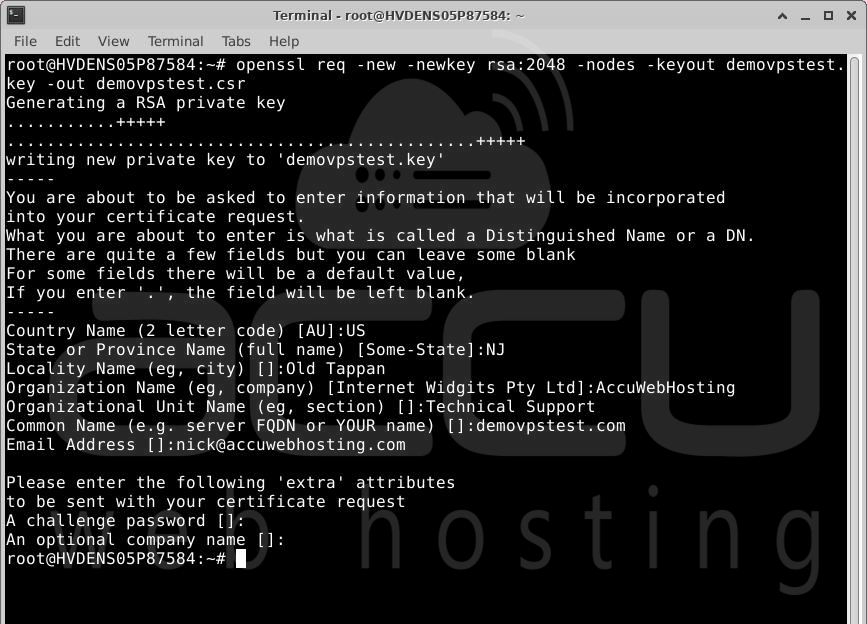
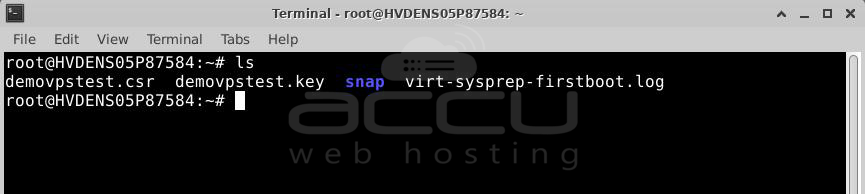
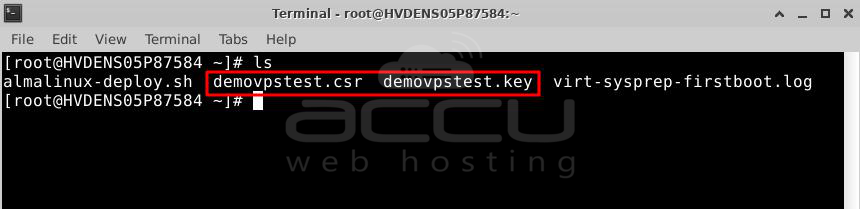
Congratulations! You’ve successfully created the CSR key. The newly generated files are yourdomain.csr and yourdomain.key. You can use the “ls” command to find them in your working directory. Open a text editor like Notepad to copy the CSR file and submit it to the CA during your order process.
Install an SSL Certificate on Ubuntu Server
Follow these steps to install your SSL certificate on Ubuntu. Make sure you don't miss any steps.
Step 1: Copy your certificate files to your server.
After the Certificate Authority validates your request, they'll send the SSL certificate files via email. Download the archived folder, extract the server and intermediate certificates (CA Bundle), and upload them to your Ubuntu server in a specific directory.
You should have these files ready for upload:
certificate.crt
ca-bundle.crt
private.key
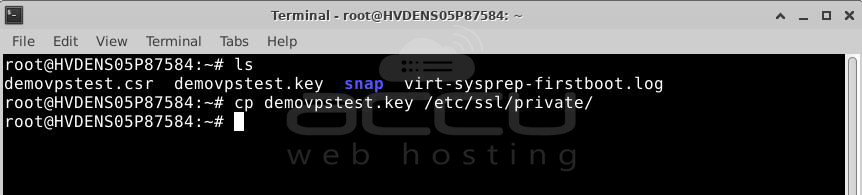
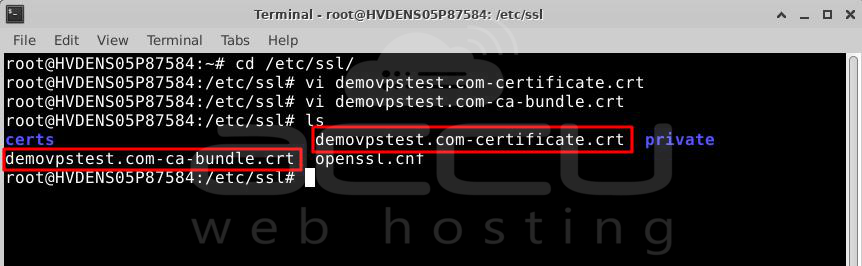
Copy these files to the /etc/ssl/ directory for certificate.crt and ca_bundle.crt, and /etc/ssl/private/ for private.key.
Step 2: Edit the Apache config file.
Find your Apache.config file in /etc/apache2/sites-enabled/your_site_name. If it's not there, run sudo a2ensite your_site_name. Open the file with a text editor.
Note: To use both HTTP and HTTPS, separate the files in the sites-enabled folder for port 80 (HTTP) and port 443 (HTTPS).

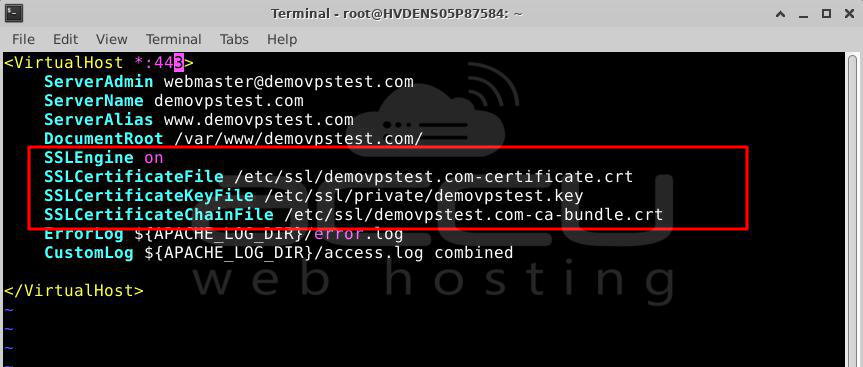
Step 3: Configure the Virtual Host block.
Make your site accessible only via HTTPS by adjusting the default Virtual Host block. Update these lines of code:
<VirtualHost *:443>
DocumentRoot /var/www/site
ServerName www.yourdomain.com
SSLEngine on
SSLCertificateFile /path/to/yourdomain.crt
SSLCertificateKeyFile /path/to/yourdomain.key
SSLCertificateChainFile /path/to/yourdomain.crt
</VirtualHost>
Update the parameters with your SSL certificate details. If SSLCertificateFile doesn't work, use SSLCACertificateFile.
Verify the block and save the .config file.
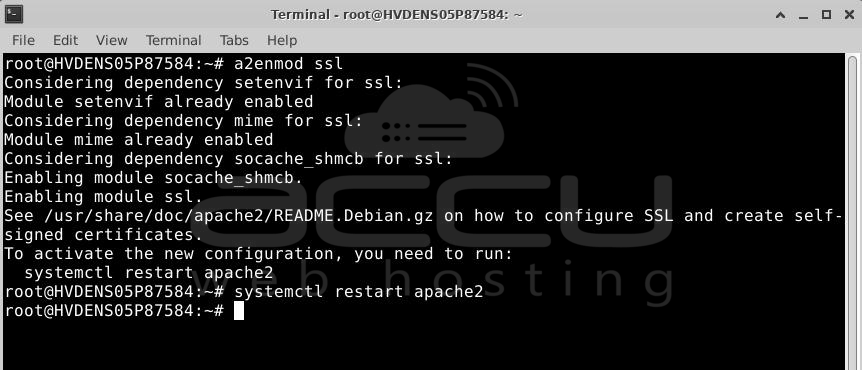
Step 4: Turn on SSL Module
SSL support is already included in the Apache package of Ubuntu 20.04. To use SSL on our system, we just need to activate it.
Activate the module by entering:
# a2enmod ssl
Once SSL is activated, you must restart the web server for the change to take effect:
# systemctl restart apache2
Now, our web server is ready to handle SSL if we set it up accordingly.
Step 5: Test your new .config file.
Run apachectl configtest to check for errors. If there's an issue, go back and repeat the previous steps. If all is fine, proceed to the next step.
Step 6: Restart Apache Service.
Restart the Apache service with systemctl restart apache2.

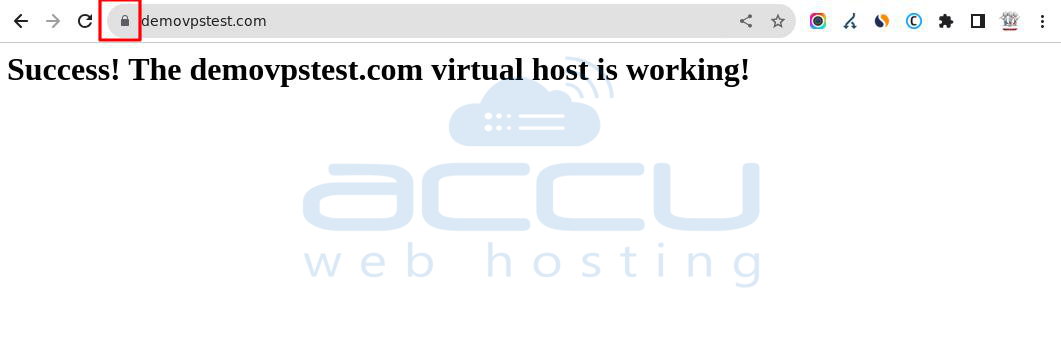
Congratulations! You've successfully installed your SSL certificate on your Ubuntu server. For further testing and status reports, you can use SSL Certificate tools.
B) How to generate a CSR key and install SSL Certificate on AlmaLinux Server without control panel?
Create a CSR Key on AlmaLinux Server
A CSR (Certificate Signing Request) is like a secret message you send to a Certificate Authority when you want an SSL Certificate for your website. You make this note on the server where the certificate will be used, and it contains information about your website and business that gets turned into the certificate.
For an Ubuntu Apache server, you can use a secure way called the secure shell (SSH) protocol to make this note.
Step 1: Log into your server using the SSH command.
Step 2: Type in this command to make the private key and CSR files:
# openssl req -new -newkey rsa:2048 -nodes -keyout yourdomain.key -out yourdomain.csr
Change "yourdomain" to your actual domain name, like demovpstest.com. Give accurate details about your company to the Certificate Authority (CA). Here are some examples:
Country Name: Use the two-letter code for your country (e.g., "US" for the United States).
State or Province: Write the full name of your state or province.
City or Locality: Provide the full name of your city.
Organization Name: For certain certificates, use your organization’s legal name (e.g., GPI Holding LLC). For others, use your full name.
Organizational Unit Name: Usually, it’s the department responsible for SSL management, like “IT” or “Web Administration”.
Common Name: Enter the fully qualified domain name (FQDN) you want to secure, like ssldragon.com.
Email Address: Give a valid email address.
Challenge Password: This is optional. You can create a password for more security.
Optional Company Name: Add an optional name for your company.

Congratulations! You’ve successfully made the CSR key. The new files you made are yourdomain.csr and yourdomain.key. You can use the “ls” command to find them in your working folder. Open a text editor like Notepad to copy the CSR file and give it to the CA when you order your certificate.
Install an SSL Certificate on AlmaLinux Server
Follow these steps to set up your SSL certificate on AlmaLinux. Make sure you follow each step carefully.
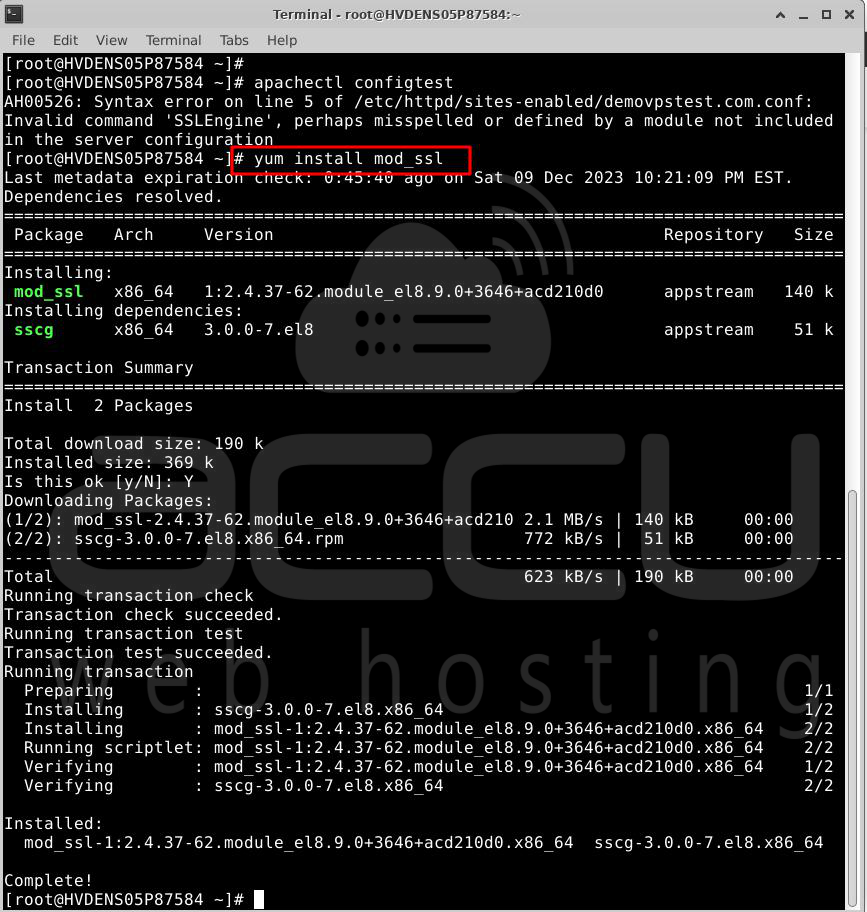
Step 1: Install mod_ssl on AlmaLinux
If you have the Apache web server, you can easily install the mod_ssl module using the DNF package manager available in the default repository for these RHEL-based Linux systems:
# dnf install mod_ssl
or
# yum install mod_ssl
Step 2: Enable mod_ssl on AlmaLinux 8
After installing the module, restart the Apache web server to enable it:
# systemctl restart httpd
Confirm that mod_SSL has been successfully enabled for Apache:
# apachectl -M | grep ssl
The output should be:
ssl_module (shared)
Step 3: Open port 443 in the firewall for Apache
As SSL (HTTPS) runs on port 443, open it in the AlmaLinux firewall to access it outside the server:
# firewall-cmd --add-service={http,https} --permanent
# firewall-cmd --reload
Now, you should be able to access the Apache web server or any active running website using the HTTPS protocol.
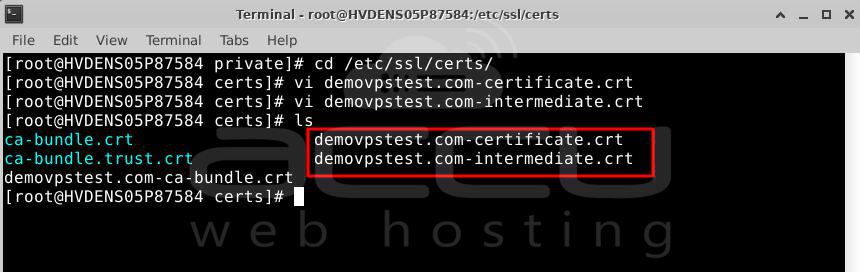
Step 5: Copy your certificate files to your server.
After the Certificate Authority validates your request, they'll send the SSL certificate files via email. Download the archived folder, extract the server and intermediate certificates (CA Bundle), and upload them to specific directories on your AlmaLinux server.
You should have these files ready for upload:
certificate.crt
intermediate.crt
ca-bundle.crt
private.key
Copy these files to the /etc/ssl/certs/ directory for certificate.crt and ca_bundle.crt, and /etc/ssl/private/ for private.key.

Step 6: Edit the Apache config file.
Locate your Apache.config file in /etc/httpd/sites-enabled/your_site_name. Open the file with a text editor.
Note: To use both HTTP and HTTPS, separate the files in the sites-enabled folder for port 80 (HTTP) and port 443 (HTTPS).

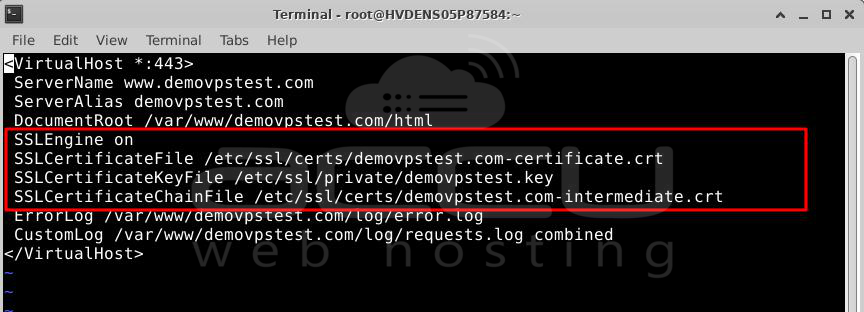
Step 7: Configure the Virtual Host block.
Make your site accessible only via HTTPS by adjusting the default Virtual Host block. Update these lines of code:
<VirtualHost *:443>
DocumentRoot /var/www/site
ServerName www.yourdomain.com
SSLEngine on
SSLCertificateFile /path/to/yourdomain.crt
SSLCertificateKeyFile /path/to/yourdomain.key
SSLCertificateChainFile /path/to/yourdomain.crt
</VirtualHost>
Update the parameters with your SSL certificate details. If SSLCertificateFile doesn't work, use SSLCACertificateFile.
Verify the block and save the .config file.
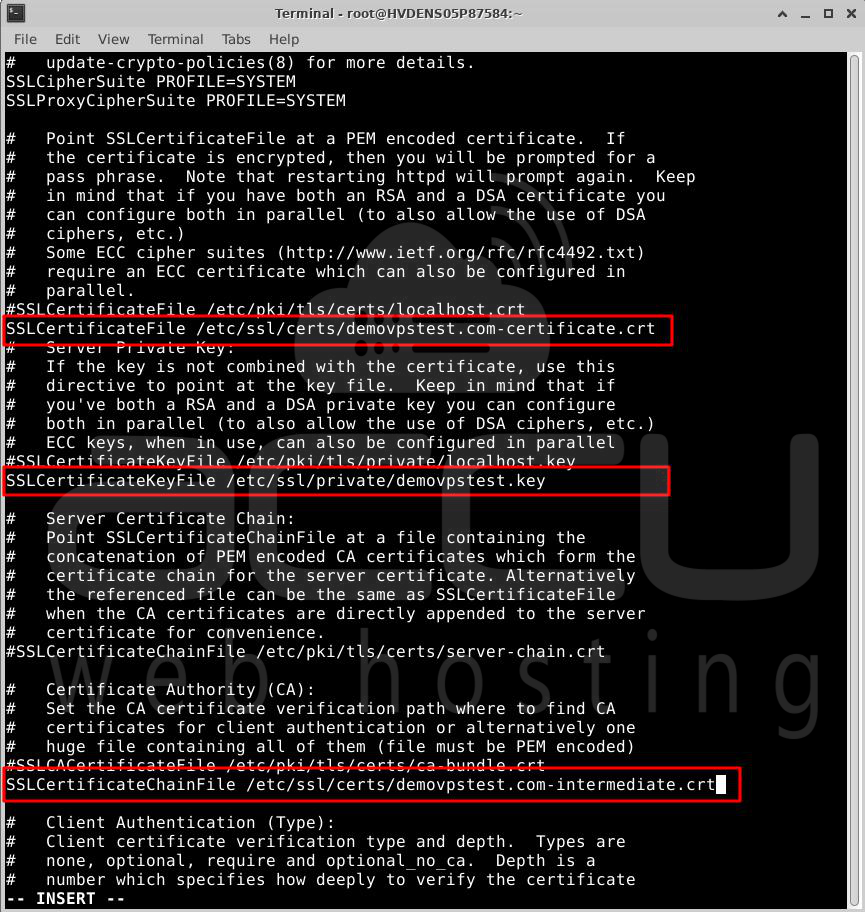
Step 8: Add the Certificate file along with the path in ssl.conf file (/etc/httpd/conf.d/ssl.conf)
Please navigate to the path /etc/httpd/conf.d/ssl.conf and open it in the vi edition.
# vi /etc/httpd/conf.d/ssl.conf

Add the following certificate file along with the path in the appropriate location.
SSLCertificateFile /path/to/yourdomain.crt
SSLCertificateKeyFile /path/to/yourdomain.key
SSLCertificateChainFile /path/to/yourdomain.crt
Afterward, save the file.
Step 9: Test your new .config file.
Run apachectl configtest to check for errors. If there's an issue, go back and repeat the previous steps. If all is fine, proceed to the next step.

Step 10: Restart Apache.
Restart the Apache service with systemctl restart apache2.

Congratulations! You've successfully installed your SSL certificate on your AlmaLinux server. For further testing and status reports, use recommended SSL tools.
That's all.
Method 2: How to install FREE SSL on Linux Ubuntu and Almalinux server without control panel
We will assume that you have an AlmaLinux system on the public Internet with a valid DNS A or CNAME record.
An A record directly associates a domain name with the IP of the device hosting that domain. A CNAME, or Canonical Name, is an alias for another domain.
To install an SSL certificate, you need to have a Web Server installed on your system.We'll be installing Nginx as our Web Server.
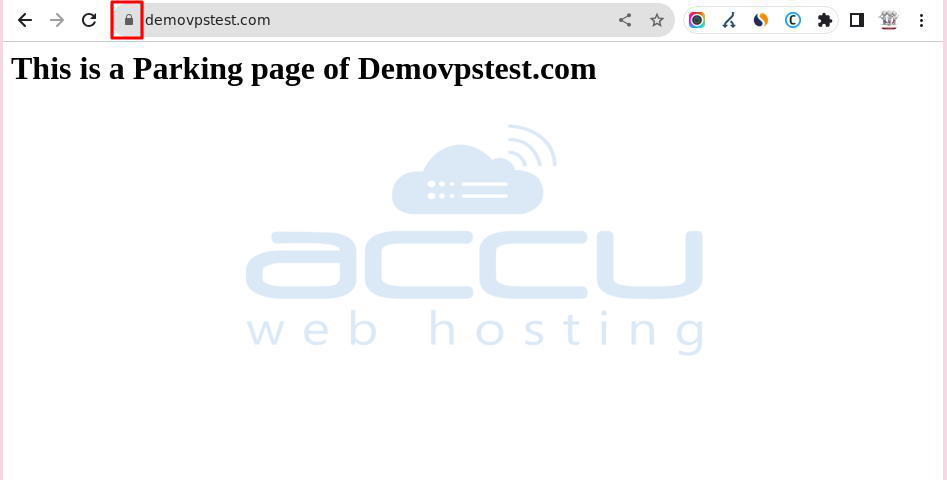
IMPORTANT: Below we will show you how to install an SSL certificate for the accutraining.demovpstest.com domain. While this domain is used in the tutorial, substitute it with your domain when following the steps.
Install On Ubuntu Server:
Step 1 — Installing Certbot
To get an SSL certificate with Let's Encrypt, the initial step is to install the Certbot software on your server. This can be done using the default Ubuntu package repositories.
We require two packages: certbot and python3-certbot-apache. The latter serves as a plugin that integrates Certbot with Apache, enabling the automation of getting a certificate & configuring HTTPS within your web server using a single command.
sudo apt install certbot python3-certbot-apache
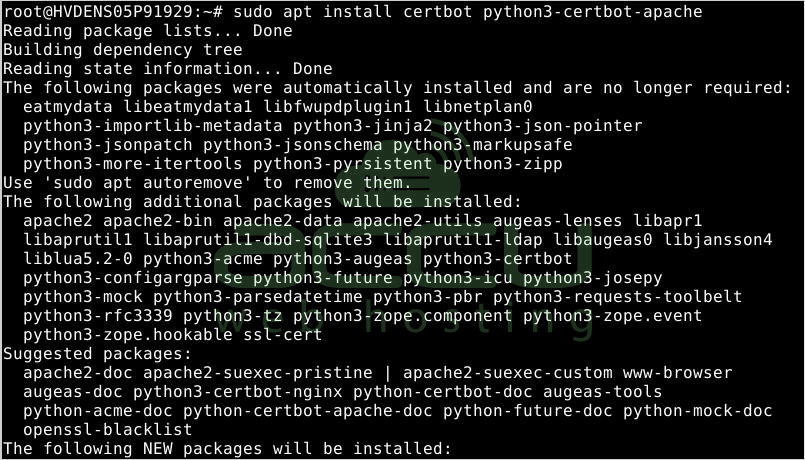
You will be asked to confirm the installation process by pressing Y and then ENTER.
Certbot has been successfully installed on your server. In the following step, we'll verify Apache's configuration to ensure your virtual host is set correctly. This ensures that the Certbot client script can identify your domains and automatically reconfigure your web server to utilize the newly generated SSL certificate.
Step 2 — Verifying Your Apache Virtual Host Configuration
Run the following command to test the Apache configuration:
sudo apache2ctl configtest

You should receive a "Syntax OK" response. If there's an error, check for typos or missing characters in the virtual host file (/etc/apache2/sites-available/your_domain.conf). Once you've confirmed the syntax is correct, reload Apache to apply the changes.
sudo systemctl reload apache2
With these modifications, Certbot will locate the appropriate VirtualHost block and make the necessary updates.
Following that, we'll make changes to the firewall to permit HTTPS traffic.
Step 3 — Enabling HTTPS in the Firewall
If you've enabled the UFW firewall, following the recommended prerequisites, you should modify the settings to permit HTTPS traffic. After installation, Apache establishes various UFW application profiles. You can utilize the Apache Full profile to enable HTTP and HTTPS traffic on your server.
To check the currently permitted traffic on your server, you can use:
sudo ufw status
The output you receive should resemble this:
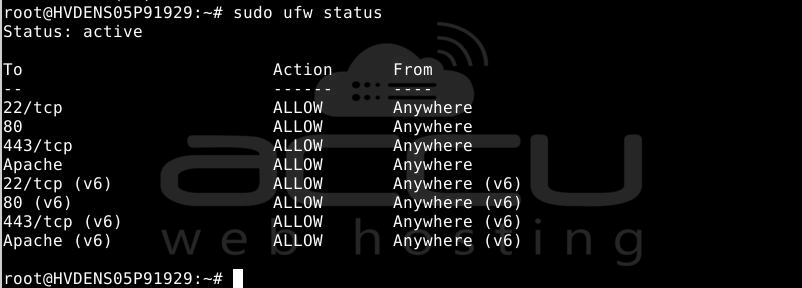
To permit HTTPS traffic as well, authorize the "Apache Full" profile and remove the unnecessary "Apache" profile:
sudo ufw allow 'Apache Full'
sudo ufw delete allow 'Apache'
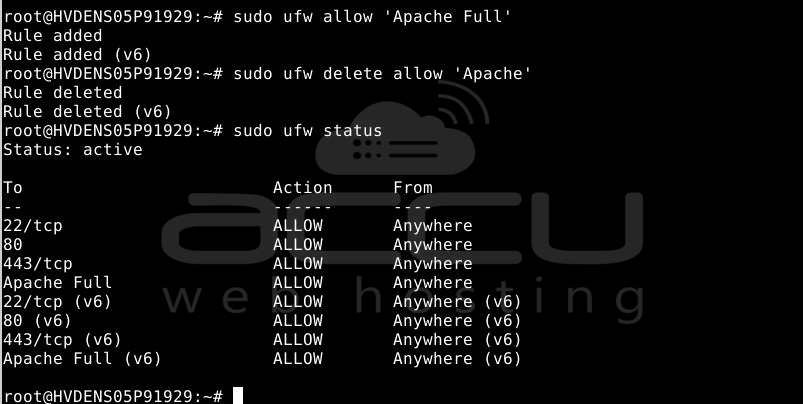
The status will now be displayed as follows:
Now, you can proceed to run Certbot and acquire your certificates.
Step 4 — Acquiring an SSL Certificate
Certbot offers various methods to obtain SSL certificates through plugins. The Apache plugin automatically handles the reconfiguration of Apache and reloads the configuration as needed. To utilize this plugin, enter the following command:
sudo certbot --apache
This script will ask you questions to set up your SSL certificate. Initially, it will request a valid email address, which will be used for renewal notifications and security notices:

After inputting a valid email address, press ENTER to move to the next step. You will then be asked to confirm whether you agree to the Let's Encrypt terms of service. Confirm by pressing A and then ENTER:]

Following that, you will be prompted to decide whether you wish to share your email with the Electronic Frontier Foundation to receive news & other information. If you don't wish to subscribe, type N. If you want to subscribe, type Y. Then, press ENTER to move to the next step.

If you encounter a situation where no names were found in your configuration file, include the domain name for which you intend to install the SSL certificate.

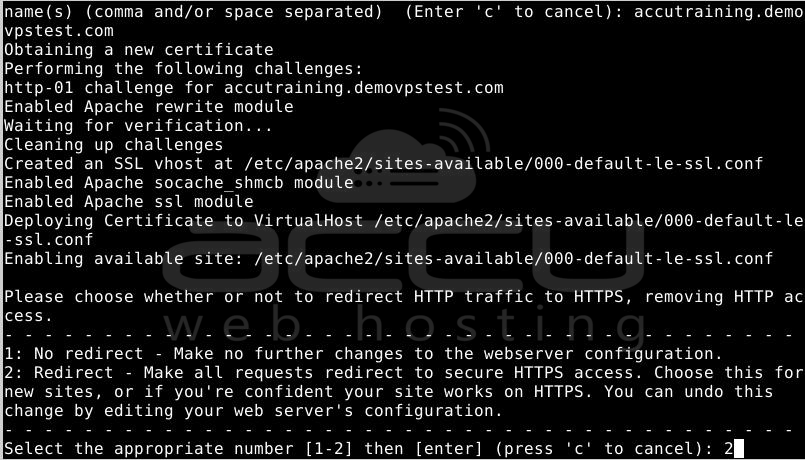
Next, you'll be asked whether you want to redirect HTTP traffic to HTTPS. When someone accesses your website through unencrypted channels (HTTP), they will be redirected to the HTTPS address. You can experience a seamless and secure environment with timely certificate renewals and minimal manual intervention. Select 2 to enable redirection, or choose 1 if you prefer to keep HTTP and HTTPS as separate ways to access your website.
Following this step, Certbot's configuration is complete, and you will receive final information about your new certificate, including the location of the generated files and instructions on how to test your configuration using an external tool to verify your certificate's authenticity.
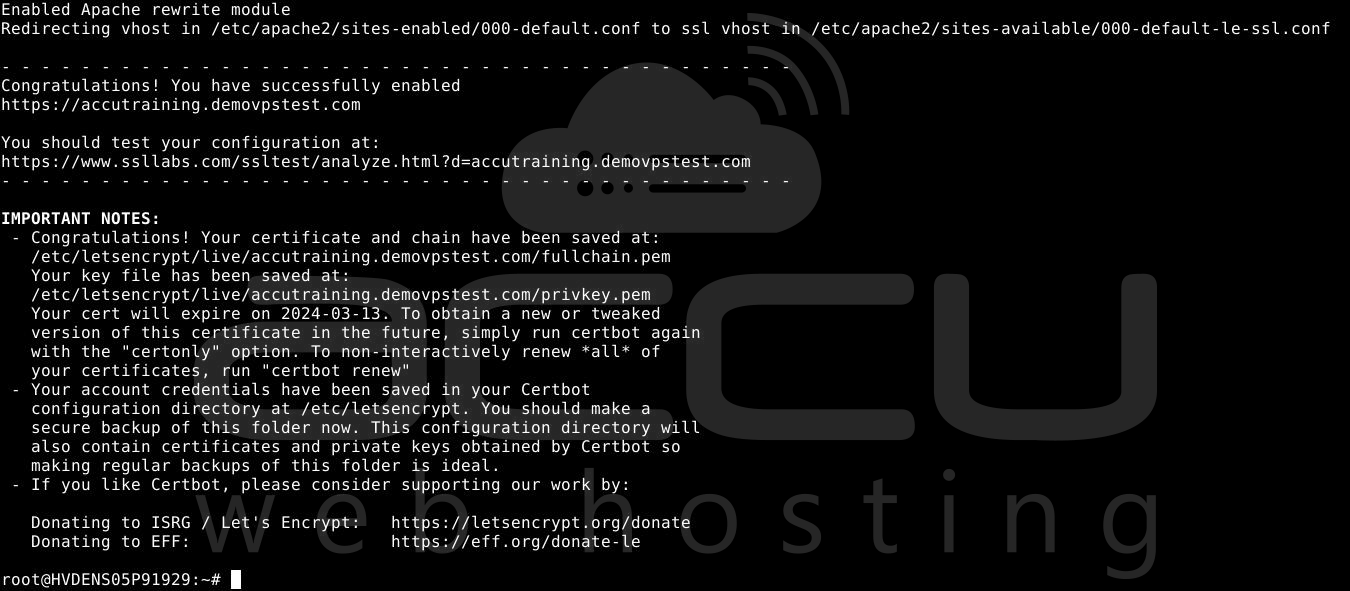
Your certificate is now installed and integrated into Apache's configuration. Attempt to reload your website using https:// and observe your browser's security indicator. It should indicate that your site is securely protected, usually by displaying a lock icon in the address bar.
You can employ the SSL Labs Server Test to check your certificate's grade and gather in-depth information about it from an external service perspective.
In the final step, we will test Certbot's auto-renewal feature, ensuring your certificate is automatically renewed before its expiration date.
Step 5 — Confirming Certbot Auto-Renewal
Certificates issued by Let's Encrypt have a validity period of only ninety days. This approach encourages users to automate the certificate renewal process and ensures that misused certificates or stolen keys expire relatively soon.
The certbot package we installed manages renewals through an included renew script in /etc/cron.d, overseen by a systemctl service named certbot.timer. This script runs twice daily and automatically renews any certificate with less than thirty days until expiration.
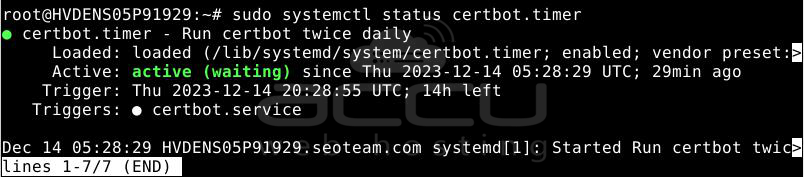
To verify the status of this service and ensure it's active and running, you can use:
sudo systemctl status certbot.timer
You will receive output similar to this:
To test the renewal process, you can perform a dry run with certbot:
sudo certbot renew --dry-run
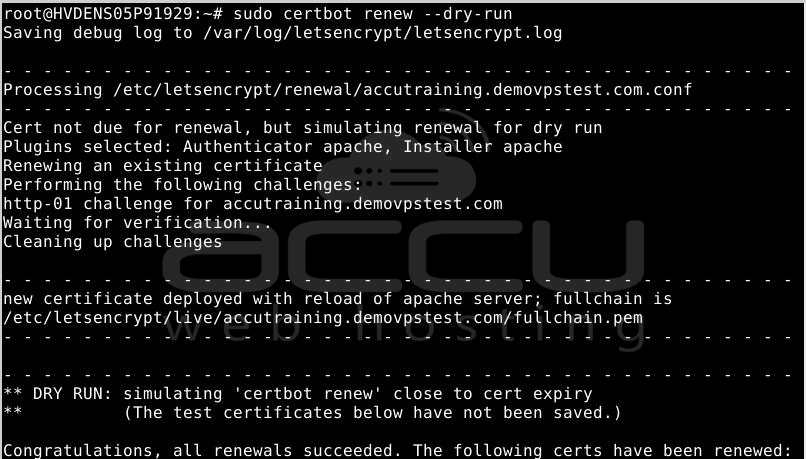
If you observe no errors, you are good to go. Certbot will handle the renewal of your certificates and reload Apache when required. In case the automated renewal process encounters any issues, Let's Encrypt will send a message to the email you provided, notifying you when your certificate is close to expiration.
Install SSL on AlmaLinux Server
Connect to the AlmaLinux Server as the Root User
Root privileges are necessary for many commands we'll be running. Log in to the Linux server as the root user. If you're logged in with another account, switch to the root account employing the "su" command:
su -
Set up & Configure the Nginx Web Server:
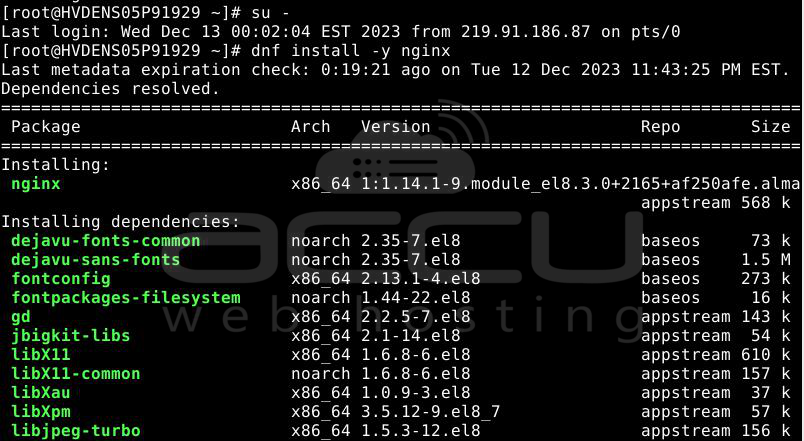
Install the Nginx Web Server:
dnf install -y nginx
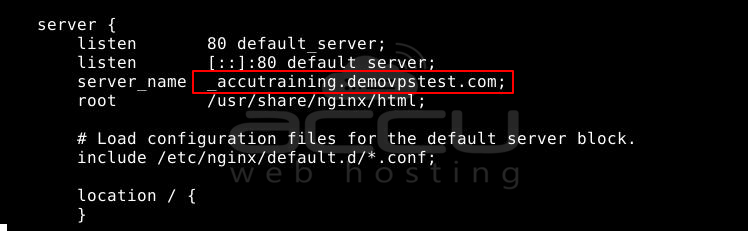
Next, you need to replace a line in the /etc/nginx/nginx.conf file. Open the file utilizing your preferred text editor.
vi /etc/nginx/nginx.conf
Locate the line that says:
server_name _;
Replace "_" with your domain name. Ensure to include a semicolon (;) after your domain at the end of the line:
server_name accutraining.demovpstest.com;
Verify for any syntax errors or typing mistakes using this command:
nginx -t

If you receive a message like "test failed," rectify your changes in the /etc/nginx/nginx.conf file and attempt the command again.
To ensure that the web server initiates during boot, you must enable it. Additionally, to start immediately, use the following command to accomplish both steps.
systemctl enable --now nginx

Confirm that the web server has started by checking its status.
systemctl status nginx
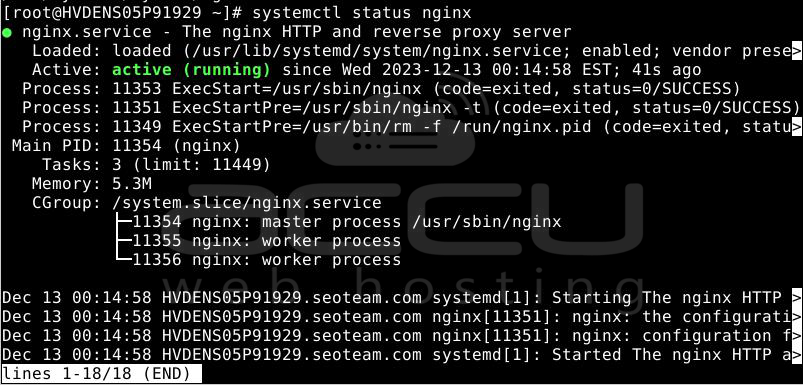
If Nginx is functioning correctly, you should observe something similar to this:
You can also employ the "is-active" option with "systemctl" to check if it is running.
systemctl is-active nginx
Enable Inbound Traffic for HTTP and HTTPS
If you're using the local Linux firewall, use the following commands to enable HTTP and HTTPS traffic:
firewall-cmd --permanent --zone=public --add-service=http

firewall-cmd --permanent --zone=public --add-service=https

firewall-cmd --reload

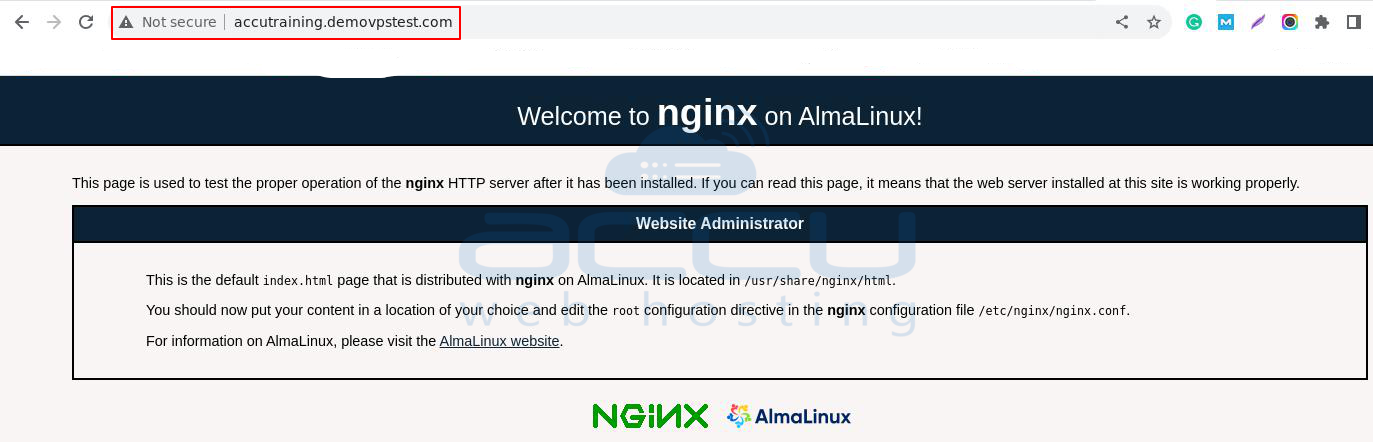
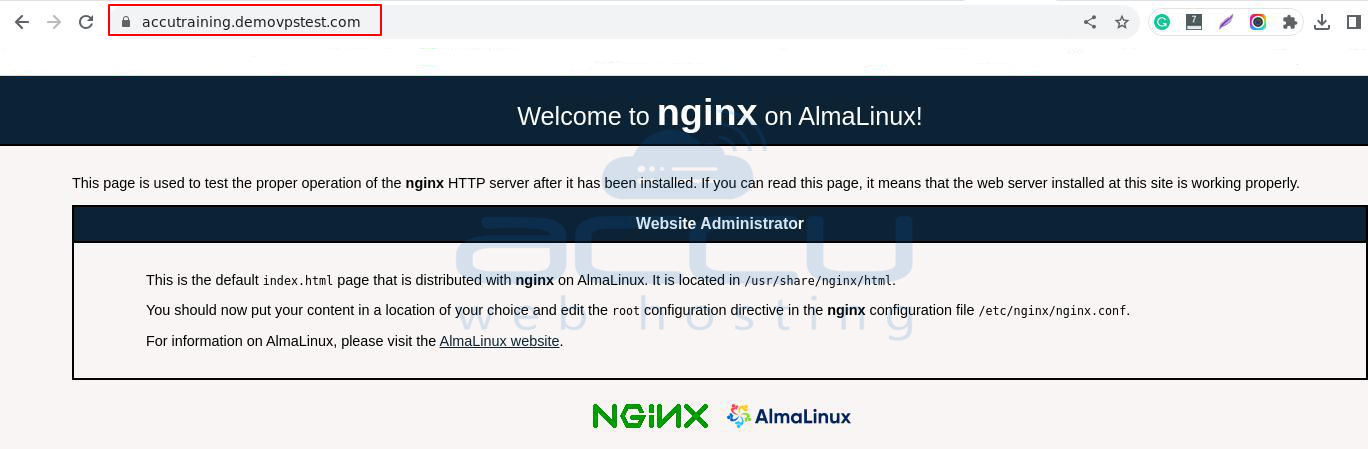
Check the functionality of the Web Server.
Open a web browser and navigate to your domain name. In this instance, I am using http://accutraining.demovpstest.com but use your domain.
You should be able to view a test page.
Now Install Certbot:
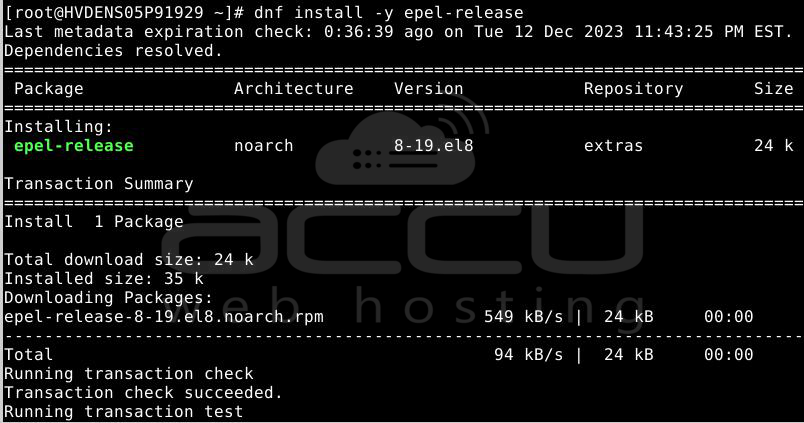
Step 1: Install the most recent EPEL release on the server:
sudo dnf install -y epel-release
Step 2: Now, install Certbot on the server.
sudo dnf install certbot python3-certbot-nginx

Step 3: To verify the successful installation of Certbot, check the version running by entering the following command:
certbot --version
The output will appear as follows:

After confirming that Certbot is available on the server, we can install the Let's Encrypt SSL certificate to secure your domain. Execute the following command:
sudo certbot --nginx

After inputting a valid email address, press ENTER to move to the next step.
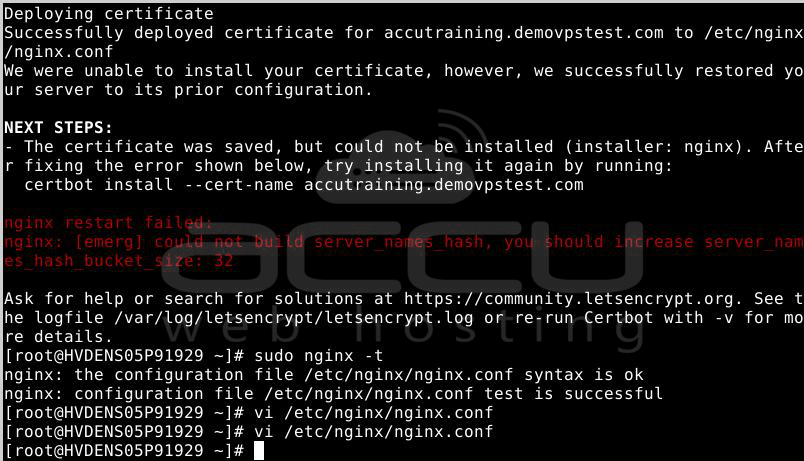
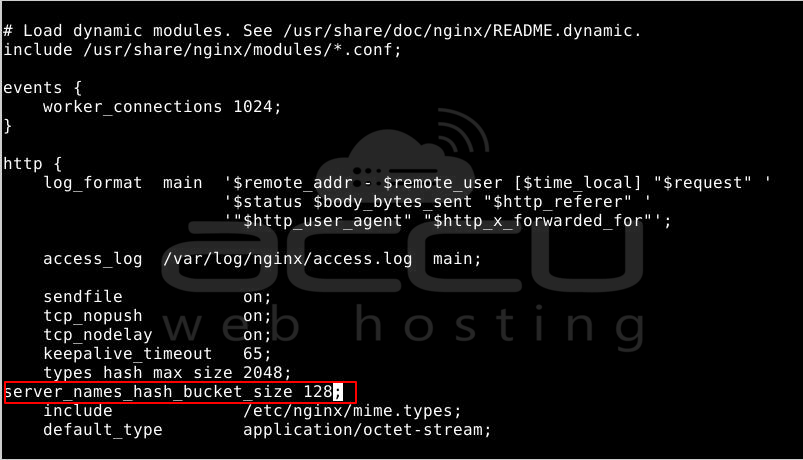
If you encounter an error like "nginx restart failed: nginx: [emerg] could not build server_names_hash," you should increase server_names_hash_bucket_size to 32. In this case, it's likely due to the long domain name. You can resolve this by adding "server_names_hash_bucket_size 64" in the http block, typically found in /etc/nginx/nginx.conf.
Type the above command again: sudo certbot --nginx
Select the appropriate option as needed.
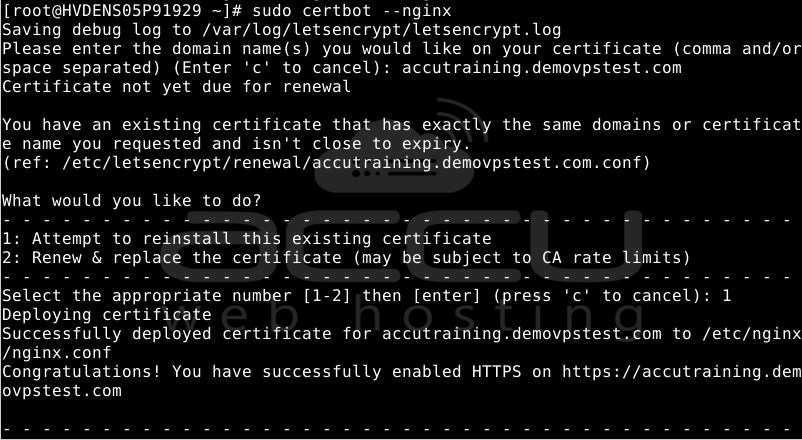
With these configurations in place, the SSL setup for your domain should be finished.
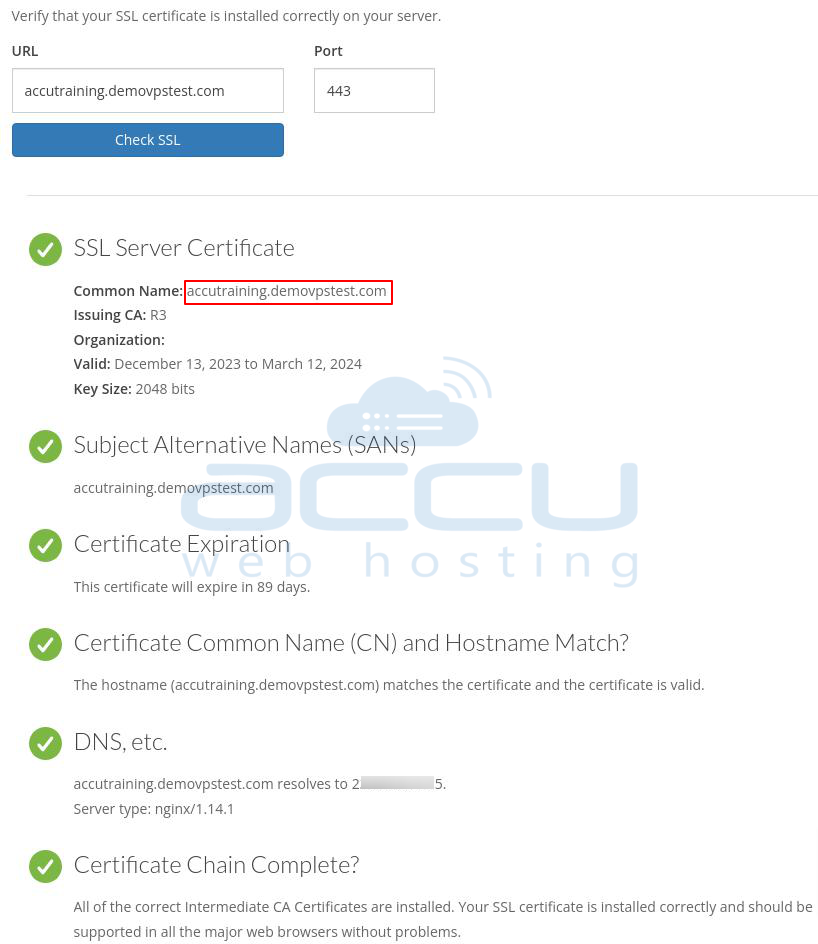
To verify the SSL status, consider using the SSL Checker provided by Geocerts, or you can verify it by opening a web browser and navigating to your domain name: https://accutraining.demovpstest.com.
Conclusion:
By following these steps, you can successfully install an SSL certificate on an Ubuntu and Almalinux server without relying on a control panel. Always remember to replace placeholders with your actual domain and file paths during the process.
