Usually, when you set up a Linux system or make a virtual machine, the computer/server gets a name. But sometimes you might have to change it. Having the same name for multiple computers/servers in a network can cause problems. This makes people change the hostname. There are other reasons too, like when the network has issues or the computer isn't recognized by its name.
In this article, we'll find out how to change the hostname name in popular Linux systems like Ubuntu, Debian, and CentOS.
What is a Hostname?
A hostname is like a name for a computer on a network. Every device on the network needs to have its own unique hostname.
The hostname can be a simple name with letters, numbers, dots, and hyphens. If the computer is connected to the Internet, like a web or mail server, it's better to use a fully qualified domain name (FQDN) as the hostname. The FQDN has two parts: the hostname and the domain name.
Prerequisite
-> To do the steps in this guide, you should have a server or Linux VPS that uses Ubuntu, Debian, or CentOS.
-> You also need special permissions called root privileges to run the commands that change the hostname. Make sure your server has a text editor like Vim installed too.
Permanently Changing Hostname in Ubuntu, Debian, and CentOS
In this part of the article, you'll learn how to permanently change the current name of your computer in popular Linux systems like Ubuntu, Debian, and CentOS. We'll do this through the terminal using different methods, including commands like hostnamectl, nmtui, and by editing configuration files.
Method 1: Changing Hostname with hostnamectl (No Need to Restart)
The hostnamectl command is a well-known way to change the computer's name and related settings in modern Linux systems managed by systemd. This first method uses the hostnamectl command, which is available by default in most Linux systems. The commands are the same for Ubuntu and CentOS, with the only difference being in how you use their package manager.
1. Installing systemd (if not available):
If your system isn't a modern Linux distribution and isn't managed by systemd, you need to install it to use the hostnamectl command:
# apt-get install systemd
2. Checking the current hostname:
Find out the current hostname in Ubuntu and CentOS with one of these commands:
# hostname
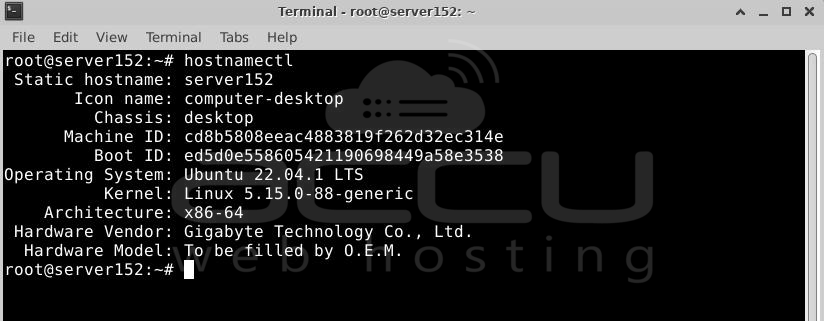
This command shows the current static hostname. For more details about the hostname and your device, use:
hostnamectl

3. Permanently changing the hostname:
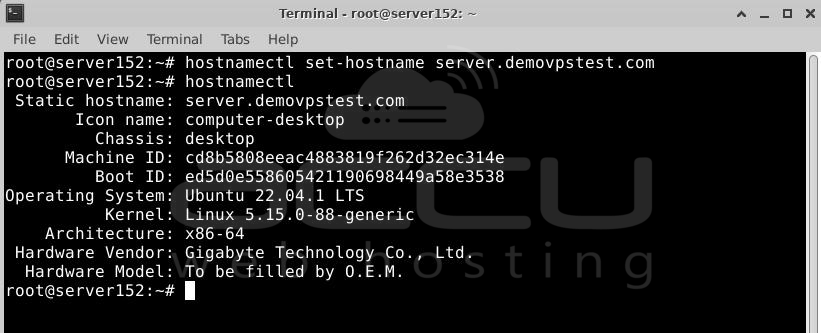
Set the new and fully qualified static hostname with this command:
# hostnamectl set-hostname new-hostname
If the command is successful, there won't be any output. Make sure the new hostname follows certain rules, like being between 2 and 64 characters and using lowercase letters, numbers, periods, and hyphens.

4. Confirming the change:
Since there's no output after setting a new hostname, confirm the change with:
# hostnamectl
This command should show the new hostname, confirming the change.
Method 2: Changing the hostname in Linux using nmtui
In this method, we will see how to change the hostname in Linux using the nmtui command. nmtui stands for Network Manager Text User Interface, and it's a simple, text-based way to manage network connections on Linux. It lets you set your computer's name through the terminal. This is helpful for configuring network settings on servers. Most Linux distributions support the nmtui command. Here's how to use it to change the hostname in Ubuntu 20.04:
1. Install nmtui package:
After connecting to the server using SSH, go to the terminal and install the NetworkManager-tui package and nmtui dependencies in CentOS:
# apt install -y network-manager
Type 'Y' and press Enter when prompted. "Complete!" will confirm a successful installation.

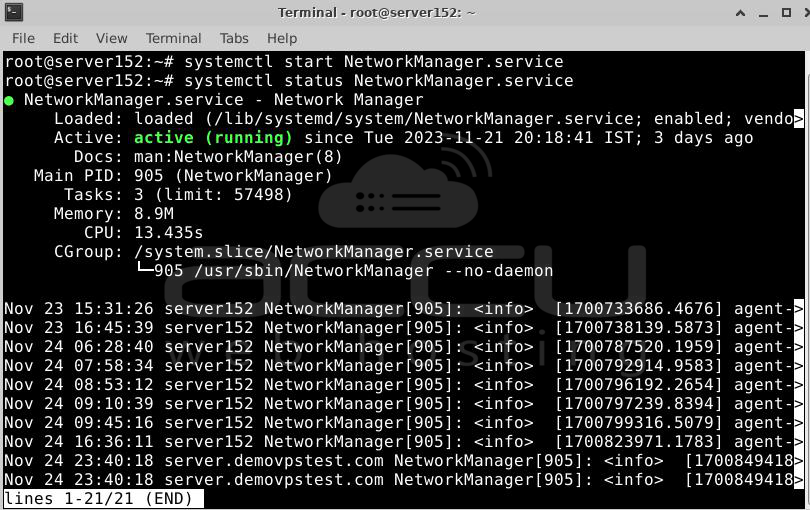
2. Check the network manager:
Make sure the installation was successful by checking the Network Manager's status:
# systemctl status NetworkManager.service
3. Start nmtui service:
Start the nmtui service with:
systemctl start NetworkManager.service
Then, use the following command to access the nmtui text-based interface for changing the hostname:
# nmtui
4. Change the hostname:
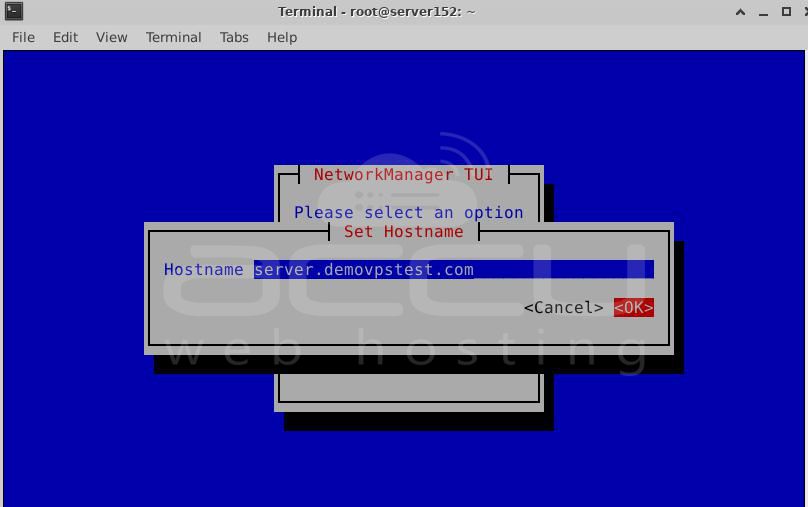
Navigate through the options in the TUI NetworkManager window, choose "Set system hostname," and press Enter.
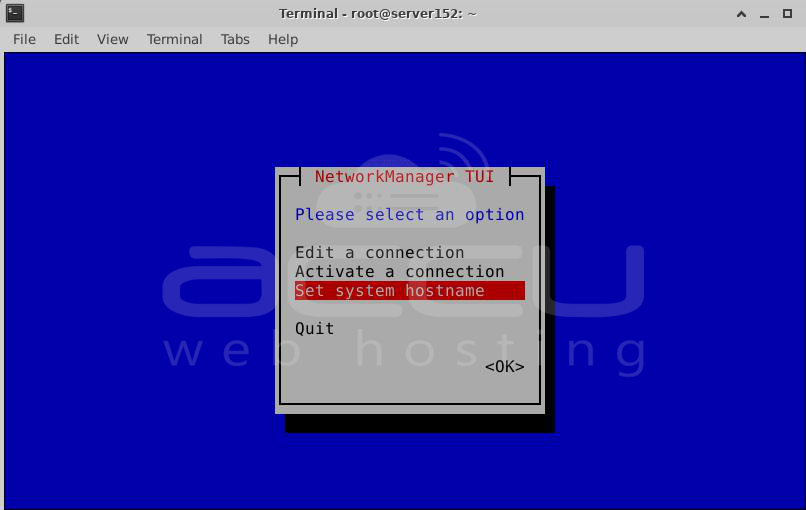
Enter your desired valid hostname and select OK to apply the changes.
Changing the hostname in Centos and Debian using the nmtui command follows the same steps as in Ubuntu, with the only difference being the package manager used.
Method 3: Changing the hostname in Linux by Editing Configuration Files (Requires Reboot)
In the article, you've learned two ways to change your computer's name using the nmtui and hostnamectl commands in Linux. Now, there's a simpler third method. You can permanently change the hostname in Ubuntu, Debian, and CentOS by editing the /etc/hosts and /etc/hostname files, which store the static hostname.
Follow these steps to change the hostname by editing the configuration files:
1. Open the /etc/hostname file:
Use your favorite editor to open the /etc/hostname file:
vi /etc/hostname

Inside, update the old hostname to the new one, save your changes, and exit.

2. Open the /etc/hosts file:
Similar to step 1, open the /etc/hosts file with your preferred editor and replace the old hostname with the new one:
# vi /etc/hosts

After making the change, save and exit.

3. Edit the cloud configuration file:
To apply the changes after system startup, edit the cloud configuration file. Access it with the following command:
# vi /etc/cloud/cloud.cfg

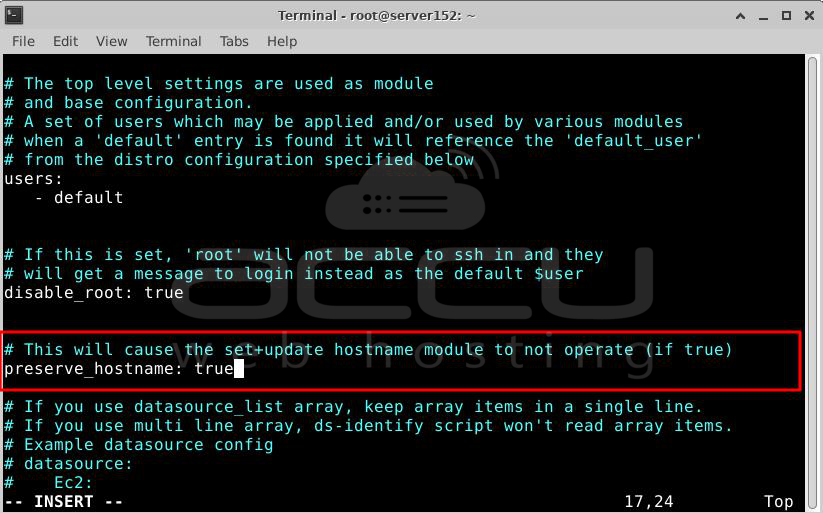
4. Make changes in the cloud configuration file:
After opening the file, change the value of the line containing "preserve_hostname" to true:
preserve_hostname: true
5. Reboot the system:
Apply the changes by rebooting the system:
# reboot

6. Confirm the change:
Check that the changes are preserved after rebooting by running:
# hostname

You should see the new hostname in the output. Additionally, open the /etc/hosts file to ensure the hostname remains the same after the system reboots.
Changing Hostname temporarily in Ubuntu and CentOS
If you only want to make a temporary change to the Hostname and don't want the changes to stay after restarting your computer, you can do that too. Linux systems, like Ubuntu and CentOS, give you the flexibility to make temporary changes. Here's a simple command to help with this:
# hostname [new_host_name]
Replace "[new_host_name]" with your desired temporary hostname.

If the command works, there won't be any output. To check if the temporary change took effect, use the following command:
# hostname
The output should show the new temporary hostname.

Remember, this change is only in place until you restart your computer. After a reboot, your device will go back to its old hostname as if you never made the temporary change.
# hostnamectl
Check the output to ensure it shows your new hostname.
Conclusion:
The hostname is important in a Linux server because it helps recognize your machine in a network.
In Linux, there are ways to personalize the hostname using different tools. We explained three methods to change the computer's name:
Use the hostnamectl command, nmtui, or edit the hosts file to permanently change the computer's name.
Use the hostname [new_host_name] command to temporarily change the computer's name without restarting the system.
