SSH, or Secure Socket Shell, is a safe way for administrators to access a computer from a distance. It includes tools that make this secure connection possible. Secure Shell ensures strong authentication and encrypts data communication between two computers, especially when connected over an insecure network like the Internet.
What is Jailed SSH Access?
Jailed SSH access is a secure way for a user to connect to your server using SSH. Unlike a regular shell environment, a jailed shell restricts access to data outside the user's home directory. This makes it seem like a real server environment with directories that are usually only accessible to administrators.
In WHM, there are three shell access levels: Bash, JailShell, and No Shell. By default, users don't have shell access, and it's recommended to only give it to trusted users.
Normal Shell gives full access, JailShell allows user-level changes without full access, and it prevents users from viewing files in other users' directories. Some functions, like EasyApache Containers, need full shell access.
How to Enable SSH for a New cPanel Account
To enable SSH for a new cPanel account, follow these steps:
Step 1: Log in to your root account in WHM.
Step 2: Navigate to Account Functions in the left menu.
Step 3: Choose Create A New Account. Provide the necessary details to create a new account.

Step 4: In the Package section, check the Select Options Manually box. This allows you to choose between normal shell, jailed shell, or disabled shell.

Scroll down the page and check the SSH Access box.

Step 5: Finally, click Create at the bottom of the page.
How to Enable SSH for an Existing cPanel Account
Here, wе will lеt you know Stеps to Enablе Jailеd SSH for an Existing cPanеl Account from Managе Shеll Accеss and tеrminal.
A) Stеps to еnablе Jailеd SSH Accеss for cPanеl usеrs from Manage Shell Access
Step 1: Log into your WebHost Manager (WHM) account. You can do this by entering the URL of your WHM interface in a web browser and logging in with your credentials.
Step 2: You'll see the WHM dashboard after successfully logging in. Navigate to the menu on the left and select Account Functions.
Step 3: Click on "Manage Shell Access." This click will automatically redirect you to the "Manage Shell Access" page.
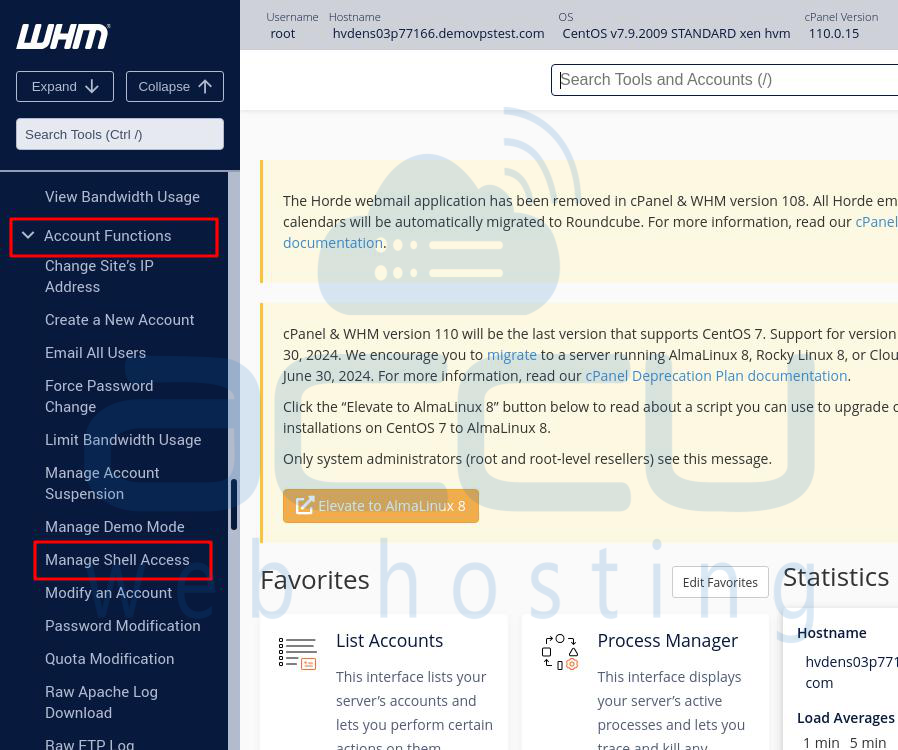
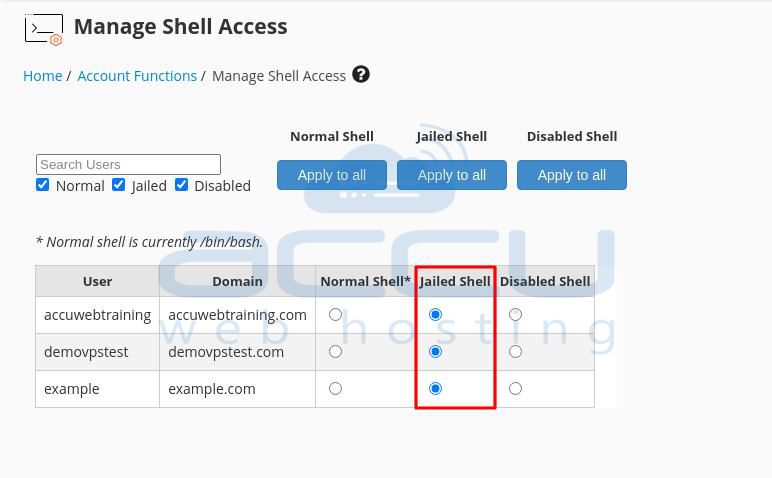
Step 4: On the "Manage Shell Access" interface, you'll see a list of cPanel users on your server. Identify the user account for which you want to set Jailed shell access and click on the Jailed Shell circle to enable it.
Normal Shell: Allows full access to the shell with no limitations.
Jailed Shell: Provides access to a jailed shell, limiting certain commands to protect your server.
Disabled Shell: Denies shell access to the user for enhanced server security.
These changes take effect immediately, and there's no need for additional savings.
B) Steps to enable jailed shell/SSH access to cPanel user using the command line:
Step 1: Open your WHM panel in a web browser and go to the "Terminal" page, usually found in the "Server Configuration" section.
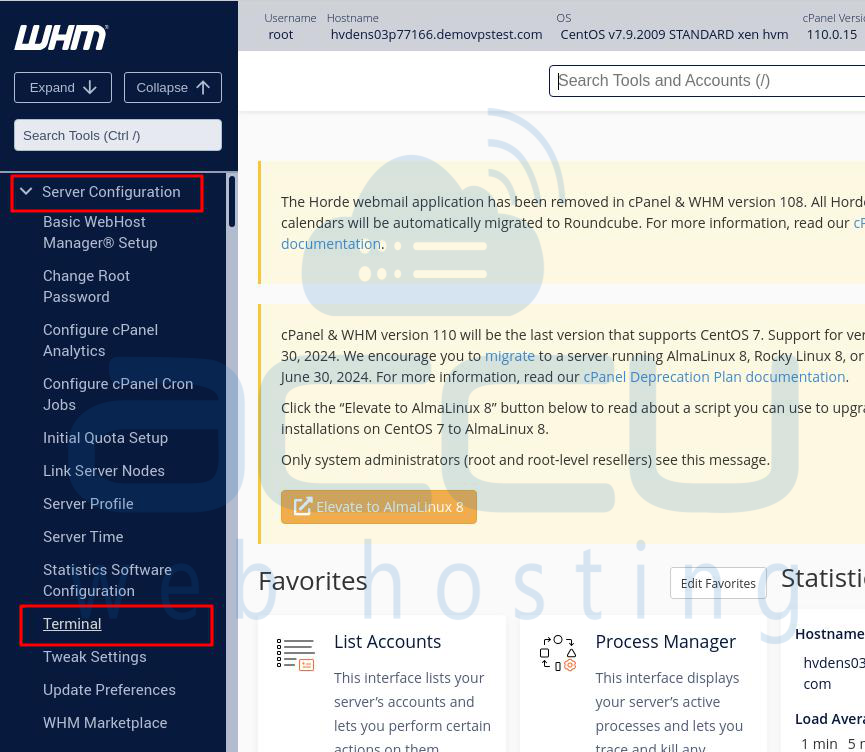
Step 2: Once in the Terminal page, use the command line interface. Run the following command to enable jailed shell or SSH access for the cPanel user:
# chsh -s /usr/local/cpanel/bin/jailshell username
Replace "username" with the actual cPanel username for which you want to enable jailed shell access. Press Enter to execute the command.
The output indicates that the shell for the specified cPanel user has been successfully changed to the jailed shell. By following these steps, you can effectively enable jailed shell/SSH access for a specific cPanel user via the command line in WHM.

Conclusion:
Turning on Jailed SSH access for cPanel users is an important security step. It protects your server from potential risks that come with unrestricted access. By following these simple steps, even those without extensive technical knowledge can improve their server's security.
