The dig command is a tool that helps you find information about different DNS records, such as host addresses, mail exchanges, and name servers. It is widely used by system administrators to troubleshoot DNS problems because it's flexible and easy to use.
This tutorial shows you how to use dig with practical examples and detailed explanations of the most common options.
To check if dig is available on your system, type the command: "dig -v".

If dig is not present, you can install it using your system's package manager.
For Ubuntu and Debian, use: "sudo apt update && sudo apt install dnsutils"
For CentOS and Fedora, use: "sudo yum install bind-utils"
For Arch Linux, use: "sudo pacman -S bind-tools"
Understanding the dig Output
When you query a single host (domain) without any extra options, the dig command provides a detailed output. For example, to query the "google.com" domain, use: "dig google.com".
The result should appear similar to this:

Let's break down the output of the dig command into simple terms:
1. The first part of the output shows the version of installed dig and the domain name you queried. The second part displays global options, usually just "cmd" by default. If you don't want these lines in the output, use "+nocmd" as the first option after the dig command.
; <<>> DiG 9.16.1-Ubuntu <<>> google.com
;; global options: +cmd
2. The next section provides technical details about the answer received from the DNS server. The header shows the action performed (opcode) and the status of the action. For example, "NOERROR" means the query was successful. You can remove this section's headers with the "+nocomments" option.
;; Got answer:
;; ->>HEADER<<- opcode: QUERY, status: NOERROR, id: 31075
;; flags: qr rd ra; QUERY: 1, ANSWER: 1, AUTHORITY: 0, ADDITIONAL: 1
3. In newer versions of dig, the "OPT" pseudo section might be shown, related to Extension mechanisms for DNS (EDNS). You can exclude this section with the "+noedns" option.
;; OPT PSEUDOSECTION:
; EDNS: version: 0, flags:; udp: 65494
4. The "QUESTION" section displays the query (question), and by default, it's an A record request. You can remove this section with the "+noquestion" option.
;; QUESTION SECTION:
;google.com. IN A
5. The "ANSWER" section provides the answer to your question. For example, the IP address associated with the domain "google.com." You usually don't want to remove this, but you can do so with the "+noanswer" option.
;; ANSWER SECTION:
google.com. 127 IN A 216.58.203.14
6. The last part of the dig output includes statistics about the query.
;; Query time: 16 msec
;; SERVER: 127.0.0.53#53(127.0.0.53)
;; WHEN: Tue Aug 01 20:55:33 IST 2023
;; MSG SIZE rcvd: 55
You can disable this part with the "+nostats" option.
Printing Only the Answer:
Usually, you just want a brief response to your dig query.
1. Getting a Short Answer:
If you want a brief answer to your dig query, use the "+short" option:
To get just the IP addresses of the A record, type:
$ dig google.com +short
The output will show only the IP addresses.

2. Getting a Detailed Answer:
For a more detailed response, you can turn off all other results with the "+noall" option and then show only the answer section using the "+answer" option:
$ dig google.com +noall +answer

Querying a Specific Name Server:
By default, dig uses the servers listed in the /etc/resolv.conf file. To query a specific name server, use the "@" symbol followed by the name server's IP address or hostname.
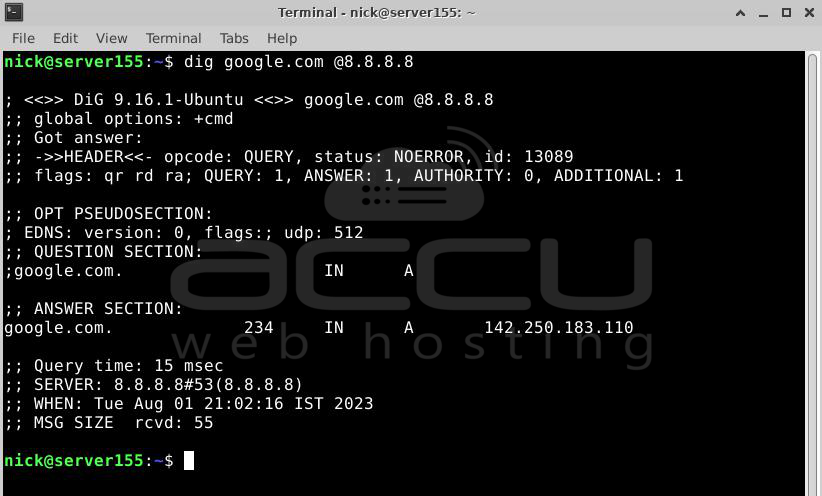
For example, to get information about the linux.org domain from the Google name server (8.8.8.8), use:
$ dig google.com @8.8.8.8
Querying Different Types of DNS Records:
With Dig, you can search for different types of information in the DNS by adding the record type to your query. Here are some examples of the most common records you can search for:
A (the IP address)
CNAME (canonical name)
TXT (text record)
MX (mail exchanger)
NS (name servers)
In the following section, we'll show you how to use these record types to find the information you need.
1. Querying A records
To get a list of IP addresses for a domain name, use the "a" option:
$ dig +nocmd google.com a +noall +answer

If you don't specify a DNS record type, dig will automatically request the A record.
2. Querying CNAME records
To find the alias domain name, use the "cname" option:
$ dig +nocmd mail.accuwebtraining.com cname +noall +answer

3. Querying TXT records
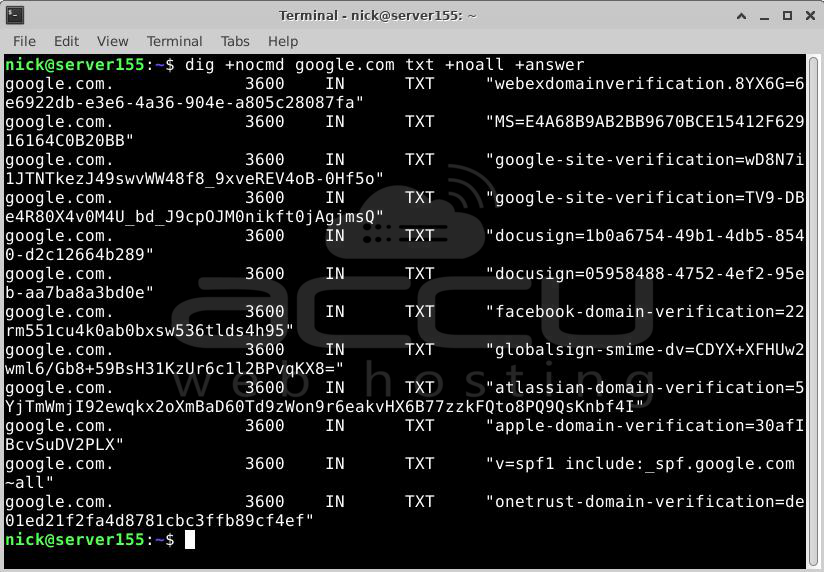
To retrieve all the TXT records for a specific domain, use the "txt" option:
$ dig +nocmd google.com txt +noall +answer
4. Querying MX records
To get a list of mail servers for a domain, use the "mx" option:
$ dig +nocmd google.com mx +noall +answer

5. Querying NS records
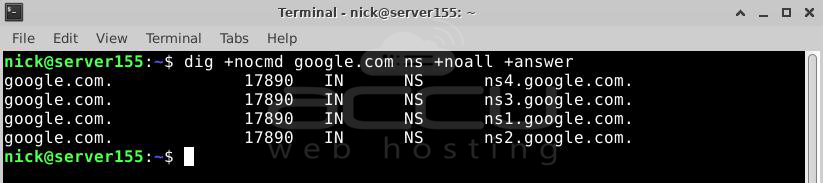
To find the authoritative name servers for a domain, use the "ns" option:
$ dig +nocmd google.com ns +noall +answer
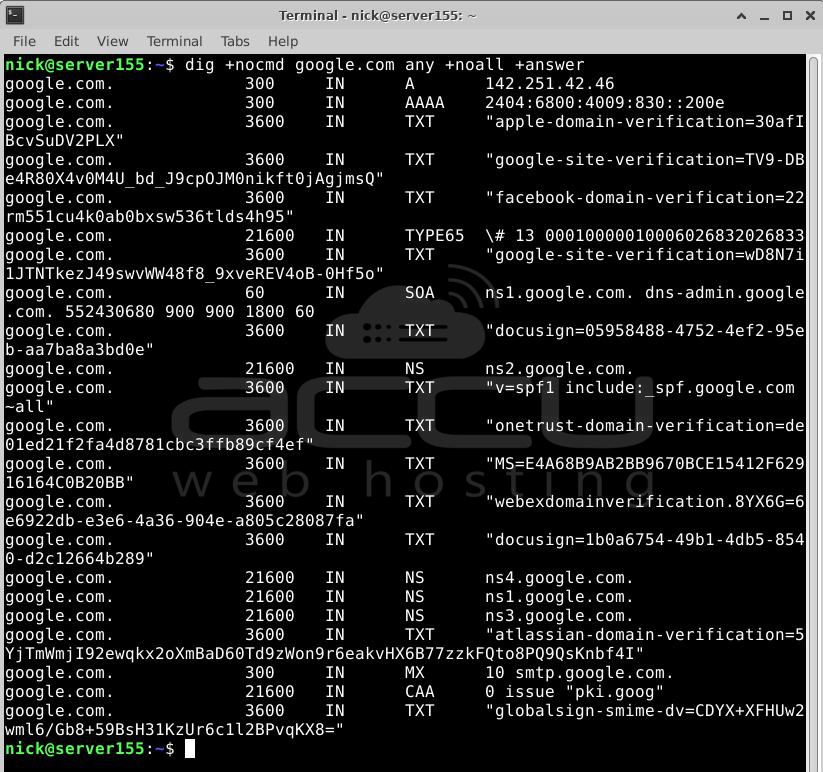
6. Querying All Records
To get a list of all DNS records for a domain, use the "any" option:
$ dig +nocmd google.com any +noall +answer
Remember that you can use these options to perform specific queries for different types of DNS records.
Reverse DNS Lookup:
To find the hostname associated with a specific IP address, use the "-x" option. For example, to do a reverse lookup on the IP address 208.118.235.148, you would type:
$ dig -x 216.58.203.14 +noall +answer
The output will show that the IP address 216.58.203.14 is associated with the hostnames hkg12s09-in-f14.1e100.net and bom12s04-in-f14.1e100.net.

Bulk Queries:
If you need to query a large number of domains, you can list them in a file (one domain per line) and use the "-f" option followed by the file name. For example, if you have a file named "domains.txt" containing the domains you want to query, use:
$ vi domains.txt

$ dig -f domains.txt +short

The .digrc File:
You can control the behavior of the dig command by setting up per-user options in the ${HOME}/.digrc file. If this file exists in your home directory, the specified options are applied before the command line arguments. For example, if you want to display only the answer section, create the ~/.digrc file with the following content:
$ vi ~/.digrc
+nocmd +noall +answer

Conclusion:
"dig" is a command-line tool used for querying DNS information and troubleshooting DNS-related issues.
