Telnet (Teletype Network) is a network protocol for bi-directional text-based communication via a CLI that allows remote access. Telnet lacks cryptography compared to modern SSH, making it vulnerable to cybersecurity attacks. For tasks such as checking if a remote server is open or not, it is still useful.
In Windows 10/11, Telnet client is disabled by default. You can enable it via Command Prompt or Control Panel. Here is how to enable Telnet client from Windows 10 via a Control panel.
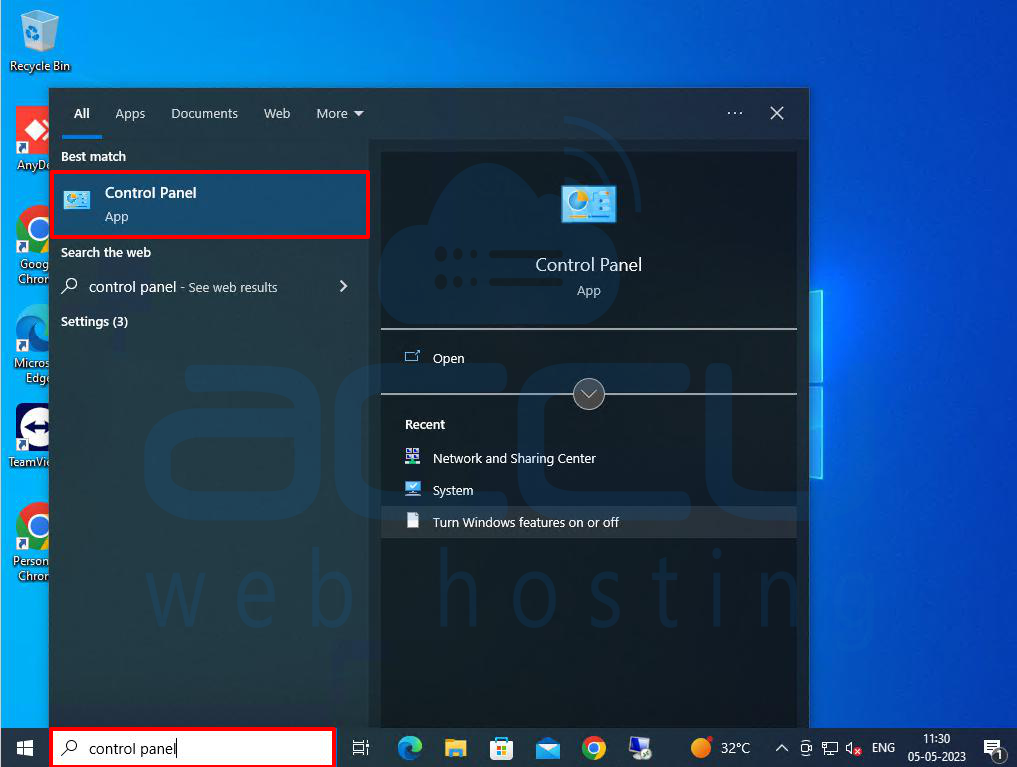
Step 1: Go to the Search box at the bottom of the screen and type the control panel.
Step 2: Click on the Control Panel option.
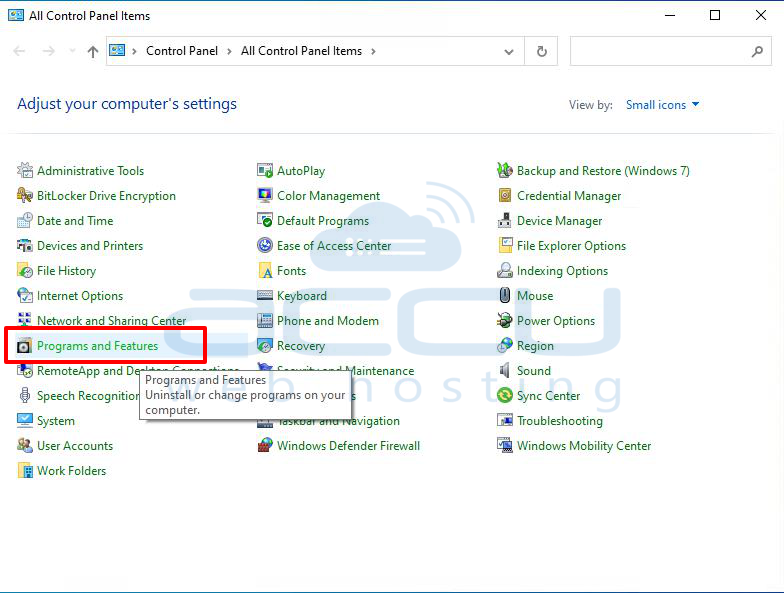
Step 3: In the control panel window, Search Programs and Features and click on it.
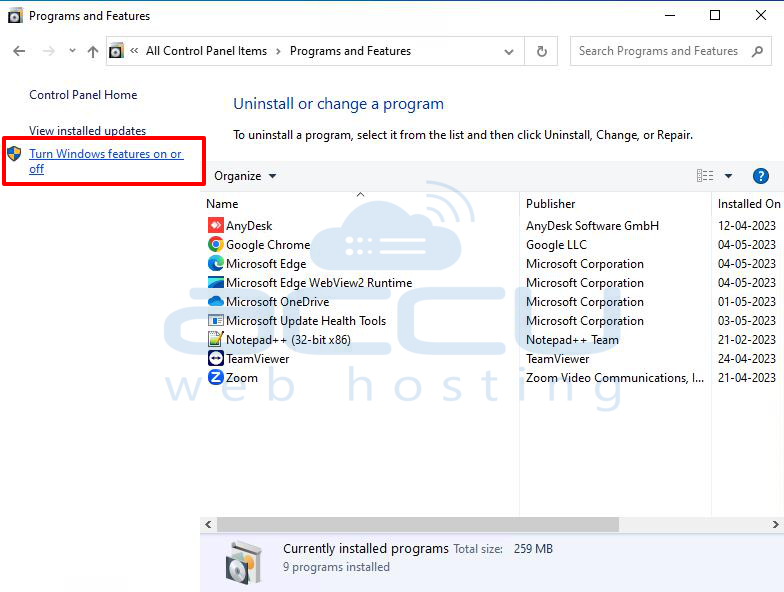
Step 4: In the Programs and Features window, click on the Turn Windows features on or Off link.
Step 5: Select the Telnet Client option in the Windows Features window. After then, click on the OK button to install it.

Step 6: Once the installation process is completed, click on the Close button to close the window.
How to use Telnet in Windows System to test Open Ports?
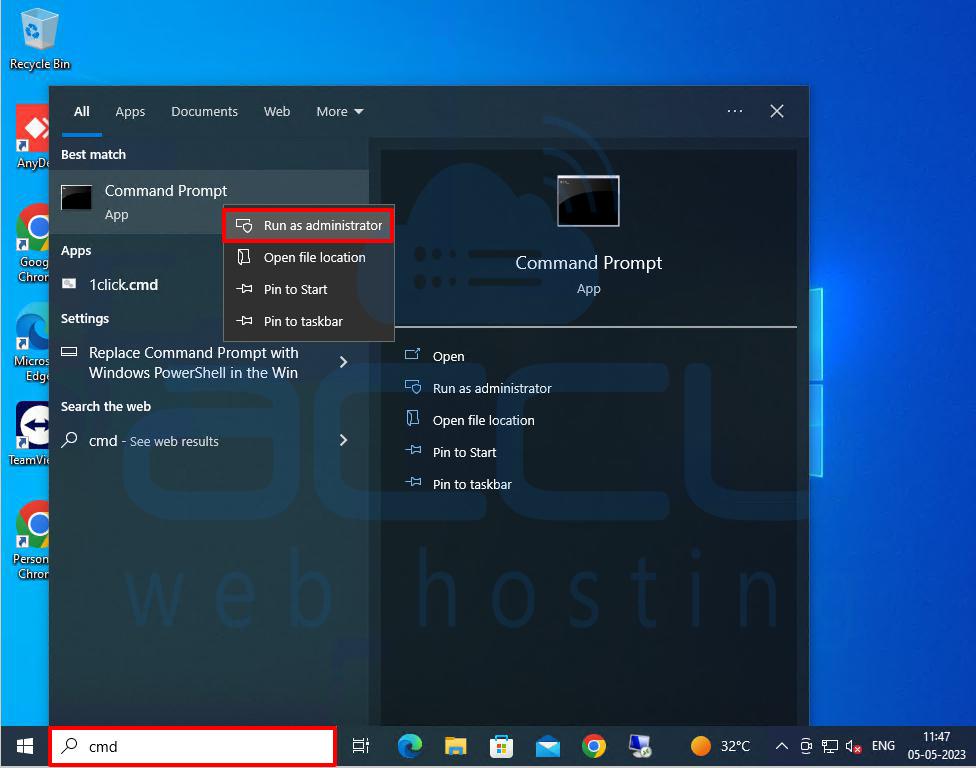
Step 1: Go to the Taskbar at the bottom of the screen and click the Search box.
Step 2: In the search box, type cmd. Choose the best match and select the Run as administrator option.
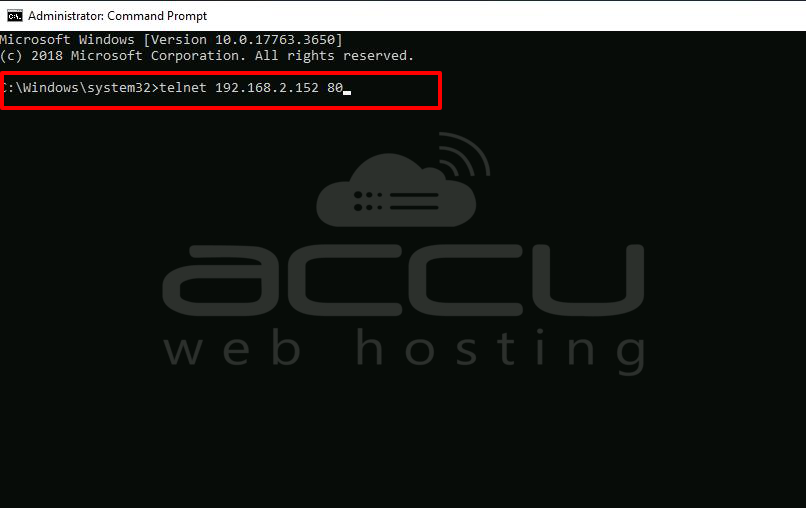
Step 3: Type the following command in the Command Prompt window and press enter.
Telnet Syntax for testing open port:
telnet <address> <port_number>
Please be informed that the command accepts both symbolic and numeric address. For example:
telnet demovpstest.com 80
Or
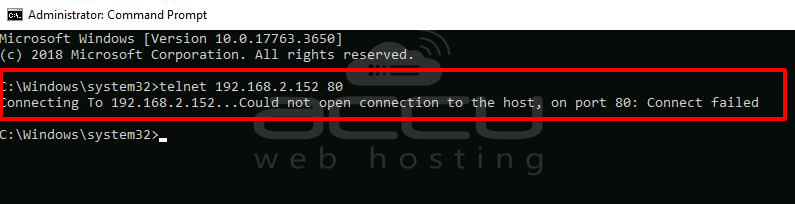
telnet 192.168.2.152 80
Note: Replace the IP address and port number with your Server IP address and Port number you want to check for open.
Step 4: If the port is opened, the command goes to a blank screen indicating that the port is available.

Step 5: If the port is closed, you will get an error message stating that "Could not open a connection to the host, on port 80: Connect failed"
That's all.
