Error 1020 blocks users from accessing a site, but following these steps can quickly fix the issue and restore access.
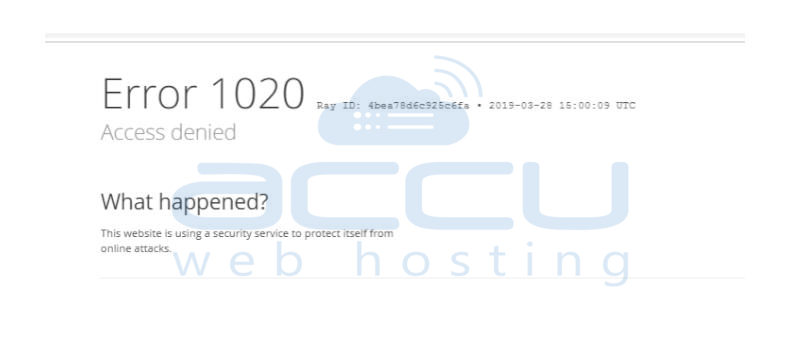
If you see the "Error 1020: Access Denied" message, it means the website’s security system (Cloudflare) thinks your IP address is unsafe.
This usually happens when Cloudflare is being too strict and blocks safe IPs by mistake, though it could also be caused by your browser.
What Causes Cloudflare Error 1020?
Cloudflare provides security and performance services for websites. As part of its security, it blocks access from IP addresses it considers dangerous, spammy, or a threat.
The "1020: Access Denied" error happens when:
- Cloudflare thinks your IP address is risky.
- You break a firewall rule set by the website.
- Your IP address is part of a shared range flagged as unsafe.
- Your Internet Service Provider (ISP) gives you a shared IP, and another user with the same IP causes issues.
This error only occurs on websites protected by Cloudflare. Since it's part of the website’s backend, visitors like you can’t fix it directly.
If you encounter this error on an AccuwebHosting site, follow the steps provided below to resolve it.
For Site Visitors
If you get the "Error 1020: Access Denied" message while visiting a site and you’re not the owner or admin, contact the site owner to fix it. For example, If you visit the AccuWebhosting site and receive Error 1020, you need to contact the AccuWebhosting support team to fix the error.
Make sure to send them a screenshot of the error or share the Cloudflare Ray ID shown at the bottom of the error page.
For Site Owners (Domain is not hosted on Cloudflare)
If you're the site owner or admin and don't have a Cloudflare account with firewall rules set up, contact our Support team for help. Please provide the following details:
- The date and time when the error happened.
- The Cloudflare Ray ID is shown under the error message.
- What you or your visitor were doing when the error occurred (like clicking a link, updating content, adding items to a cart, or submitting a form).
For Site Owners (Domain is hosted on Cloudflare)
If you have a Cloudflare account with firewall rules, check the Firewall Events Log (Security -> Events) to see which rule triggers and blocks the request. Below are the steps on how to check the Firewall Event log from Cloudflare.
Step 1: Log in to your Cloudflare account.
Step 2: Click Security from the left side menu under the Overview section.
Step 3: Select the Events option.
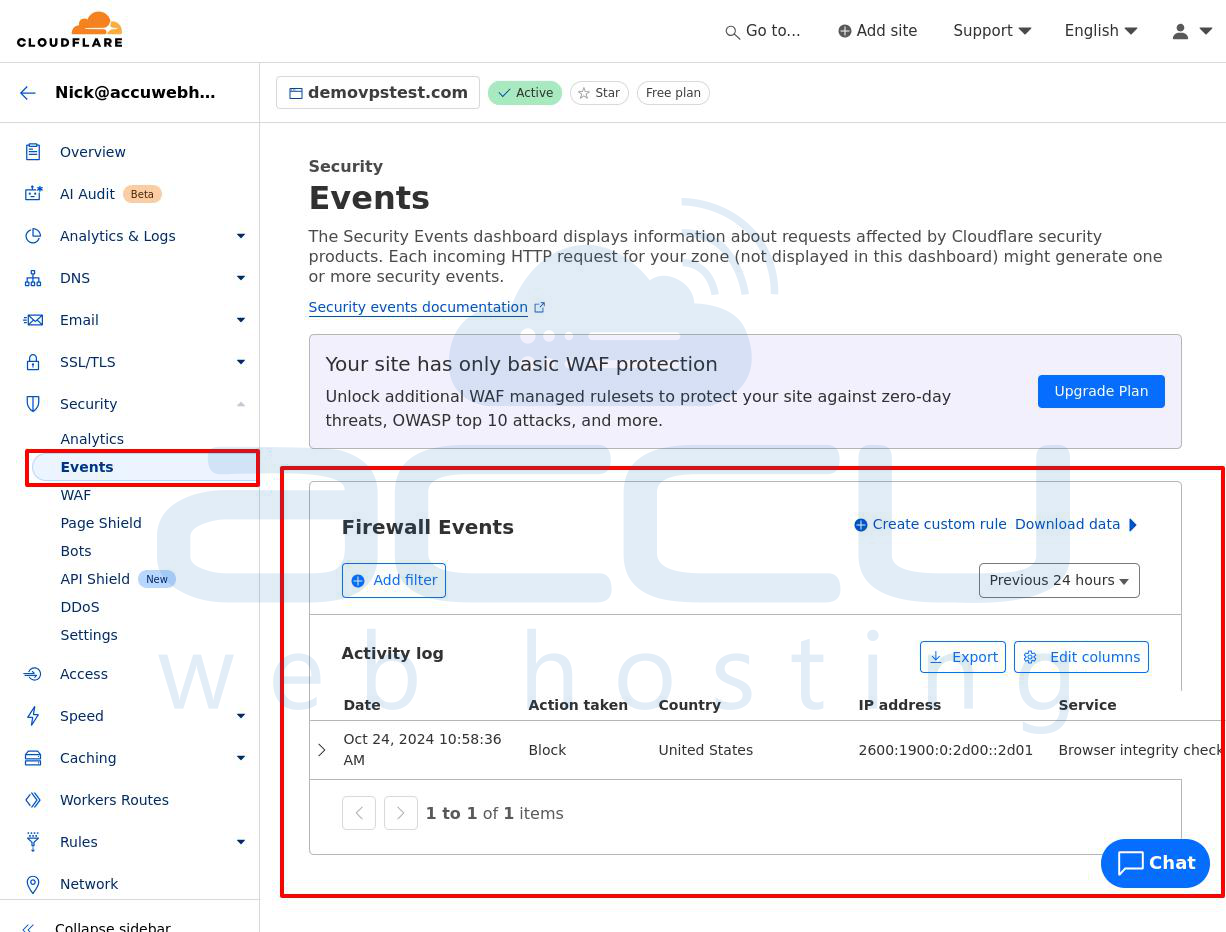
Step 4: In the Firewall Events window, you will see a list of the logs. Search for the IP address you want to unblock.
Step 5: Click on the Selected IP address. It will expand the screen, so go to the Action Taken option. Then click on the Exclude option to unblock the IP address.

Step 6: Once you click on the exclude option, the selected IP address will be removed from the Firewall events section.
Alternative Option:
If you can't find the IP address in the rules, you can create a custom rule to allow it in Cloudflare.
Cloudflare suggests creating WAF custom rules instead of IP Access rules for IP-based or location-based blocking (geoblocking):
- For IP-based blocking: Use an IP list in the custom rule.
- For geoblocking: Use fields like AS Num, Country, or Continent in the rule.
How to remove the IP address from Cloudflare:
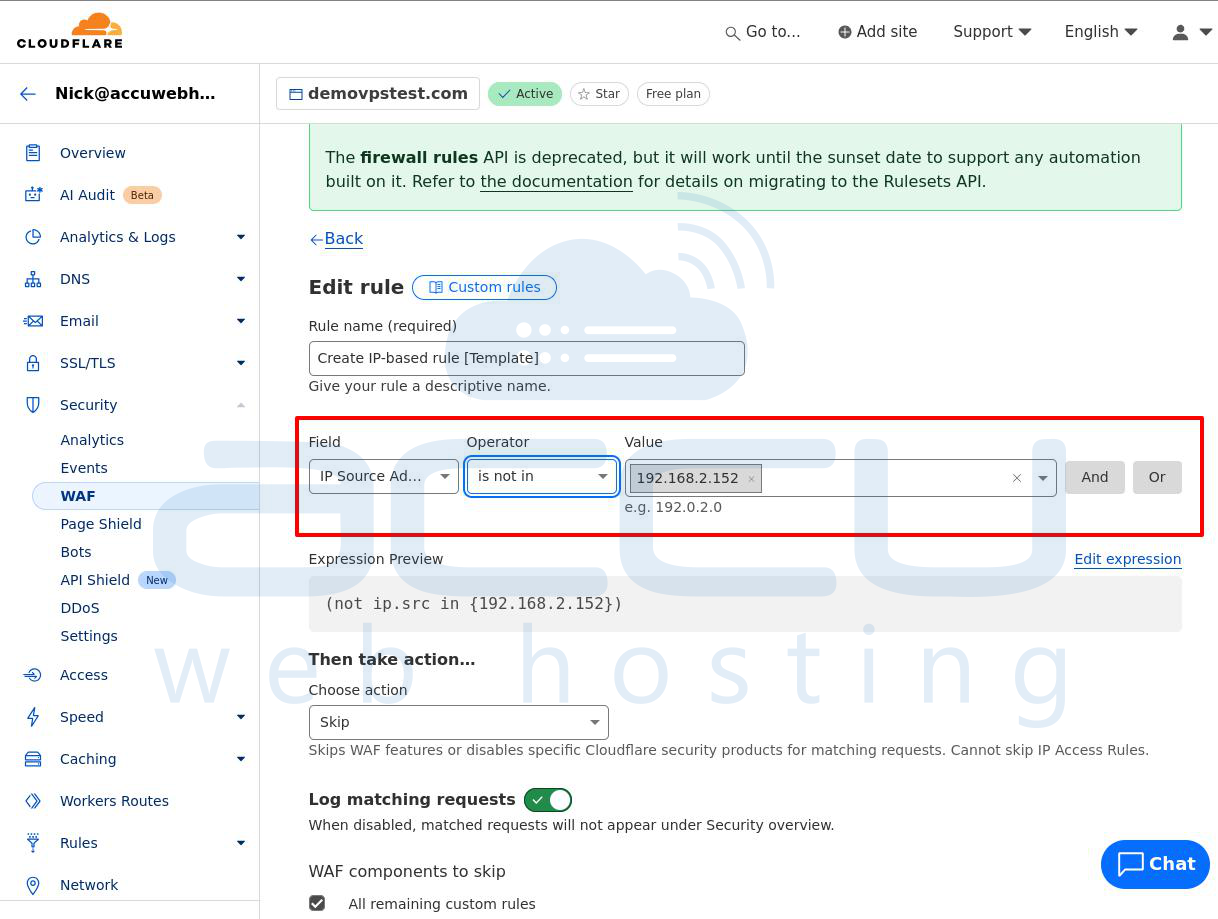
1) Modify the existing firewall rule:
- Use "Source IP Address - is not" to exclude a single IP.
- For multiple IPs, use "is not in" to list them.
- Use the AND operator to combine conditions.
2) Create a new firewall rule:
- Match the IPs you want to exclude using "Source IP Address - is not" or "is not in".
- Set the rule action to Allow, save it, and move this rule above the existing Block rule.
Steps to Create a Firewall Rule to Exclude an IP Address in Cloudflare:
Step 1: Log in to your Cloudflare account.
Step 2: Click Security from the left side menu under the Overview section.
Step 3: Select the WAF option.
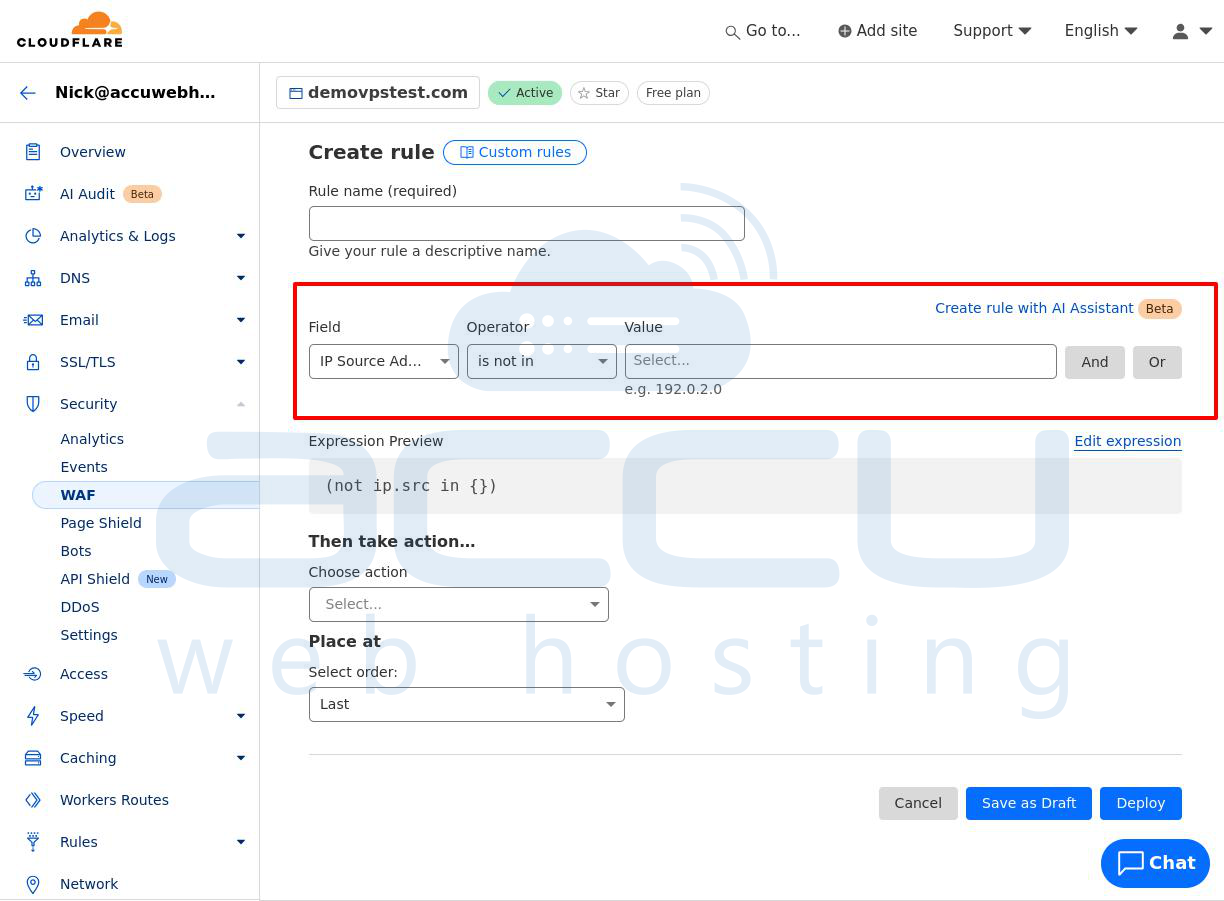
Step 4: In the WAF window, go to the Custom Rules tab.
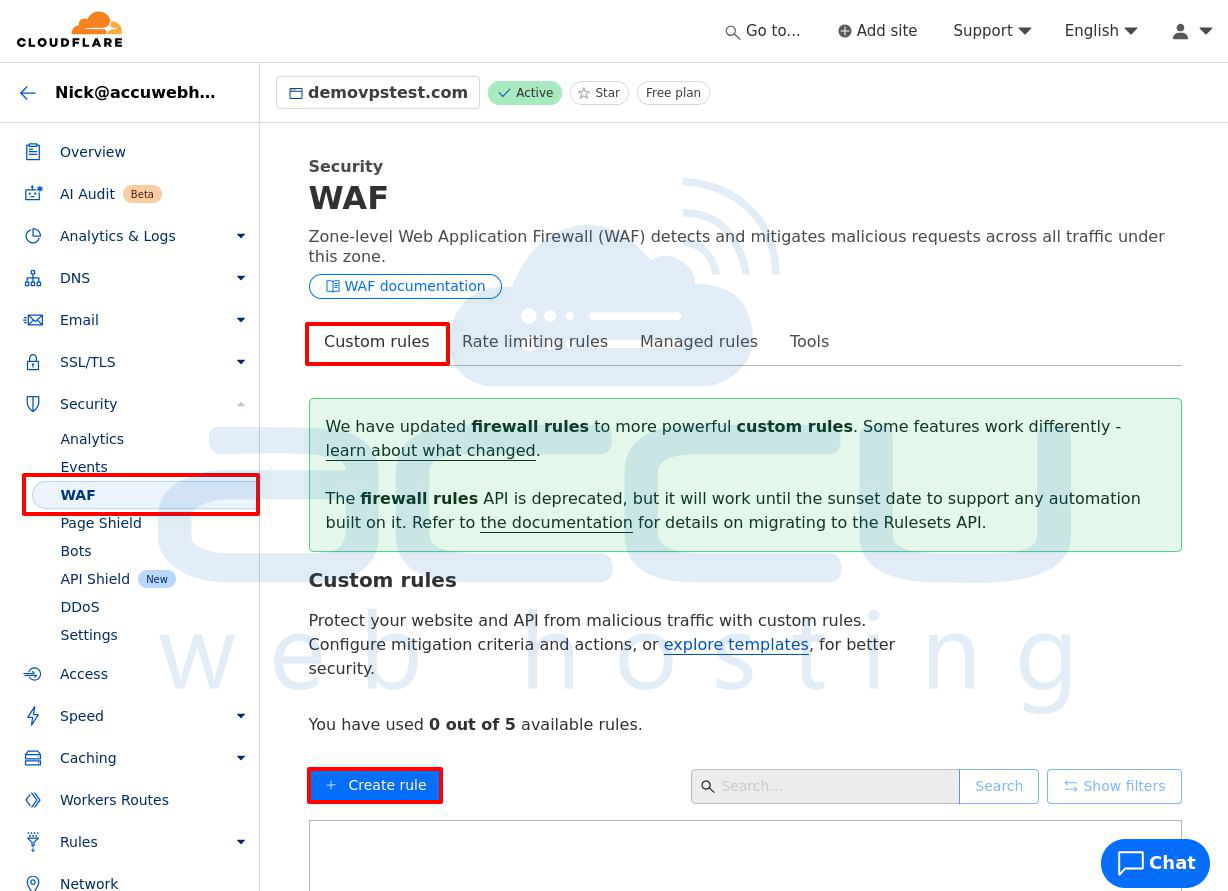
Step 5: Click the Create Rule button.
Step 6: In the Field section, select IP Source Address. In the Operator field, choose equals.
Enter the IP address to allow in the Value field (e.g., 192.168.2.152).
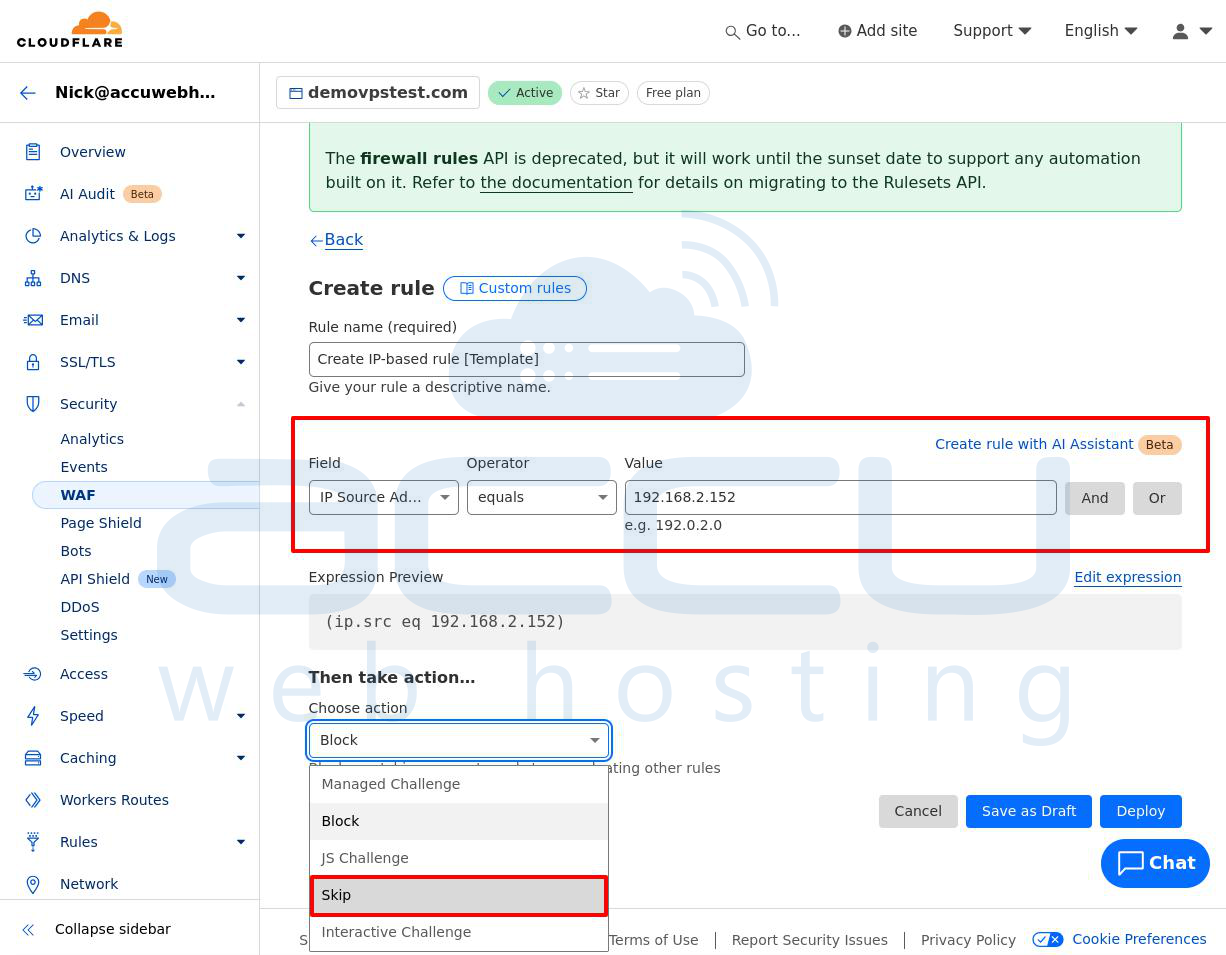
Firewall Actions Explained:
- Block: Prevents visitors from accessing your site.
- Skip: Allows visitors to bypass security checks like Browser Integrity Check, “I’m Under Attack” mode and WAF rules. Use this if Cloudflare blocks a trusted visitor.
- Managed Challenge: Automatically applies different challenges to visitors based on their behavior.
- JavaScript Challenge: Requires visitors to pass a JavaScript test to access the site, helpful for DDoS protection.
- Interactive Challenge: Visitors must complete a challenge to access your site, useful to block bots.
Step 7: In the Choose action field, select Skip from the drop-down list to allow the IP. Select the specific security checks to skip (e.g., skip the first three rules).
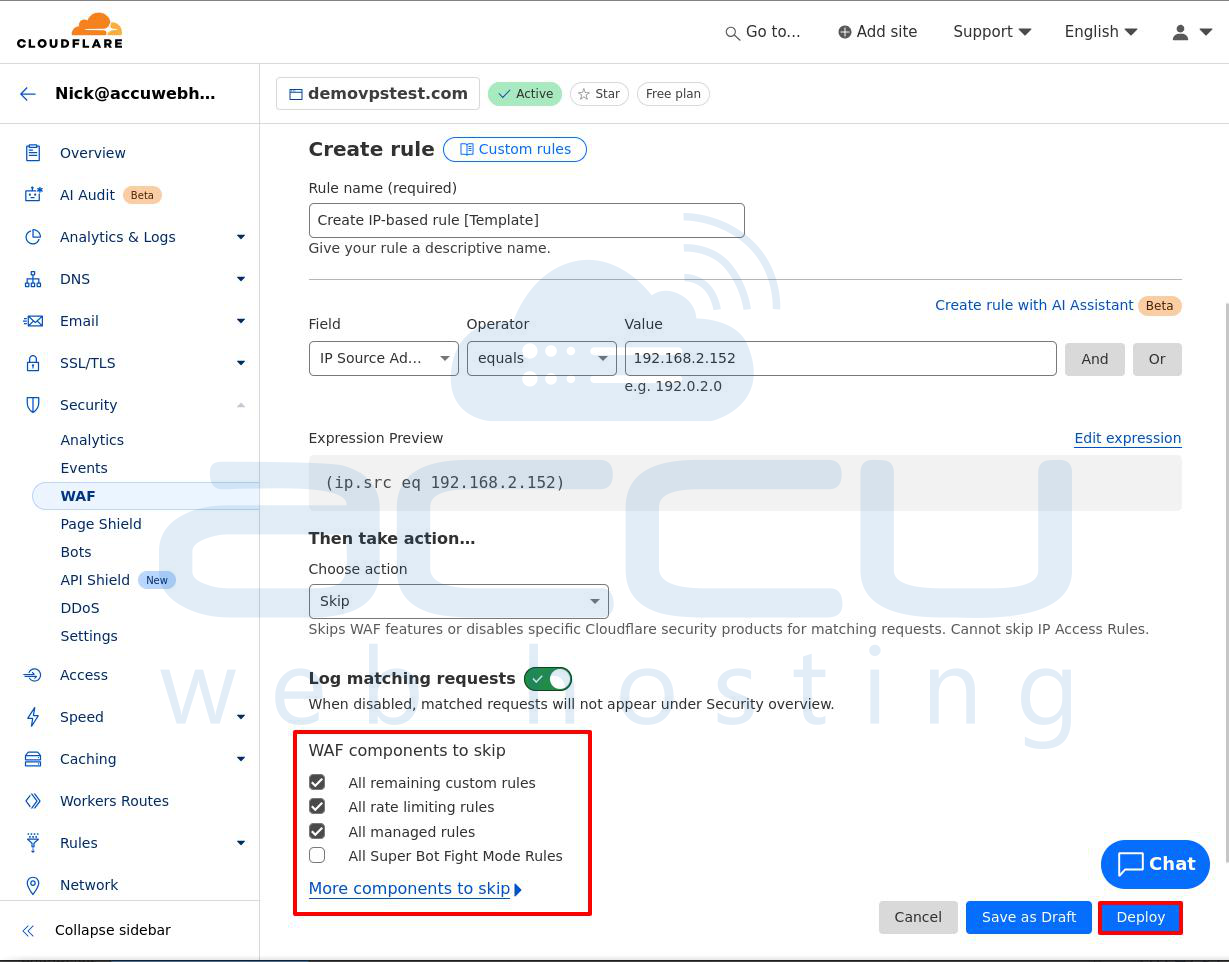
Step 8: Click Deploy to apply the rule. Your new rule will now appear under the Create Rule button.
Important Notes:
- Allowing an IP, ASN, or country to bypass custom rules, rate limits, and deprecated firewall rules.
- Allowing a country not to bypass WAF Managed Rules (current or previous versions).
Conclusion:
Error 1020 blocks users from accessing a site, but following these steps can quickly fix the issue and restore access.
