The number of cores in the processor can be checked on Windows Server using Task Manager, Command Prompt, PowerShell, and System Information. Each of these methods provides a number of physical and logical processors.
Task Manager shows the number of sockets and logical processors, while PowerShell and Command Prompt display the number of cores and logical processors. System Information provides details about the processor, including the number of cores and logical processors.
Here are multiple ways to check how many cores your processor has on Windows Server:
Using Task Manager:
Step 1. Right-click on the taskbar and select Task Manager.
Step 2. Click on the Performance tab.
Step 3. Under the CPU section, you can see the number of sockets (physical processors) and the number of cores (logical processors).

Using System Information:
Step 1. Open the Run dialog box by pressing the Windows key + R.
Step 2. Type "msinfo32" and press Enter.
Step 3. In the System Information window, select Processor. Here, you can see the number of cores and logical processors.

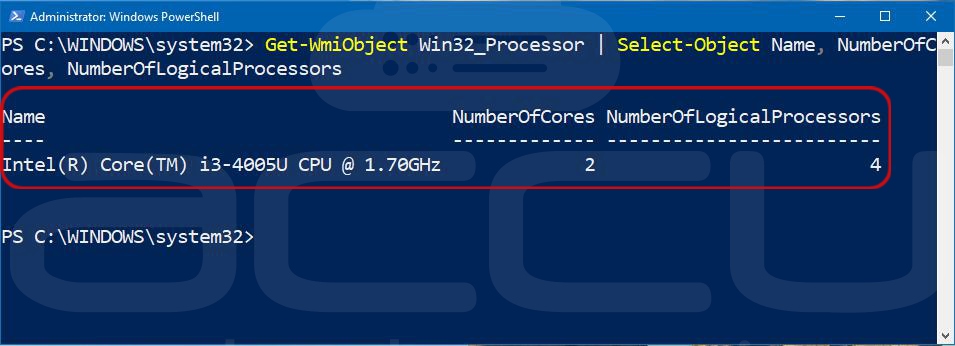
Using PowerShell:
Step 1. Open PowerShell as an administrator.
Step 2. Type the following command: Get-WmiObject Win32_Processor | Select-Object Name, NumberOfCores, NumberOfLogicalProcessors
Step 3. Press Enter. This will display the processor name, number of cores, and logical processors.
Using Command Prompt:
Step 1. Open Command Prompt as an administrator.
Step 2. Type the following command: wmic cpu get NumberOfCores, NumberOfLogicalProcessors
Step 3. Press Enter. This will display the number of cores and logical processors for each CPU on the system.

Conclusion:
In conclusion, checking the number of cores your processor has on Windows Server is a simple process that can be done using various tools, including Task Manager, Command Prompt, PowerShell, and System Information. These methods provide different information about the processor, such as the number of physical and logical processors, or the number of cores and logical processors.


