Running Telnet on a Mac OS system is a simple process. However, before delving into the steps involved, it's essential to understand what Telnet actually is.
What is Telnet?
Telnet is a network protocol that allows users to establish connections with remote computers or devices. It grants access and control over other computers via a network or the internet, enabling the execution of commands on a remote machine as if physically present at the location.
Steps to run Telnet on Mac OS:
The following steps outline how to run Telnet on a Mac OS system:
Step 1: Open the Terminal application located in the Applications > Utilities folder.
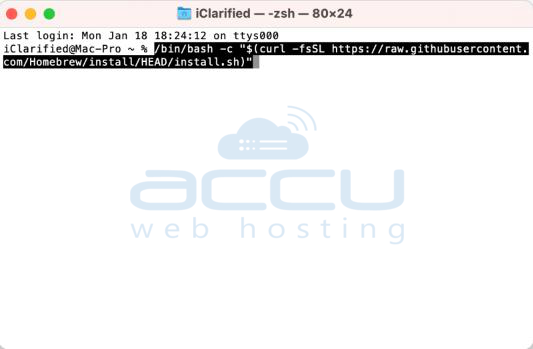
Step 2: Install Homebrew by entering the command below in the Terminal window:
/bin/bash -c "$(curl -fsSL https://raw.githubusercontent.com/Homebrew/install/HEAD/install.sh)"
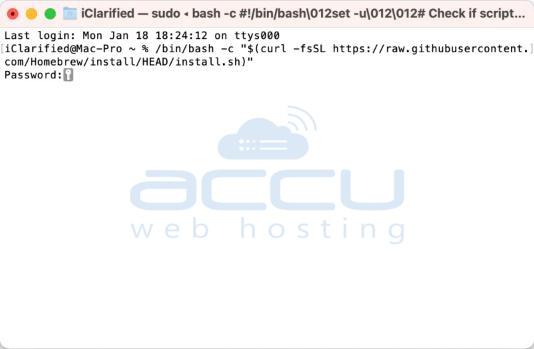
Provide your administrative password when prompted.
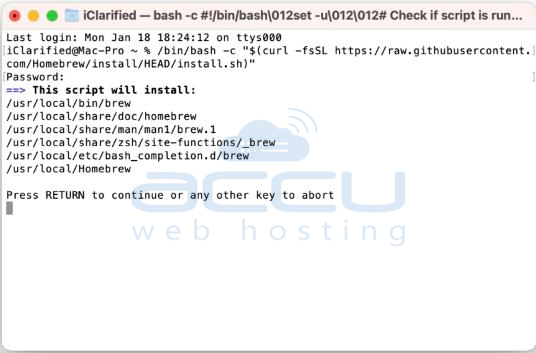
Press RETURN to initiate the installation process.
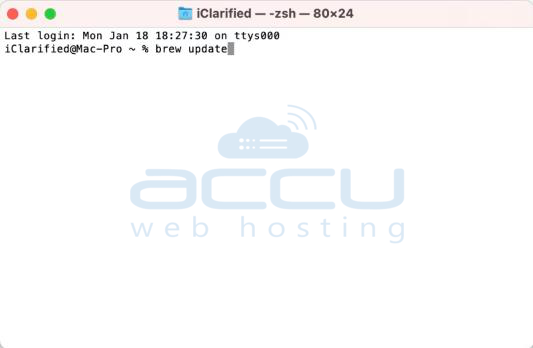
**If you already have Homebrew installed, use the "brew update" command instead. Please note that this command may take some time to complete.
Step 3: Once Homebrew is installed, you can install Telnet using the following command:
brew install telnet

Step 4: Telnet is now ready to use directly from the Terminal. For example, you can enter telnet [IP address] to establish a connection. Further details on how to utilize Telnet can be found by entering man telnet in the Terminal.

Conclusion:
Telnet serves as a powerful network protocol, facilitating access and control of remote devices across networks or the internet. By following the aforementioned steps, you can effortlessly install and run Telnet on your Mac OS system.
Remember to exercise responsible usage by connecting only to devices that you have authorized access to.
