Connecting to a Remote Desktop (RDP) using Chrome or Chrome OS is simple. First, you will need to install the Chrome Remote Desktop extension from the Chrome Web Store. Once the extension is installed, you will need to set up the computer you want to connect to for remote access.
To set up the remote computer for RDP, you will need to ensure that the Remote Desktop feature is enabled on the computer. In Windows, this can be done by going to the System Properties and enabling Remote Desktop under the Remote tab. You will also need to note the IP address or hostname of the computer and the credentials for an account that has permission to access the computer remotely.
This guide will walk you through the process of connecting to a remote desktop using Remote Desktop Protocol (RDP) in Chrome and Chrome OS devices such as Chromebooks. This method is extremely useful for remotely accessing Windows Virtual Private Server (VPS) instances.
Here are the steps to connect to a remote desktop using RDP in Chrome and Chrome OS:
Step 1. Download the Chrome Remote Desktop app from the Chrome Web Store on your Chrome Os and Windows VPS. Once installed, it will be available on your Chrome launch screen and App Launcher. Open Chrome Remote Desktop.

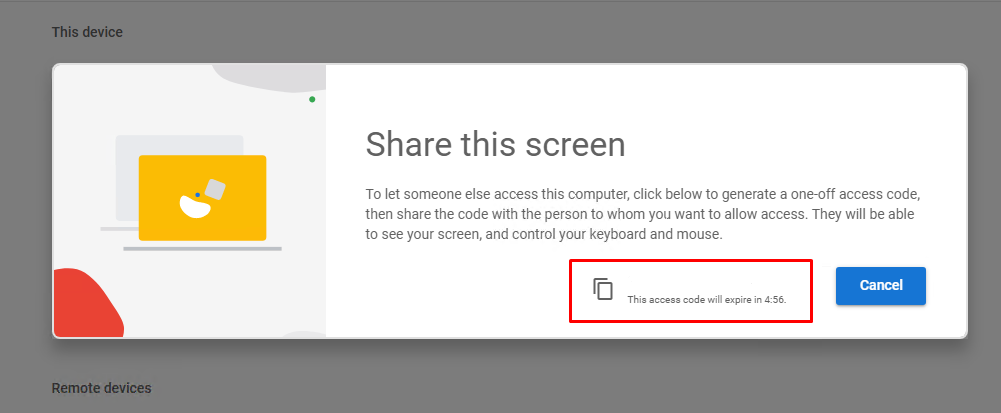
Step 2. On the Windows VPS, generate a code by clicking the "Generate Code" button.

Step 3. A screen will appear and display the code. Copy the code.
Step 4. On your Chrome OS, paste the code into the remote Windows VPS and click "Connect".

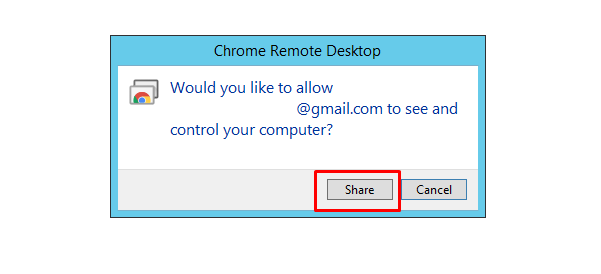
Step 5. The remote Windows VPS or Windows server will ask for permission to allow you to see and control the computer. Click "Share".
That's it! Chrome RDP will open the remote desktop session directly in Chrome. You will be able to control the remote Windows server just as if you were sitting in front of it.

In case you experience any difficulty with this process or need assistance connecting to a Windows VPS, please don’t hesitate to contact our Accu Web Hosting Technical Support team for assistance.
